Sorry I took so long, Windows 8 is a real challenge. lnfletcher (Larry) on this forum was the first to do this on a B&B that I know of, so he gets the credit.
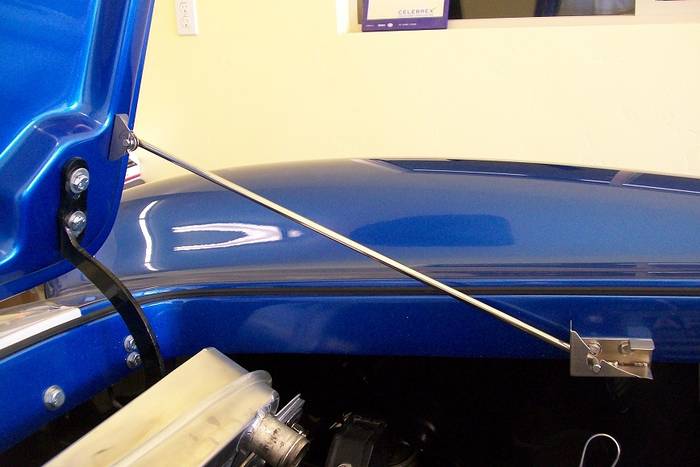
The B&B is ideally suited to install Finish Lines stainless steel prop on because the B&B has a strong wide glass section all around the inside hood opening to mount the rod catch. This system mounts low and is out of the way so you can work on the car. If the hood rod bracket is located in the right place you may get lucky and hit steel to tap the lower screw for a machine screw. So do not drill these holes too big until you know if you hit steel. Then drill for the proper tap.
I really like this system but reasonable accuracy counts as there are issues to consider that I will explain.
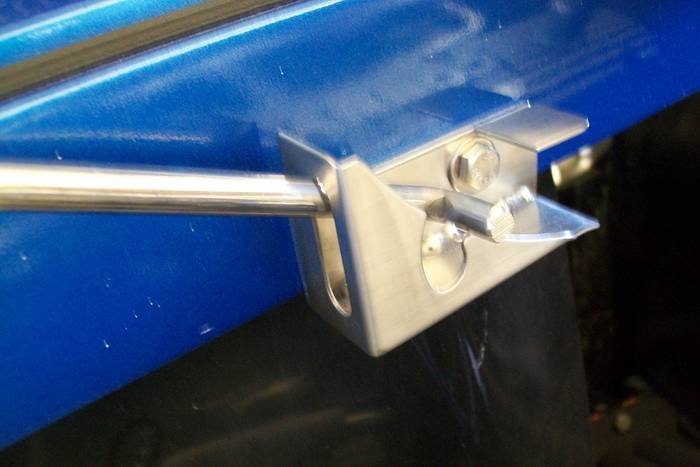
Note I decided to cut the lower section off of my prop rod catch as I didn't like it hanging down. I had a friend tig weld the inside of the bracket to give it strength. This is not necessary. There is also another hole added to the left.
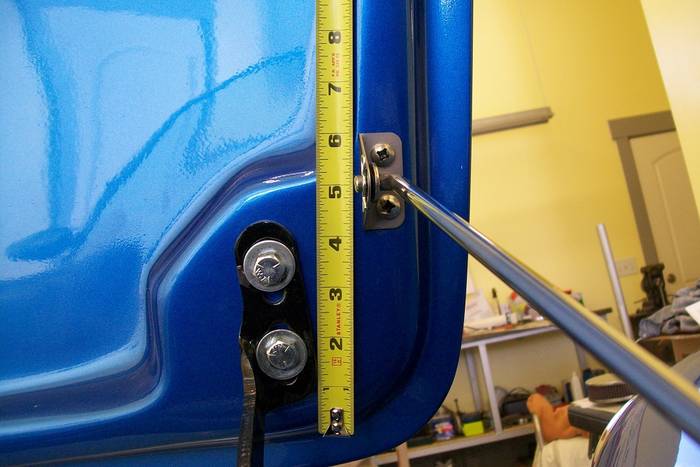
There are three issues to consider on the B&B. The rod catch cannot be too high or the inside of the hood bulge that gives the hood strength will hit it. Note how mine is located about 1/8" down and the upper left outside corner is very slightly trimmed down. So you cannot angle it up much or you risk the hood hitting it. Another issue to consider is height of the hood angle mounting bracket which I reversed from the way it came. If you put it too high you will bind the rod at the top of the end rod latch slot and the rod lock ramp tab. Mine is very close. I think if I was to do it again I would drop the hood bracket 1/2" more.
This picture shows how when the rod is lifted it must have room to clear the hump on the bracket and room to slide down the ramp.
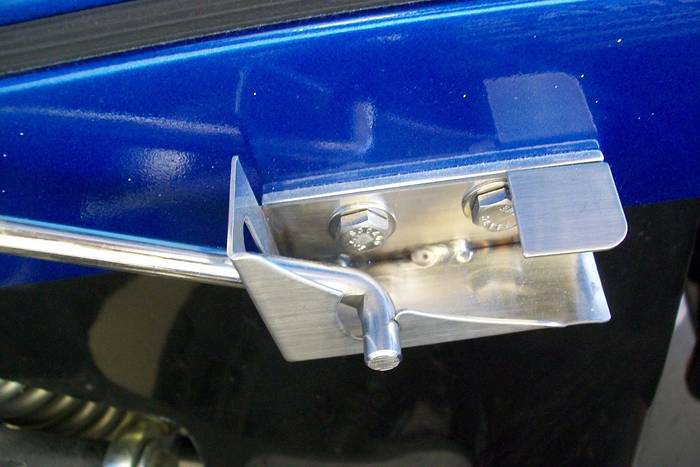
The other issue to consider is the max hood opening. If you mount this so the hood is maxed out in the open position you cannot open the hood further to raise the rod and clear the latch tab. I mounted mine with another 1/2" to 3/4" movement, just enough so the rod moves back and can be lifted to clear the tab and slide down the ramp. This works good as wind can only move the hood slightly and it cannot fall unless the rod is lifted over the tab. I also removed the spring washer and left it off as the rod needs more movement to swing in the angle of the hood opening. I also bent the hood bracket out slightly so the rod could more easily follow the angle of the hood as the rod slides through the latch hole.
I suggest you remove the inner wheel well panel if it is just bolted in, remove the tire and mock the brackets up with tape and then test it out before you drill any holes. The rod needs to slide easily through the whole range of motion. You can bend the end down on the ramp slightly if you have to. I used stainless steel screws and bolts.
Accuracy really counts so take your time. You can slightly angle the latch bracket as long as the hood cannot hit it when closed, and if you have room to drill the rear hole.
Added:
I also added a 1/8" piece of aluminum behind the latch bracket so when the hood is closed it moves the rod slightly away from the inside edge of the hood opening. I also drilled some clearance holes in the wheel well inner panel to clear the back side nuts that hold the latch bracket.