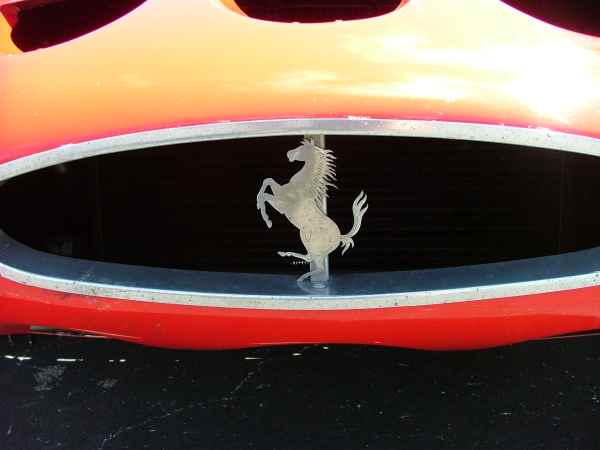
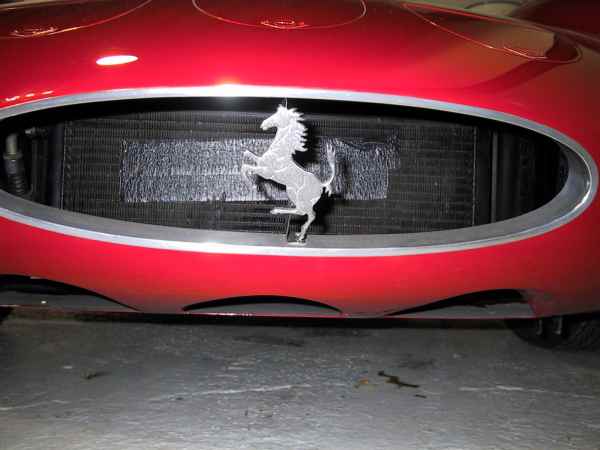
So here's a couple of pictures of actual GTO trim rings:
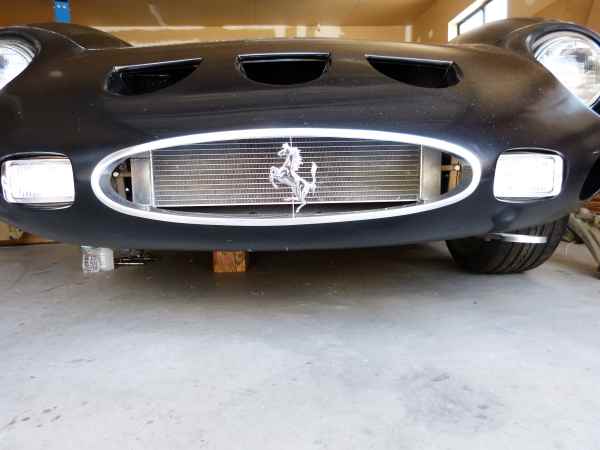
And here's a pic of the trim ring I made for my GTO:
Ok, what follows are detailed instructions on how to make the GTO radiator opening trim ring. I'm providing the detail, not because I think Peter needs it, but because it will give others the insight into how to make a trim ring for on opening in a compound curved surface.
The GTO radiator opening trim piece can be made from a single piece of aluminum sheet. By doing this it will only have a single weld seam to finish out. I used .050 3003 H14 when I made mine. You could probably use thinner or a bit thicker sheet but I would stick to the soft alloy's, in other words stay away from 5XXX and 6XXX. The reason for using a soft alloy is to be able to make the slight curve in the horizontal plain would be much harder with the stiffer alloys. In addition, 3003 polishes out nice to a mirror finish.
The length of the sheet will vary based on the size of the opening. Original GTOs had various size openings and thus replicas also follow suit. Make the length a couple inches longer than needed as you'll cut to actual length after inital forming. A key thing is to make the width you start with about 3/4" to 1" wider than the desired width on the finished piece. I used a piece about 3" wide. More on why later.
Step 1 is to put a 90 degree bend the length of the sheet to form the outside lip. I made the outside lip on mine 1/2". This is probably best done with a sheet metal break or bead roller depending on tools available. The lip angle will be fine tuned to the opening later so getting it a perfect 90 is not necessary. You may also think about how sharp you want the bend. I wanted mine a bit rounded so I used a bead roller with a rounded tipping wheel. You can achieve the same on a sheet metal break with different fingers and spacing. If none of these tools are available, you can also use a straight table or workbench edge and rubber mallet to make the bend.
Step 2 is to form the rounded edges/corners that will turn the long straight sheet into an oval. You'll need to take measurements as you'll most likely want the seam in the middle. I put the seam in the middle top on mine where it would be least visible. To round the edges, you'll need to do linear stretching on the outside lip. This can be done with a planish, power, or handheld hammer depending on tools available. For a handheld bodyhammer, linear stretch can be done with the hammer face that's about 1/2" by 1/16" and flat across. Be sure to hammer on the back side only and use a flat die or dolly on the visible side. This will minimize the marking. Use light hammer hits as the aluminum will easily stetch to form the rounded oval shape. Check your work against the opening often so you can see where more stetch is required to get a nice even oval shape.
Step 3 is to cut and weld the seam. You should make sure the oval fits snuggly in the opening prior to marking and cutting. I'd suggest the weld be metal finished flat but not fully dressed yet. You'll now have an oval that should fit snugly in the opening but the outside lip will have a gap away from the body on both the left and right ends.
Step 4 is to curve the trim ring to remove the gap on outside lip to body. The GTO nose is curved when viewed from the top and thus the trim ring needs to be adjusted to this curve. This is where the extra material is used and you'll need a "shrinking" tool. A Lancaster style shrinker works best for this. Lancaster style shrinkers are the most common kind and they grab and shrink near the sheetmetal edge. Shrink on the "extra" metal at the back of the trim ring. Do many small shrinks and check the trim ring in the opening often. The gap should go away as the trim ring is now curved from the shrinking.
Step 5 is to cut off the metal marked from the shrinking. The shrink extends into the metal beyond where the jaws grabbed. The marked metal can be cut away and the trim ring will retain the shape. If you're worried about some spring back, you might curve it a bit more than needed but I didn't experience much spring back at all on mine. The inside lip on mine is 1 1/2" and I used aviation snips to cut off the marked metal.
Step 6 is to place the trim ring into the opening and flatten the outside lip to the body behind it using a rubber mallet. The body comes into the trim ring at various angles in different places around the oval and this should bring trim ring up tight to body everywhere.
Step 7 is to polish out the trim ring. I had some marking from linear stretching so the first part was to file off the marking before starting with sand paper. For me, polishing the metal is the least fun part. I used a small cotton buffing wheel on a drill motor for the final polish.
Step 8 is to fabricate a vertical bar for mounting the Ferrari stallion. On original GTOs, some have the thick side showing and some the thin/edge. I wanted this piece to be as invisible as possible so I did it edge showing. I cut it such that I could bend a couple of 90 degree tabs for the studs on back of stallion to mount to. I made slits in the top and bottom of trim ring and welded the vertical bar in. I'd suggest aluminum braze or solder if you have it just because it's much easier and lower heat causes less distortion. You'll also need to re-polish the heat affected areas but that's much easier than polishing the whole thing after the vertical bar is in place. The vertical bar can be attached via screws or rivets (like on most original GTOs) but that is less appealing to me.
There you have it. You've now got a trim ring that's as good or better than the original. Mine fits the opening snug enough that I don't think it needs anything to secure it. To be sure, I'll probably run a bead of silicon on the backside once it's installed for the final time.
Peter: if you don't have access to a Lancaster shrinker, I'd suggest you post something on All Metal Shaping asking about someone in the Sydney area that does. I know there's several good metal shapers from Australia that frequent that forum.