Been a bit going on lately.
Been doing a lot of Landcruiser brake jobs, when it rains out here the mud is like sandpaper, I have seen a set of pads wear out inside 1000kls.
I sold the blue VF Coupe, it is now living in Port Lincoln.
I have also bought myself a new car trailer.
I wanted something a bit bigger to use behind my truck, I can also use it as a stepping stone for loading the truck for lower cars (Cobra & Mildred).
This is the trailer, except I have ordered with Beaver tail.

I have also ordered the steel and flooring to put a mezzanine above the pallet racking.
Hope to make a start on that this weekend (temp permitting).
Lastly, a few weeks ago I visited Brisbane and attended a metal shaping course, the course is designed for rookies wanting to learn (me to a T).
2 days in Brisbane and was a fantistic thing to do, I already had all the tools and could play around with them, but was never sure if what I was doing was correct.
The instructor has many projects you can do, or you can bring your own stuff to have a crack.
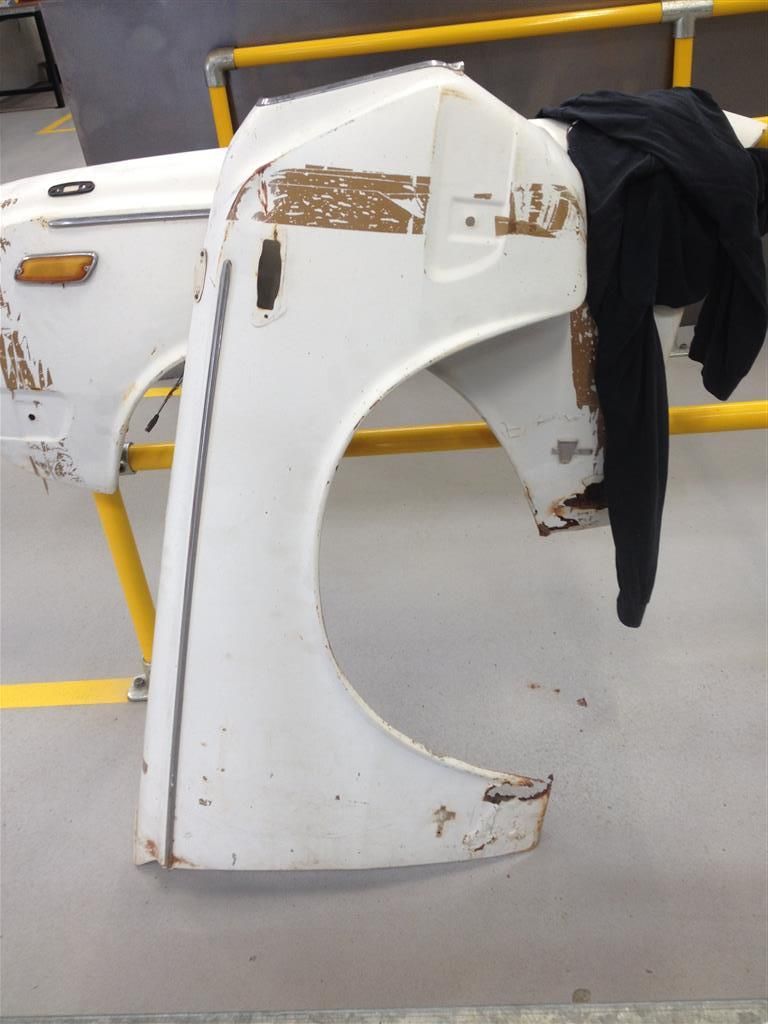
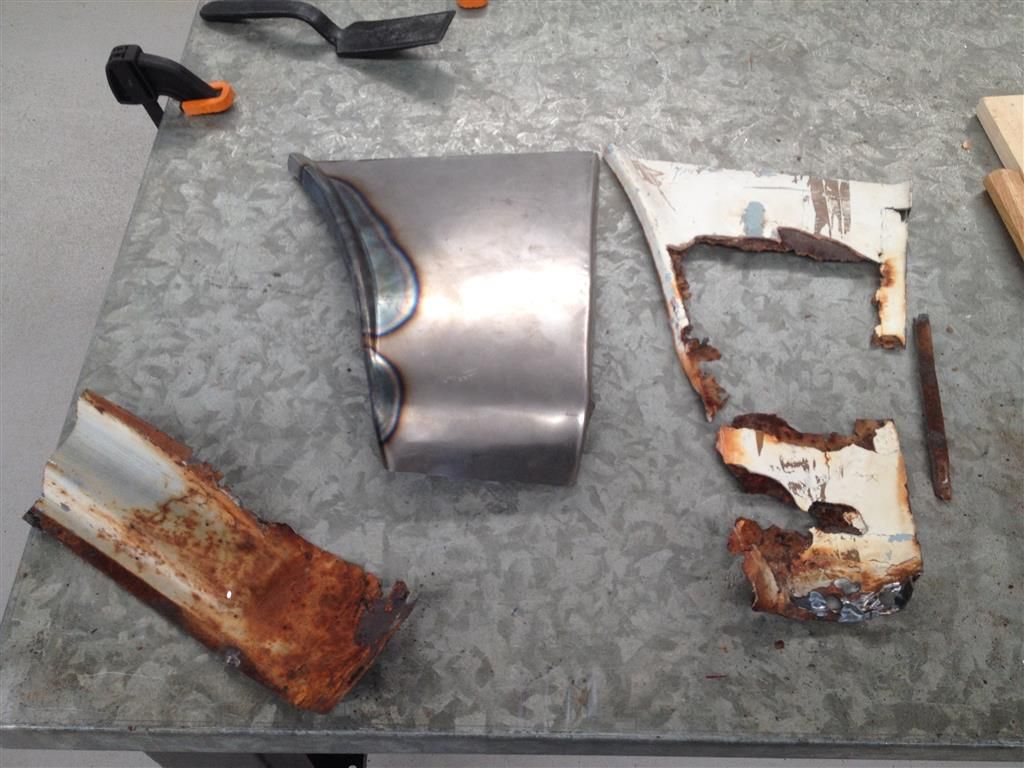
I bought a pair of Corona guards with me to make rust replacement sections.
Here is the guards, as you can see lower rear is rusted out, also the support inside is rusted.
[IMG]
[/IMG]
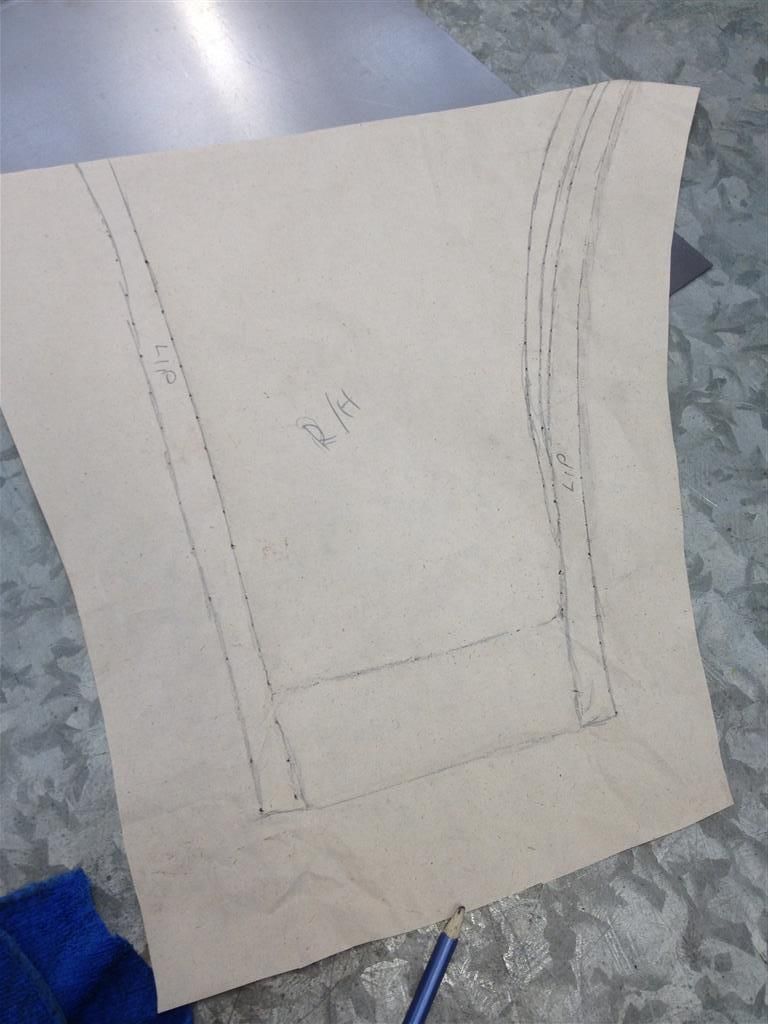
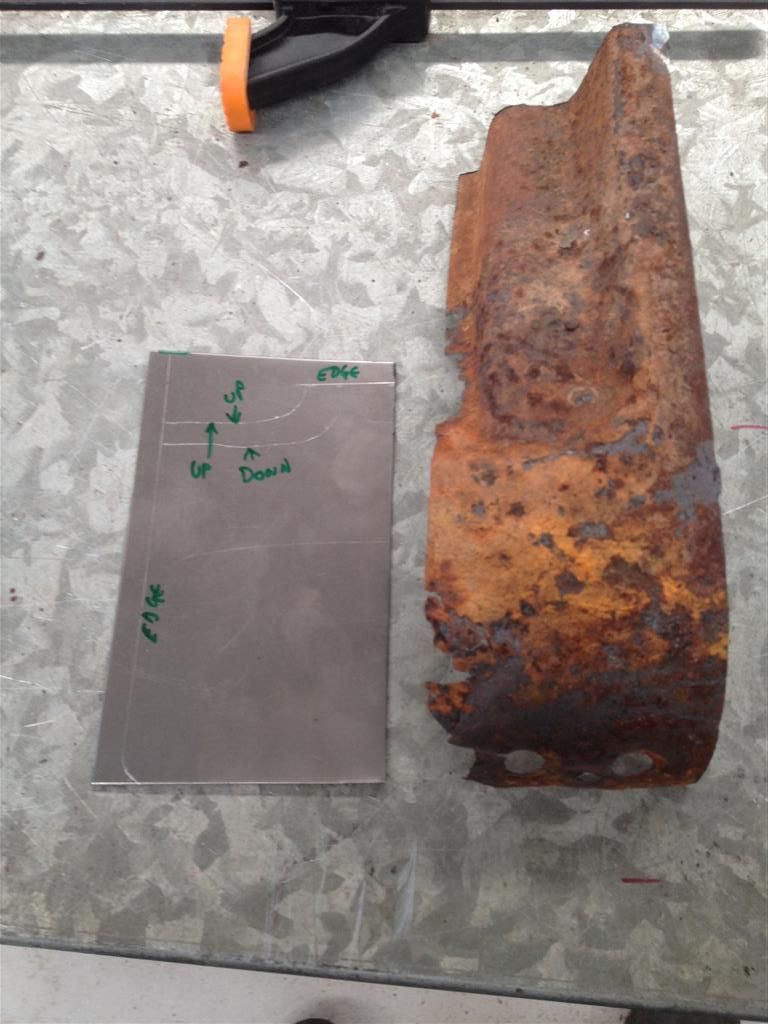
First step is a paper template.
[IMG]
[/IMG]
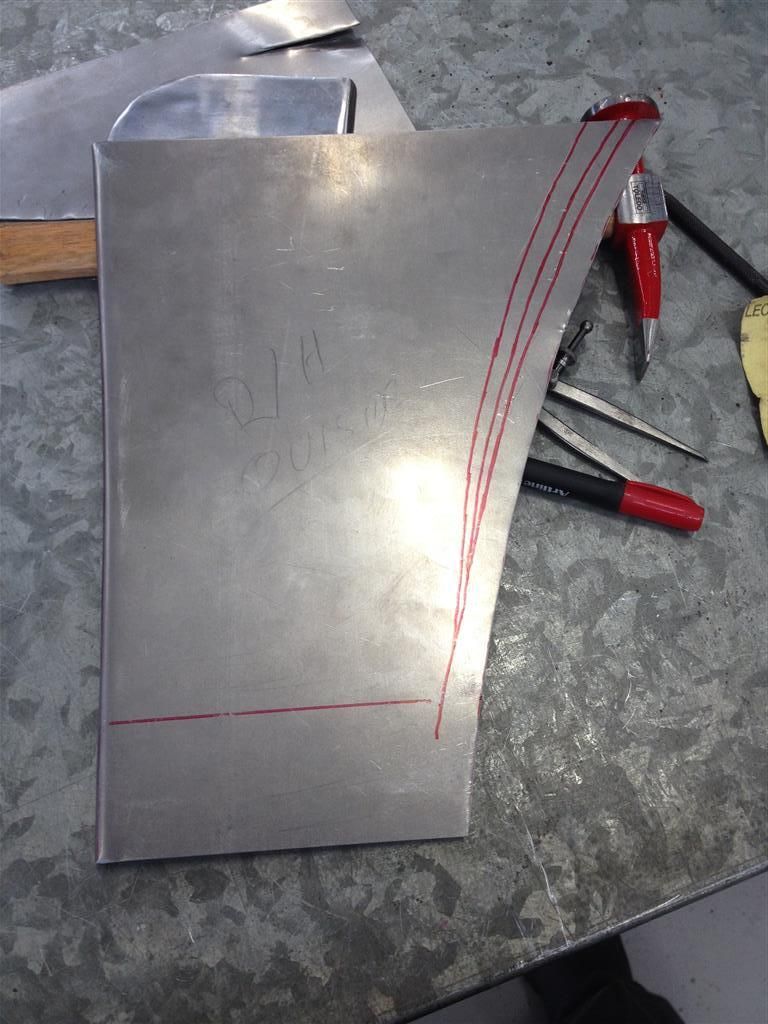
Next that gets transferred to the tin.
[IMG]
[/IMG]
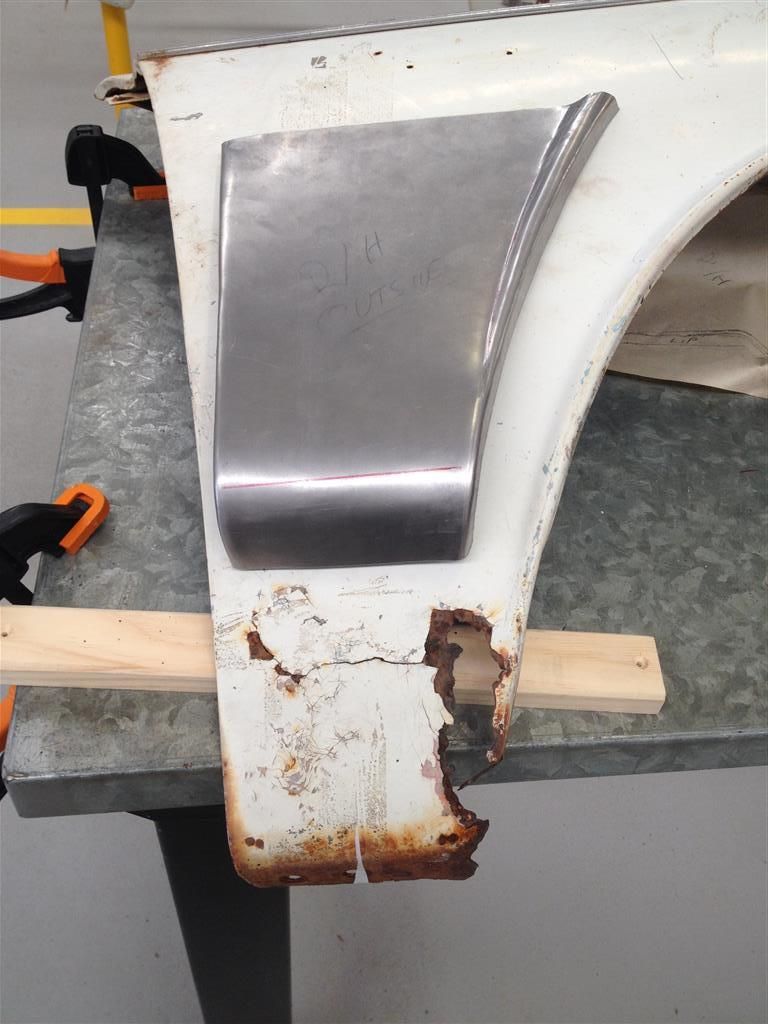
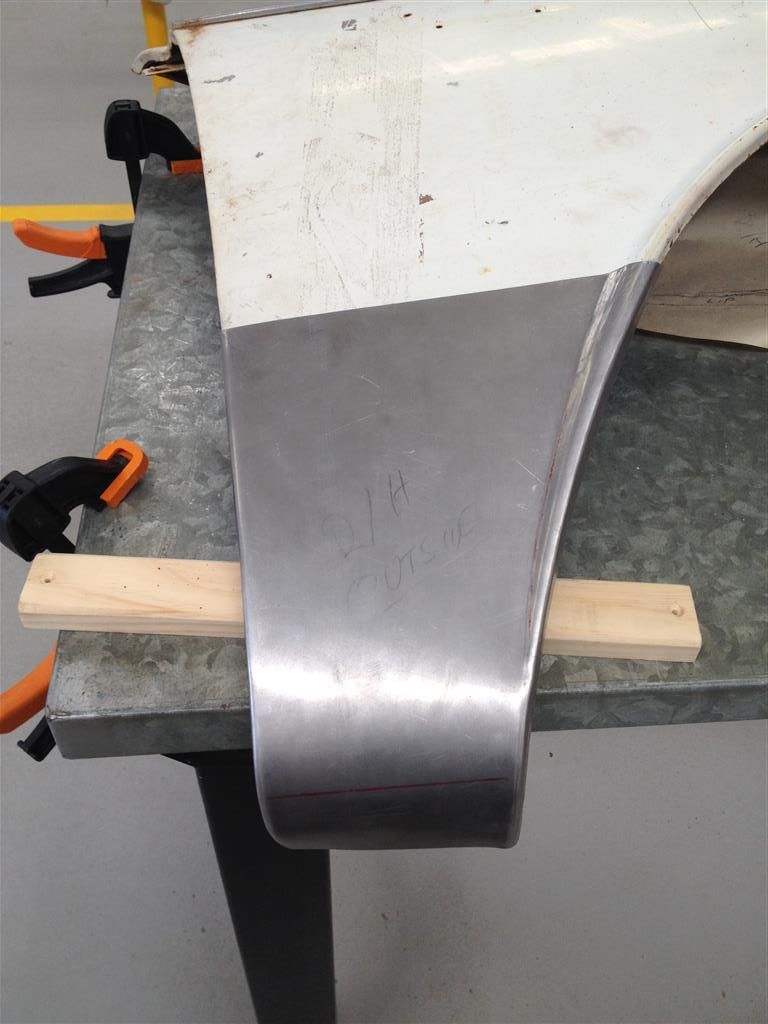
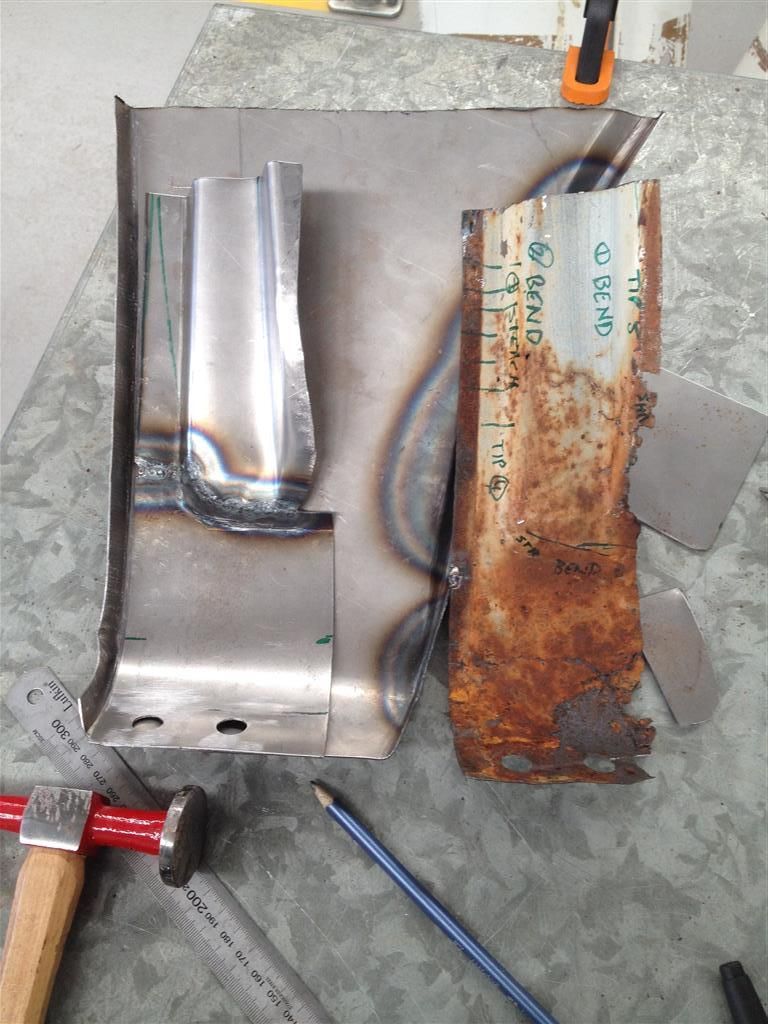
With the use of bead roller, hammer and dolly and shrinker stretcher, I had made this.
[IMG]
[/IMG]
[IMG]
[/IMG]
I then also made a left side, you can see the blue section, I had to heat to get a tighter bend than cold rolling would allow, so I did a heat shrink.
[IMG]
[/IMG]
The left side was the worst, so I tackled that first as far as replacing the section.
I also found once section removed I needed to slightly increase the curve in wheel lip to get correct profile, again this required a heat shrink.
[IMG]
[/IMG]
With the inner brace cut out, it was determined much easier to make in 2 pieces.
Here you can see I have made a paper template and transferred that to sheetmetal and cut that out.
[IMG]
[/IMG]
Lower section made.

Upper section made and all TIG welded together.
I forgot to get more pics along the way, but I then welded the outer section on, and it was time to pack up.
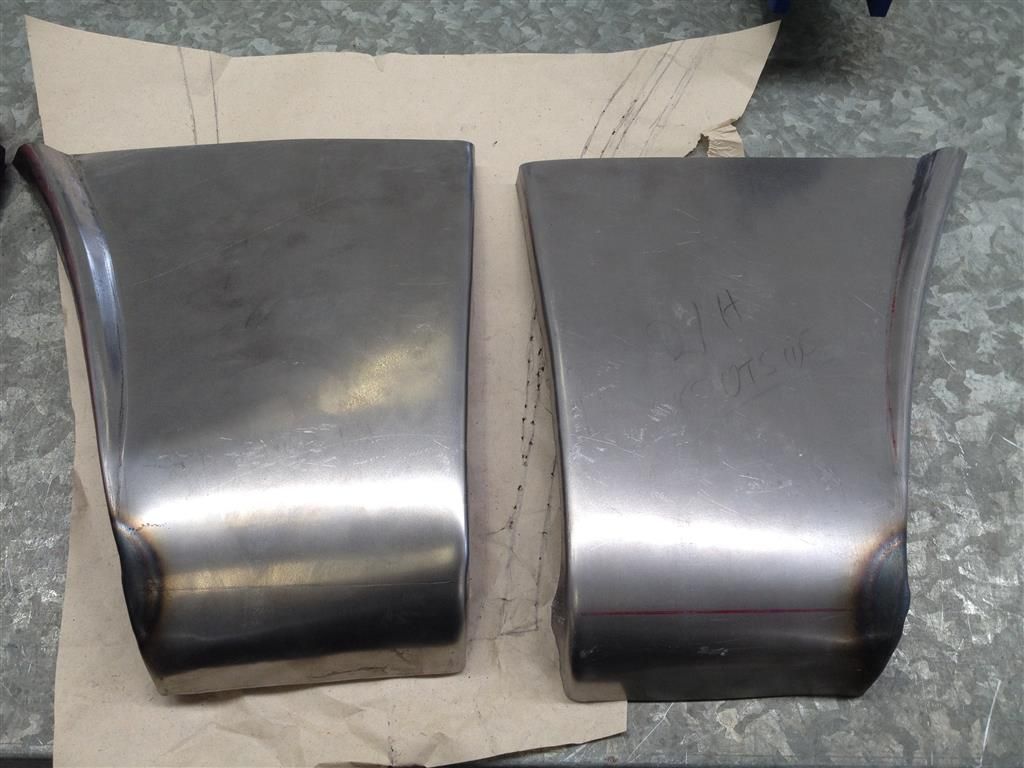
Here are the pieces I made all in my motel room.
I made a second left (as I will need it anyway)
[IMG]

[/IMG]
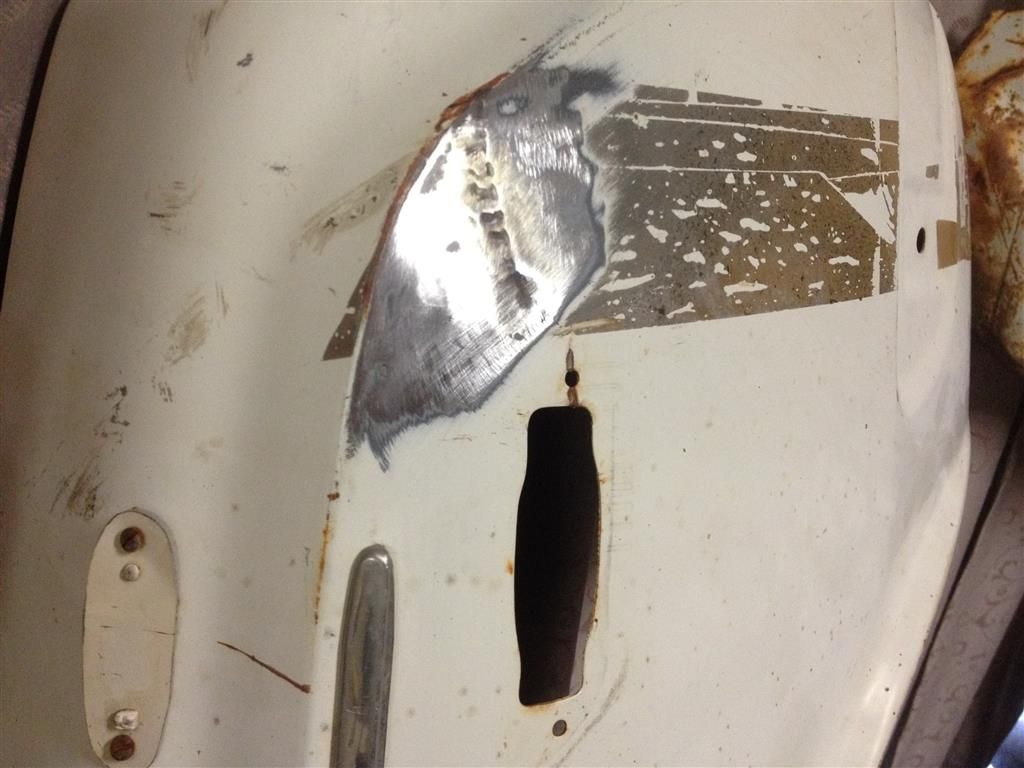
We also had a bit of time and he showed me how to use a shrinking disc, this dent was a crease about 5-6mm deep, it is now almost at file finish. or 3 coats of spray putty will have it perfect.
[IMG]
[/IMG]