I know I sent this around in the owners group however some could not open the file:
Contemporary Classic Radiator Upgrade and Installation
As you probably know Contemporary Classic Cobras are still one of the top replicas on the market today. However they do not have the advantages of continued upgrades for accuracy as do ERA, SPF , or even new CSX glass cars. Even with that said our cars are still top rated and well respected. Every winter I try to make upgrades as CCX would have if they were still manufacturing. I will share those upgrades with you over the winter in hopes other may like what I have done and follow suite.
On to the radiator, CCX radiators are set up at 90 degree position. This is not accurate when comparing to CSX, KMS, or even ERA. Changing the radiator positioning and installing the right hardware was more work than I expected. To start I removed everything including radiator, all CCX radiator supports, all hoses, and
oil cooler then proceeded to clean up the area. I knew there would need to be brackets made and aluminum sheeting installed to support the new radiator.
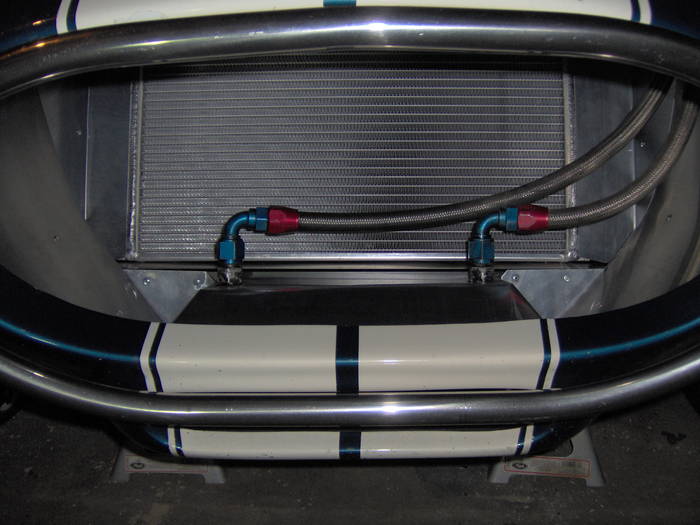
1) I purchased a new Fluidyne three core aluminum CSX replacement radiator.
2) The first bracket to be made was ½ steel tube with a ¾ spacer which spanned the frame rail side to side. I used the same holes drilled for the original brass unit so it would be a bolt in item.
3) Next I placed the radiator in place gently so I could figure where the radiator pads would be for the bottom attachment. (see picture as reference)
4) I had to weld the pads in place so there would be correct lower support.
5) The upper tube was fashioned again with ½ steel tubing and spanned inner fenders. Each end of the tube used small pads which allow for two grade #8 bolts on each end to hold them in position. Caution, check to make sure the hood has plenty of room to open and close. It is a tight squeeze!
6) I used steel to connect the upper radiator support as per CSX. (see picture)
7) Next the ½ square tube was installed and it too spanned the inner lower fender well. It would be a support area for sheet aluminum,
oil cooler, and eventually added structure to the lower radiator support itself.
8) I added a bit of angle to the cooler so it looks OEM CSX.
9) Now, all the aluminum was purchased at a local hardware store thus low$. I used thin cardboard as initial templates for all aluminum fabrication. This took an eternity!
10) Once all the hardware is structurally sound I went to hoses. I purchased several hoses and used parts of each to accomplish the plumbing direction and connection. Then fill and bleed and your done.
Drove all summer with advanced cooling and correct look. It will cost an estimated $600 depending on how much you pay for the radiator itself. I still need to add a CSX puke tank and the look will be complete. Good luck!