 
 Main Menu
|
|
Nevada Classics
|
|
Advertise at CC
|
| S |
M |
T |
W |
T |
F |
S |
| |
|
|
1 |
2 |
3 |
4 |
| 5 |
6 |
7 |
8 |
9 |
10 |
11 |
| 12 |
13 |
14 |
15 |
16 |
17 |
18 |
| 19 |
20 |
21 |
22 |
23 |
24 |
25 |
| 26 |
27 |
28 |
29 |
30 |
|
|
|
|
CC Advertisers
|
|
 9Likes 9Likes

12-29-2022, 05:14 PM
|
|
CC Member

|
|
|
Join Date: Aug 2022
Cobra Make, Engine: Superformance Mk II 289
Posts: 17
|
|

 Not Ranked
 Can anyone share a Mark II installation guide?
SPS 0061 just arrived
but the little techno-card thats embedded with my installation manual is running behind schedule.
Were hoping to set the engine in tomorrow
all Im finding online are Mark III guides and theyre just not quite the same.
Does anyone have a PDF (or any version) theyd share?
Thanks a million!
|
12-29-2022, 06:07 PM
|
 |
CC Member
|
|
|
Join Date: Aug 2013
Location: Canandaigua,
NY
Cobra Make, Engine: SPF MKII Riverside Racer FIA
Posts: 2,504
|
|
Neutral
I have no way to be able to share the drive. I have had my engine in and out numerous times do to it being a race car. PM me and give me your number and I will share my number with you and you can call me. However, I will not have access to a PM after 6 am Eastern time on Friday, so you will have to PM me before then.
You will need to remove the forward struts there are two 10 mm bolts on each one, one at the leaf spring tower and the other one underneath the dash near the door hinges. There are ground wires attached at both ends under the dash. Where the struts go through the firewall there is some caulk that needs to be loosened. There is also a 14mm nut on the drivers side one top of the footbox. Once loosened the struts are removed by sliding them back towards the passenger compartment and then once the forward end comes free, then slide them towards the nose until the aft end comes out of the firewall and remove. They are reinstalled inn the opposite manner.
A few points, easier to get the engine in from the side than from the front as the nose is so long, it can be done from the front, but easier from the side. You will need to place the headers in first, especially the one on the drivers side, it cannot be placed after the engine is in. The passenger side can be depending on the header and engine. Install the lower parts of the motor mounts on the stands tight enough to keep them in place, but loose enough for adjustments. The same with the uppers, attach them loosely to the block so that adjustments can be made. Slide the connecting bolts to tie both half of the motor mounts inn together once the engine is in, and then align the engine and tighten.
You will need to remove the overflow tank straps that are on top of the leaf springs before installing the engine. Before installing the engine, fit the headers in place and make sure that there is no interference with the header and spark plugs; then remove both of the headers and the spark plugs. If there is not enough room to get the plug or socket in, grind at the header flange until the plug fits and you can get a socket fully engaged. Be ready to swear and complain when you go to re-install the plugs as #8 is a PITA!
I installed the engine and transmission together once, with the car on lift and tilted forward, while possible, it was a pain and I did the engine and transmission separate for all the times. Shelby used a special stand to install the engine and transmission together.
Jim
__________________

Last edited by 1795; 12-30-2022 at 02:11 PM..
|
12-29-2022, 07:14 PM
|
|
CC Member
|
|
|
Join Date: Aug 2022
Cobra Make, Engine: Superformance Mk II 289
Posts: 17
|
|
Not Ranked
Thanks Jim! PM sent!
|
12-29-2022, 10:21 PM
|
 |
CC Member
|
|
|
Join Date: Jul 2021
Cobra Make, Engine: Alloy Shelby CSX 8057/Kirkham 1010, 289 Vintage Lykins Build
Posts: 130
|
|
Not Ranked
Is there actually a Mark II Installation Guide? I dont see any mention of it on the SCOF site. I am not referring to the Owners Manual but a true Installation Guide like that shown on SCOF for the Mark III.
|
12-30-2022, 02:13 AM
|
|
CC Member
|
|
|
Join Date: Aug 2013
Location: Canandaigua,
NY
Cobra Make, Engine: SPF MKII Riverside Racer FIA
Posts: 2,504
|
|
Not Ranked
There is a thumb drive that you get with a new purchase.
Greg,
As you probably already are aware, you have to remove the bonnet (10mm socket or wrench), remove the front wheels and make sure that your jack stands are on the tubes aft of the engine bay so that you have room to work and they do not interfere with the cherry picker. Removing the small bolts from the forward struts under the dash is not easy, as you have today on your back underneath the dash to access them. A thin straight blade screwdriver helps for loosening up the sealer around the tubes, as there is a lot of it and it adheres very well. After I have removed each of those bolts, I like to hang them through the ground wires so that I do not forget to re-attach the ground wires when installing the tubes. Also, you will have to remove the horn from the front of the tube inorderr to remove them.
Remember to remove the alternator prior to installation, the more things out of the way, the easier it goes. Just in case this is your first time, the handle on the leveler for your engine hoist goes to the front of the engine, if it is at the backside it will get in the way. If you do not have an engine leveler, stop and go buy one, as it will not be any easy install without it.
You will need to start with the crank pulley hanging over the transverse leaf springs and then angle the bell housing down and slowly work your way back dropping the engine, angling, and then leveling as you go to get the bottom flange of the bell housing over the cross member that is in front of the tunnel. After you get the bell housing on the aft side of that cross member, it gets easier. Just remember to keep an eye on the header that you dropped into the engine bay on the driver's side, it will need to be adjusted and may interfere with the install at times. The tail of the header goes in the opening to the wheel side of the engine mount stand.you need to pull it up and hold it in place with a couple of bolts to get it out of the way when you go to hookup the motor mounts.
__________________
Last edited by 1795; 12-30-2022 at 03:07 AM..
|
12-30-2022, 04:21 AM
|
|
Senile Club Cobra Member
|
|
|
Join Date: Feb 2001
Location: Buffalo, NY USA,
NY
Cobra Make, Engine: Superformance
Posts: 4,574
|
|
Not Ranked
Quote:
Originally Posted by 1795

There is a thumb drive that you get with a new purchase.
Greg,
As you probably already are aware, you have to remove the bonnet (10mm socket or wrench), remove the front wheels and make sure that your jack stands are on the tubes aft of the engine bay so that you have room to work and they do not interfere with the cherry picker. Removing the small bolts from the forward struts under the dash is not easy, as you have today on your back underneath the dash to access them. A thin straight blade screwdriver helps for loosening up the sealer around the tubes, as there is a lot of it and it adheres very well. After I have removed each of those bolts, I like to hang them through the ground wires so that I do not forget to re-attach the ground wires when installing the tubes. Also, you will have to remove the horn from the front of the tube inorderr to remove them.
Remember to remove the alternator prior to installation, the more things out of the way, the easier it goes. Just in case this is your first time, the handle on the leveler for your engine hoist goes to the front of the engine, if it is at the backside it will get in the way. If you do not have an engine leveler, stop and go buy one, as it will not be any easy install without it.
You will need to start with the crank pulley hanging over the transverse leaf springs and then angle the bell housing down and slowly work your way back dropping the engine, angling, and then leveling as you go to get the bottom flange of the bell housing over the cross member that is in front of the tunnel. After you get the bell housing on the aft side of that cross member, it gets easier. Just remember to keep an eye on the header that you dropped into the engine bay on the driver's side, it will need to be adjusted and may interfere with the install at times. The tail of the header goes in the opening to the wheel side of the engine mount stand.you need to pull it up and hold it in place with a couple of bolts to get it out of the way when you go to hookup the motor mounts.
|
The expansion tank straps Jim refers to are only on an FIA, not a street roadster. Please PM me with your email and I can supply some additional details.
__________________
"I'm high all right, but on the real thing....powerful gasoline and a clean windshield..."
rick@autoventureusa.net
|
12-30-2022, 04:41 AM
|
 |
CC Member
|
|
|
Join Date: Sep 2002
Cobra Make, Engine: SPF#0760
Posts: 3,409
|
|
Not Ranked
You have a message. I make the Wiring Diagrams, Owners Manuals and maintain the Service Bulletins for all the Superformance MKII’s and CSX7000/8000 cars along with Wiring Diagrams for a few others. (SPF MKIII’s, GT40’s, CSX4000/6000, and soon the Grand Sport)
I’d be happy to help you out. Your OM package is complete, and probably just delayed getting to you due to the holidays.
Blas
__________________
Wiring Diagrams: SPF MKII, MKIII, GT40, CSX7000, CSX8000, Corvette Grand Sport, and Shelby Sebring, Bondurant & Cinema Tribute Cars.
Owners Manuals: SPF MKII, CSX7000, CSX8000, Sebring, Bondurant, Cinema Tribute Cars $ GT40s..
Large, easy to read and trace schematics with part numbers, wire colors, wire gauge, fuses, and electrical upgrade information. Trouble-shooting and replacement part numbers for those roadside repair adventures.
SPFWiringDiagrams@Comcast.net
Last edited by Blas; 12-30-2022 at 08:53 AM..
|
12-30-2022, 05:43 AM
|
|
CC Member
|
|
|
Join Date: Aug 2022
Cobra Make, Engine: Superformance Mk II 289
Posts: 17
|
|
Not Ranked
Quote:
Originally Posted by Blas
You have a message. I make the Wiring Diagrams, Owners Manuals and maintain the Service Bulletins for all the Superformance MKIIs and CSX7000/8000 cars along with Wiring Diagrams for a few others. (GT40s, CSX4000/6000, and soon the Grand Sport)
Id be happy to help you out. Your OM package is complete, and probably just delayed getting to you due to the holidays.
Blas
|
John told me he just received my OM package and was expecting the MSO any day and hoped to ship them to me together. Thank you! With everyone shopping online and everyone, including UPS, FedEx, US Mail, etc short-staffed, its miraculous that this project has come together as quickly as it has! |
12-30-2022, 02:11 PM
|
|
CC Member
|
|
|
Join Date: Aug 2013
Location: Canandaigua,
NY
Cobra Make, Engine: SPF MKII Riverside Racer FIA
Posts: 2,504
|
|
Not Ranked
So, how did it go today?
__________________
|
12-30-2022, 04:13 PM
|
|
CC Member
|
|
|
Join Date: Apr 2022
Cobra Make, Engine:
Posts: 7
|
|
Not Ranked
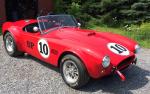
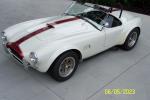
Is that color Princess Blue? Very nice.
|
12-30-2022, 05:55 PM
|
|
CC Member
|
|
|
Join Date: Jul 2021
Cobra Make, Engine: Alloy Shelby CSX 8057/Kirkham 1010, 289 Vintage Lykins Build
Posts: 130
|
|
Not Ranked
Quote:
Originally Posted by 1795
I have no way to be able to share the drive. I have had my engine in and out numerous times do to it being a race car. PM me and give me your number and I will share my number with you and you can call me. However, I will not have access to a PM after 6 am Eastern time on Friday, so you will have to PM me before then.
You will need to remove the forward struts there are two 10 mm bolts on each one, one at the leaf spring tower and the other one underneath the dash near the door hinges. There are ground wires attached at both ends under the dash. Where the struts go through the firewall there is some caulk that needs to be loosened. There is also a 14mm nut on the drivers side one top of the footbox. Once loosened the struts are removed by sliding them back towards the passenger compartment and then once the forward end comes free, then slide them towards the nose until the aft end comes out of the firewall and remove. They are reinstalled inn the opposite manner.
A few points, easier to get the engine in from the side than from the front as the nose is so long, it can be done from the front, but easier from the side. You will need to place the headers in first, especially the one on the drivers side, it cannot be placed after the engine is in. The passenger side can be depending on the header and engine. Install the lower parts of the motor mounts on the stands tight enough to keep them in place, but loose enough for adjustments. The same with the uppers, attach them loosely to the block so that adjustments can be made. Slide the connecting bolts to tie both half of the motor mounts inn together once the engine is in, and then align the engine and tighten.
You will need to remove the overflow tank straps that are on top of the leaf springs before installing the engine. Before installing the engine, fit the headers in place and make sure that there is no interference with the header and spark plugs; then remove both of the headers and the spark plugs. If there is not enough room to get the plug or socket in, grind at the header flange until the plug fits and you can get a socket fully engaged. Be ready to swear and complain when you go to re-install the plugs as #8 is a PITA!
I installed the engine and transmission together once, with the car on lift and tilted forward, while possible, it was a pain and I did the engine and transmission separate for all the times. Shelby used a special stand to install the engine and transmission together.
Jim
|
Helpful information as I will be doing an install in the coming months. Glad to see the correction to #8 from #12, as I wondered if you might be installing a V-12.

|
12-30-2022, 06:27 PM
|
|
CC Member
|
|
|
Join Date: Aug 2013
Location: Canandaigua,
NY
Cobra Make, Engine: SPF MKII Riverside Racer FIA
Posts: 2,504
|
|
Not Ranked
Quote:
Originally Posted by nkb
Helpful information as I will be doing an install in the coming months. Glad to see the correction to #8 from #12, as I wondered if you might be installing a V-12.
|
That's what happens when you try to write something quickly as you are preparing for bed.
I hope that your install goes well. Feel free to ask if you need anything.
Jim
__________________
|
12-30-2022, 06:52 PM
|
|
CC Member
|
|
|
Join Date: Aug 2022
Cobra Make, Engine: Superformance Mk II 289
Posts: 17
|
|
Not Ranked
Quote:
Originally Posted by 1795
So, how did it go today?
|
Ha! We took more parts off the car than we installed! The hood is off, the strut tubes (is that what youd call them?) are out, the seats are out, the transmission tunnel is out, the crossmember mount for the transmission is out
its a riot!
My oldest son (18) recognized that its likely not too many Superformance customers are doing their own installations. Its an easy car to work on, but there really arent any instructions and we have no idea what pieces were missing.
We think well have the motor mounts squared away tomorrow and be able to set the engine in the chassis. Engine/bellhousing/transmission are ready to go. Once its set it well set a seat back in and test the shifter location. Looks like its reversible on the TKX which could let us move it forward about 4 or so. Then we can cut the whole in the tunnel.
Anyhow, good chance well at least fire it tomorrow if only for a minute. Not sure if well have cooling all hooked up, but theres a good chance of thunder.
Getting the slave cylinder and bracket figured out for the hydraulic clutch, but I dont think any businesses will be checking emails or answering phones until Tuesday, so were managing expectations accordingly.
Heres a picture of my 3 sons and my good friend Dave that built my 396hp 331. Hes priceless on this operation! |
12-31-2022, 04:11 AM
|
|
CC Member
|
|
|
Join Date: Aug 2013
Location: Canandaigua,
NY
Cobra Make, Engine: SPF MKII Riverside Racer FIA
Posts: 2,504
|
|
Not Ranked
Yes, you do end up removing more than you install! Glad that you put the full list of everything that has to be removed for others to see, I was running out of time when I was posting and it is a lot. As you said, you have to remove the interior in order to get the tunnel cover off. It's a lot easier getting those bolts underneath the dash for the forward struts off with the seats out of the way, especially on the drivers side. Once you get the engine and transmission in, you can then make sure that the tail of the transmission and the differential have the correct orientation and you can measure and have your driveshaft made.
Getting the hoses made for the radiator takes a little bit of hunting to find the right ones, but not too bad. Having a lot of helping hands is nice. I have done the install by myself twice, and it is not easy trying to line things up and move the engine by yourself. Nor is lifting a 100 lb transmission into place by yourself. A helpful way to aid in installing the transmission that I have seen on the forum and used is to purchase four bolts (6-8" long) of the proper thread for the bell housing, cut the heads off of them and then once the engine and bell housing are installed, thread the bolts into the bell housing. You can then slide the transmission down the bolts and remove them one at a time after the transmission is properly mated, and install the connecting bolts. Takes a lot of pressure off your back, chest and arms.
Looking forward to seeing photos of the completed project.
Jim
__________________
Last edited by 1795; 12-31-2022 at 04:16 AM..
|
12-31-2022, 06:11 AM
|
|
Senile Club Cobra Member
|
|
|
Join Date: Feb 2001
Location: Buffalo, NY USA,
NY
Cobra Make, Engine: Superformance
Posts: 4,574
|
|
Not Ranked
Slave and arm setup on my 289: Superformance clutch slave
__________________
"I'm high all right, but on the real thing....powerful gasoline and a clean windshield..."
rick@autoventureusa.net
|
12-31-2022, 06:41 AM
|
 |
CC Member/Contributor
|

|
|
Join Date: Feb 2000
Location: Greenville,
SC
Cobra Make, Engine: 70 Shelby convertible, ERA-289 FIA, ERA 289 roadster hybrid, mystery Ford powered 2dr convertible
Posts: 12,800
|
|
Not Ranked
__________________
Instead of being part of the problem, be part of a successful solution.
First time Cobra buyers-READ THIS
|
12-31-2022, 11:59 AM
|
|
CC Member
|
|
|
Join Date: Jul 2021
Cobra Make, Engine: Alloy Shelby CSX 8057/Kirkham 1010, 289 Vintage Lykins Build
Posts: 130
|
|
Not Ranked
Quote:
Originally Posted by Mark IV
|
I don't see a rubber boot on the fork into the bell housing? Clutch is exposed to dirt/moisture. |
01-01-2023, 05:12 AM
|
|
CC Member
|
|
|
Join Date: Aug 2022
Cobra Make, Engine: Superformance Mk II 289
Posts: 17
|
|
Not Ranked
Yesterday was a good day! Engine is in and we fired it up briefly. Still a myriad of details to work out and finalize, but very happy to be this far along!
|
01-01-2023, 05:15 AM
|
|
CC Member
|
|
|
Join Date: Aug 2022
Cobra Make, Engine: Superformance Mk II 289
Posts: 17
|
|
Not Ranked
Too bad you cant enjoy this view when the hood is in place!
Last edited by Gpfarrell; 01-01-2023 at 05:17 AM..
|
 Posting Rules
|
You may not post new threads
You may not post replies
You may not post attachments
You may not edit your posts
HTML code is Off
|
|
|
All times are GMT -7. The time now is 03:00 PM.
Links monetized by VigLink
|


 Linear Mode


