Absolute Pace

Go Back   Club Cobra > Club Forums > Australian Cobra Club

Welcome to Club Cobra!  The World's largest non biased Shelby Cobra related site!

  •  » Representation from nearly all Cobra/Daytona/GT40 manufacturers
  •  » Help from all over the world for your questions
  •  » Build logs for you and all members
  •  » Blogs
  •  » Image Gallery
  •  » Many thousands of members and nearly 1 million posts! 

YES! I want to register an account for free right now!  p.s.: For registered members this ad will NOT show

MMG Superformance
Nevada Classics
Main Menu
Nevada Classics
Nevada Classics
MMG Superformance
MMG Superformance
Advertise at CC
Banner Ad Rates
MMG Superformance
MMG Superformance
April 2024
S M T W T F S
  1 2 3 4 5 6
7 8 9 10 11 12 13
14 15 16 17 18 19 20
21 22 23 24 25 26 27
28 29 30        

Kirkham Motorsports

Reply
 
LinkBack Thread Tools Rate Thread Display Modes
  #1 (permalink)  
Old 01-14-2008, 06:03 PM
boxhead's Avatar
CC Member
Visit my Photo Gallery

 
Join Date: Feb 2002
Location: Alice Springs, central Australia, NT
Cobra Make, Engine: Classic revival kit (CR3181), gen III engine, T56 6 speed box, AU XR8 lsd diff
Posts: 5,699
Send a message via Yahoo to boxhead
Not Ranked     
Default Yet another update

Well after finally making an a/c system for inside my shed I can now safely and comfortably work in there.
We have had days upto 44 degrees out here lately.

Friday night after work I headed out to the shed with the aim being to have the pedal assys ready to bolt in and allready be adjusted to the correct levels. I also wanted to make the brake and clutch pipes from the master cylinders to there connectors.

I fitted the master cylinders to my under dash support brace and shortened the push rods the required amount to allow me the correct pedal positions.


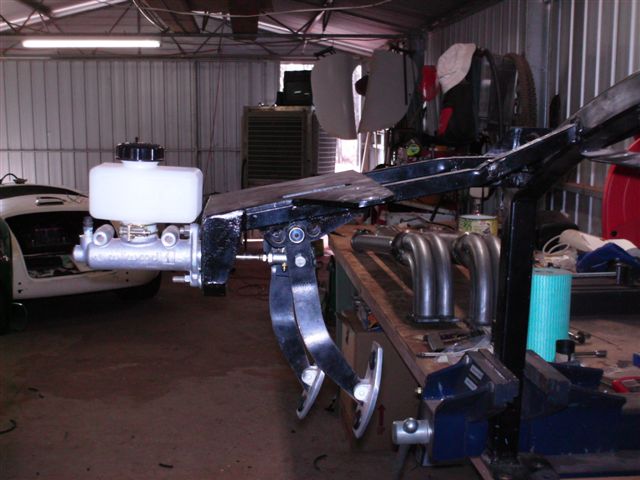
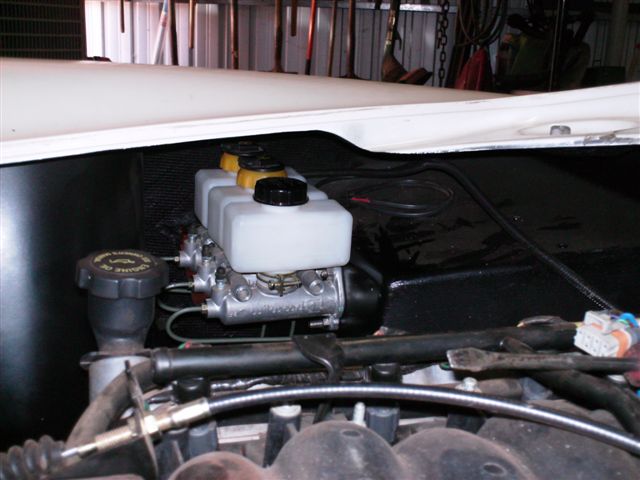
Once I was satisfied with that I mounted a master cylinder to the firewall and bent the pipes into there correct shapes, I also bought the genuine Holden pipes and hoses and clips for the clutch system, I modified and mounted these to a position where I was happy that all would be located where they need to be.

Saturday morning I headed into town and had the brake guy flare the ends for me (I had broken my flaring tool last week), I also bought some steel and odds and ends.
Back at home I mounted the under dash brace and fitted the master cylinders to the car, fitted and adjusted the pedals and push rods then fitted the pipes I had made.


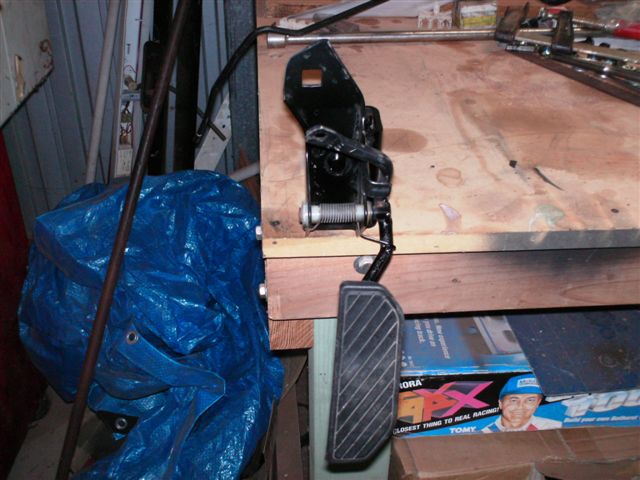
Next I started on the accelerator pedal, I wasnt happy with its alignment so I modified the arm so I could get the pedal sitting how I wanted it, also to allow for an easier mounting postion and still have clearance from brake pedals and the bias balance bar system.


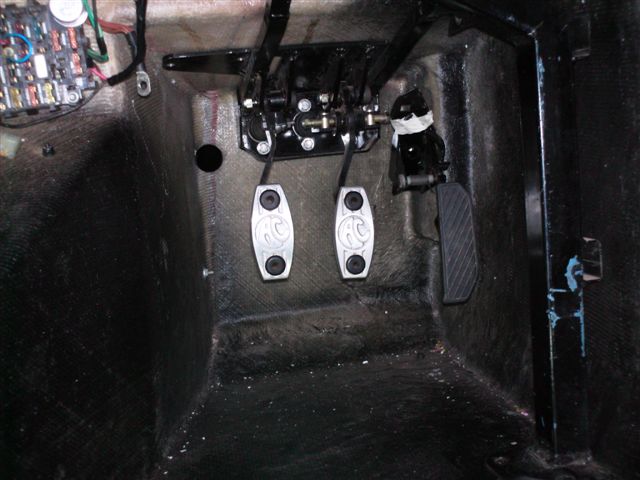
Then I bolted it into the car, the mounting bolts are accessable through the side vent hole.


Now it was time to get the steering shaft sorted out and fit a suport for it.
After much measuring and testing this is the suport bracket I made.


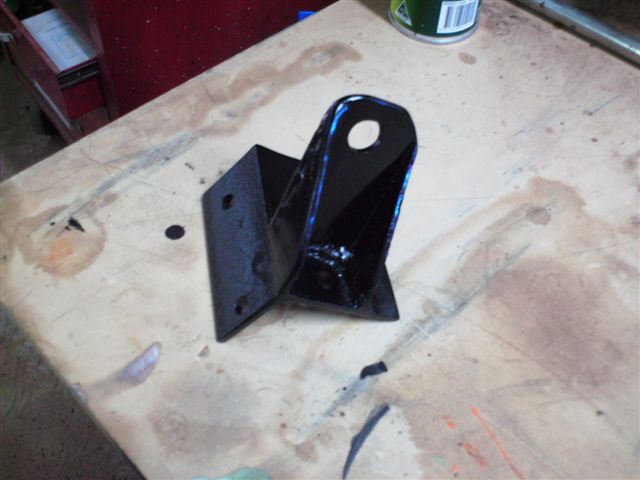
And here it is mounted in the car.

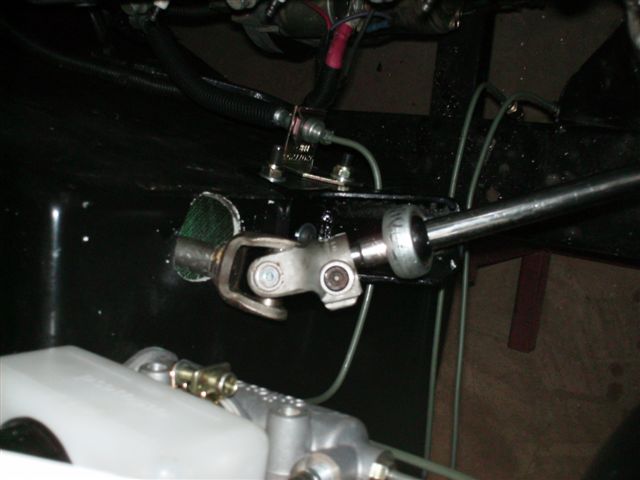
That is the clutch pipe and hose you can see below it.

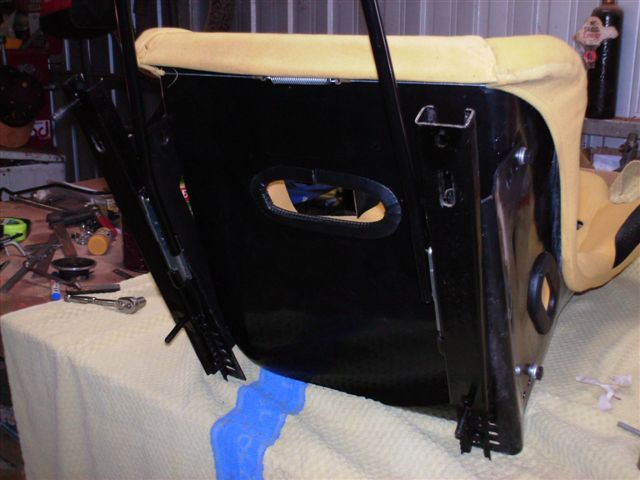
Next came time to make an adjustable drivers seat base.
I bought my seats from ebay a few years ago from a store, they initally sent me a wrong seat, when I contacted them they where very helpful and sent me the correct 2 seats straight away, I asked how I could get the wrong seat back to them and they advised me to keep it, this was a good thing as it had sliding tracks on it.
I used this track and fitted it to the seat, I measured up the pre made seat mounting position and found that one side had been drilled about 5 mm different to the other side (inner and outer position on drivers side) I measured the slider I had and found it was 320mm centre to centre and my floor was 320 one side and 325 the other.
After modifying the runner I mounted it to the car and tested the fit and adjuster, all working well.


Next up was to refit the dash and fit the hand brake, I remembered talking to Aussie Mike and in passing coversation he had said that the hole around the gearstick is a good access point for the hand brake, I just needed to make the hole bigger.
So being very mindful of where the fuel lines, battery lead and rear wiring harness where located in the tunel I cut my hole larger.
And I have to agree that what used to be a task I would sware at for 1 hour before getting it fitted now took all of 10 minutes.
Before refitting the indicator switch I looked at it a little more thorough and realised the plastic cover on the indicator/headlight stalk is bolted on.
I have mounted a headlight switch in the dash and have moved my hazzard light switch to a dash location aswell and I am not fitting wipers, so I could remove all these switches from the assy.
I have removed the wiper switch and fitted the assy upside down to the colomn, so now the stalk is on the left hand side of my steering wheel.
When I removed the plastic cover of the indicator stalk I found the shaft inside is a nice aluminium one, so I will polish this up and fit a little plastic knob on it like the older Holdens had.


It was at about this time I realised I had forgotten on Friday night to fit a brake light switch, so out came the seat again and luckily it was a fairly simple task to weld a tab in place and sort that out.

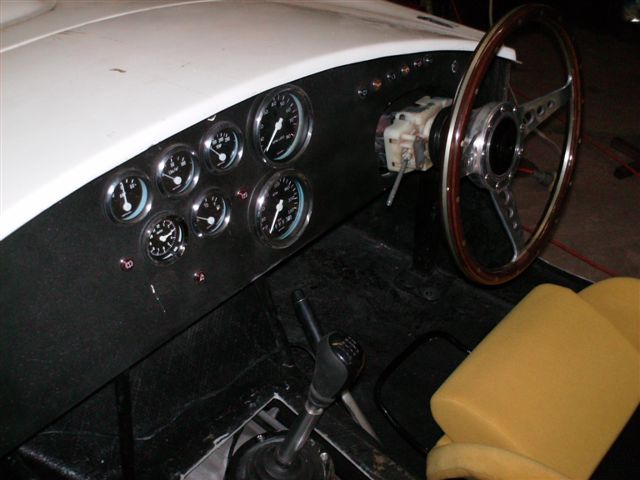
I then refitted the seat and bolted in the steering wheel, I couldnt help myself but to sit in the seat, hold the wheel and start pressing pedals.
I then grabbed a chux and cleaned all the spitle from the steering wheel and dash.
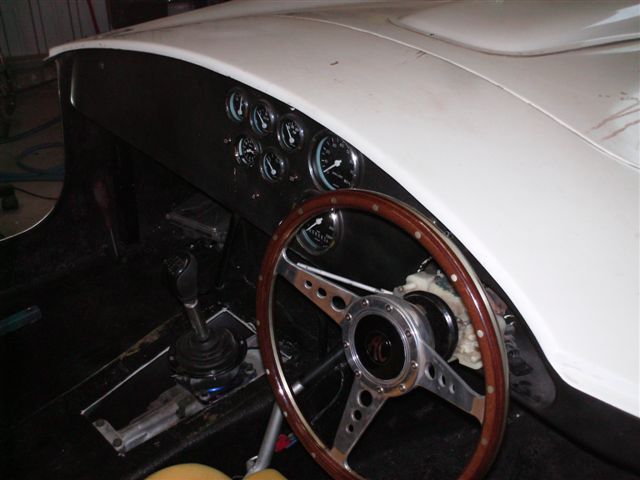
Here are some pics of dash in place.


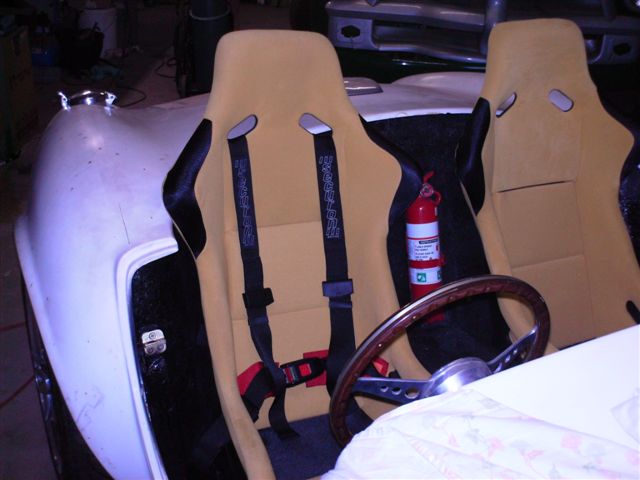
And lastly I started on the passengers seat but it was getting close to diner time, my feet where sore and I was ready for a shower.
So I sat the seat in place and sat the drivers seat belt in place for 1 last pic.


Hope the story wasnt too long or boring.
__________________

Cruising in 5th


---------------------------------------------
Never be afraid to do something new, Remember, Amateurs built the Ark: Professionals built the Titanic.
Reply With Quote
  #2 (permalink)  
Old 01-14-2008, 08:41 PM
CC Member
Visit my Photo Gallery

 
Join Date: Feb 2006
Location: Sydney, NSW
Cobra Make, Engine:
Posts: 554
Not Ranked     
Default

Nice work, Boxhead. Hope to see it at the Shelby Fest.
Richard
PS Good story, not too long or boring. I read it twice to avoid going back to work!
Reply With Quote
  #3 (permalink)  
Old 01-15-2008, 02:57 AM
Gav's Avatar
Gav Gav is offline
CC Member
Visit my Photo Gallery

 
Join Date: Apr 2006
Location: Mildura, vic
Cobra Make, Engine: FFR Coupe, 416ci of LS goodness
Posts: 2,349
Not Ranked     
Default

Looking good Dave, can't wait to catch up at Shelbyfest.
__________________
Powered by Cu
Reply With Quote
  #4 (permalink)  
Old 01-15-2008, 03:23 AM
Outwest34au's Avatar
CC Member
Visit my Photo Gallery

 
Join Date: Oct 2007
Location: Near Emerald, Qld
Cobra Make, Engine: Evans kit, 6 litre, 6 speed, Jag F/R,
Posts: 365
Not Ranked     
Default

Nice job on the brake and clutch setup. Nice and tidy.
__________________
Missed my Cobra budget by thaaaat much.
Ya get that on big jobs.
Reply With Quote
  #5 (permalink)  
Old 01-15-2008, 03:26 AM
Outwest34au's Avatar
CC Member
Visit my Photo Gallery

 
Join Date: Oct 2007
Location: Near Emerald, Qld
Cobra Make, Engine: Evans kit, 6 litre, 6 speed, Jag F/R,
Posts: 365
Not Ranked     
Default

BTW, the pipes on the bench gave me a half woody too.
__________________
Missed my Cobra budget by thaaaat much.
Ya get that on big jobs.
Reply With Quote
  #6 (permalink)  
Old 01-15-2008, 03:07 PM
CC Member
Visit my Photo Gallery

 
Join Date: May 2004
Location: Melbourne, Vic
Cobra Make, Engine: Cobra RMC 377ci Windsor, Harrison Daytona Coupe, Ford XC Coupe.
Posts: 1,588
Not Ranked     
Default A STIFFY you mean......

Boxhead,


Great work, I can see by the temperatures where you live the cooler would be a must..

I do like the brake set up, very neat indeed.

Keep up the good work and I will hopefully see you at the SHELBYFEST.


STIFFY
Reply With Quote
  #7 (permalink)  
Old 01-16-2008, 04:10 PM
boxhead's Avatar
CC Member
Visit my Photo Gallery

 
Join Date: Feb 2002
Location: Alice Springs, central Australia, NT
Cobra Make, Engine: Classic revival kit (CR3181), gen III engine, T56 6 speed box, AU XR8 lsd diff
Posts: 5,699
Send a message via Yahoo to boxhead
Not Ranked     
Default

Quote:
Originally Posted by Outwest34au
BTW, the pipes on the bench gave me a half woody too.
Since you like em so much here are some more pics of the side pipes.
I had these on another thread but that may have disappeared.


__________________

Cruising in 5th


---------------------------------------------
Never be afraid to do something new, Remember, Amateurs built the Ark: Professionals built the Titanic.
Reply With Quote
Reply


Posting Rules
You may not post new threads
You may not post replies
You may not post attachments
You may not edit your posts

BB code is On
Smilies are On
[IMG] code is On
HTML code is Off
Trackbacks are On
Pingbacks are On
Refbacks are On


All times are GMT -7. The time now is 09:23 PM.


Powered by vBulletin® Version 3.8.0
Copyright ©2000 - 2024, Jelsoft Enterprises Ltd.
Search Engine Friendly URLs by vBSEO 3.6.0
The representations expressed are the representations and opinions of the clubcobra.com forum members and do not necessarily reflect the opinions and viewpoints of the site owners, moderators, Shelby American, any other replica manufacturer, Ford Motor Company. This website has been planned and developed by clubcobra.com and its forum members and should not be construed as being endorsed by Ford Motor Company, or Shelby American or any other manufacturer unless expressly noted by that entity. "Cobra" and the Cobra logo are registered trademarks for Ford Motor Co., Inc. clubcobra.com forum members agree not to post any copyrighted material unless the copyrighted material is owned by you. Although we do not and cannot review the messages posted and are not responsible for the content of any of these messages, we reserve the right to delete any message for any reason whatsoever. You remain solely responsible for the content of your messages, and you agree to indemnify and hold us harmless with respect to any claim based upon transmission of your message(s). Thank you for visiting clubcobra.com. For full policy documentation refer to the following link: CC Policy