 
 Main Menu
|
|
Nevada Classics
|
|
Advertise at CC
|
| S |
M |
T |
W |
T |
F |
S |
| |
|
|
1 |
2 |
3 |
4 |
| 5 |
6 |
7 |
8 |
9 |
10 |
11 |
| 12 |
13 |
14 |
15 |
16 |
17 |
18 |
| 19 |
20 |
21 |
22 |
23 |
24 |
25 |
| 26 |
27 |
28 |
29 |
30 |
|
|
|
|
CC Advertisers
|
|
 23Likes 23Likes

07-28-2013, 07:19 AM
|
|
CC Member

|
|
|
Join Date: Oct 2003
Posts: 4,078
|
|

 Not Ranked

Quote:
Originally Posted by lippy

It mounts on a pedestal directly behind the passenger side wheel. You remove the panel behind the wheel for access. I have the optional heat vent and heat shields, and I am going to add either heat shlelding on the bottom of the pedestal, an insulated battery cover Thermo-Tec : Battery Wrap Acid Absorbing Heat Barrier, or both. |
Think.
You're making a maintenance nightmare for yourself. The valve cover will have to come off for batt changing or service / testing. Trickle charging with a Battery Tender also not easy. With the shields and the other crap, access is very problematic. Header gaskets and pipe fits are harder to access. And a 36 pound Optima installed over the fender top and bending inward gets old fast. A battery cover makes it 10 x's worse.
I'm not just talking through my ass; in the 90's, when I rebuilt the car for the second time, I had all that crap.
Heat shields, batt on footbox. In six moths, I tore it all out; batt in trunk, kill switch on bulkhead, no heat shielding. Improved weight bias, EASY battery and header maintenance, longer batt life.
As I said another time, you're over-worrying this. Trying to make a C6 out of a Cobra. You wanted Brent's big power but you're weighing the car down with junk and a radio.
Cobras are elemental, they produce heat and noise. If it's the right car for you, none of those elements will deter you.
__________________
Chas.
|
07-28-2013, 07:35 AM
|
 |
Half-Ass Member
|
|
|
Join Date: Jun 2005
Cobra Make, Engine: ERA #732, 428FE (447 CID), TKO600, Solid Flat Tappet Cam, Tons of Aluminum
Posts: 22,025
|
|
Not Ranked
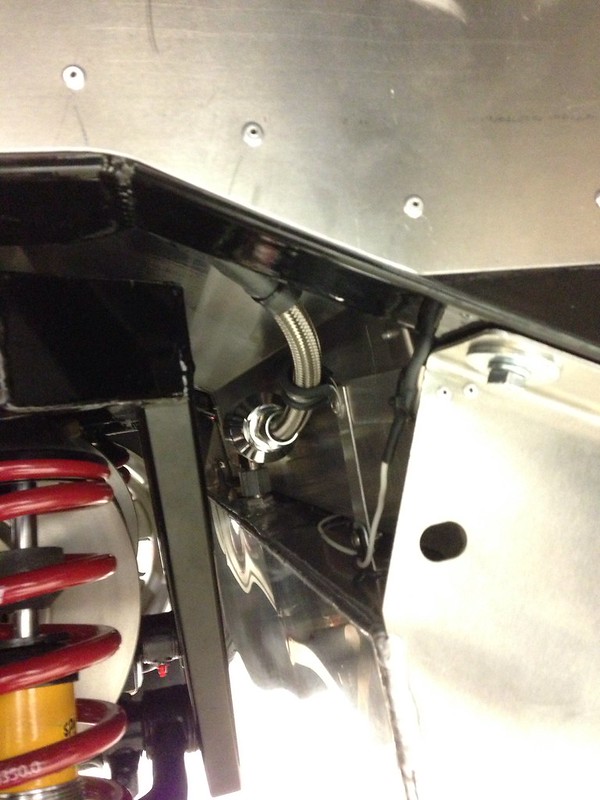
My last Interstate lasted 5+ years. Here's a pic of the tray that is sits on, as snapped through the panel in the well. Changing it out is not really a big deal. Just get your car on the road -- moving your battery to the back, to the front, or to wherever, is one of those little "touch up" jobs of which you will have many.

Last edited by patrickt; 10-26-2016 at 09:04 AM..
|
07-28-2013, 08:19 AM
|
 |
CC Member
|
|
|
Join Date: Dec 2001
Location: Castalia,
Oh
Cobra Make, Engine: EM cobra, 450 inch sbc running a best ET of 9.14..so far..ALL MOTOR...approx 800 horse.............ERA with 482 FE..All Aluminum Engine
Posts: 1,395
|
|
Not Ranked
Having just got my ERA a couple of months ago, I wanted to make sure the battery had a good charge. Found it nearly impossible to get to the positive terminal mounted in the right front wheel well. I took battery terminal off solinoid and charged it through that line. Then and there I decided my fist mod would be to put the battery in the trunk. I figured if I ever get stopped out on the road, getting to the battery would be a nightmare. IMHO
__________________
Jack
XSSIVE .....
|
07-28-2013, 10:34 AM
|
|
CC Member
|
|
|
Join Date: Apr 2012
Location: Bay Area (Peninsula),
CA
Cobra Make, Engine: ERA 427, 427/487 side-oiler
Posts: 1,248
|
|
Not Ranked
Quote:
Originally Posted by ERA Chas
The valve cover will have to come off for batt changing or service / testing.
|
Why can't I just remove the wheelwell panel to change the battery? The guys at ERA told me I could.
And I want an amp and speakers. It's part of the fun for me and I don't care if it's not "elemental". |
07-28-2013, 01:21 PM
|
|
Half-Ass Member
|
|
|
Join Date: Jun 2005
Cobra Make, Engine: ERA #732, 428FE (447 CID), TKO600, Solid Flat Tappet Cam, Tons of Aluminum
Posts: 22,025
|
|
Not Ranked
Quote:
Originally Posted by lippy
Why can't I just remove the wheelwell panel to change the battery? The guys at ERA told me I could.
|
You can. But getting to the positive terminal is next to impossible. So, if you want to charge your battery, you just clamp to the starter solenoid. No big deal. As to weight, with my battery up front my right front weight is 667 and my right rear weight is 725. |
07-28-2013, 02:36 PM
|
|
CC Member
|
|
|
Join Date: Oct 2003
Posts: 4,078
|
|
Not Ranked
Quote:
Originally Posted by lippy
Why can't I just remove the wheelwell panel to change the battery? The guys at ERA told me I could.
And I want an amp and speakers. It's part of the fun for me and I don't care if it's not "elemental".
|
I had an early chassis car which had no removable aluminum panel. I forgot the the later chassis was improved as such. So yes you have easier battery access than I knew. Pat's picture shows me the new layout.
But all the criticisms I and several others pointed out still apply.
I get it Lippy, your $$ so build it your way. But a lot of what you're piling in there is at cross-purposes with your other priorities.
You obviously don't need my opinions or experience so I'll butt-out.
__________________
Chas.
|
07-28-2013, 03:43 PM
|
|
CC Member
|
|
|
Join Date: Apr 2012
Location: Bay Area (Peninsula),
CA
Cobra Make, Engine: ERA 427, 427/487 side-oiler
Posts: 1,248
|
|
Not Ranked
Quote:
Originally Posted by ERA Chas
But all the criticisms I and several others pointed out still apply.
I get it Lippy, your $$ so build it your way. But a lot of what you're piling in there is at cross-purposes with your other priorities.
You obviously don't need my opinions or experience so I'll butt-out.
|
I really don't mind your comments and appreciate the good info from you and others on the forum. But the only purposes of this project are: (1) to build it with my kids, and that's going *really* well - they love it, and (2) to get the car the way I want it. I will rarely if ever race the car, so the weight of the battery up front, and the extra 20# of the speakers and amp are worth the trade off to me. As long as I can reasonably service the battery, I'll be fine. I'll change it to the rear if it bothers me. |
07-28-2013, 03:55 PM
|
|
CC Member
|
|
|
Join Date: Oct 2003
Posts: 4,078
|
|
Not Ranked
Very glad the kids are a positive factor in your build. Although they didn't actually 'build', my kids were a great enjoyment I got out of owning the car with them around.
And we went for some wild rides. A source of pride for me was teaching my son to drive it at age 18.
__________________
Chas.
|
07-28-2013, 04:32 PM
|
 |
CC Member
|
|
|
Join Date: Apr 2009
Location: Little Rock area,
AR
Cobra Make, Engine: ERA Street Roadster #782 with 459 cu in FE KC engine, toploader, 3.31
Posts: 4,533
|
|
Not Ranked
Quote:
Originally Posted by patrickt
You can. But getting to the positive terminal is next to impossible. So, if you want to charge your battery, you just clamp to the starter solenoid. No big deal. As to weight, with my battery up front my right front weight is 667 and my right rear weight is 725.
|
Another front mounted battery ERA here. I do wish they built the pedestal for a slightly lower positioning like the original cars. I assume it interfers with the headers for side exhaust systems - I have undercar exhaust. Even 1 to 1-1/2 inches lower would be a big help on access.
Looking good Lippy. |
08-28-2013, 11:23 AM
|
|
CC Member
|
|
|
Join Date: Apr 2012
Location: Bay Area (Peninsula),
CA
Cobra Make, Engine: ERA 427, 427/487 side-oiler
Posts: 1,248
|
|
Not Ranked
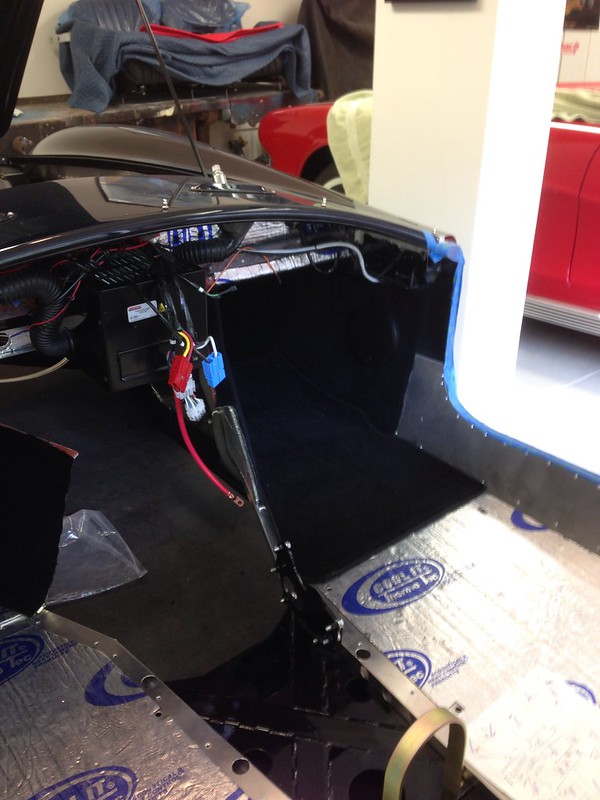
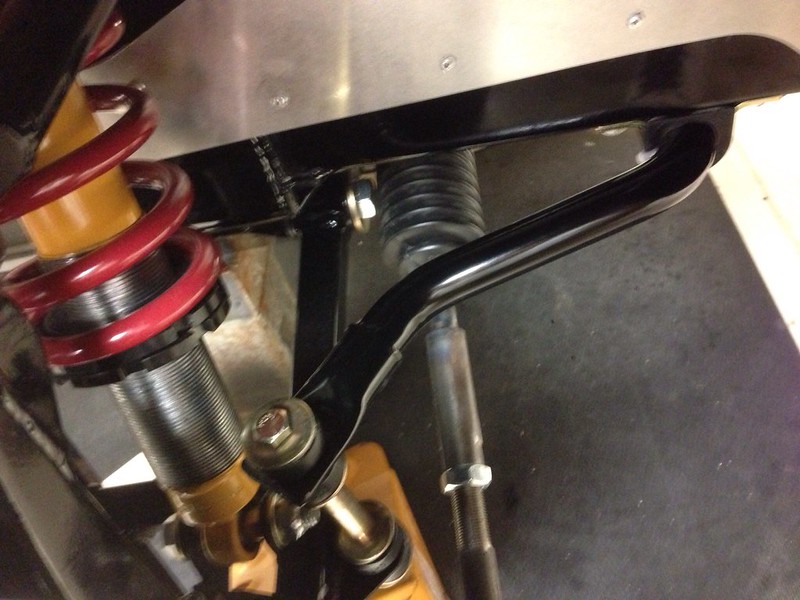
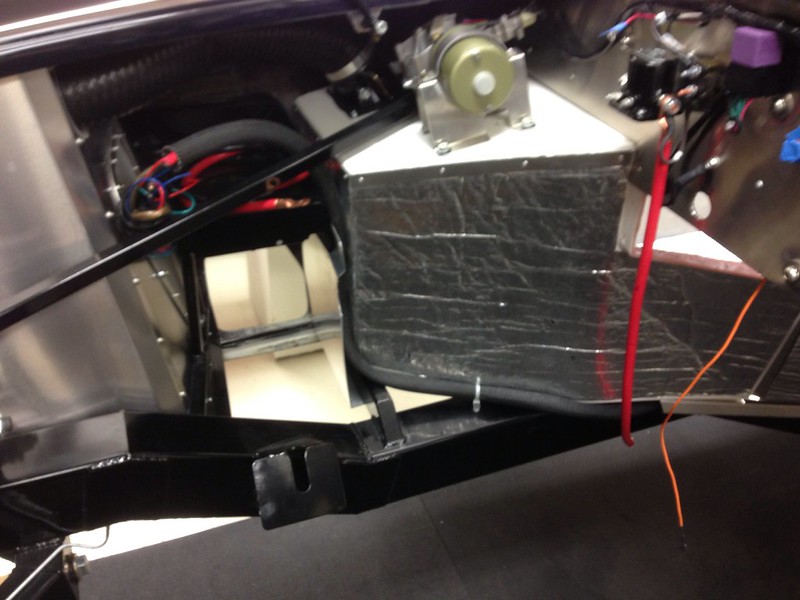
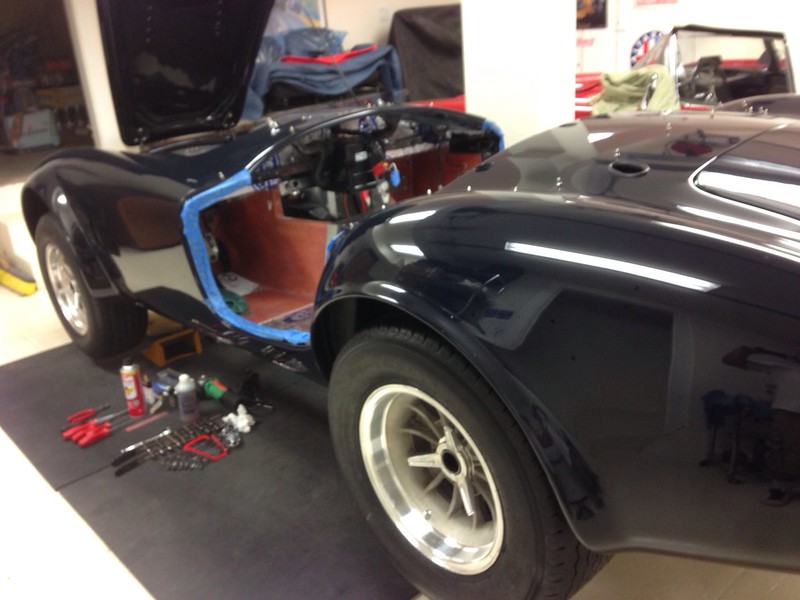
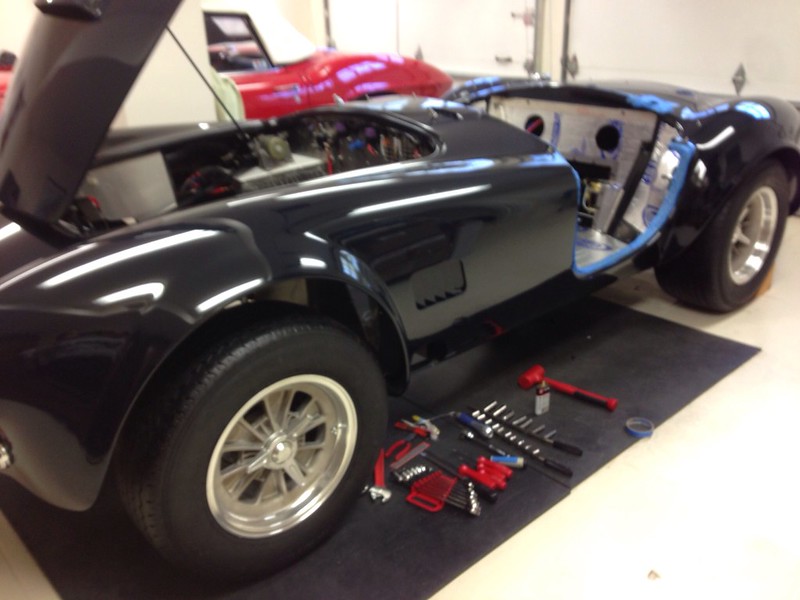
Seems like I've been spending a lot of time on smaller things lately. Since the last update, I've:
- Installed front and rear sway bars. I switched the direction of the bolts on the front one, btw, so the nut is on the top, like the rear
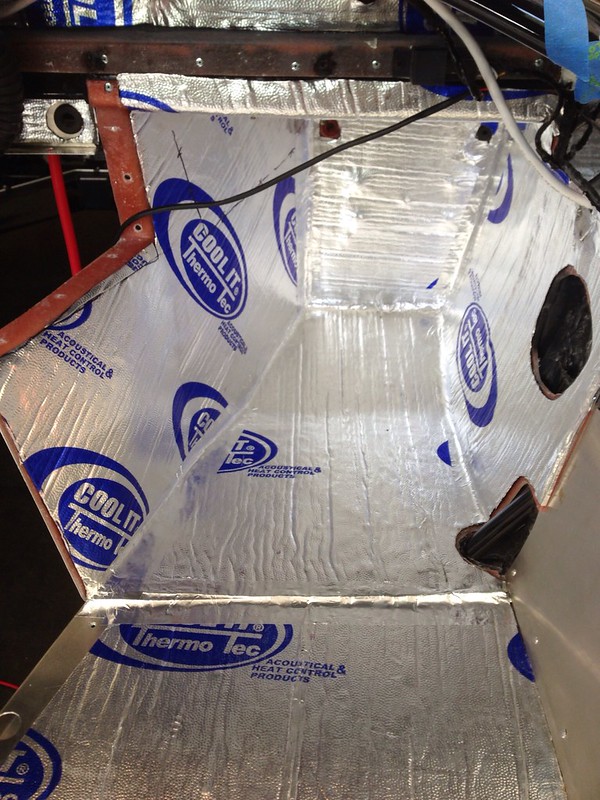
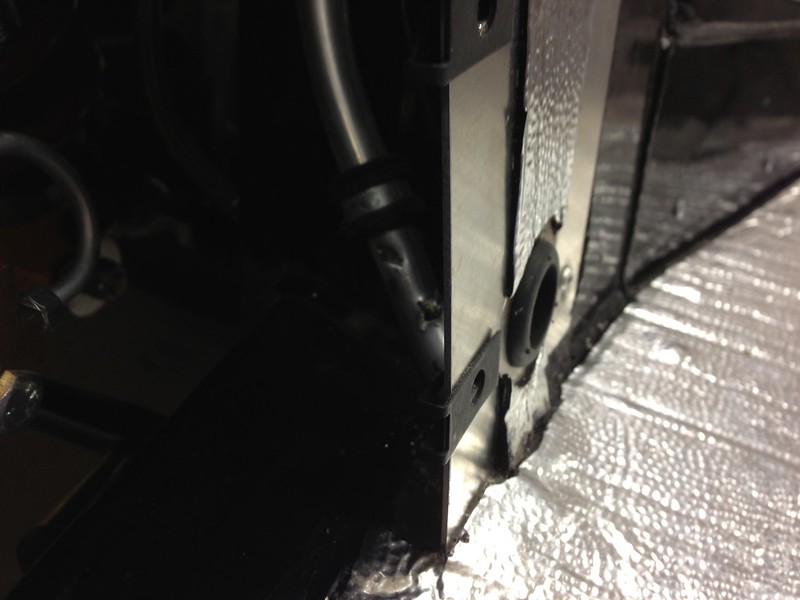
- Finished insulation on the footboxes
- Ran a front-rear conduit for amp power, speaker, and other misc electrical cables
- Mounted all hubs and checked that wheels fit on pins. They do
- Mounted the gas tank
- Managed to drill a hole in my hard fuel line ( First bonehead mistake. Need advice.). I got the old line out and am in the process of installing a new stainless braided line. The one good thing about this mistake is that I'll eliminate some fittings by using one continuous line from the filter all the way to the fuel pump on the engine
Brent estimates it will take him only a few more weeks to complete the engine, so I'm trying to make sure I'm ready for that. I'm planning on using the HF 1-ton foldable engine hoist for the job, and then sell it on Craigslist. If I install from the side it seems to measure out ok. Has anyone actually used this hoist, as opposed to the slightly longer 2-ton one?
Last edited by lippy; 08-28-2013 at 11:43 AM..
Reason: Removed links to pix, they are below
|
08-28-2013, 11:35 AM
|
|
Half-Ass Member
|
|
|
Join Date: Jun 2005
Cobra Make, Engine: ERA #732, 428FE (447 CID), TKO600, Solid Flat Tappet Cam, Tons of Aluminum
Posts: 22,025
|
|
Not Ranked
Those pics looked good...
|
08-28-2013, 11:40 AM
|
|
CC Member
|
|
|
Join Date: Apr 2012
Location: Bay Area (Peninsula),
CA
Cobra Make, Engine: ERA 427, 427/487 side-oiler
Posts: 1,248
|
|
Not Ranked
Patrick - how did you get those to work? I tried but couldn't.
|
08-28-2013, 12:09 PM
|
|
Half-Ass Member
|
|
|
Join Date: Jun 2005
Cobra Make, Engine: ERA #732, 428FE (447 CID), TKO600, Solid Flat Tappet Cam, Tons of Aluminum
Posts: 22,025
|
|
Not Ranked
Quote:
Originally Posted by lippy
Patrick - how did you get those to work? I tried but couldn't.
|
Just take the image source path, such as h.t.t.p://farm6.staticflickr.com/5473/9580812534_7f316f386c_c.jpg and encase it with image tags, like this [I.M.G.] and [/I.M.G.] Don't use the periods, I just put the dots in there to keep the site from interpreting the tags and source paths so you could see how it's done. |
08-28-2013, 12:30 PM
|
|
CC Member
|
|
|
Join Date: Apr 2009
Location: Little Rock area,
AR
Cobra Make, Engine: ERA Street Roadster #782 with 459 cu in FE KC engine, toploader, 3.31
Posts: 4,533
|
|
Not Ranked
Installing the engine from the side works fine. Just about any good 1 ton lift should work for it. A engine tilter is kind of a nice feature to use but isn't absolutely necessary. Before you completely turn loose of the engine be sure to level is up from side to side as there is quite a bit of room in those slotted motor mounts. Mine was a little low on one side and I loosened the chains on the high side and lifted it just slightly on the low side with the hoist and it slipped/rotated around until it sat level (used a level across the valve covers).
I can't believe I've already forgotten but I think I installed mine with the clutch in place but not the bellhousing. I'll look at my pictures tonight.
The transmission is the real trick because it goes a ways up under the dash. I used the hoist but the chains would have hit the dash cowl long before the transmission was in place. I ended up assembling a little lifting beam with a heavy metal piece that I strapped to the top of the transmission and then picked it up at a single point as far back as I could. I was able to get it into position then.
I usually use a couple of 4 inch dowels screwed into the top transmission bolt holes in the bellhousing to hang the transmission on so I can align it and then slide it into the clutch disc and pilot bushing without putting any weight on the clutch disc and possibly springing it (hello clutch chatter). However my dowels were for a Muncie and a Toploader uses a larger transmission bolt that so I ended up just doing the best I could - fortunately without any problem for the clutch. To make the dowels just buy some four inch bolts of the right size, cut the head off and round off the cut end a little. Believe me its well worth the effort.
Car looking real nice - I wish I had bought FIA wheels.
What was I thinking - need a 2-ton lift.
Last edited by DanEC; 09-26-2013 at 05:32 PM..
Reason: Brain malfunction
|
08-28-2013, 05:12 PM
|
|
CC Member
|
|
|
Join Date: Apr 1999
Location: Waco, TX,
TX
Cobra Make, Engine: ERA #766, FE V8, Toploader
Posts: 257
|
|
Not Ranked
Your FIA wheels look great--I may consider switching to these when the lack of decent 15" tires forces a change to 17" wheels and tires (perhaps sooner than I think!).
Remember, it was easy to install the engine/clutch/bellhousing/transmission as a single unit from the front--you don't even have to angle it much. To do this, the upper center section of the transmission tunnel must not be installed. I used screws to install the center section (instead of rivets) in case of future maintenance/repair. This approach would have been very difficult if not impossible with the old design (757 and earlier). By the way, I'd already installed the radiator and instrument panel, too.
I also mounted the starter to the powertrain unit before the 3-minute installation took place (last-minute decision). As it turned out, I could also have mounted the cast-iron water pump and the expansion tank prior to the installation (not the alternator or fuel pump, though).
ERA still does it the original way even with the new design (758 on), but they were interested in learning that it could be done. They don't know of anyone else who has tried it this way; however, if I can do it . . . . well, it just wasn't hard to do. (Keep in mind, though: 1965 cast-iron FE block, Lakewood bellhousing, and 1965 cast-iron Ford toploader. With other combinations, your results may vary!).
If you want to try it, it saves time and effort, and it greatly simplifies adding the clutch and transmission. I had put everything together just to make sure there would be no problems (doesn't everyone do this?); while it was all together, I decided to experiment and try to install it all together just to see if it would work. Was I ever happy when it did!

|
08-28-2013, 05:53 PM
|
|
CC Member
|
|
|
Join Date: Apr 2009
Location: Little Rock area,
AR
Cobra Make, Engine: ERA Street Roadster #782 with 459 cu in FE KC engine, toploader, 3.31
Posts: 4,533
|
|
Not Ranked
Cscobra - do you have some pictures of installing the engine and transmission as a unit? That would simplify things but no one suggested it was possible when I installed mine. I assume you used an engine tilter?
|
08-31-2013, 09:07 PM
|
|
CC Member
|
|
|
Join Date: Apr 1999
Location: Waco, TX,
TX
Cobra Make, Engine: ERA #766, FE V8, Toploader
Posts: 257
|
|
Not Ranked
I have some pictures, but I've not yet decided where to put them on the web. I'll get to work on that when possible along with the other information I mentioned in my thread last February, when #766 hit the road (670 miles so far).
I just finished fitting the top two nights ago after spending a careful two weeks on it--looks good, and exhibits no flapping of the top or rattling of the sidecurtains even when driving at 75 for a bit.
|
08-31-2013, 09:13 PM
|
|
CC Member
|
|
|
Join Date: Apr 1999
Location: Waco, TX,
TX
Cobra Make, Engine: ERA #766, FE V8, Toploader
Posts: 257
|
|
Not Ranked
Dan, I just noticed the part of your message about the engine tilter--I did not use one. My engine came with a lifting plate bolted to the intake manifold. It had three large holes in the vertical lifting portion. We started off using the forward hole thinking that a lot of tilt would be necessary, but it was too much! We ultimately used the center hole instead with no problems and with good results.
|
09-16-2013, 11:18 AM
|
|
CC Member
|
|
|
Join Date: Apr 2012
Location: Bay Area (Peninsula),
CA
Cobra Make, Engine: ERA 427, 427/487 side-oiler
Posts: 1,248
|
|
Not Ranked
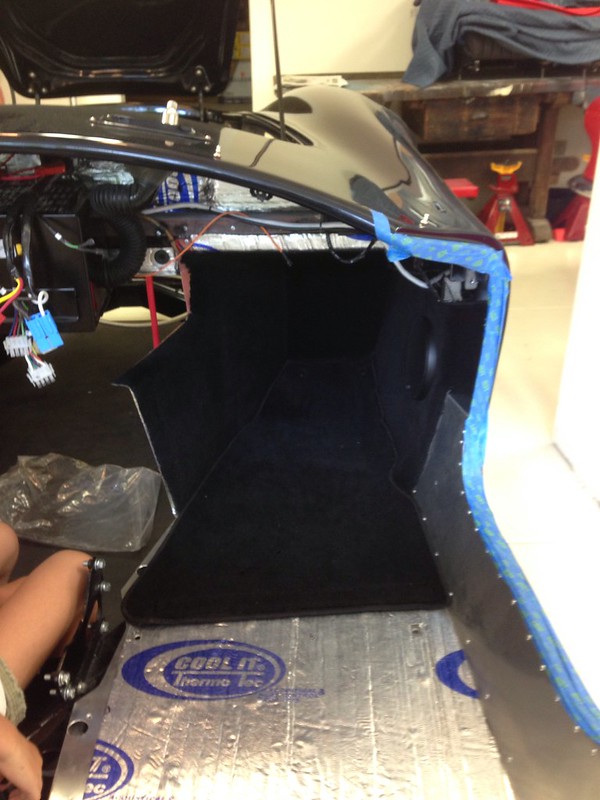
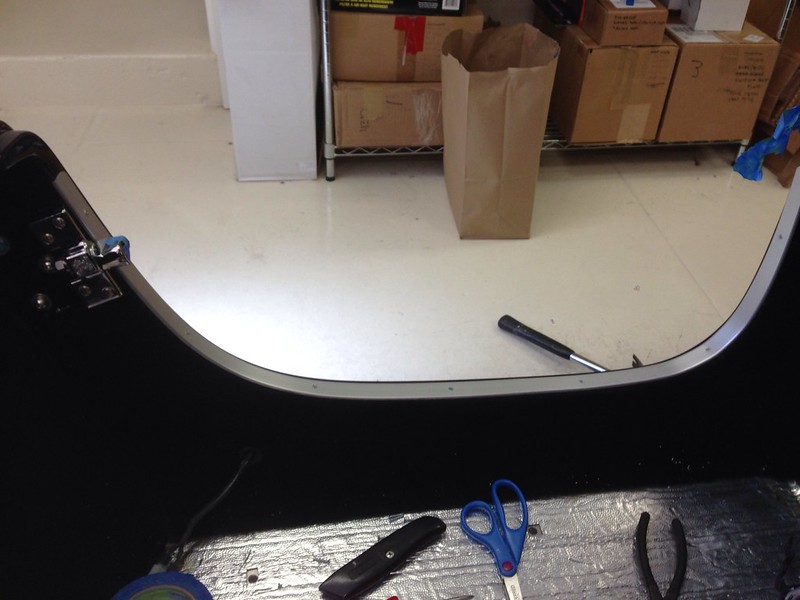
I think we're making good progress. Since my last post, we've:
- Replaced my damaged fuel line with a flex PTFE one
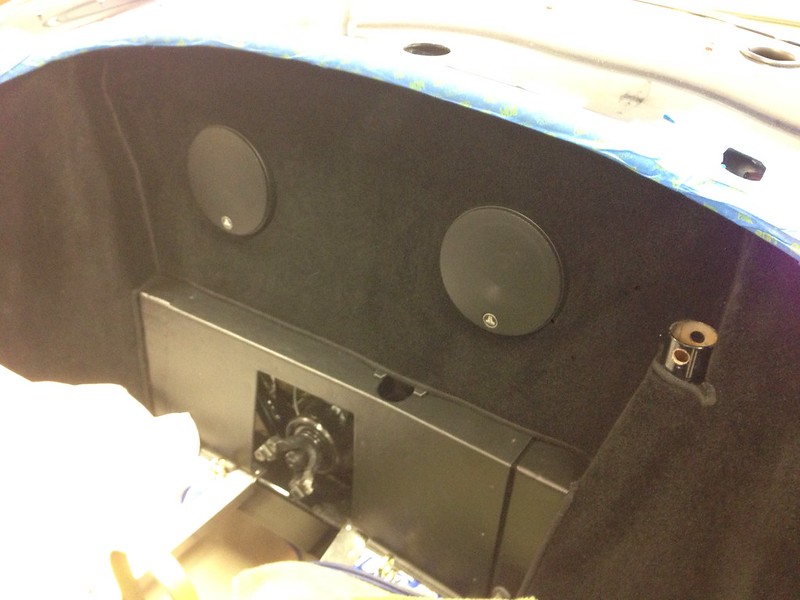
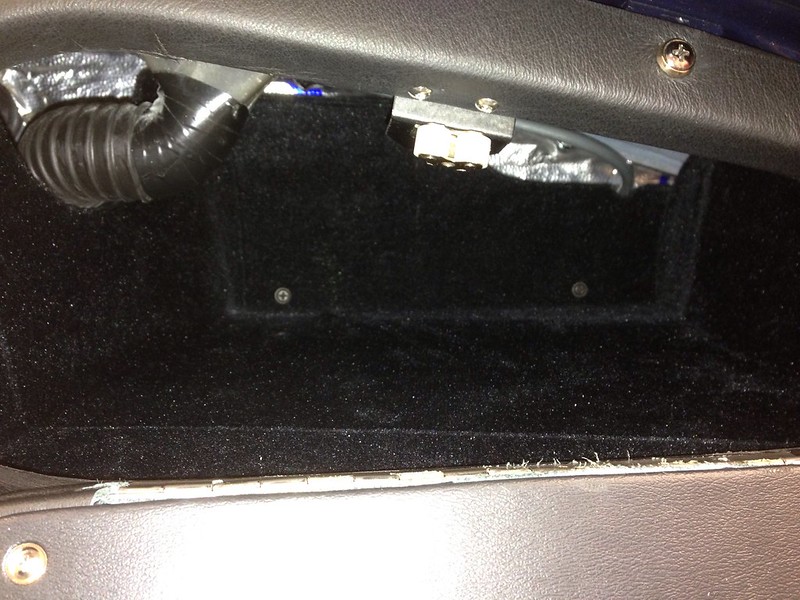
- Installed pretty much all of the interior carpet. Glad I went with the wool. It looks and feels great
- Got the crossovers and speakers in, and finished up the conduit that carries the amp wiring, etc, to the rear of the car
- Replaced the ammeter with a matching voltmeter
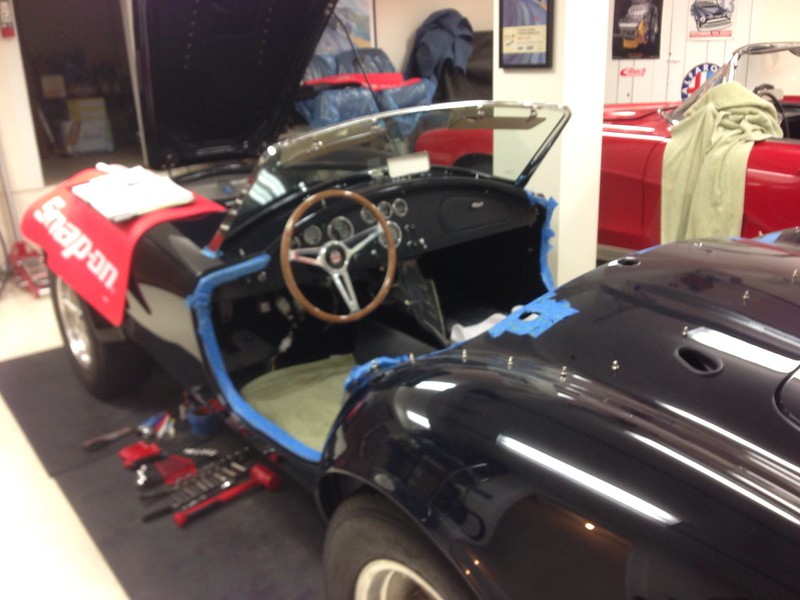
- Installed the dash and windshield
- Installed the steering column. I may move the turn signal to the left. Also, the block that clamps the steering column to the shaft that extends through the footbox tends to rub the carpet panel when the wheel turns, so I will modify the block by rounding the corners and shortening the bolts
- Installed the glove box. Since there was no back panel included with the kit, we cut and formed one out of sheet aluminum, covered it with felt, and fastened it using black screws
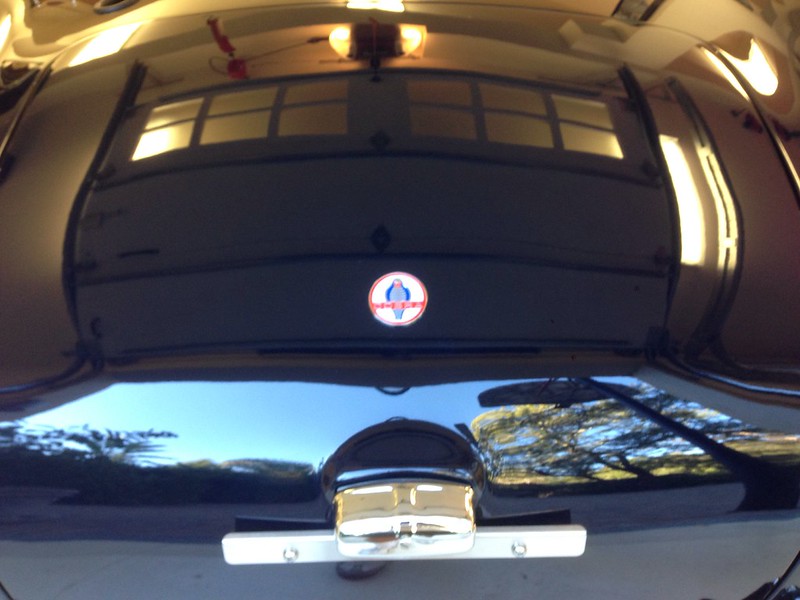
- Finished most of the dash and MSD wiring and tied it up
- Mounted the emblems and rear view mirror (kids were really excited about this). I think I will go with the bullet mirror on the left and Raydyot on the right.
Last edited by lippy; 09-16-2013 at 11:28 AM..
|
09-16-2013, 11:28 AM
|
|
CC Member
|
|
|
Join Date: Apr 2012
Location: Bay Area (Peninsula),
CA
Cobra Make, Engine: ERA 427, 427/487 side-oiler
Posts: 1,248
|
|
Not Ranked
|
 Posting Rules
|
You may not post new threads
You may not post replies
You may not post attachments
You may not edit your posts
HTML code is Off
|
|
|
All times are GMT -7. The time now is 10:41 PM.
Links monetized by VigLink
|


 Linear Mode


