 
 Main Menu
|
|
Nevada Classics
|
|
Advertise at CC
|
| S |
M |
T |
W |
T |
F |
S |
| |
|
|
|
|
1 |
2 |
| 3 |
4 |
5 |
6 |
7 |
8 |
9 |
| 10 |
11 |
12 |
13 |
14 |
15 |
16 |
| 17 |
18 |
19 |
20 |
21 |
22 |
23 |
| 24 |
25 |
26 |
27 |
28 |
29 |
30 |
| 31 |
|
|
|
|
|
|
|
|
CC Advertisers
|
|
 8Likes 8Likes

04-24-2017, 07:32 PM
|
|
CC Member

|
|
|
Join Date: Apr 2014
Cobra Make, Engine: ERA 289 FIA 351Windsor
Posts: 150
|
|

 Not Ranked
 Era fia fast efi 8 stack project...
I put together a show and tell about my recent 8 stack EFI project. With photos, per Geoff's request! Ill post in different installments so it doesnt become one long rambling mess. When I started this project my knowledge about EFI was practically zero and I consider myself a novice mechanic. Unfortunately, I deleted some of the photos I took along the way but youll get the gist. Im happy to answer any questions that might help anyone interested in this type of EFI modification.
THE BASICS,,,
I wanted to replace my Holley 650 double pumper with either a Weber system or 8 stack EFI. The system I chose was the FAST EZ EFI 2.0 system coupled with the Speedmaster 8 stack injection intake, first generation. It all started when I won an Ebay auction for the new manifold and throttle bodies for $650. And even though I had heard about some issues with these units, and there WERE issues, I couldn't pass up the price. I figured with coupling the intake to the well-reviewed Fast EFI, that I could mitigate a lot of problems and if things worked well I could pop for a more expensive intake in the future. Speed Master is marketing a newer intake for about $2000 that looks pretty cool and I think they have taken care of some of the fitment issues I ran into. Unfortunately, it only comes in a funny polished version
too much bling for me. The plan was to use all FAST components except for the intake. That included the EFI, Dual Sync Distributor, Ignition box, coil and in-line fuel system kit. After receiving all the components I stared fitting things together.
|
04-24-2017, 07:39 PM
|
|
CC Member
|
|
|
Join Date: Apr 2014
Cobra Make, Engine: ERA 289 FIA 351Windsor
Posts: 150
|
|
Not Ranked
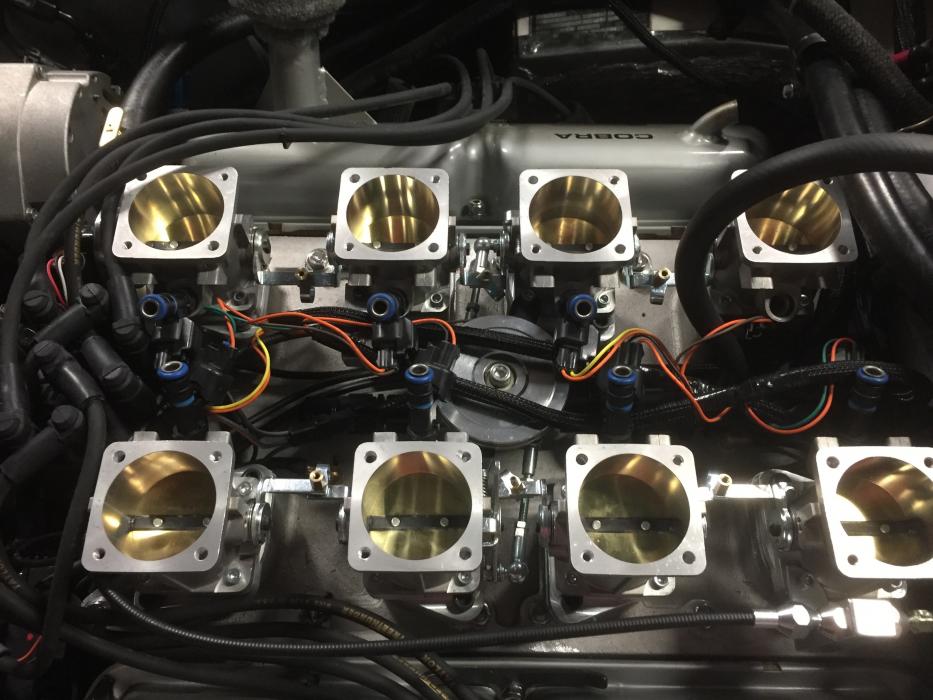
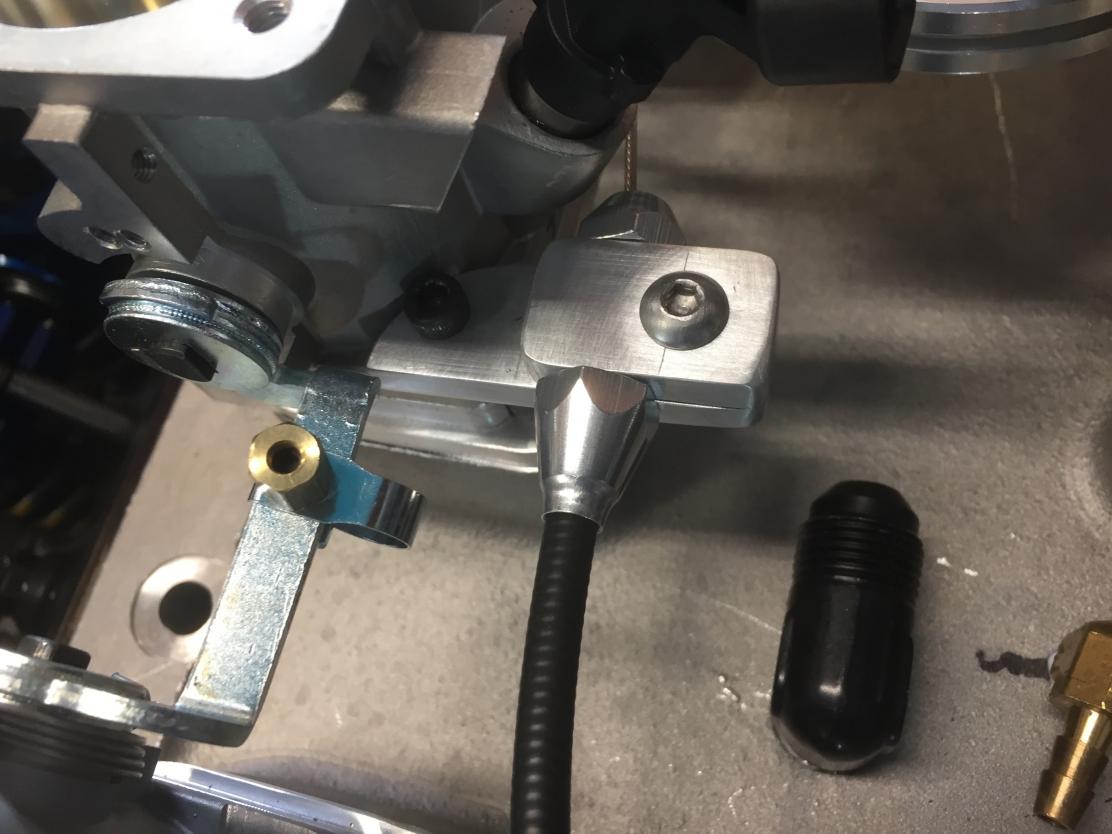
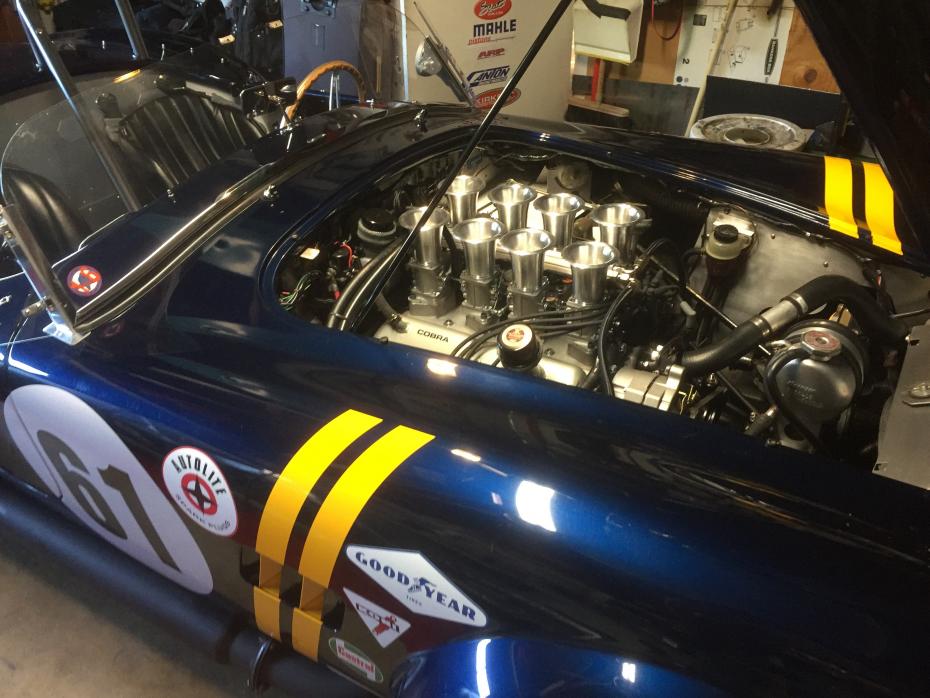
THE INTAKE…
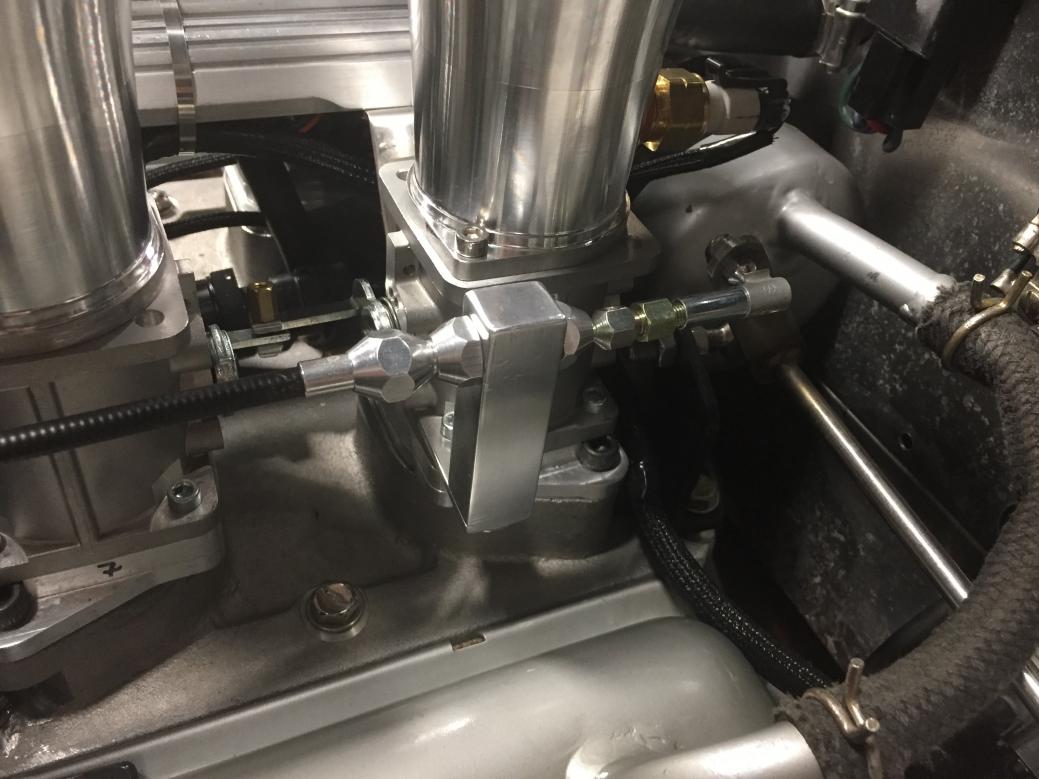
To keep the vintage look of Webers I decided to make things far more difficult by changing the position of the fuel rails from the outside of the throttle bodies, to the inside. I was hoping to “hide” the rails, giving the intake a more carburetor-like look. Because the 351w has a wider block at the top, there was enough room to simply swap the throttle bodies from left to right and with some clearencing on the fuel rails, it seemed like it just might work, This center fuel rail conversion will NOT work on a 289 or 302. I had to lower the throttle center pulley and linkage and fashion a throttle cable system that looped around the front of the throttle bodies on the left side and fabricated a cable holder that lined up pretty well with the stock ERA throttle linkage.
There were a few fitment issues. First, I had to grind the sides of the intake about 1/8th of an inch on both sides so the intake would go down between the heads. I’m not sure if this will be an issue with different manufactured heads but it was with mine. Luckily the mating surfaces were all fine and it bolted down with no leaks. The four centered intake bolts had to be changed out for studs and nuts, not horrible, just another thing to do. A couple of tapped holes in the manifold for vacuum fittings and some more “clearancing” of the alternator bracket for the water neck made the intake install complete.

 |
04-24-2017, 07:45 PM
|
|
CC Member
|
|
|
Join Date: Apr 2014
Cobra Make, Engine: ERA 289 FIA 351Windsor
Posts: 150
|
|
Not Ranked
THE DISTRIBUTOR
The distributor became my biggest hurdle. After bench assembly of the intake and modifying everything for the fuel rails to run thru the center, when I put it on the motor I realized part of the distributor cap had to run underneath the fuel rails. The FAST Dual Sync Distro is a tall MF and I couldnt use it if I wanted to keep the rails in the center. I had to find a distributor that had a stock profile and would also work with the FAST EFI. There are 3 alternatives to the type of HEI distributors you can use with the FAST system if you want to have the EFI control your timing curve and for it to be easily adjusted by using the hand held interface. 1) Dual Sync 2) Locked distributor with crank trigger or 3) Locked 2 wire distributor with a phasable rotor. After much internet searching I finally found a 2 wire MSD small cap distributor(black
sexy!) with the same height and size of the cast stock distributor, great! Not so great
the body of the distributor hit the manifold a good 1/2 before it seated in the block. Some more careful clearancing (read, grinding)and I was able to get the distributor home. The MSD distributor was easily lockable and the phasable rotor was easy to get.

|
04-24-2017, 07:51 PM
|
|
CC Member
|
|
|
Join Date: Apr 2014
Cobra Make, Engine: ERA 289 FIA 351Windsor
Posts: 150
|
|
Not Ranked
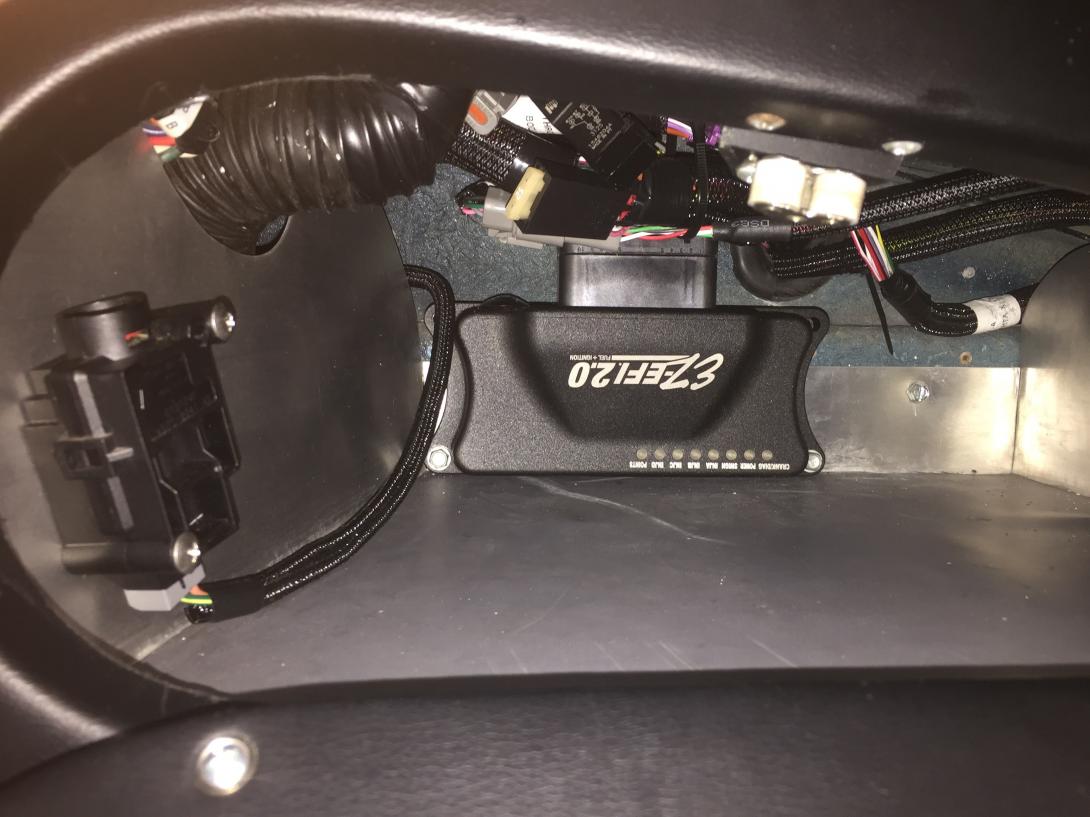
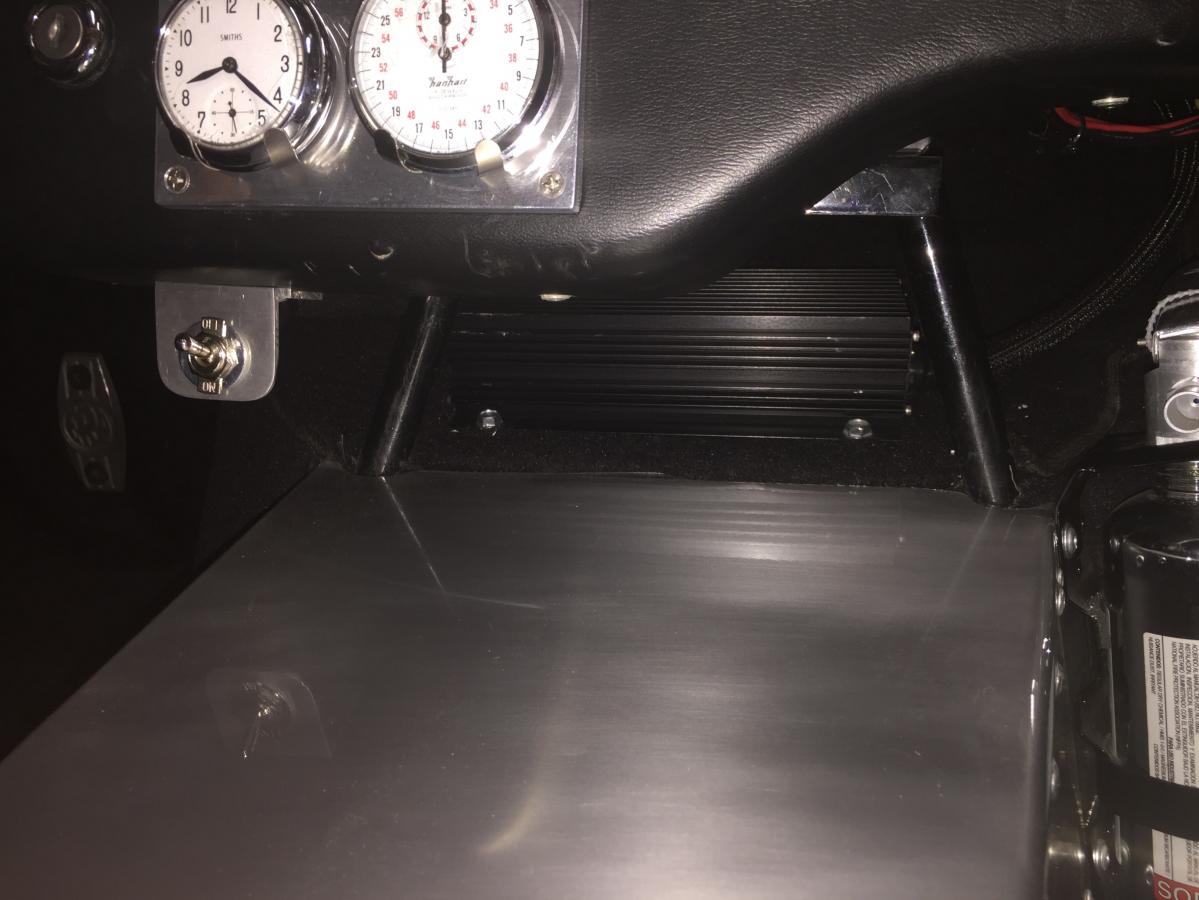
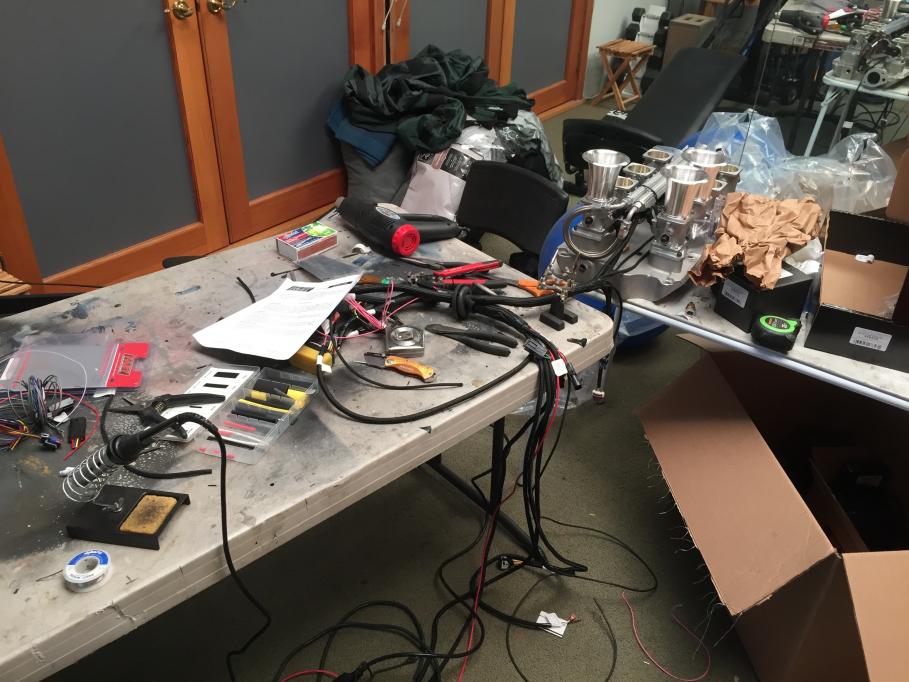
THE BRAINS…
I decided to mount the computer in the back of the glove box upside down. It gave easy access for the harness to the engine. The CD box I mounted on the top of the tunnel under the dash. The wiring was a lot of work. Even though the harness was a plug and play, I ended up cutting and splicing about 80% of the wires(40ish) to the senders and such to shorten them. I also installed a fuel pump cut-off switch under the dash and an inertia cut-off switch in the glove box within reach when I'm belted in
Last edited by Akimbeau; 04-24-2017 at 08:14 PM..
|
04-24-2017, 07:54 PM
|
 |
CC Member
|
|
|
Join Date: Oct 2002
Location: Eagle,
Ne.
Cobra Make, Engine: 1966 Lone Star 427SC.
Posts: 4,310
|
|
Not Ranked
Great project. Quite the lover of stacked injection.
__________________
Regards,
Kevin
|
04-24-2017, 07:54 PM
|
|
CC Member
|
|
|
Join Date: Apr 2014
Cobra Make, Engine: ERA 289 FIA 351Windsor
Posts: 150
|
|
Not Ranked
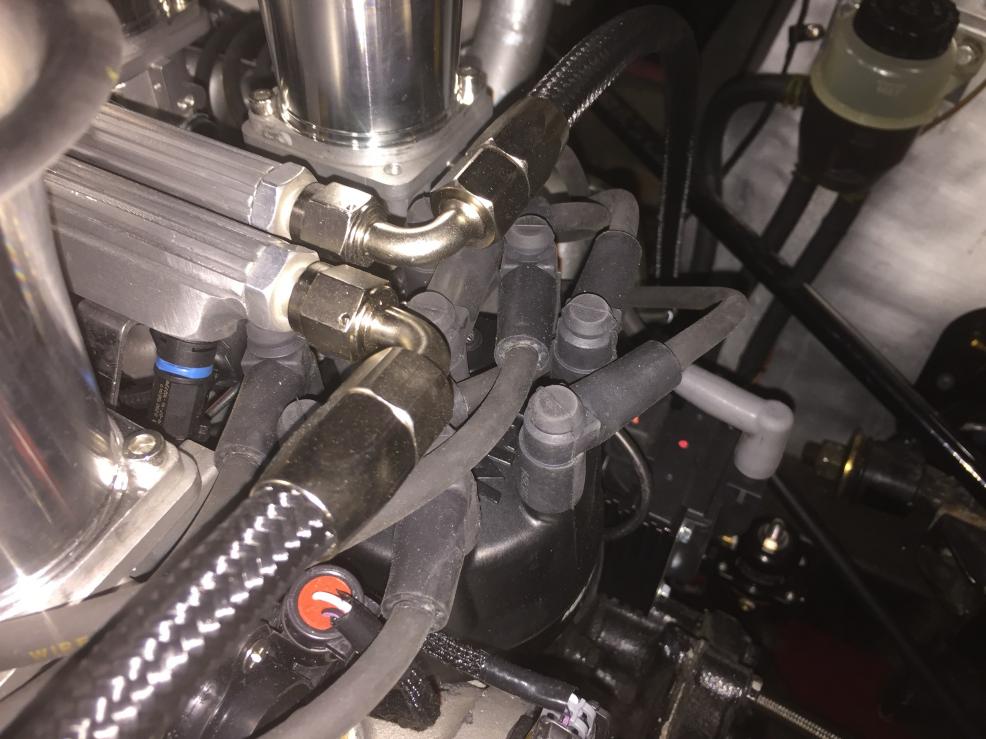
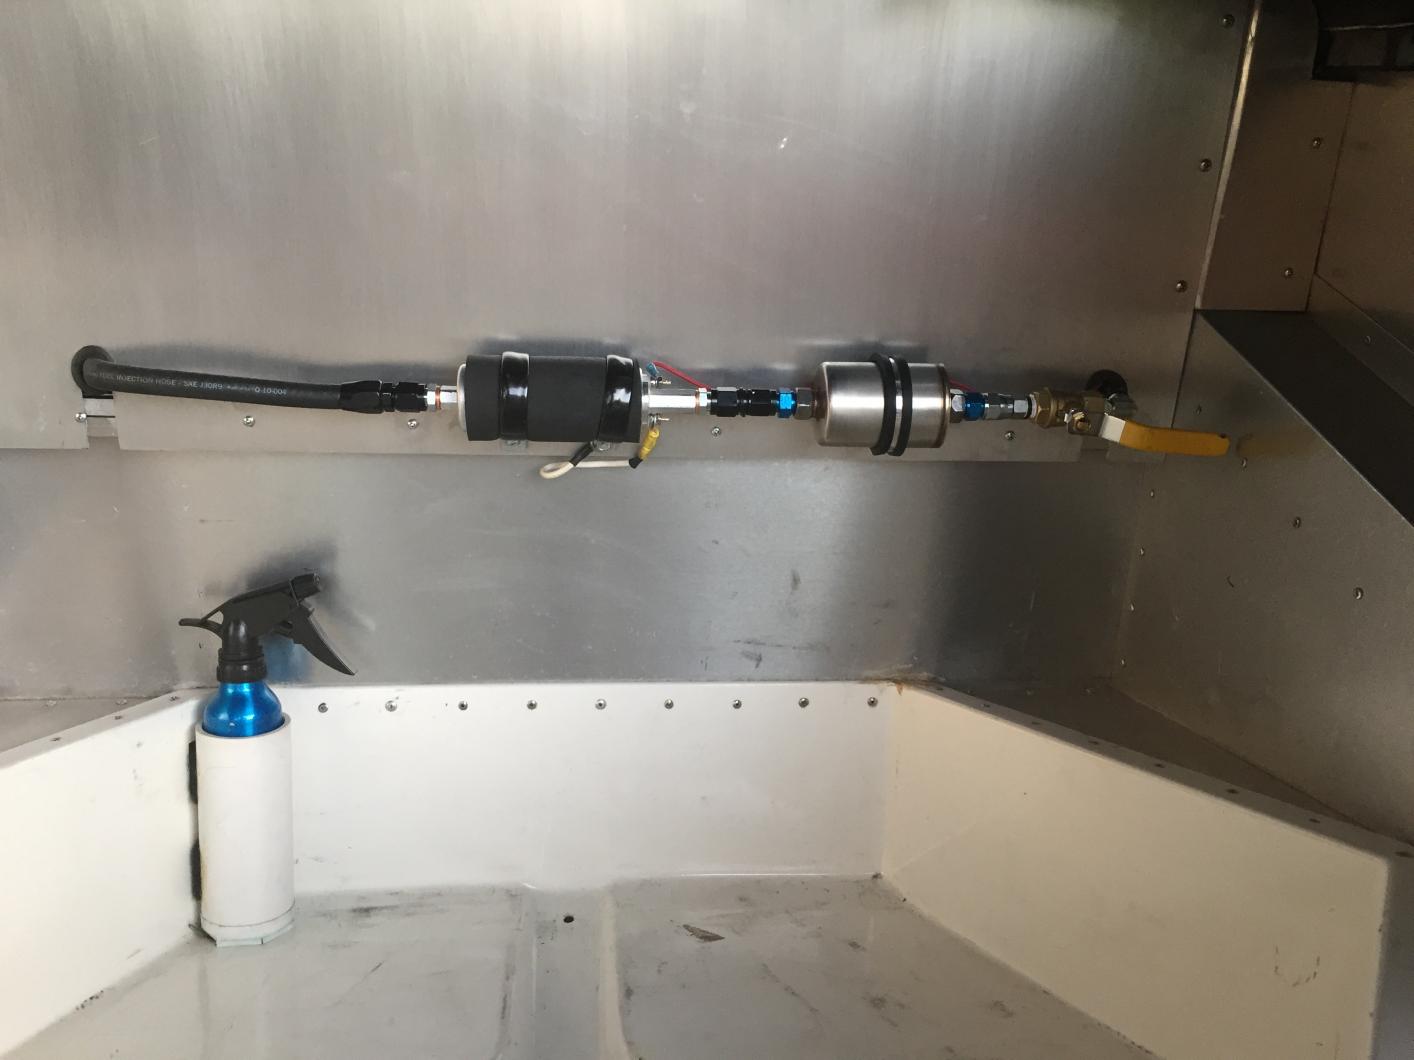
NEW FUEL SYSTEM
I decided to use a return system with an in-line pump. I removed the tank and had an extra bung welded to the bottom. I used my old fuel line for the return line and ran a new high pressure line along the right side frame rail. The fuel system requires a fuel pressure switch and a pressure regulator. All of these parts were included in the fuel system kit from FAST but I did need to buy the new fuel line and a lot of AN fittings to connect it all.
|
04-24-2017, 08:00 PM
|
|
CC Member
|
|
|
Join Date: Apr 2014
Cobra Make, Engine: ERA 289 FIA 351Windsor
Posts: 150
|
|
Not Ranked
THE START UP
The initial start up did not go well. During the test of the new fuel system, the portion of the set-up wizard where you adjust fuel pressure and check for leaks before cranking the engine, the engine flooded
and I mean FLOODED! It appeared the injectors were stuck open and gobs of fuel was running into the motor. I removed all the plugs and pumped all the gas out, maybe as much as a quart or two! Changed the oil, of course, and then pulled the throttle bodies and fuel rails off to see what was going on.
Well, after much detective work I found the answer. Pilot error. Were all friends here, right? I can trust none of what Im about to say will go no further, right? Well, I didn't notice that the pressure regulator had 2 threaded holes in it, one for vacuum and one for a pressure gauge
kinda glossed over the instructions and might have had one too many beers during its install. So, I inadvertently hooked the vacuum line to the gauge port and, in doing so, pumped the manifold and the rest of the motor full of gas when I was testing the fuel pressure. Kinda wondered why the pressure never went above 3lb. It was a mess to say the least!
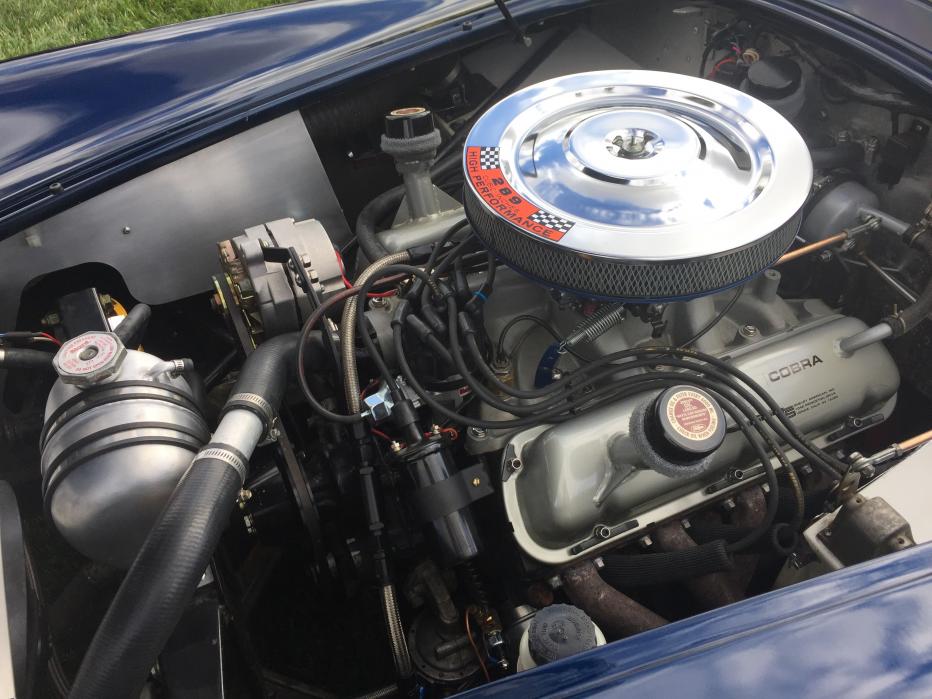
After, remedying my mistake and re-installing the throttle bodies the new test was a success and it finally started.
Attachment 30133
|
04-24-2017, 08:01 PM
|
|
CC Member
|
|
|
Join Date: Apr 2014
Cobra Make, Engine: ERA 289 FIA 351Windsor
Posts: 150
|
|
Not Ranked
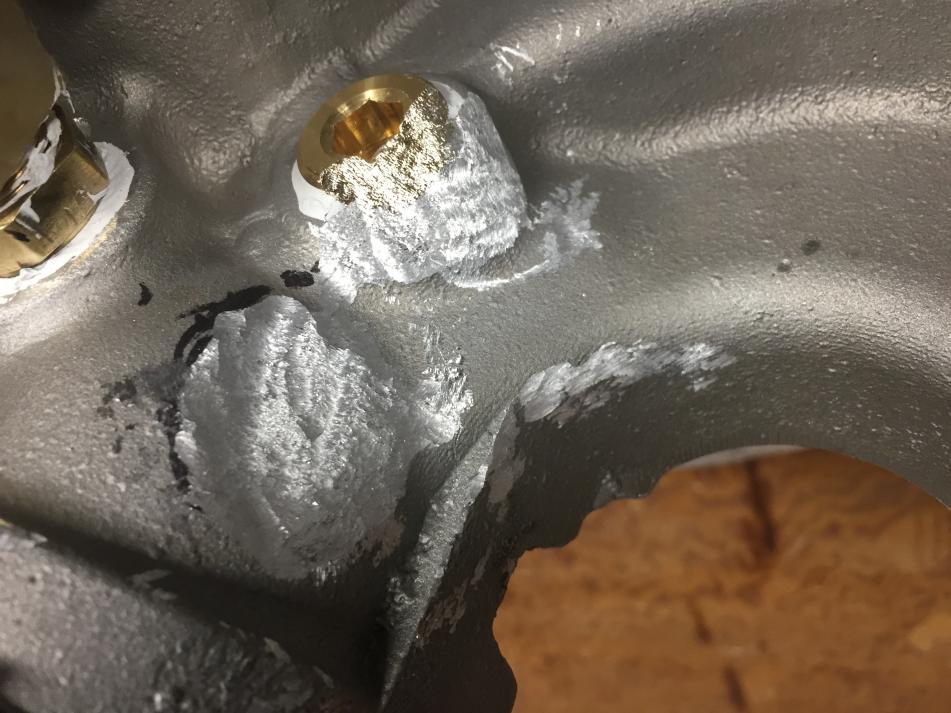
THE TUNE
When I first started driving the car it sputtered and popped and overall gave me concern that something was amiss, it didnt seem to be self-learning all that well. I noticed that the coolant temp was reading about 30 degrees cooler on the EFI interface than what the engine was actually running. The manual states that the learning doesn't actually start until the coolant temp reaches at least 160 degrees. So I relocated the sender from the back of the intake manifold to a port in the water neck and the temp readings became accurate. And subsequently the learning began and within 20 or 30 miles the car was very drivable. I now have about 120 miles on it and things are behaving quite well. Starting is instantaneous and it idles smoothly at 750rpm even though it has an aggressive cam. Throttle response is tremendous and there certainly feels like a good increase in HP over the 650 double pumper that it replaced.My plan is to take the car to a dyno and do some power tuning once I put some more learning miles on the car. I also plan to take the car to the Cobra track event at Willow Springs in May and that will give me a good opportunity to adjust the wide open throttle settings. Kinda hard to do in my cul-de-sac
|
04-24-2017, 08:05 PM
|
|
CC Member
|
|
|
Join Date: Apr 2014
Cobra Make, Engine: ERA 289 FIA 351Windsor
Posts: 150
|
|
Not Ranked
IN CLOSING...
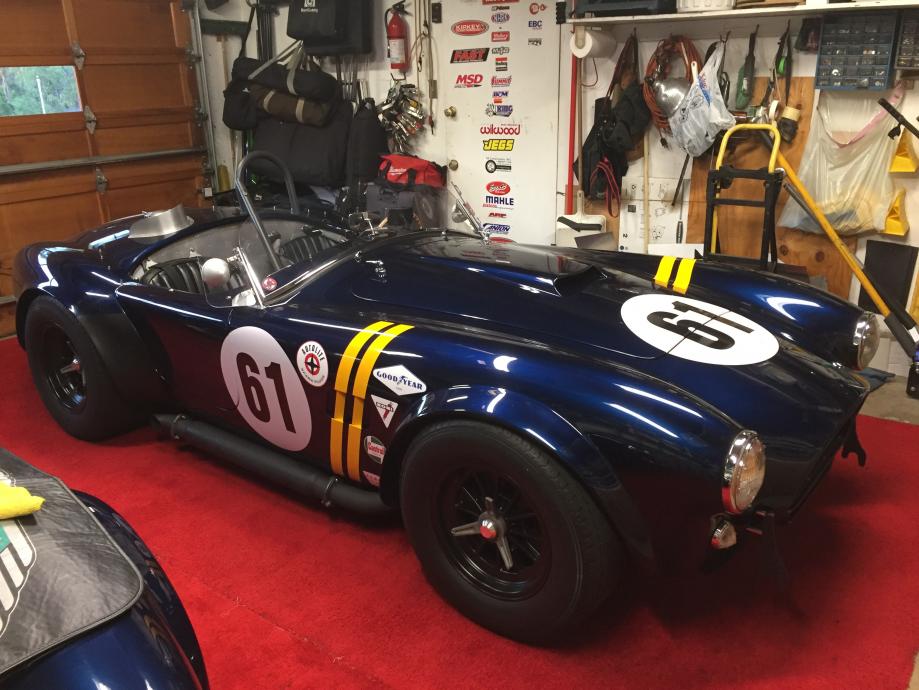
I debated for some time the decision between going to Webers or the 8 stack injection. The price of the new Webers and manifold would have been about the same, maybe a few hundred less than what I paid for the EFI system and I’m sure installation would have been less than 8 hours for the Webers. I probably spent 50 or 60 hours putting in the EFI system with all the issues I had to overcome. And as much as I want the car to have a high level of authenticity, I think it was a good choice and a fun learning experience without a huge compromise in its authentic appearance. The car will never appear as an original to those that really know, but for those that don’t, I feel it gives a good impression. Like every owner of a Cobra, I’m frequently asked if my Cobra is real. My reply is always the same…”It’s real enough.”
Last edited by Akimbeau; 04-24-2017 at 08:08 PM..
|
04-25-2017, 03:48 AM
|
 |
CC Member
|
|
|
Join Date: Aug 2013
Location: Canandaigua,
NY
Cobra Make, Engine: SPF MKII Riverside Racer FIA
Posts: 2,504
|
|
Not Ranked
Very nice work and I liked the way you provided the ups and downs of the installation. It looks nice. Depending on the lobe separation on your cam, you may have had to change the cam too if you went to Webers. I was looking at Jim Ingleses' website thinking about maybe down the road changing to Webers and you cannot run them well with lobe separation below 110 degrees, so in my case I would need to change out the cam.
Have fun with it and when you take it to the track take some video!
__________________

|
04-25-2017, 04:22 AM
|
 |
CC Member
|
|
|
Join Date: Jun 2014
Location: Boston,
MA
Cobra Make, Engine: Former owner of ERA #744
Posts: 40
|
|
Not Ranked
Great chronicle and great car! Thanks for sharing with us.
|
04-25-2017, 06:23 AM
|
|
CC Member
|
|
|
Join Date: Aug 2010
Cobra Make, Engine: Lone Star with IRS, 427W with megasquirt, T56 magnum
Posts: 309
|
|
Not Ranked
Nicely done.
I did the same thing with the wife's 71 vette with a 383 and megasquirt. After figuring out that the crappy chinese TPS was noisy it's been great.
I added a lot of plumbing under the intake for 2 common plenum2, one for an idle air valve and PCV and one for MAP and FPR vacuum.
Looks like you have the same HAKO iron and HF heat gun I have.
|
04-25-2017, 06:44 AM
|
|
CC Member
|
|
|
Join Date: Apr 2014
Cobra Make, Engine: ERA 289 FIA 351Windsor
Posts: 150
|
|
Not Ranked
Quote:
Originally Posted by 1795

Very nice work and I liked the way you provided the ups and downs of the installation. It looks nice. Depending on the lobe separation on your cam, you may have had to change the cam too if you went to Webers. I was looking at Jim Ingleses' website thinking about maybe down the road changing to Webers and you cannot run them well with lobe separation below 110 degrees, so in my case I would need to change out the cam.
Have fun with it and when you take it to the track take some video!
|
Similar to the Webers, the cam can give you issues with the fuel injection as well… Especially the self learning systems. They recommend at least 10 pounds of vacuum at idle. A simple vacuum test will give the answer of whether or not the current cam will work well with the system. Mine was right at 10 pounds so it gave me the confidence to go ahead with the conversion without changing the cam. I'm not sure that my cam would perform well with Webers though. |
04-25-2017, 06:52 AM
|
|
CC Member
|
|
|
Join Date: Apr 2014
Cobra Make, Engine: ERA 289 FIA 351Windsor
Posts: 150
|
|
Not Ranked
Quote:
Originally Posted by Luce
Nicely done.
I did the same thing with the wife's 71 vette with a 383 and megasquirt. After figuring out that the crappy chinese TPS was noisy it's been great.
I added a lot of plumbing under the intake for 2 common plenum2, one for an idle air valve and PCV and one for MAP and FPR vacuum.
Looks like you have the same HAKO iron and HF heat gun I have.
|
NICE!
Habor freight for all your tool needs. If they don't see much use, they'll last a lifetime!😊
Did you have that fuel block that connects the front rails made? I saw some posts somewhere where some guys with space issues were looking for such a block. |
04-25-2017, 09:02 AM
|
|
CC Member
|
|
|
Join Date: Aug 2010
Cobra Make, Engine: Lone Star with IRS, 427W with megasquirt, T56 magnum
Posts: 309
|
|
Not Ranked
I made the block. It's just a chunk of 6061 with 4 intersecting holes I milled. couldn't figure a way to neatly rout enough hose to make the U turn, so I did this instead.
My fuel rails were missing the chamfer for the O ring, and I didn't trust their swivel hoes ends, so they went straight in the trash.
I made a dummy oil pump drive and hid the FPR and filter in the back where Chebby puts their dizzy.
I also had to completely rework the linkage, but doing so I made it very progressive. The first half throttle only opens about 20%. Makes it really driveable, but a banshee when you start mashing it past 75%.
I also trimmed off the trumpets and made a carbon fiber air cleaner. |
04-25-2017, 09:48 AM
|
|
CC Member
|
|
|
Join Date: Apr 2014
Cobra Make, Engine: ERA 289 FIA 351Windsor
Posts: 150
|
|
Not Ranked
Quote:
Originally Posted by Luce
I made the block. It's just a chunk of 6061 with 4 intersecting holes I milled. couldn't figure a way to neatly rout enough hose to make the U turn, so I did this instead.
My fuel rails were missing the chamfer for the O ring, and I didn't trust their swivel hoes ends, so they went straight in the trash.
I made a dummy oil pump drive and hid the FPR and filter in the back where Chebby puts their dizzy.
I also had to completely rework the linkage, but doing so I made it very progressive. The first half throttle only opens about 20%. Makes it really driveable, but a banshee when you start mashing it past 75%.
I also trimmed off the trumpets and made a carbon fiber air cleaner. |
Very Cool! I'm trying to figure out a hood mounted filter box but I think I'll also have to trim the stacks about and inch to give me enough chamber area. Did you cut them on a lathe? |
04-26-2017, 06:08 AM
|
|
CC Member
|
|
|
Join Date: Aug 2010
Cobra Make, Engine: Lone Star with IRS, 427W with megasquirt, T56 magnum
Posts: 309
|
|
Not Ranked
Yes sir. I chucked them in the little lathe and parted them off about 1.5" shorter.
I made a home made CNC plasma table about 4 years ago. I can remove the torch head and mount a router in it's place, load a different Mach profile and use it as a 2.5D router/mill. I used that to make a mold out of MDF, then layed it up with carbon fiber and epoxy in a visquene envelope and hooked my A/C vacuum pump to it, (with a catch can of course).
It's not absolute best practice for carbon fiber parts but works OK for this. Truth is there's way more epoxy than needed for max strength and min weight. A thinner vacuum infusion resin with proper release and breather ply would be better, but I work with what I have.
|
04-26-2017, 07:45 AM
|
|
CC Member
|
|
|
Join Date: Apr 2014
Cobra Make, Engine: ERA 289 FIA 351Windsor
Posts: 150
|
|
Not Ranked
That's pretty slick! My plan is to build a box out of aluminum that would attach to the hood and scoop encasing a filter element. It would then seal against the stacks with foam when the hood is locked into place. It might end up being pretty restrictive at WOT but I think the computer will compensate and the filter box will only be for street use and the car does not see WOT very much on the street. The filter box will be removable for track use. The magic of Velcro!
|
04-26-2017, 08:13 AM
|
|
CC Member
|
|
|
Join Date: Aug 2010
Cobra Make, Engine: Lone Star with IRS, 427W with megasquirt, T56 magnum
Posts: 309
|
|
Not Ranked
The answer to alignment issues may be make something similar to my base that has a flange that seals to the hood mounted air box. You can lay a layer of stretchy saran wrap or similar over your 8 stack set up, then glass it. Once cured, just lift if off the 8 stack and reinforce or add a flat flange.
I've made many small fiberglass parts like that.
I can see it being a challenge to line up a box with 8 holes on the hood. Having 2 boxes, one with filter and one that just seals to scoop would be cool, and easily swapped.
|
04-26-2017, 03:13 PM
|
|
CC Member
|
|
|
Join Date: Aug 2008
Location: Tahoe/Truckee,
ca
Cobra Make, Engine: Ford Racing 363/8-stack injection, SPFR0012
Posts: 260
|
|
Not Ranked
This has given me some ideas on dealing with our 8 stack.
Thanks
Mark
|
 Posting Rules
|
You may not post new threads
You may not post replies
You may not post attachments
You may not edit your posts
HTML code is Off
|
|
|
All times are GMT -7. The time now is 05:40 PM.
Links monetized by VigLink
|


 Linear Mode


