Welcome to Club Cobra! The World's largest
non biased Shelby Cobra related site!
- » Representation from nearly all
Cobra/Daytona/GT40 manufacturers
- » Help from all over the world for your
questions
- » Build logs for you and all members
- » Blogs
- » Image Gallery
- » Many thousands of members and nearly 1
million posts!
YES! I want to register an account for free right now!
p.s.: For registered members this ad will NOT show
 
 Main Menu
|
|
Nevada Classics
|
|
Advertise at CC
|
|
April 2026
|
| S |
M |
T |
W |
T |
F |
S |
| |
|
|
1 |
2 |
3 |
4 |
| 5 |
6 |
7 |
8 |
9 |
10 |
11 |
| 12 |
13 |
14 |
15 |
16 |
17 |
18 |
| 19 |
20 |
21 |
22 |
23 |
24 |
25 |
| 26 |
27 |
28 |
29 |
30 |
|
|
|
|
CC Advertisers
|
|

05-10-2011, 02:04 PM
|
 |
CC Member

|
|
|
Join Date: Apr 2006
Location: Charlottesville,
va
Cobra Make, Engine: Coombe, Shelby Block 496
Posts: 1,187
|
|

 Not Ranked
Looks great, no problem doing it your self if you take your time. I find it better to install with the gear box removed but leave the bell on. This way engine will fit straight down with out tilting. Then put the gear box in second.
Good Job.
|
06-11-2011, 05:56 PM
|
 |
CC Member
|
|
|
Join Date: Apr 2009
Location: Bethesda,
MD
Cobra Make, Engine: CSX 6022, navy blue, period correct 427 SO
Posts: 2,154
|
|
Not Ranked
Awesome! Post some pics of it complete when you get a chance.
__________________
There are only three sports: bullfighting, motor racing, and mountaineering; all the rest are merely games.
www.partskeeper.com
(Less time searching, more time wrenching & driving)
|
06-11-2011, 06:42 PM
|
 |
CC Member
|
|
|
Join Date: May 2010
Location: Birmingham,
AL
Cobra Make, Engine: Kirkham 289 FIA, 363 Stroker
Posts: 751
|
|
Not Ranked
Well, it's not quite there yet. Im still working on getting the wiring finished and the bulkhead is going to get powdercoated on monday. Im also dealing with some interference issues with the darn remote oil filter. Lots of small details to round up, but i will certainly make sure to post videos and pictures when things have progressed further. |
06-12-2011, 08:26 AM
|
 |
CC Member
|
|
|
Join Date: Mar 2011
Location: Sleepy Hollow,
IL
Cobra Make, Engine: Kirkham #647 brushed
Posts: 412
|
|
Not Ranked
Quote:
Originally Posted by RestoCreations

Well, it's not quite there yet. Im still working on getting the wiring finished and the bulkhead is going to get powdercoated on monday. Im also dealing with some interference issues with the darn remote oil filter. Lots of small details to round up, but i will certainly make sure to post videos and pictures when things have progressed further. |
That car is going to be awesome when done! (already looking awesome now)
Whats goign on with your remote oil filter? Which one do you have? I'm asking because I'm currently shopping around for a remote oil filter set up and don't know which one to grab for my KM... Any recommendations? |
06-12-2011, 12:23 PM
|
|
CC Member
|
|
|
Join Date: May 2010
Location: Birmingham,
AL
Cobra Make, Engine: Kirkham 289 FIA, 363 Stroker
Posts: 751
|
|
Not Ranked
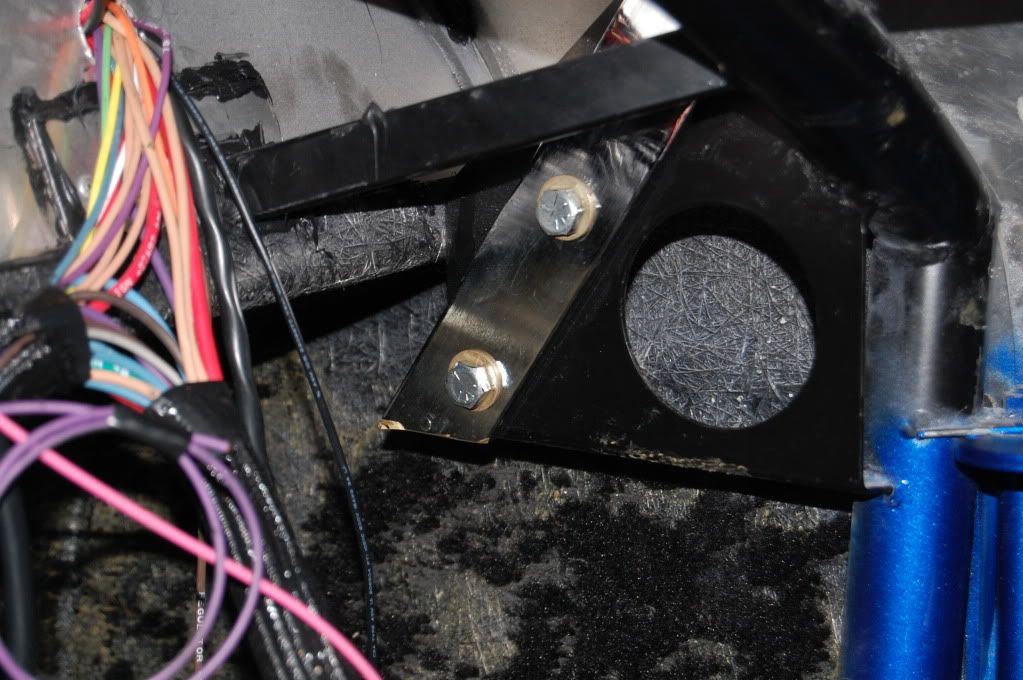
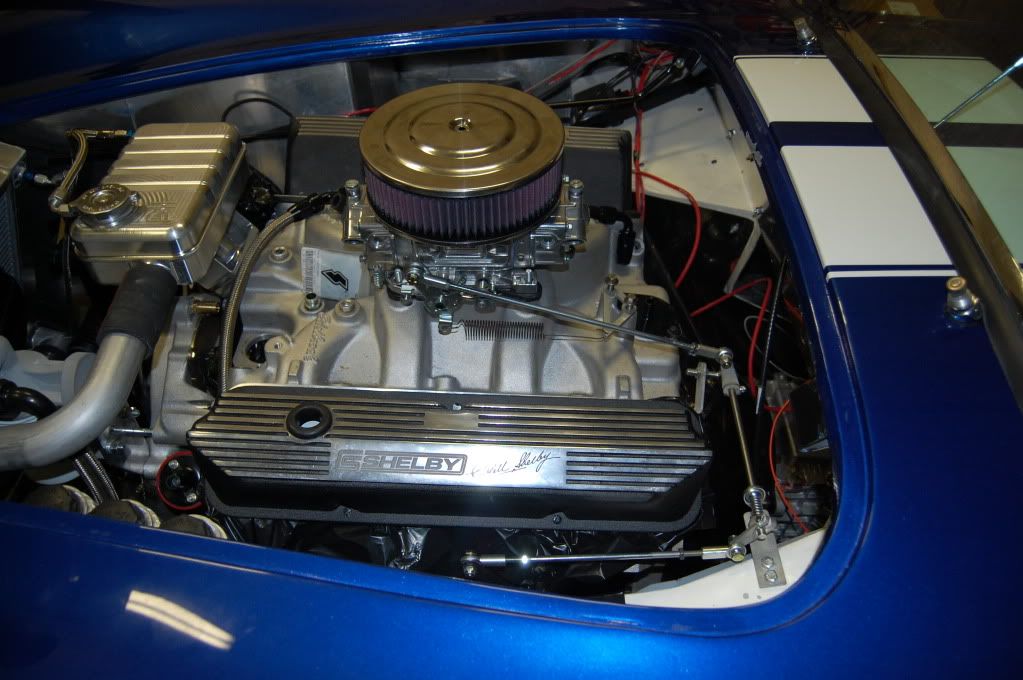
I have the shelby block plate and the the remote adapter is from Finishline. I was initially running straight NPT to AN fittings with th -12 AN 90 degree hose fittings. However, that interfered with the upper radiator hose. So, i installed 90 degree NPT to AN fittings with the 90 degree -12 an hose ends, but now the lines are rubbing on the intermediate steering shaft.
|
06-12-2011, 08:31 PM
|
|
CC Member
|
|
|
Join Date: May 2010
Location: Birmingham,
AL
Cobra Make, Engine: Kirkham 289 FIA, 363 Stroker
Posts: 751
|
|
Not Ranked

Here is a quick update. These are just a few of the small things that i took care of this weekend. I have been out of town a lot lately, every weekend for the past 5 weeks, so i havent had much time to work on the car until this weekend. I put in 22 hours in the last 3 days. Its amazing what gets done when the girlfriend is out of town for the weekend. 
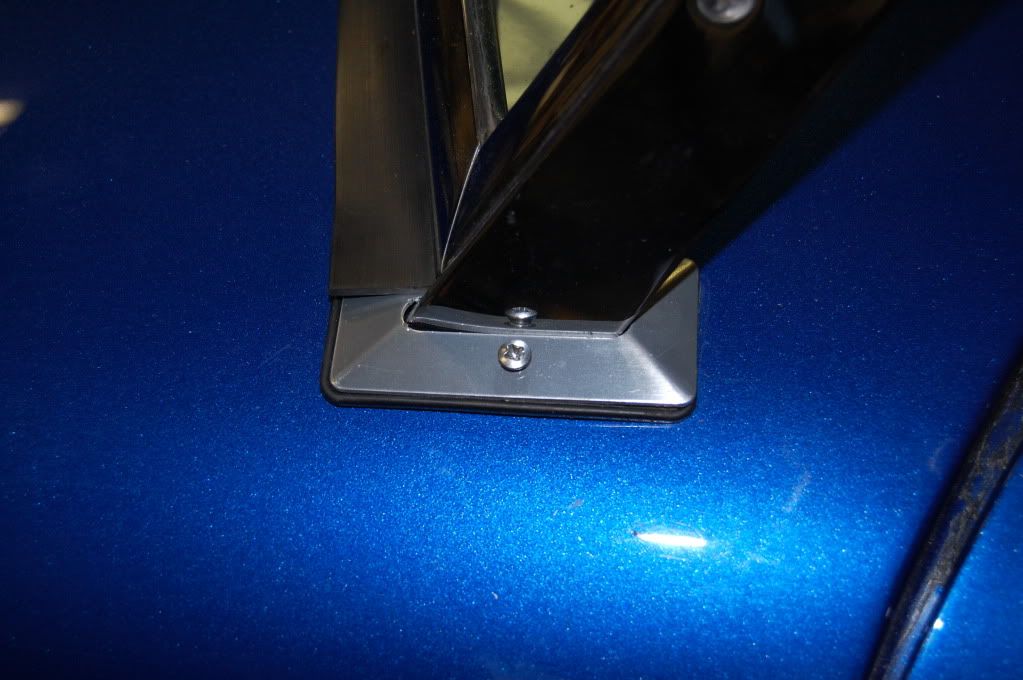
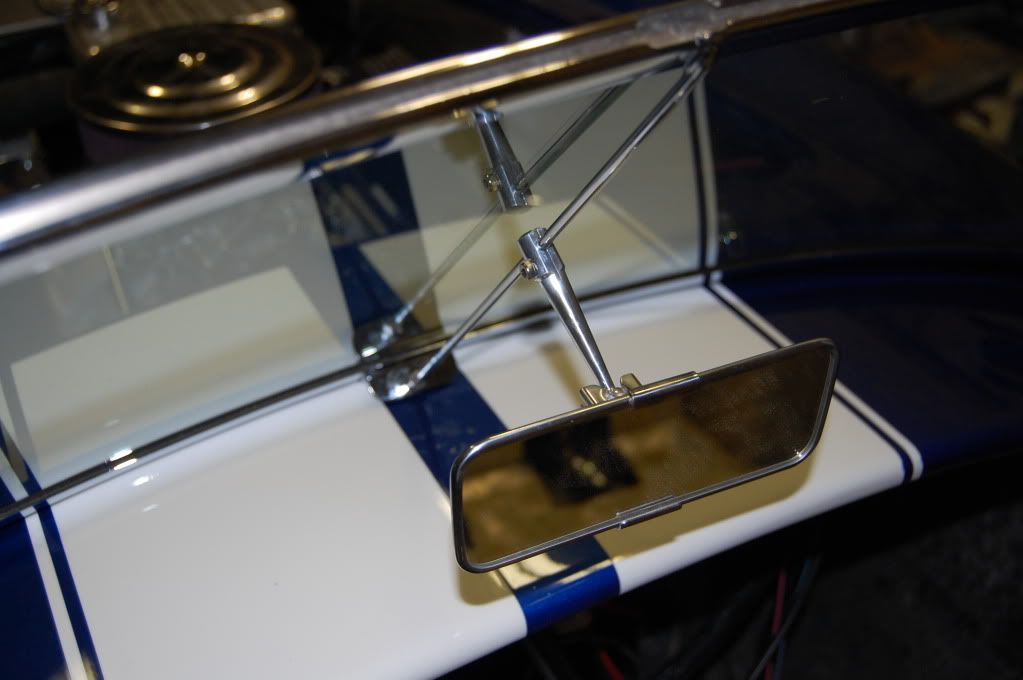
-Removed windshield and cut the bars so that would not poke someone in the leg. Polished windshield, installed new sliding mirror, which required a lot of cutting from my dremel tool, installed new grommets, put windshield back in place.
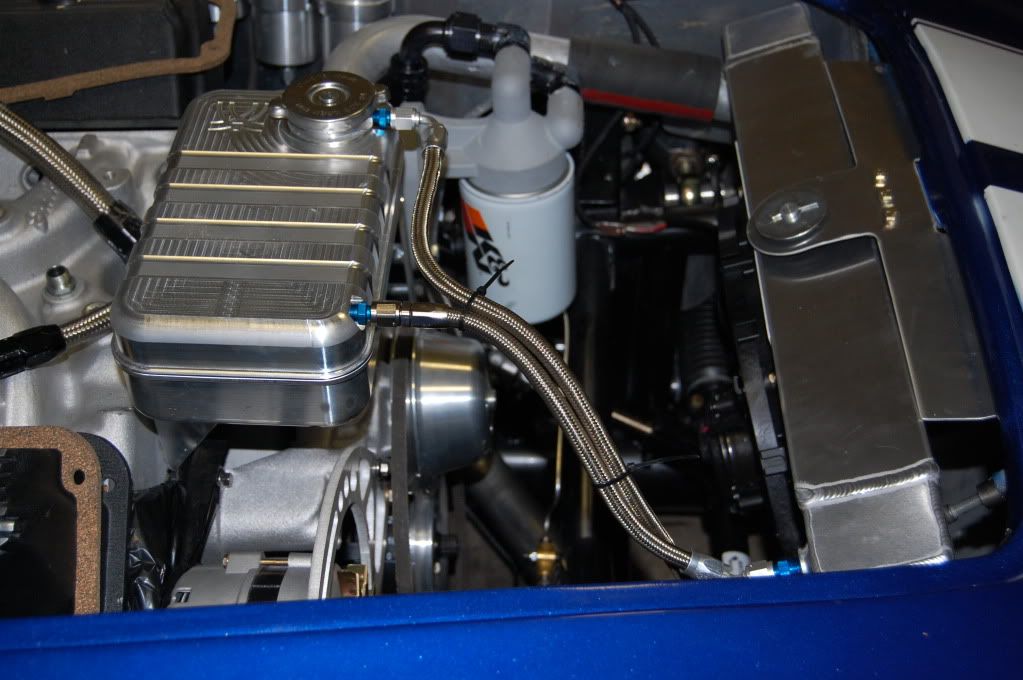
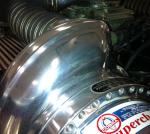
-Installed fancy, bling bling, Kirkham coolant tank with new -4 AN braided lines. Dont worry, i am not leaving the zip ties on the lines. It is only temporary.
-Installed Nick Acton's Throttle Linkage-very good stuff by the way.
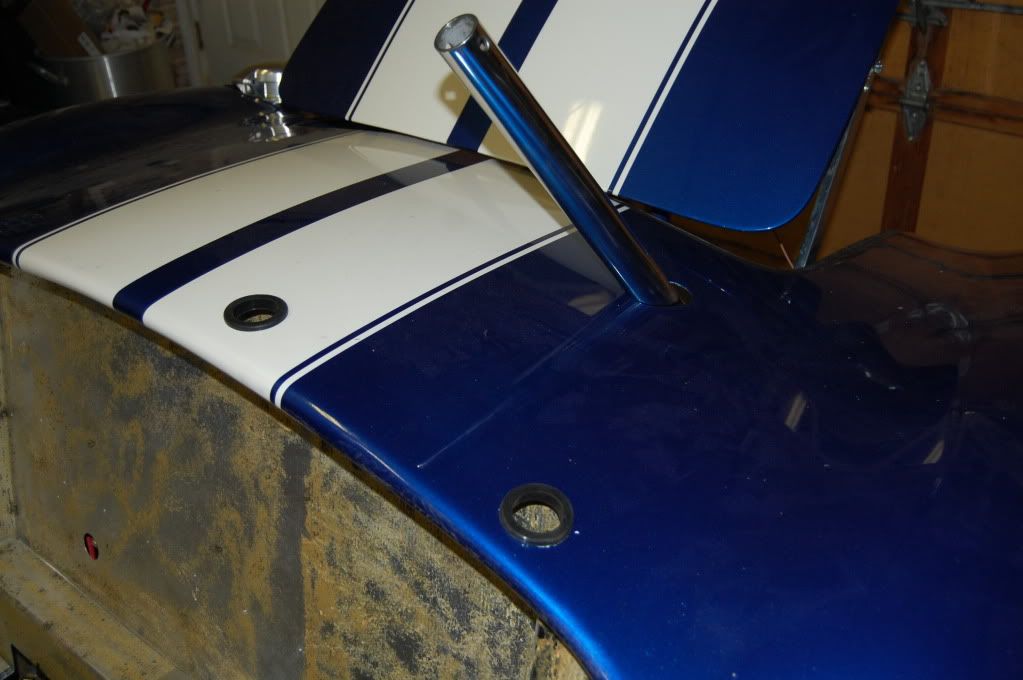
Roll bar removed for polishing and removal of bulkhead. Bulkhead is going to the powdercoaters. Apparently the originals did not have carpet in this area. I was unaware of this until the carpet showed up and i thought that somebody goofed and left pieces out of the box. Scraping the old 80/20 carpet off of the panels took a while. Somebody REALLY wanted to make sure that the carpet didnt fly out when Tony Stark fell on the car. Also installed rollbar grommets.
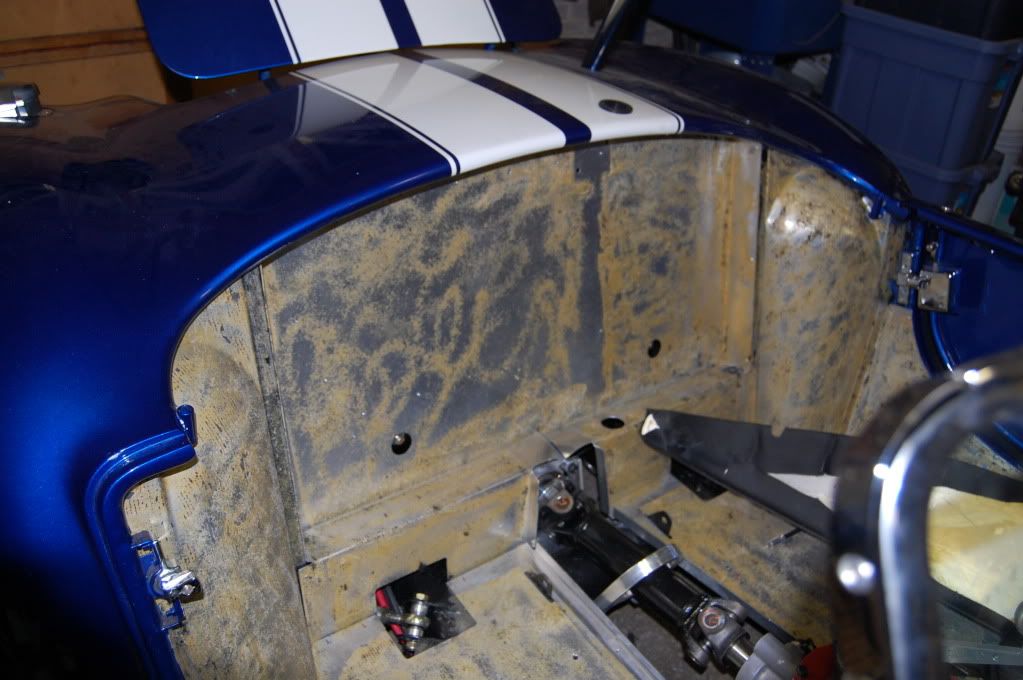
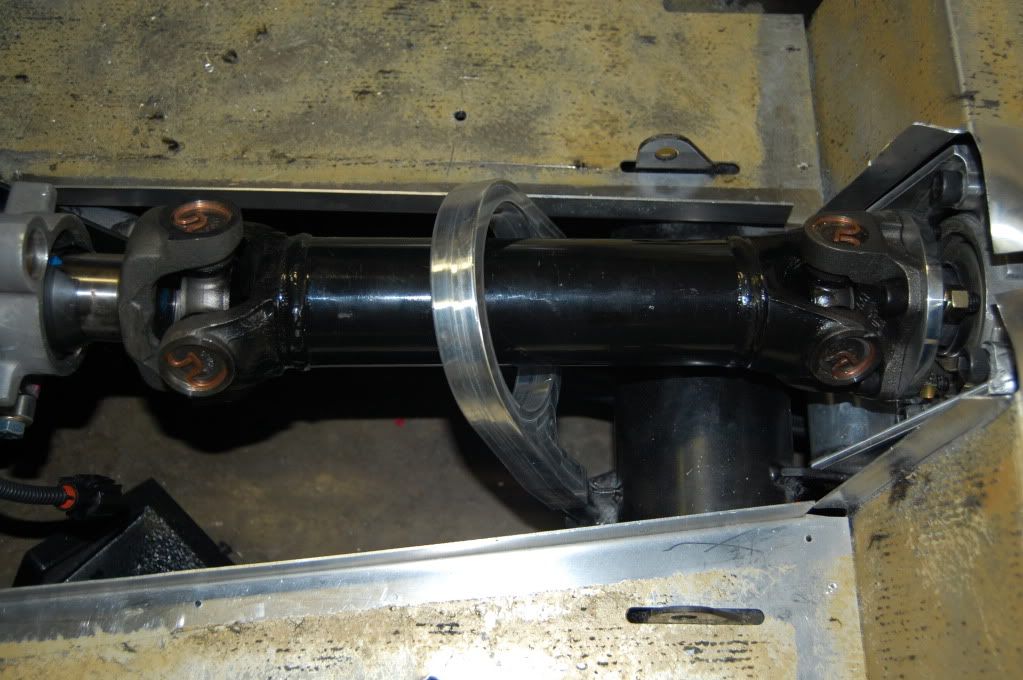
Driveshaft and driveshaft safety loop are in.
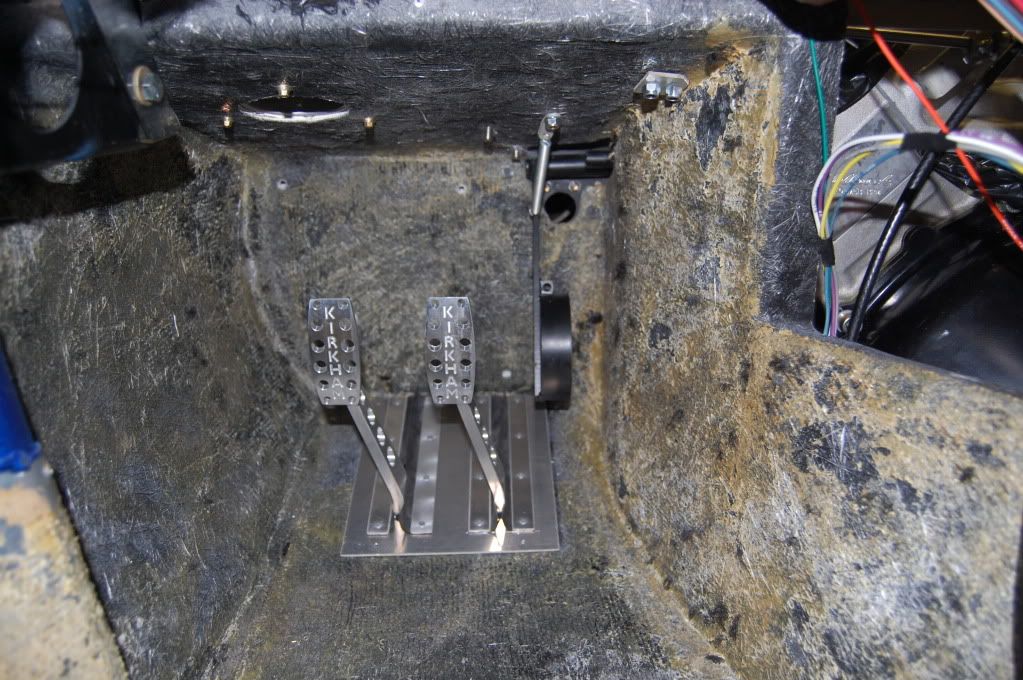
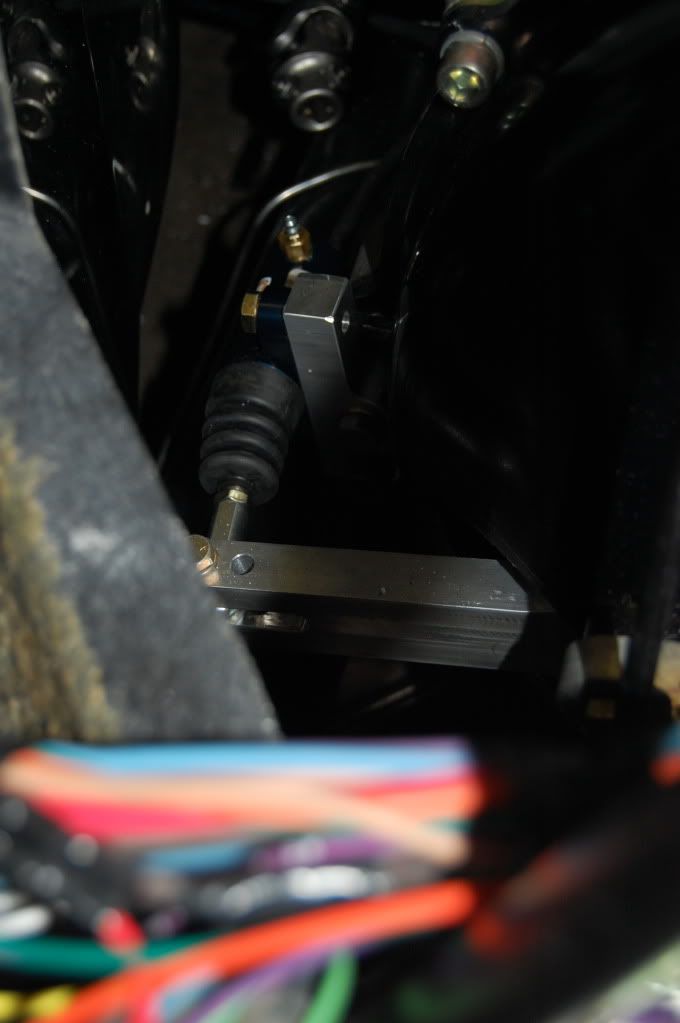
Throttle pedal is adjusted and the hydraulic clutch is working. I bought a 25.00 neaumatic bleeder from Harbor freight a few days ago-GREAT TOOL if you need to bleed hydraulic lines on your own. No more, "push the pedal, now let up, push the pedal, now let up"

Retracted
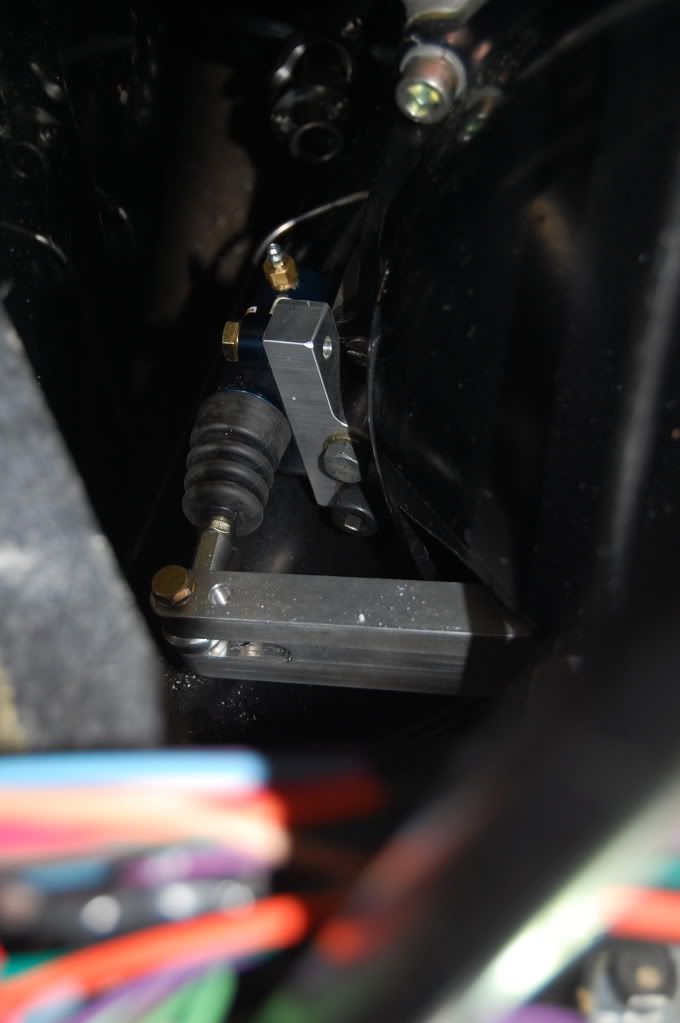
Extended
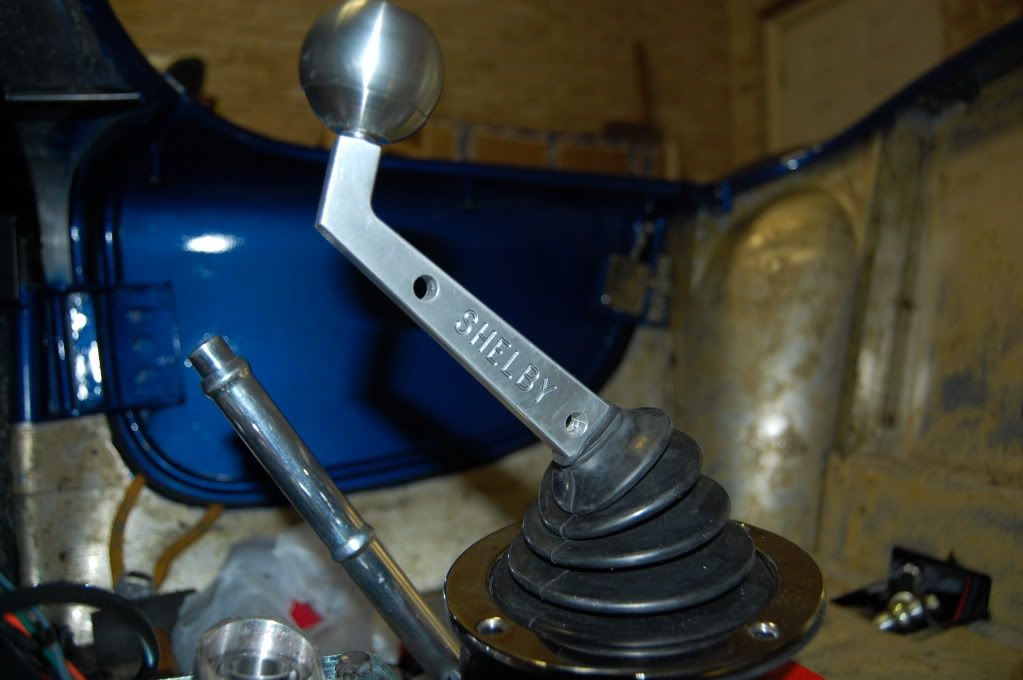
Shifter boot. I really like this shifter. I have an extra one if anybody is interested.
Alternator, alternator wiring, and belt in place. Every little thing counts, right? 
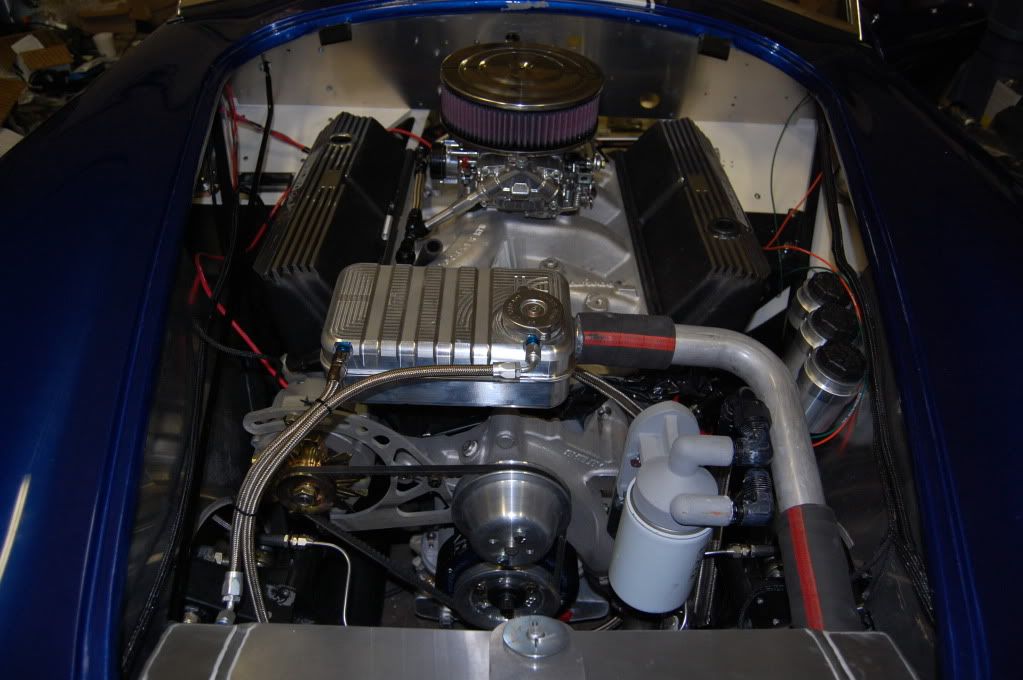
Lots of other little wiring and details taken care of as well. Heat shild install-i dont recommend doing this after you put the engine in place-PITA!!! Fuse box mounted, fresh air vent system installed, fluids in place, etc. and so on. The First start is on the horizon. Very exciting!
Last edited by RestoCreations; 06-12-2011 at 08:41 PM..
|
06-13-2011, 12:17 AM
|
 |
Senior Club Cobra Member
|
|
|
Join Date: Feb 2006
Location: Melbourne,
VIC
Cobra Make, Engine: RMC, carb 347 TopLoader and Jag running gear ~ so old school I time it with an hour-glass :D
Posts: 1,293
|
|
Not Ranked
Thanks for the progress pics & updates - really enjoying seeing the build progress
LoBelly
|
06-13-2011, 04:42 AM
|
|
Senior Club Cobra Member
|
|
|
Join Date: Dec 2007
Cobra Make, Engine: ERA FIA 'Street' Build
Posts: 2,129
|
|
Not Ranked
Resto ... great progress! Look forward to hearing how the first start up goes ... then the first drive |
06-13-2011, 08:18 AM
|
 |
CC Member
|
|
|
Join Date: Jun 2004
Location: Leicestershire,
UK
Cobra Make, Engine: Kirkham #523, 427 S/O
Posts: 1,137
|
|
Not Ranked
Looking good, although I don't like the look of those prop-shaft bolts and washers. 
Get in touch with David K. and ask him to send you some aircraft fasteners that they use.
Paul |
06-13-2011, 08:22 AM
|
|
CC Member
|
|
|
Join Date: May 2010
Location: Birmingham,
AL
Cobra Make, Engine: Kirkham 289 FIA, 363 Stroker
Posts: 751
|
|
Not Ranked
Good eye. They are too long and i am changing them out. They are great 8 though. I need to place an order with McMaster for some other fasteners and better radiator hose clamps as well.
|
06-13-2011, 09:20 AM
|
 |
Full Blown Member
|

|
|
Join Date: Sep 2008
Cobra Make, Engine: KMP 427 S/C, Twin Paxton 511 FE
Posts: 2,594
|
|
Not Ranked
Looks awesome!
Can't wait to see it completed.
Fun thread.
__________________
rodneym
|
06-14-2011, 09:26 AM
|
|
CC Member
|
|
|
Join Date: May 2010
Location: Birmingham,
AL
Cobra Make, Engine: Kirkham 289 FIA, 363 Stroker
Posts: 751
|
|
Not Ranked
Thanks!
Driveshaft bolts:
Ok, i just ordered high strength bolts with a rockwell harness of C25 and minimum tensile strength of 116,000 PSI with high strength 12 point flange nuts with a minimum rockwell harness of C34.
Hopefully that will hold it. Im just now educating myself on the rockwell and tensile strength scales/charts/tables
Last edited by RestoCreations; 06-14-2011 at 09:29 AM..
|
06-24-2011, 06:42 AM
|
 |
CC Member
|
|
|
Join Date: May 2004
Cobra Make, Engine: CSX6363
Posts: 180
|
|
Not Ranked
Looking great Chris! I was home on R&R a few weeks ago and spent most of my time either at the lake or white-water rafting so we never headed in your direction. Like everyone else, I'm eagerly awaiting the day that you have this car out on the road. Send the girlfriend down to the beach for a few more weekends and you'll have a better chance of having the car running w/in the next month!!!
|
06-27-2011, 07:38 PM
|
|
CC Member
|
|
|
Join Date: May 2010
Location: Birmingham,
AL
Cobra Make, Engine: Kirkham 289 FIA, 363 Stroker
Posts: 751
|
|
Not Ranked
haha Mike! If only dating/female companionship and sleeping weren't such a strong human need.
I'm working on the sidepipe cutouts tonight. Not much else to do while i wait on the bulkhead to be powdercoated and a few parts to come in from summit. Hopefully the little parts will be in soon. Im not going to attempt to start the car again until at least the header tubes are hooked up.
|
06-28-2011, 07:42 AM
|
|
CC Member
|
|
|
Join Date: May 2010
Location: Birmingham,
AL
Cobra Make, Engine: Kirkham 289 FIA, 363 Stroker
Posts: 751
|
|
Not Ranked
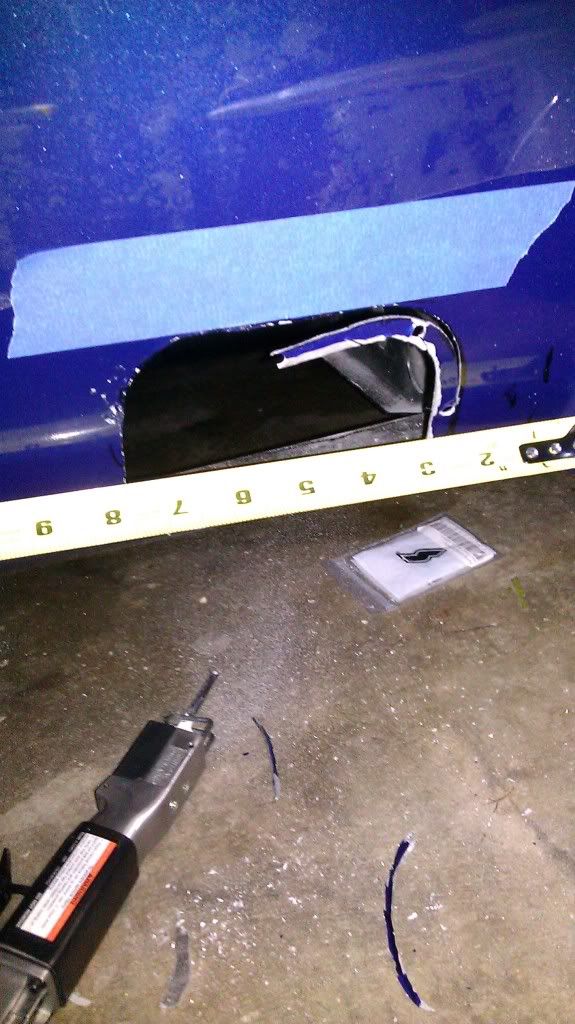
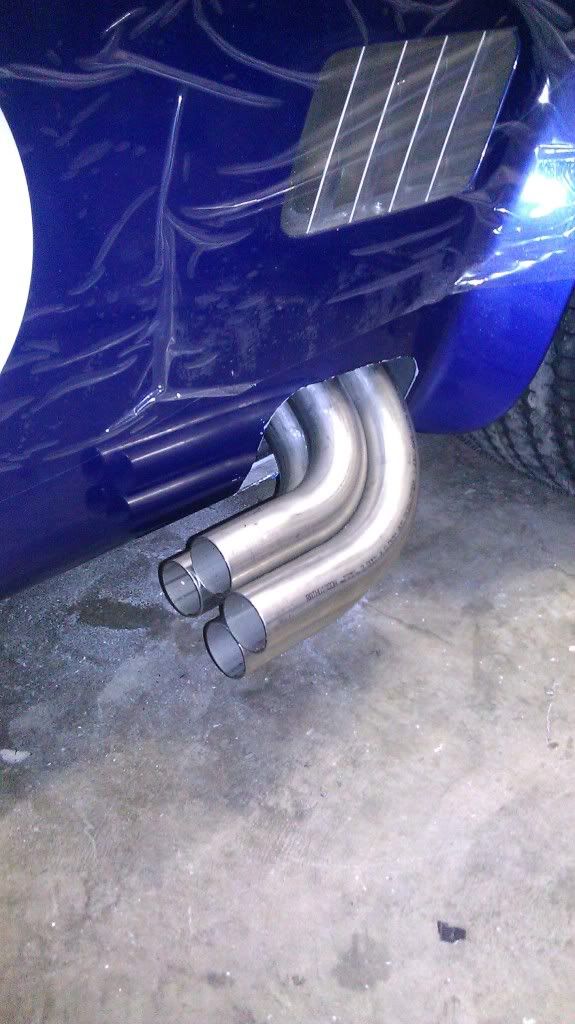
I had a good time with my new 20.00 high speed cutting saw last night. The holes had to be enlarged quite a bit. Initially I thought i would be able to make the cutouts similiar to how the kirkhams cut them, but the hole had already been cut too far back at the top, so i just ended up making sort of an oval shape.
It took 4 hours to cut this hole out. I had to install a pipe, remove a pipe, make a cut, install the pipe again, make another cut, remove the pipe, etc and so on. Im pretty happy with how it turned out. I went very slowly to make sure that i did not cut a hole too large.
Initially, i thought i was just going to need to give it a light trim, but once I installed the number 1 header tube, it was obvious that a good bit of metal needed to be removed.
 |
06-28-2011, 10:11 PM
|
|
CC Member
|
|
|
Join Date: Mar 2011
Location: Sleepy Hollow,
IL
Cobra Make, Engine: Kirkham #647 brushed
Posts: 412
|
|
Not Ranked
Looks good Chris! I'm glad it worked out if you put some metal edging on it, it could reduce the hole size a bit. |
06-29-2011, 01:27 PM
|
|
CC Member
|
|
|
Join Date: May 2010
Location: Birmingham,
AL
Cobra Make, Engine: Kirkham 289 FIA, 363 Stroker
Posts: 751
|
|
Not Ranked
I might do that to prevent it from chipping as well. The hole actually looks quite normal when you look down on it from a normal height. If you get down on the ground and stare at it, it looks a little too big, but I really dont think most people will be crawling around on the ground looking at the sidepipe cut out. |
06-29-2011, 04:33 PM
|
 |
CC Member
|
|
|
Join Date: Dec 2001
Location: San Diego,
CA
Cobra Make, Engine:
Posts: 2,979
|
|
Not Ranked
A bare aluminum surround piece could finish it off nicely and help close up the gap.
__________________
Remember, It's never too early to start beefing up your obituary.
|
06-30-2011, 11:45 PM
|
|
CC Member
|
|
|
Join Date: Jun 2004
Location: Leicestershire,
UK
Cobra Make, Engine: Kirkham #523, 427 S/O
Posts: 1,137
|
|
Not Ranked
Quote:
Originally Posted by xlr8or
A bare aluminum surround piece could finish it off nicely and help close up the gap.
|
No. Once the edge is cleaned up and painted, it will look fine.
I thought the gaps an mine were on the large side to start with, but now I'm used to them, they look exactly as they should.
The rear edge of the hole should be angled backwards i.e. the hole is wider at the bottom than it is at the top.
Looking good. I'm looking forward to seeing it all finished. My only comment would be that the side roundals and numbers are on the small side, but I assume they're just stick on, are they?
Paul |
07-07-2011, 09:04 PM
|
|
CC Member
|
|
|
Join Date: May 2010
Location: Birmingham,
AL
Cobra Make, Engine: Kirkham 289 FIA, 363 Stroker
Posts: 751
|
|
Not Ranked
I could not cut an angle in for the side pipe cut outs due to the hole that was already cut. I cant paint the cutouts that i have made because i have no idea what color paint cinema vehicles used on the car.
The gumballs are the ones that they, cinema vehicles, stuck on for the movie, so they will stay. And you are correct, they are just stickers. Im not the biggest fan of gumballs, but i am trying to keep the car looking as close to the way it was built for the movie as possible. Actually, if was building one from start to finish, it would be black with no stripes.
|
 Posting Rules
|
You may not post new threads
You may not post replies
You may not post attachments
You may not edit your posts
HTML code is Off
|
|
|
All times are GMT -7. The time now is 01:24 PM.
|
|


 Hybrid Mode

