 
 Main Menu
|
|
Nevada Classics
|
|
Advertise at CC
|
| S |
M |
T |
W |
T |
F |
S |
| 1 |
2 |
3 |
4 |
5 |
6 |
7 |
| 8 |
9 |
10 |
11 |
12 |
13 |
14 |
| 15 |
16 |
17 |
18 |
19 |
20 |
21 |
| 22 |
23 |
24 |
25 |
26 |
27 |
28 |
| 29 |
30 |
31 |
|
|
|
|
|
|
CC Advertisers
|
|
 3Likes 3Likes

02-27-2018, 04:08 PM
|
 |
CC Member

|
|
|
Join Date: Jun 2003
Location: Waco,
TX
Cobra Make, Engine: 1980 Arntz, 350 'Vette & Muncie, & Jag rear
Posts: 219
|
|

 Not Ranked
 Anyone Make A Kit To Uncage Jag XKE Rear?
Working on the Jag rear for my Arntz, wondered if anyone made a kit to uncage the rear end. I can come up with something, but would like to see if there's something out there to buy or maybe copy.
Thanks,
Jim
|
02-27-2018, 04:37 PM
|
 |
Half-Ass Member
|
|
|
Join Date: Jun 2005
Cobra Make, Engine: ERA #732, 428FE (447 CID), TKO600, Solid Flat Tappet Cam, Tons of Aluminum
Posts: 22,025
|
|
Not Ranked
Quote:
Originally Posted by Jim Coleman

Working on the Jag rear for my Arntz, wondered if anyone made a kit to uncage the rear end. I can come up with something, but would like to see if there's something out there to buy or maybe copy.
Thanks,
Jim
|
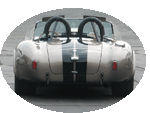
I would steal the design of the ERA "optional rear" -- it is based on the Jag rear and is absolutely lovely. Front view of rear suspension. |
02-27-2018, 05:27 PM
|
|
CC Member
|
|
|
Join Date: Nov 2003
Location: New Britain,
CT
Cobra Make, Engine: Size 10 Feet
Posts: 3,032
|
|
Not Ranked
If I remember correctly, the Arntz is basically the same as Contemporary. The differential is mounted to a cross-tube at the top. The lower control arms pivots go through a crossmember at the front and float at the back. Contemporary uses a tie-bar at the rear for reinforcement. Trailing arms are "geometrically" impossible because of the binding involved, although some people do it anyway. I would reinforce the lower radius arms like ERA.
|
02-27-2018, 06:06 PM
|
 |
CC Member
|
|
|
Join Date: Feb 2009
Posts: 1,696
|
|
Not Ranked
On an Arntz, there is a plate on the upper crossmember where the differential mounts. There are outer plates on the upper crossmember where the shocks mount. You can either run the factory style trailing arms to the front, or make your own off the lower outer fulcrum to the rear. The inner fulcrum shaft should go through the frame crossmember.
If you have to fabricate everything yourself, you might want to look at a Corvette rearend from a C4. They are all LSD and parts are a lot easier to find. Maybe even a 8.8 IRS, although they seem to be pretty complicated.
|
02-27-2018, 06:57 PM
|
|
CC Member
|
|
|
Join Date: Jun 2003
Location: Waco,
TX
Cobra Make, Engine: 1980 Arntz, 350 'Vette & Muncie, & Jag rear
Posts: 219
|
|
Not Ranked
I like the look of the rear end uncaged.
Thanks,
Jim
Last edited by Jim Coleman; 02-27-2018 at 10:03 PM..
|
02-27-2018, 10:20 PM
|
|
Banned
|
|
|
Join Date: Sep 2015
Cobra Make, Engine: Rowan Replicars, 352 4V
Posts: 94
|
|
Not Ranked
I fabricated a mounting system for my Rowan Replicars replica, the car came with an 8" Ford rear end and leaf springs.
I mounted the differential on a cross member that bolts to each side of the upper frame rail, I then used a series of heim rods to hold the differential in place and gave me some adjustment. I added brackets to the cross member that provide the shock mounts.
I also used a 1/4" plate on the bottom of the differential, heim rods connect that plate to the chassis at the front and rear. I also modified the leaf spring mount to have the correct angle for the control arms (level with the lower control arm diff pivot points).
This mod was quite a job, I had to pay special attention to pinion angle and the height of the differential so the drive shaft would have the correct angle.


 |
02-28-2018, 04:11 AM
|
 |
CC Member
|
|
|
Join Date: Aug 2013
Location: Canandaigua,
NY
Cobra Make, Engine: SPF MKII Riverside Racer FIA
Posts: 2,507
|
|
Not Ranked
Nice work fabricating that up!
__________________

|
02-28-2018, 07:38 AM
|
 |
CC Member
|
|
|
Join Date: May 2006
Location: LAS VEGAS,
NV
Cobra Make, Engine: contemporary(2) one with 427 sohc and one with 427 center oiler
Posts: 491
|
|
Not Ranked
I'm currently rebuilding the Jag set up in my Contemporary. I swapped out the XKE housing for a newer XJS. I will have to use the XKE lower brackets to keep the proper pinion angle. I braced the LCA this week.
I have been exploring the idea of fabricating radius rods to support LCA movement when braking and acceleration. Any input from the Club would be appreciated.
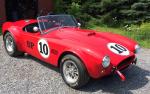
pormgb - I see in your photos above that you have radius rods, do you experience any binding in the suspension travel? 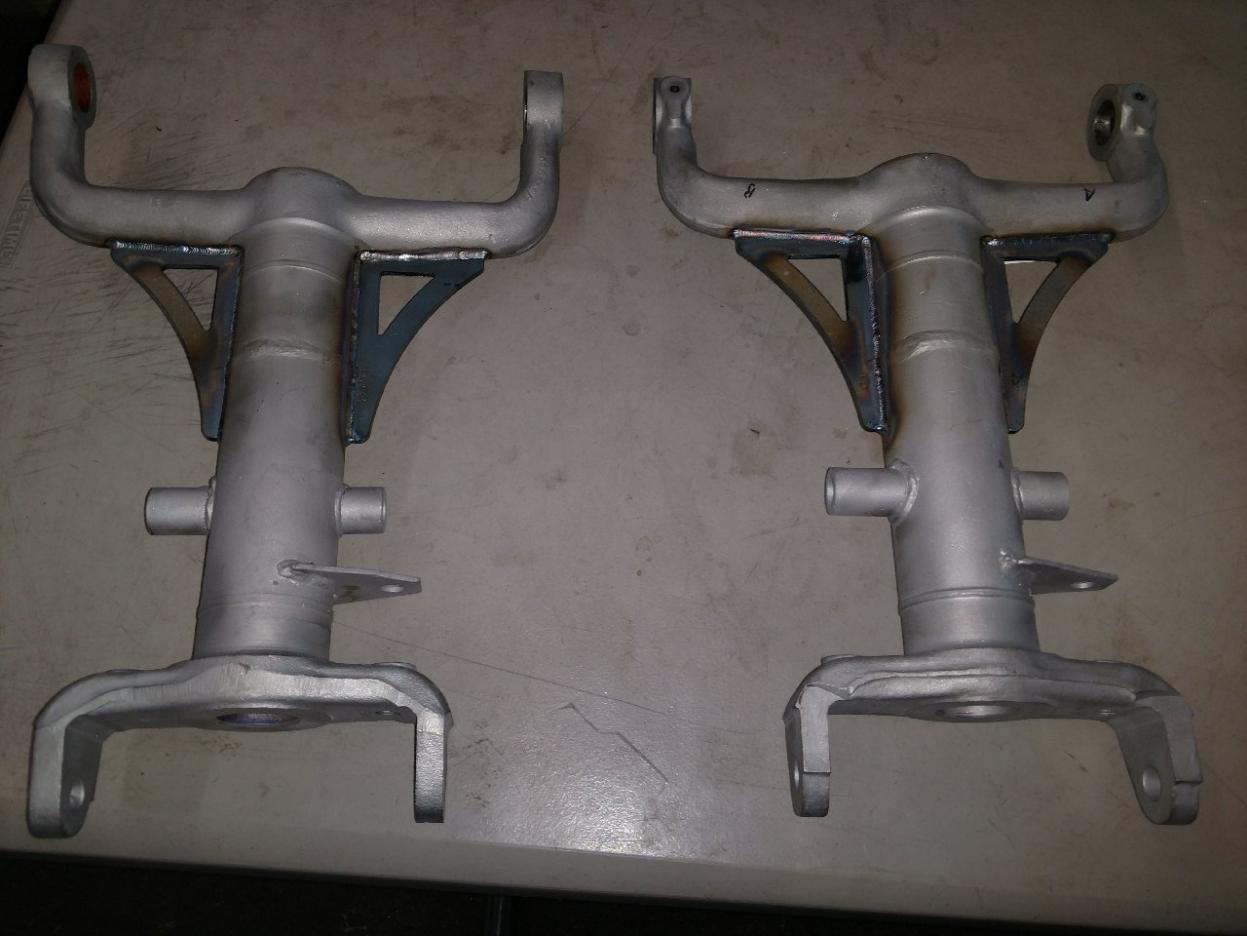
|
02-28-2018, 10:00 AM
|
 |
Senior Club Cobra Member
|
|
|
Join Date: Mar 2000
Location: St. Augustine,
FL
Cobra Make, Engine: E-M / Power Performance / 521 stroker / Holley HP EFI
Posts: 1,949
|
|
Not Ranked
Interesting thread.
Experience would say there might be a need to reinforce the wishbone at the outer end, also:
__________________
Wells's law of engine size: If it matters what gear you're in, the engine's too small!
|
02-28-2018, 10:06 PM
|
|
Banned
|
|
|
Join Date: Sep 2015
Cobra Make, Engine: Rowan Replicars, 352 4V
Posts: 94
|
|
Not Ranked
Quote:
Originally Posted by Tom Wells
Interesting thread.
Experience would say there might be a need to reinforce the wishbone at the outer end, also:
|
I fixed that problem by turning down solid round steel so it connects both pieces at the joint, I then tapered the edges and welded the joint penetrating through to the steel round.
I also drilled two holes either side of joint, these holes exposed the steel round, I then welded up the hole securing the round to the lower control arm tube.

 |
03-01-2018, 04:01 AM
|
 |
CC Member
|
|
|
Join Date: Feb 2000
Location: St. Lucia, West Indies,
WI
Cobra Make, Engine: Unique 427SC 383 stroker
Posts: 3,786
|
|
Not Ranked
I'm also using an inner reinforcement on my LCA's. Not solid round, but heavy gauge tubing matched to the I.D. of the arms. Should be getting them back from the machine shop today. Last of the brake components arrived yesterday and I can't wait to get started on putting the whole assembly back together.
__________________
Tropical Buzz
Grant me the serenity to accept the things I cannot change, the strength to change the things I can, and the wisdom to know the difference. -(wasn't me)
BEWARE OF THE DOGma!! Dogmatism bites...
|
03-01-2018, 03:56 PM
|
|
CC Member
|
|
|
Join Date: Jun 2003
Location: Waco,
TX
Cobra Make, Engine: 1980 Arntz, 350 'Vette & Muncie, & Jag rear
Posts: 219
|
|
Not Ranked
Can't Get Splined Shafts Out Of Housings
I removed the cotter pins, castle nuts and washers on both sides.
I can't get the splined shafts out of the housings.
Tried a hammer and pointed chisel, and then my 10 ton press.
Released the press as it wasn't moving and I didn't want to damage them.
Suggestions ?
Thanks,
Jim
|
02-28-2018, 09:50 PM
|
|
Banned
|
|
|
Join Date: Sep 2015
Cobra Make, Engine: Rowan Replicars, 352 4V
Posts: 94
|
|
Not Ranked
Quote:
Originally Posted by legenmetals
I'm currently rebuilding the Jag set up in my Contemporary. I swapped out the XKE housing for a newer XJS. I will have to use the XKE lower brackets to keep the proper pinion angle. I braced the LCA this week.
I have been exploring the idea of fabricating radius rods to support LCA movement when braking and acceleration. Any input from the Club would be appreciated.
pormgb - I see in your photos above that you have radius rods, do you experience any binding in the suspension travel? Attachment 31509 |
No, no binding. I do have dual 250lb springs per side so there ain't much suspension movement. When setting up the differential, I made sure that when at rest, the control arms were as horizontal as possible. This gives equal movement up and down, the radius arms don't travel very much in either direction. |
02-28-2018, 10:16 AM
|
|
CC Member
|
|
|
Join Date: Feb 2009
Posts: 1,696
|
|
Not Ranked
Pictures sent.
|
02-28-2018, 11:18 AM
|
|
CC Member
|
|
|
Join Date: May 2006
Location: LAS VEGAS,
NV
Cobra Make, Engine: contemporary(2) one with 427 sohc and one with 427 center oiler
Posts: 491
|
|
Not Ranked
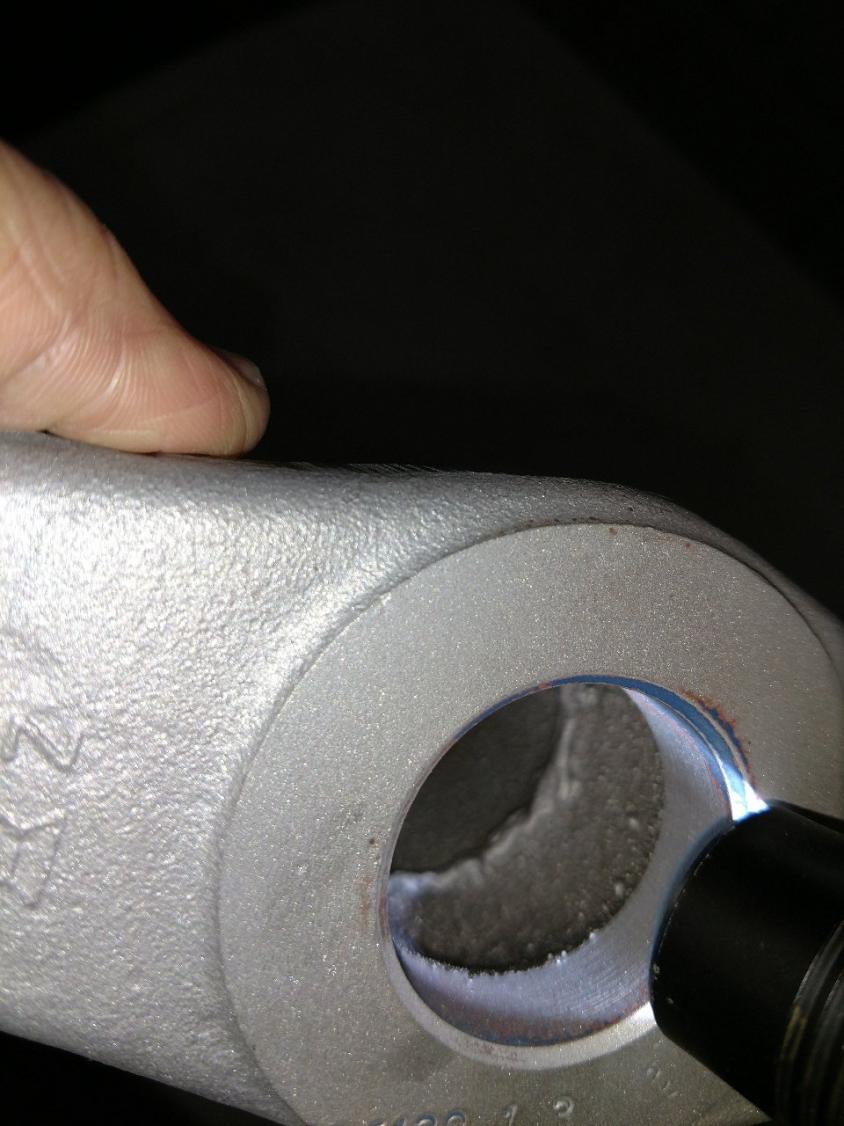
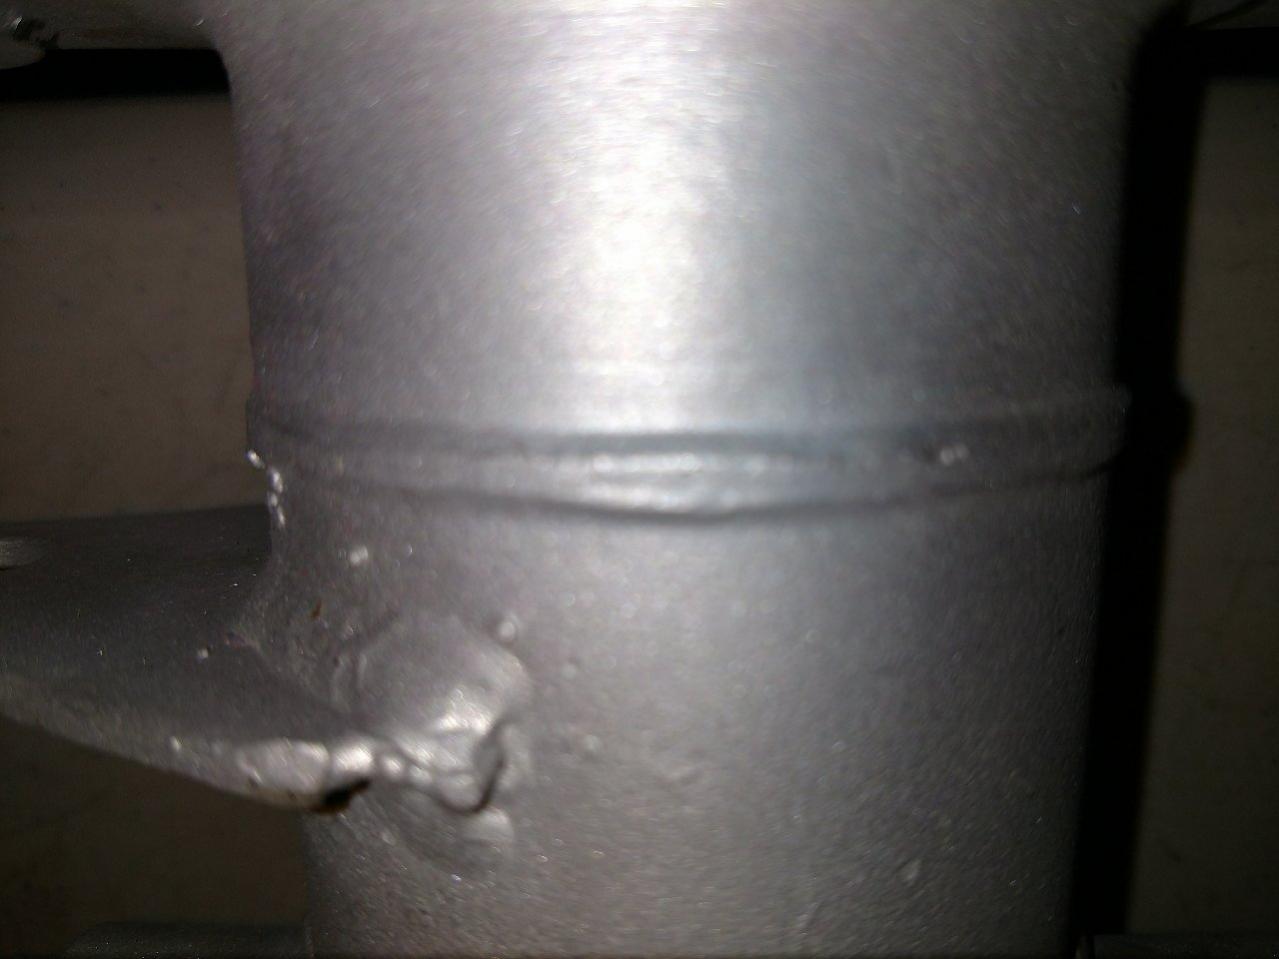
After looking at the broken LCA pictured I reviewed mine and took a couple of pictures.
What I see in the pictures are a forging and a tube that are butt welded.
The two parts are put into a locating jig that arc electricity between the two parts bringing them up to temperature and than pushes the two parts together quickly. I would assume they use air cylinders to accomplish this because of the speed required.
This process squeezes out the metal around the welded joint, Then the weld looks to be turned down on the OD leaving the metal on the inside of the tube.
Maybe not a bad idea to brace.
|
02-28-2018, 12:19 PM
|
 |
CC Member
|
|
|
Join Date: Feb 2014
Location: White City,
SK
Cobra Make, Engine: West Coast, 460 CID
Posts: 2,916
|
|
Not Ranked
Quote:
Originally Posted by legenmetals
Attachment 31511
Attachment 31512
After looking at the broken LCA pictured I reviewed mine and took a couple of pictures.
What I see in the pictures are a forging and a tube that are butt welded.
The two parts are put into a locating jig that arc electricity between the two parts bringing them up to temperature and than pushes the two parts together quickly. I would assume they use air cylinders to accomplish this because of the speed required.
This process squeezes out the metal around the welded joint, Then the weld looks to be turned down on the OD leaving the metal on the inside of the tube.
Maybe not a bad idea to brace.
|
Based upon the photo of the broken LCA, it would seem the first place to reinforce would be the lower portion of the outer butt weld. This would be most stressed as it's between the shocks/springs and the hub, and therefore subject to the greatest tension due to the weight of the vehicle, cornering forces, etc.
The upper portion of the same weld is under compression most of the time, so less stressed, but probably still worth reinforcing.
A short section of tubing with the same ID as the OD of the LCA could be used to reinforce the joint. Once separated into two halves it could be wrapped around the LCA butt weld joint, clamped and then welded around its circumference on both sides and across both seams where the halves join. Voila - much stronger with minimal addition to unsprung weight.
__________________
Brian
|
02-28-2018, 12:36 PM
|
|
CC Member
|
|
|
Join Date: May 2006
Location: LAS VEGAS,
NV
Cobra Make, Engine: contemporary(2) one with 427 sohc and one with 427 center oiler
Posts: 491
|
|
Not Ranked
Good idea,maybe I can incorporate an attach point for a radius rod also.
|
02-28-2018, 05:20 PM
|
|
CC Member
|
|
|
Join Date: Jun 2003
Location: Waco,
TX
Cobra Make, Engine: 1980 Arntz, 350 'Vette & Muncie, & Jag rear
Posts: 219
|
|
Not Ranked
Some good looking work there guys !
I am in the process of complete disassembly of the rear end as was advised on RallySnake on another post.
I got a set of flanges with lug nut studs with the rear end to replace the knock off flanges. My question is: how do I get the knock off flanges off ? I thought they might just pull out but they're stuck on there pretty good. Soaked them with PB Blaster, and am letting them sit until I get advice on how to remove them.
Thanks,
Jim
|
02-28-2018, 06:43 PM
|
|
CC Member
|
|
|
Join Date: May 2006
Location: LAS VEGAS,
NV
Cobra Make, Engine: contemporary(2) one with 427 sohc and one with 427 center oiler
Posts: 491
|
|
Neutral
Removal
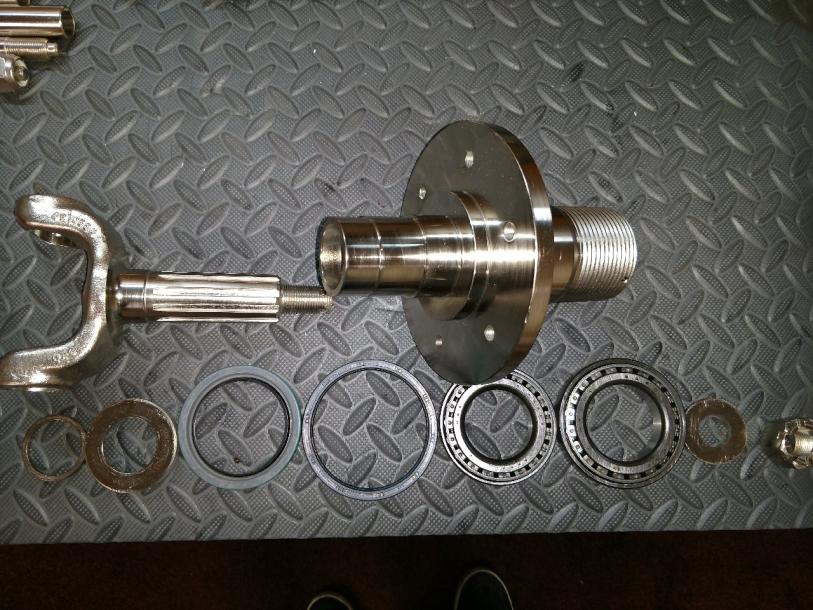
This is a shot of the parts that stack up to build the rear hub assembly. These parts fit into the aluminum upright.
The knock off hubs are splined to fit over the axle shaft, on the end of the axle is a nut that you have to remove. You will find a hole in the side off the knock off hub to access a cotter pin that goes through the axle and nut.
This hole is for installation and removal of the cotter pin. Not unlike the front hub of a car.
Un-screw the nut and the hub should slide off and out of the aluminum upright.
I hope this is the answer you are looking for.
|
02-28-2018, 09:40 PM
|
|
CC Member
|
|
|
Join Date: Jun 2003
Location: Waco,
TX
Cobra Make, Engine: 1980 Arntz, 350 'Vette & Muncie, & Jag rear
Posts: 219
|
|
Not Ranked
I didn't see what you were talking about, had the assembly sitting upside down with the PB Blaster in it.
Turned it over, and saw the nut. Don't know why I didn't see it before............
Thanks.
Jim
Last edited by Jim Coleman; 02-28-2018 at 11:18 PM..
|
 Posting Rules
|
You may not post new threads
You may not post replies
You may not post attachments
You may not edit your posts
HTML code is Off
|
|
|
All times are GMT -7. The time now is 01:54 AM.
Links monetized by VigLink
|


 Hybrid Mode

