Welcome to Club Cobra! The World's largest
non biased Shelby Cobra related site!
- » Representation from nearly all
Cobra/Daytona/GT40 manufacturers
- » Help from all over the world for your
questions
- » Build logs for you and all members
- » Blogs
- » Image Gallery
- » Many thousands of members and nearly 1
million posts!
YES! I want to register an account for free right now!
p.s.: For registered members this ad will NOT show
 
 Main Menu
|
|
Nevada Classics
|
|
Advertise at CC
|
|
January 2026
|
| S |
M |
T |
W |
T |
F |
S |
| |
|
|
|
1 |
2 |
3 |
| 4 |
5 |
6 |
7 |
8 |
9 |
10 |
| 11 |
12 |
13 |
14 |
15 |
16 |
17 |
| 18 |
19 |
20 |
21 |
22 |
23 |
24 |
| 25 |
26 |
27 |
28 |
29 |
30 |
31 |
|
|
CC Advertisers
|
|

11-28-2010, 03:06 AM
|
 |
CC Member

|
|
|
Join Date: Jun 2009
Location: Sydney,
NSW
Cobra Make, Engine: RCM, Jag front and rear, LS3
Posts: 1,640
|
|

 Not Ranked
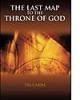
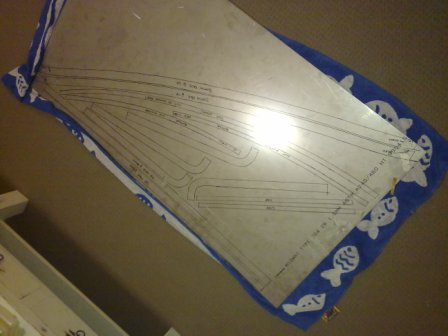
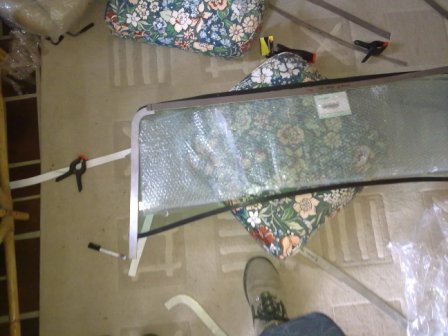
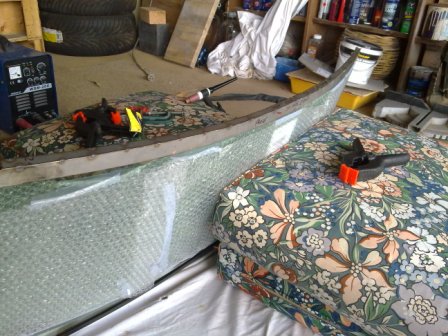
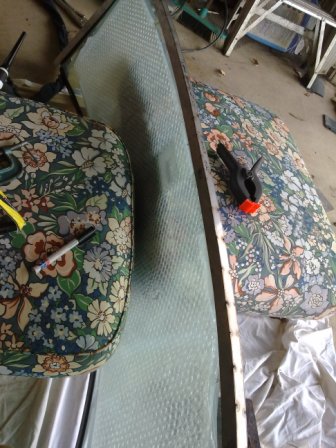
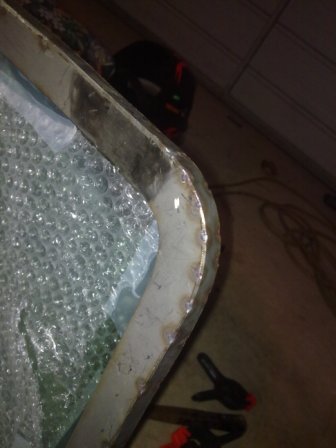
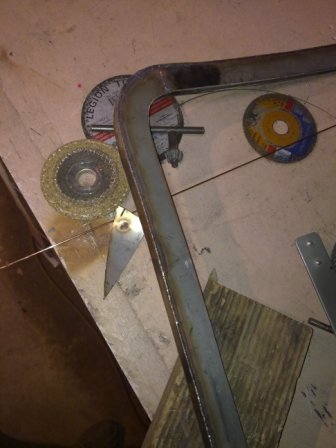
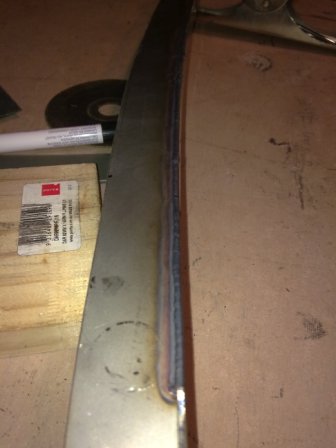
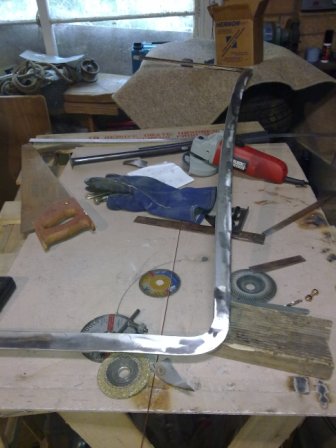
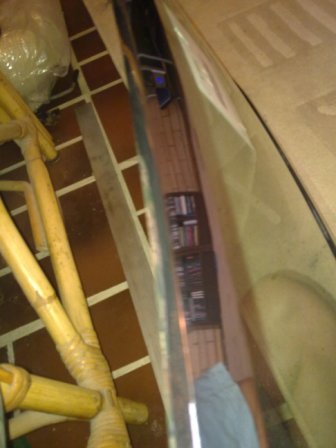
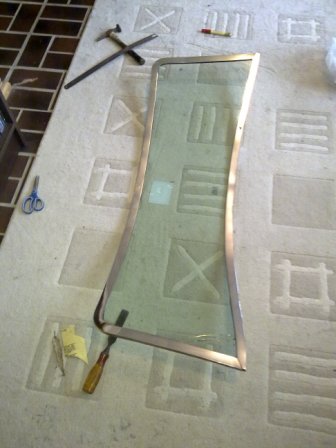
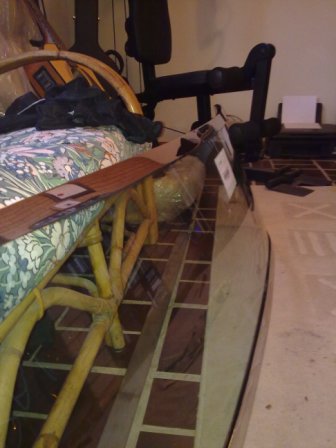
 My DIY windscreen frame. (pics)

|
11-28-2010, 03:13 AM
|
 |
CC Member
|
|
|
Join Date: May 2010
Location: Golden Square,
Posts: 161
|
|
Not Ranked
You are unbelievable Liam.
looks very nice.
well done.
Stan.
|
11-28-2010, 03:14 AM
|
 |
CC Member
|
|
|
Join Date: Oct 2007
Location: Near Emerald,
Qld
Cobra Make, Engine: Evans kit, 6 litre, 6 speed, Jag F/R,
Posts: 366
|
|
Not Ranked
Absolutely wicked work. That looks extremely professional.
You have more patience and talent than me.
Congrats on the rug rat too.
__________________
Missed my Cobra budget by thaaaat much.
Ya get that on big jobs.
|
11-28-2010, 03:15 AM
|
 |
CC Member
|
|
|
Join Date: Nov 2004
Location: Sydney,
NSW
Cobra Make, Engine: Classic Revival #3199. 366ci L76, T56 6 speed, Blue circle custom paint, Australias most original cobra 2009-2010
Posts: 2,396
|
|
Not Ranked
 Wow
Wow
When I first read you were doing this I thought you were kidding. The finished product looks amazing and you should be very proud of your work. Some of the best from scratch fabrication Ive seen.  Awesome!!!!
PS. Congrats on the new Bub.
__________________
Proudly registered since 2013.
|
11-28-2010, 03:39 AM
|
|
CC Member
|
|
|
Join Date: Jun 2009
Location: Sydney,
NSW
Cobra Make, Engine: RCM, Jag front and rear, LS3
Posts: 1,640
|
|
Not Ranked
Thanks for the comments guys.
We had a baby girl. Everything went smoothly (except for the 2:30am start).
Stan i havnt forgotten about the side vents either. They are on the list but i need a break from polishing!
|
11-28-2010, 03:46 AM
|
|
CC Member
|
|
|
Join Date: May 2010
Location: Golden Square,
Posts: 161
|
|
Not Ranked
I am going to pull the jag diff down this week.
Any pointers on polishing the outer hubs?
And congrats on the birth of your baby girl.
My baby girl was a bit sick today, but she is 20 and it was self inflicted. lol
|
11-28-2010, 03:55 AM
|
|
CC Member
|
|
|
Join Date: Jun 2009
Location: Sydney,
NSW
Cobra Make, Engine: RCM, Jag front and rear, LS3
Posts: 1,640
|
|
Not Ranked
Pointers on polishing the hubs.. Not really, its a filthy job and you will have no finger tips left when you finish. It does look good though.
I used 80 grit and 120 grit flap wheels from bunnings. Followed by hand wet sanding with 120 up to 1200 wet and dry then polished with the polishing kits they also sell in bunnings. Look for a kit that comes with a sisal wheel and a loose cloth wheel with a bar of grey and a bar of white compound. I used them on the drill. If you have a dremel or similar that will help also.
To be honest i would probably paint them in hindsight. The POR15 i used has not sealed them properly. I think this was because there were pin holes in the casting. These pin holes have caused oxidation to form in some spots under the clear. Im not too concerned at the moment but will eventually strip the clear off and consider anodizing.
|
11-28-2010, 04:00 AM
|
|
CC Member
|
|
|
Join Date: May 2010
Location: Golden Square,
Posts: 161
|
|
Not Ranked
That sounds a lot easier. Maybe even just paint them in 2pak..
On a different note: What type of seats did you use?
|
11-28-2010, 04:09 AM
|
 |
CC Member
|
|
|
Join Date: Mar 2008
Location: Gold Coast,
QLD
Cobra Make, Engine: Harrison #69, HSV LS2, T56, Custom rear suspension
Posts: 604
|
|
Not Ranked
Impressive work Liam, well done.
Congrats to you and yours on the arrival of your daughter.
Cheers
__________________
Geoff
Cobra Car Club of Qld - UAE Chapter
|
11-28-2010, 04:12 AM
|
|
CC Member
|
|
|
Join Date: Jun 2009
Location: Sydney,
NSW
Cobra Make, Engine: RCM, Jag front and rear, LS3
Posts: 1,640
|
|
Not Ranked
I used RX7 series 5. They are quite narrow so fit well and were only $50. The MX5 seats are similar but thinner on the upright.
You need to be very carefull with what seats you get though because its hard to find something that complies (see Baz's post).
The RX7 seats are a bit short but are slightly talller than MX5. I am working on a way to modify them without comprimising the performance or appearance. Also waiting to see if Baz's method is acceptable with the RTA.
There are a few clubbie manufacturers that have ADR approved seat frames that you then have to pad and cover.
|
11-28-2010, 05:21 AM
|
 |
CC Member
|
|
|
Join Date: Jul 2004
Cobra Make, Engine: 347 Stroker Morrison Injection. Registered.
Posts: 1,440
|
|
Not Ranked
Fu@k me, I thought I could fabricate some nice things but they don't compare to your work. Couple of thoughts; how are you going to attach the bottom rubber and have you tapped any holes for the wind wings and the sun visors?
Regards.
__________________
Mando
|
11-28-2010, 02:12 PM
|
|
CC Member
|
|
|
Join Date: Jun 2009
Location: Sydney,
NSW
Cobra Make, Engine: RCM, Jag front and rear, LS3
Posts: 1,640
|
|
Not Ranked
I have got some rubber that i plan glue along the bottom. Making a channel for the rubber was just too much work. It should look the same when finished.
I have left a 5mm gap all around to allow room for screws for mounting sunvisors and attaching the side bars. I havnt yet tapped these because i dont have any brackets yet for the hole locations.
|
11-28-2010, 05:43 PM
|
 |
CC Member
|
|
|
Join Date: Jul 2007
Location: Sydney Australia,
NSW
Cobra Make, Engine: RMC with 6 litre 307KW LS2, Comp Cam, 348rwhp & 532.5 ftlb of torque with 6L80E Tiptronic Transmission
Posts: 1,400
|
|
Not Ranked
Quote:
Originally Posted by Zedn

I have got some rubber that i plan glue along the bottom. Making a channel for the rubber was just too much work. It should look the same when finished.
I have left a 5mm gap all around to allow room for screws for mounting sunvisors and attaching the side bars. I havnt yet tapped these because i dont have any brackets yet for the hole locations.
|
Well done Liam and congratulations on the new daughter.
Don't worry about fitting or even drilling the holes for the wind wing mounts as you will be knocked on these by RTA as non compliant ADR -That is speaking from experience.
Lovely work on the screen fabrication also.
Baz
Last edited by Baz; 11-29-2010 at 01:35 PM..
|
11-29-2010, 04:13 AM
|
|
CC Member
|
|
|
Join Date: Jun 2009
Location: Sydney,
NSW
Cobra Make, Engine: RCM, Jag front and rear, LS3
Posts: 1,640
|
|
Not Ranked
Quote:
Originally Posted by Baz
Well done Liam and congratulations on the new daughter.
Don't worry about fitting or even drilling the holes for the wind wing mounts as you will be knocked on these by RTA as non compliant ADR -That is speaking from experience.
Lovelky work on the screen fabrication also.
Baz
|
Hi Baz,
My engineer told me about the wind wings when i met with him. Dont know why but it was just one of the things he told me. I guess that a few people get caught out by it. I am just having padded sun visors as per the ADR requirements.
Are you any closer to the final inspection yet?
Liam |
11-29-2010, 01:34 PM
|
|
CC Member
|
|
|
Join Date: Jul 2007
Location: Sydney Australia,
NSW
Cobra Make, Engine: RMC with 6 litre 307KW LS2, Comp Cam, 348rwhp & 532.5 ftlb of torque with 6L80E Tiptronic Transmission
Posts: 1,400
|
|
Not Ranked
Quote:
Originally Posted by Zedn
Hi Baz,
My engineer told me about the wind wings when i met with him. Dont know why but it was just one of the things he told me. I guess that a few people get caught out by it. I am just having padded sun visors as per the ADR requirements.
Are you any closer to the final inspection yet?
Liam
|
Contacted my Engineer yesterday as he had promised to send me his second revised report for the RTA by Friday last week which didn't arrive. It is now promised by the end of this week. A copy will go direct to RTA and C.C.'d to me. Then the next wait starts. I'm getting used to this now. Can't see anything happening this side of 2011.
18 family and friends are off for 13 nights over Christmas around New Zealand on Sun Princess on Dec. 17 and return on 30th so there's 2010 gone.
See my surgeon next Tuesday and I'm telling him to make arrangements to have my left knee replaced early in 2011.
So as far as the Cobra Registration goes... who knows. If the RTA start stalling me so I come within the confines of the new Engineer Signatory Agreement, which means that I have to start again from scratch with a new Engineer, we'll be off to Court where I've been assured through my Barrister, that a win with substantial costs awarded against them is well and truly on the cards.
2011 could be a very exciting year, not much better than 2010, but exciting just the same.
Baz
|
11-28-2010, 02:47 PM
|
|
CC Member
|
|
|
Join Date: Feb 2006
Location: The Hills,
NSW
Cobra Make, Engine: Absolute Pace
Posts: 1,354
|
|
Not Ranked
Nice work mate!
Cangrats on the new bub too!
Ben
|
11-28-2010, 02:51 PM
|
|
CC Member
|
|
|
Join Date: Jan 2008
Cobra Make, Engine:
Posts: 773
|
|
Not Ranked
Congratulations on becoming a father!! And, great work on the frame. Very impressive.
|
11-28-2010, 03:18 PM
|
 |
CC Member
|
|
|
Join Date: Jun 2007
Location: Sunshine Coast Qld,
QLD
Cobra Make, Engine: Harrison # 80; Ford 5.0L HO Trickflow heads, cam and rockers and MassFlow EFI
Posts: 3,482
|
|
Not Ranked
Well done Liam - on both counts. The earlier Thread from Istanbul shows another scratch built windscreen frame, but the edges are much thicker and solid. Yours looks great.
__________________
Merv
Ford Cobra
Harrison #80.
Peregian Beach
Sunshine Coast Qld.
|
01-09-2011, 10:53 AM
|
 |
CC Member
|
|
|
Join Date: Feb 2000
Location: St. Lucia, West Indies,
WI
Cobra Make, Engine: Unique 427SC 383 stroker
Posts: 3,787
|
|
Not Ranked
Just saw this
That is really beautiful work! Congratulations on a fantastic job and the new addition to the family.
__________________
Tropical Buzz
Grant me the serenity to accept the things I cannot change, the strength to change the things I can, and the wisdom to know the difference. -(wasn't me)
BEWARE OF THE DOGma!! Dogmatism bites...
|
01-10-2011, 05:23 AM
|
 |
Member of the north
|
|
|
Join Date: May 2003
Cobra Make, Engine: A Cobra
Posts: 11,207
|
|
Not Ranked
WOW, that is some beautiful work, congrats.
Good job on the windshield frame also.

__________________
I'm a writer, feed the artist and buy a book.
|
 Posting Rules
|
You may not post new threads
You may not post replies
You may not post attachments
You may not edit your posts
HTML code is Off
|
|
|
All times are GMT -7. The time now is 07:02 PM.
|
|


 Hybrid Mode

