Welcome to Club Cobra! The World's largest
non biased Shelby Cobra related site!
- » Representation from nearly all
Cobra/Daytona/GT40 manufacturers
- » Help from all over the world for your
questions
- » Build logs for you and all members
- » Blogs
- » Image Gallery
- » Many thousands of members and nearly 1
million posts!
YES! I want to register an account for free right now!
p.s.: For registered members this ad will NOT show
 
 Main Menu
|
|
Nevada Classics
|
|
Advertise at CC
|
|
April 2026
|
| S |
M |
T |
W |
T |
F |
S |
| |
|
|
1 |
2 |
3 |
4 |
| 5 |
6 |
7 |
8 |
9 |
10 |
11 |
| 12 |
13 |
14 |
15 |
16 |
17 |
18 |
| 19 |
20 |
21 |
22 |
23 |
24 |
25 |
| 26 |
27 |
28 |
29 |
30 |
|
|
|
|
CC Advertisers
|
|
 92Likes 92Likes

10-20-2015, 04:40 PM
|
 |
CC Member

|
|
|
Join Date: Feb 2002
Location: Alice Springs, central Australia,
NT
Cobra Make, Engine: Classic revival kit (CR3181), gen III engine, T56 6 speed box, AU XR8 lsd diff
Posts: 5,699
|
|

 Not Ranked
Looks great,
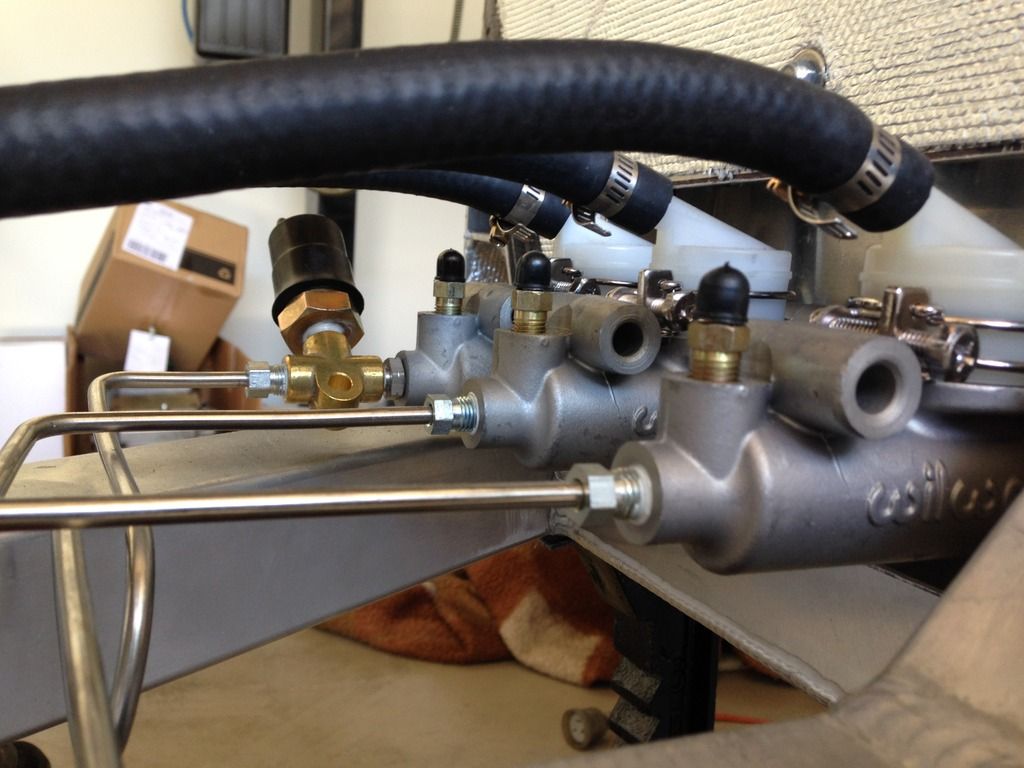
I assume it is still an ADR requirement, but the brake fluid reservoirs require a low fluid warning system to light up a light in dash.
__________________
Cruising in 5th

---------------------------------------------
Never be afraid to do something new, Remember, Amateurs built the Ark: Professionals built the Titanic.
|
-
Advertising

10-20-2015, 05:56 PM
|
 |
CC Member
|
|
|
Join Date: Nov 2006
Location: Gold Coast Queensland,
QLD
Cobra Make, Engine: Harrison#97 LS7 / T56
Posts: 1,683
|
|
Not Ranked
Our system works on any loss in pressure.( ADR Requirement)
Sensors indicate reduction to full pressure, allowing for customers to have a choice of decorative resevoirs.
That's my understanding.
Cheers,
Warren.
|
10-20-2015, 06:36 PM
|
|
CC Member
|
|
|
Join Date: Jul 2012
Location: Melbourne,
Vic
Cobra Make, Engine: Pace 427SC. LSA Supercharged with 6sp TR-6060 trans.
Posts: 463
|
|
Not Ranked
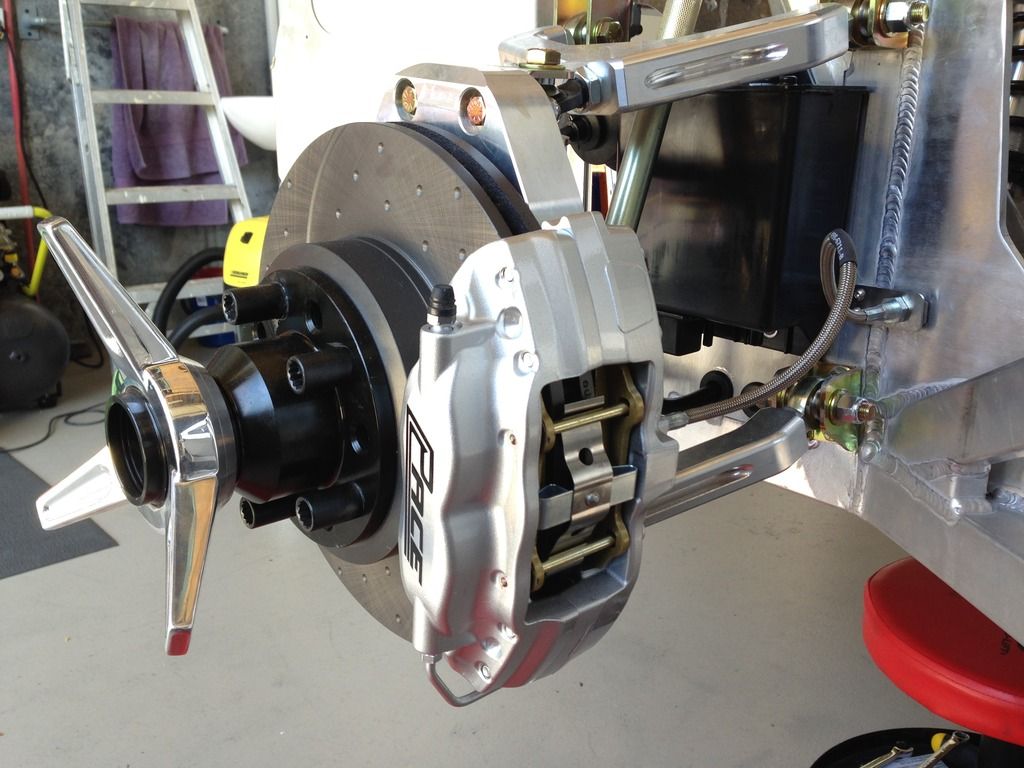
Love the bracket Darryl! Great work. 
The minimum capacity for the reservoirs and supply line to the master cylinder has to be 90ml each.
__________________
www.paintwerks.com.au
|
10-20-2015, 07:08 PM
|
|
CC Member
|
|
|
Join Date: Feb 2002
Location: Alice Springs, central Australia,
NT
Cobra Make, Engine: Classic revival kit (CR3181), gen III engine, T56 6 speed box, AU XR8 lsd diff
Posts: 5,699
|
|
Not Ranked
Yeah, I believe it can be done in 2 ways.
Fluid level, or pressure loss.
I am just not sure if the pressure loss method is the best option on a dual cylinder setup.
If 1 cylinder loses pressure it would allow full travel without applying any pressure to second cylinder.
But on a dual circuit single cylinder, once the piston sees no fluid in one piston, the piston pushes just the fluid side to retain brakes. (triggering the light)
The low fluid warning would give a warning prior to losing a pedal.
__________________
Cruising in 5th
---------------------------------------------
Never be afraid to do something new, Remember, Amateurs built the Ark: Professionals built the Titanic.
Last edited by boxhead; 10-20-2015 at 07:22 PM..
Reason: Added last line.
|
11-15-2015, 12:55 PM
|
 |
CC Member
|
|
|
Join Date: Sep 2012
Location: Maribyrnong,
Vic
Cobra Make, Engine: Cobra Replica, 5.0 Supercharged Coyote
Posts: 385
|
|
Not Ranked
|
11-15-2015, 04:05 PM
|
 |
CC Member
|
|
|
Join Date: Nov 2008
Location: Brisbane Australia. Cobra:Arntz Chev 454,
Posts: 847
|
|
Not Ranked
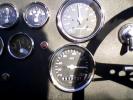
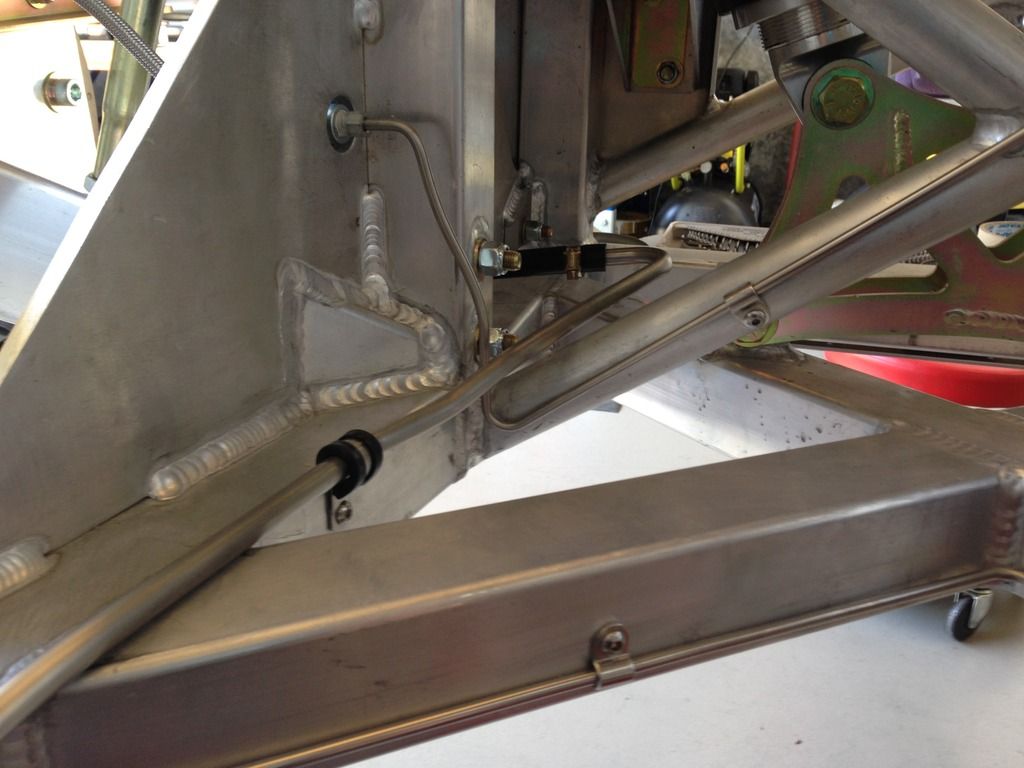
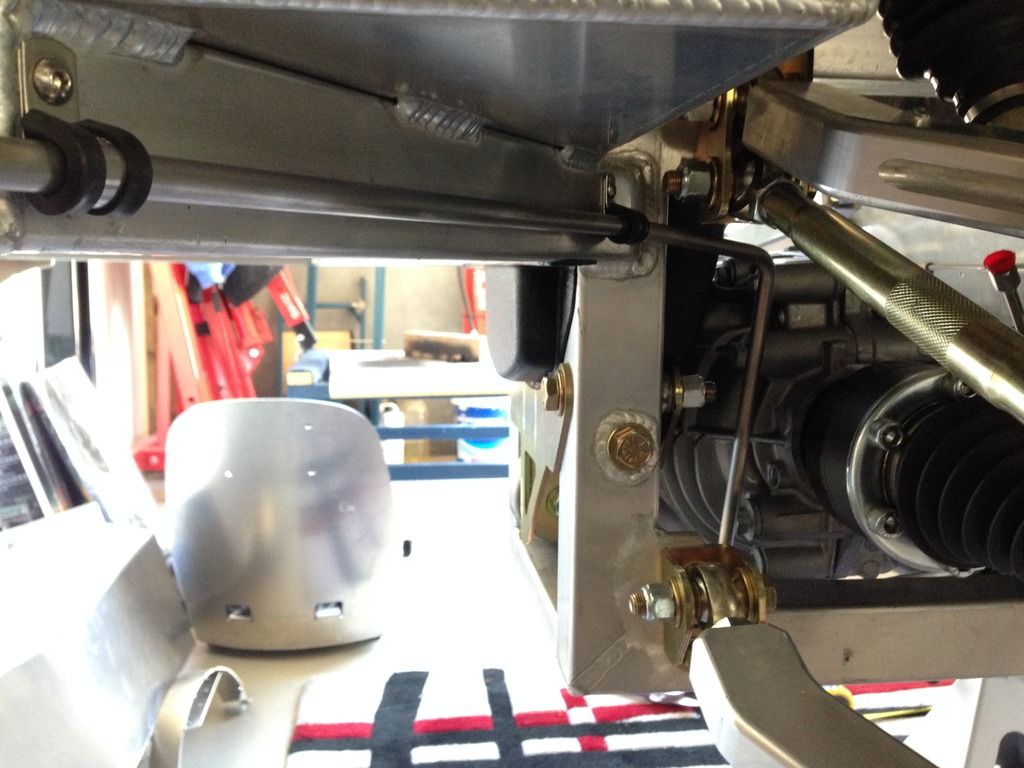
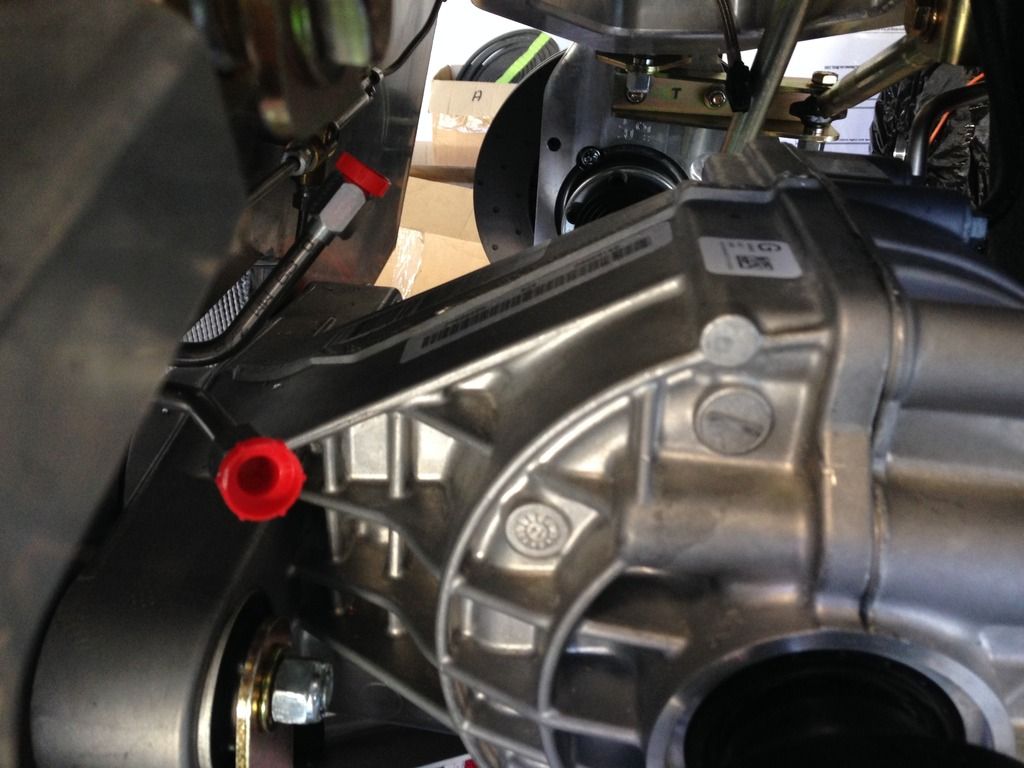
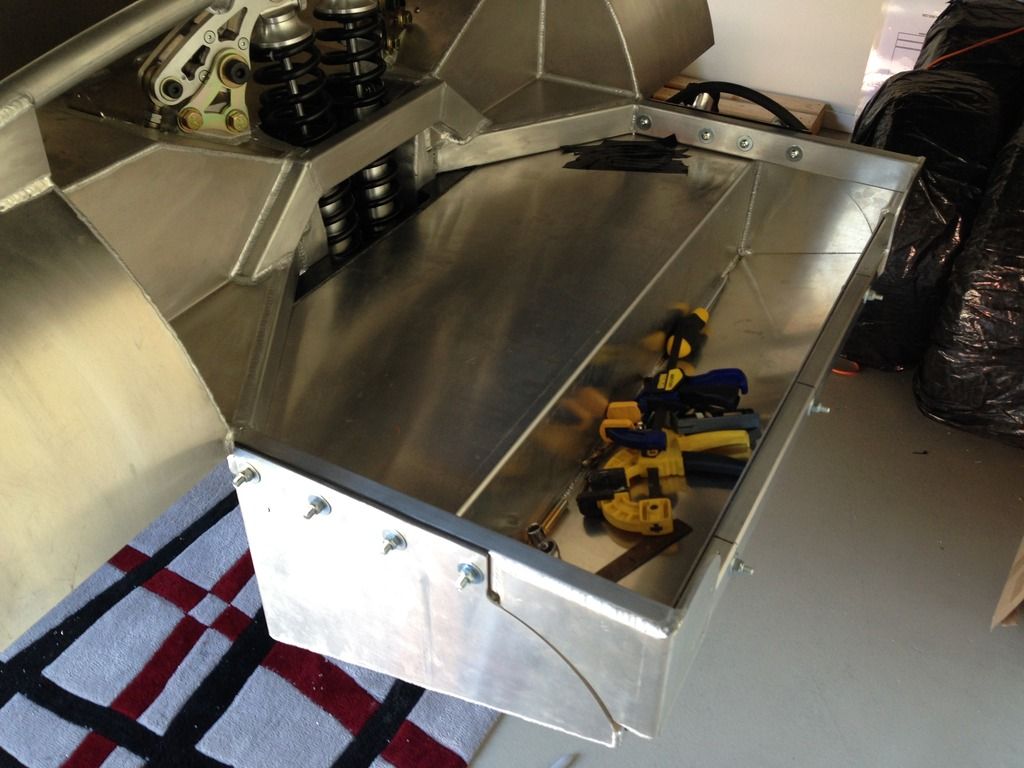
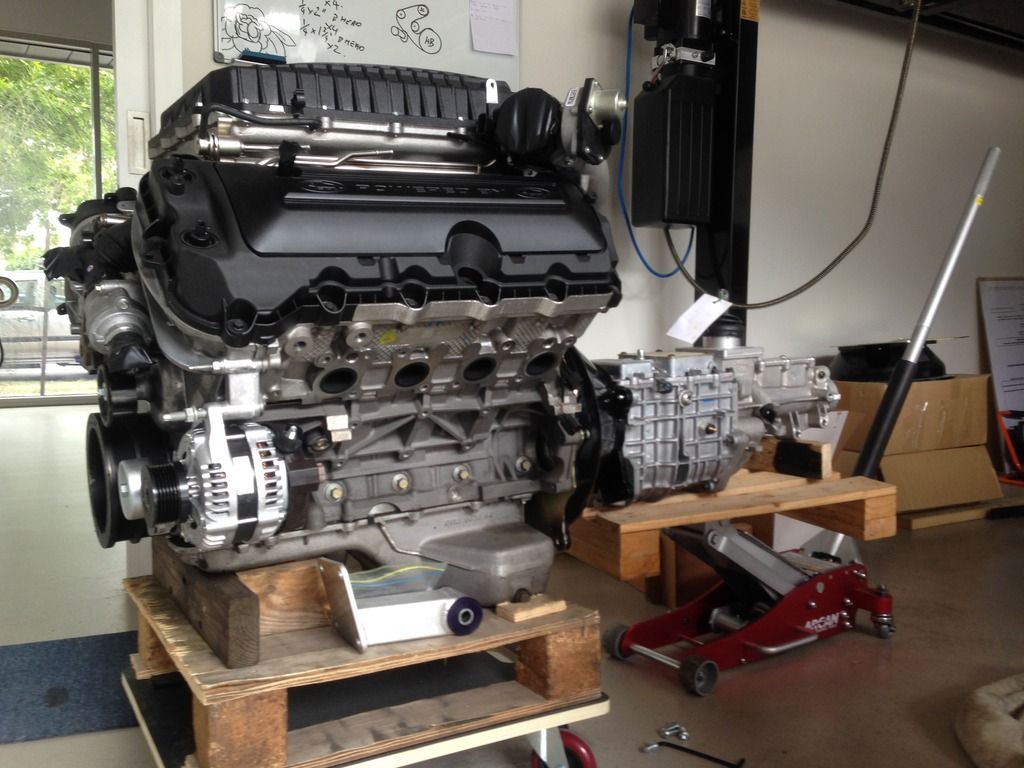
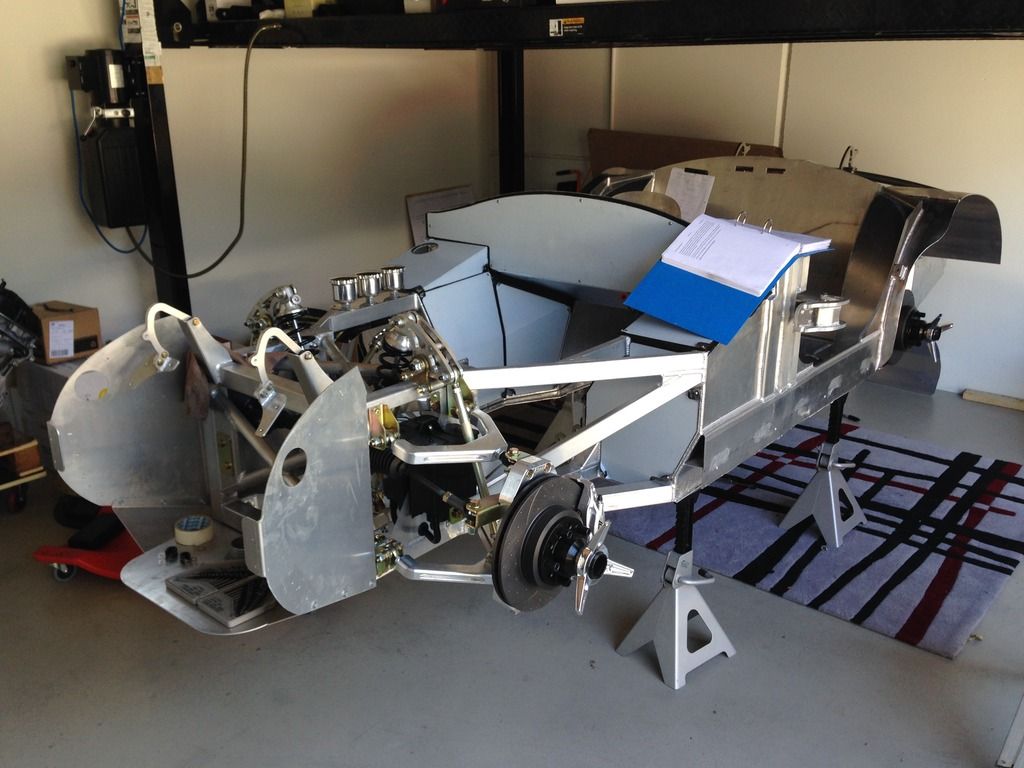
Yet again I'm amazed at how pretty these cars look during the build phase. Forget the untold hours of design and engineering and development work that's gone into them -- they're just beautiful, almost too good to cover up.
I wonder if AP will ever offer a transparent body?
You'd have to think that with the development of materials and 3D printers it would be possible to produce a sturdy clear body with some sort of invisible solar protection for the driver and passenger built in. And what a way for Craig and Waz to point out the salient features of the car to prospective buyers! 
__________________
Don.
|
11-15-2015, 04:13 PM
|
|
CC Member
|
|
|
Join Date: Sep 2015
Location: Windsor,
Vic
Cobra Make, Engine:
Posts: 196
|
|
Not Ranked
i agree with don, finish on these bad boys is simply amazing. love the detail.
great photos.
|
11-15-2015, 04:52 PM
|
|
CC Member
|
|
|
Join Date: Jun 2001
Location: munno para west,
sa
Cobra Make, Engine: absolute pace chassis #50 L98 & 6 speed auto
Posts: 1,141
|
|
Not Ranked

to me this is what a true kit car should be like . in regards it should come with as many components as possible . sure ive heard them called flat pack cars and lego cars amongst others .
lets face it how many kits in the past remained unfinished and pushed to the back of sheds and given up till sold for a bargain price to someone else with dreams to finish it .in my view the more that comes with the car and the easier it is to build the greater chance of it getting on the road by the original buyer .
ive been down the path of buying a kit that came with a basic chassis and body where you have had to put the doors / bonnet / boot together and then get all the gaps right a daunting task if you dont have body work skills . or they have the skills to do the body but dont have a mechanical mindset and end up buying a old jag front and rear and just clean it paint it and wack it in hoping for the best .
or people dont have the time to scrounge thru wreckers getting covered in grease and crap hoping to find what they need and a good price .
ive been there and done that and this time round had no interest at all in building another kitcar again hence my first plan was to look for a car with rego hop in and drive .
it was only after flying interstate a couple of times looking at cars that did not seem to meet the description in the add i was about ready to forget the idea of getting another cobra till i saw a add vert for the pace . it seemed to tick most of the boxes in what i wanted and after seeing them in the flesh at the factory decided i could def build one of these without the head aches i had in the past with my first kit .
ive prob gone off course with this post as it was just meant to agree with donunder about the beauty of these cars lol a clear body hell yeah put me down for that .
cheers dean
__________________
a cobra is a passion anything else is just a car
i dont care what the question is .. The answer is more power!!!
|
11-15-2015, 08:13 PM
|
|
CC Member
|
|
|
Join Date: Sep 2015
Cobra Make, Engine: Pace 427 LSA
Posts: 24
|
|
Not Ranked
Looking Good.
All the photos coupled with the build manual help me to know how to go with my build.
|
11-16-2015, 01:17 AM
|
 |
CC Member
|
|
|
Join Date: Jan 2002
Location: Melbourne, Australia,
VIC
Cobra Make, Engine: AP Pace427 (AP4033) GM L77 6.0L TR6060
Posts: 838
|
|
Not Ranked
Looks excellent Darryl.
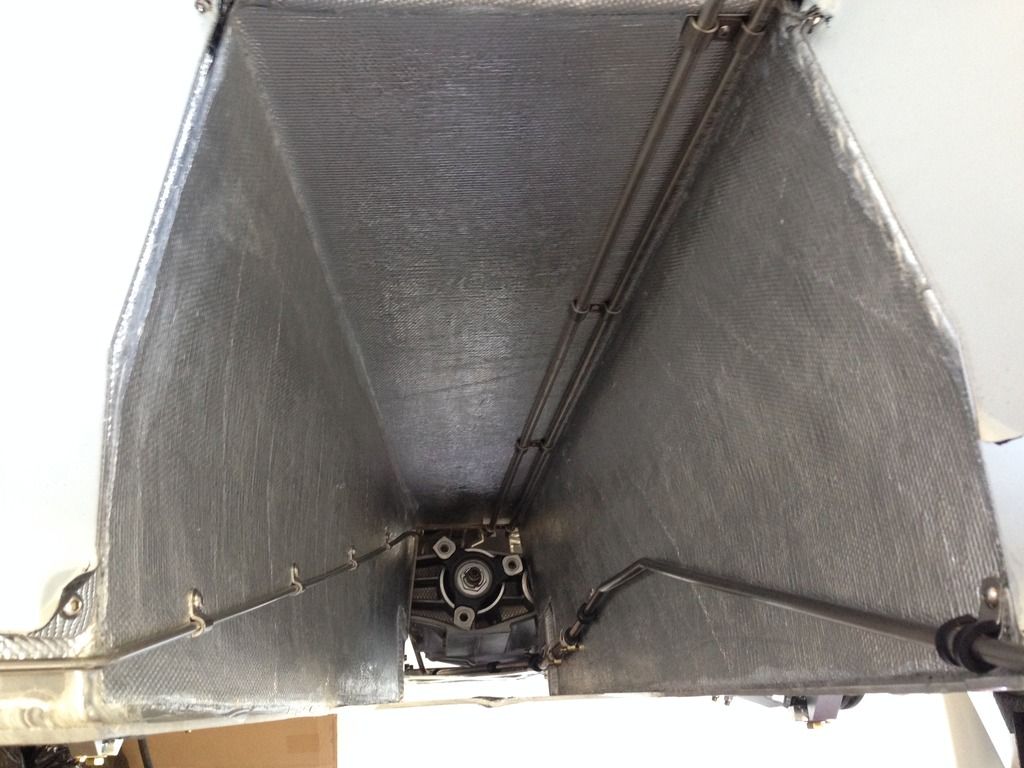
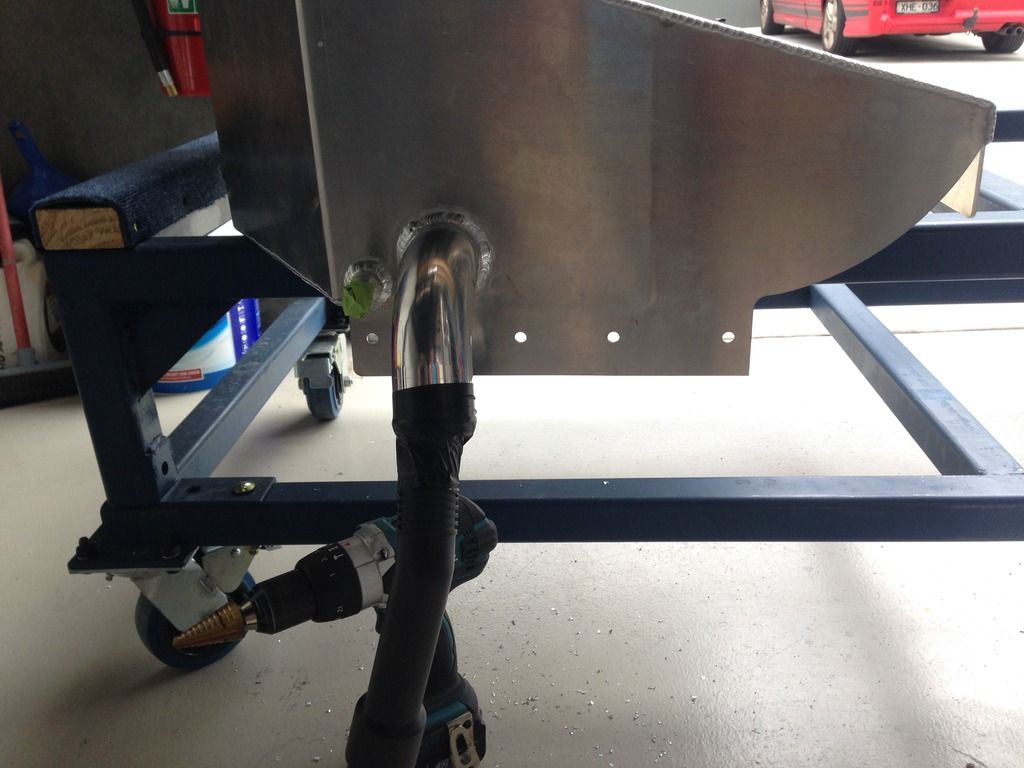
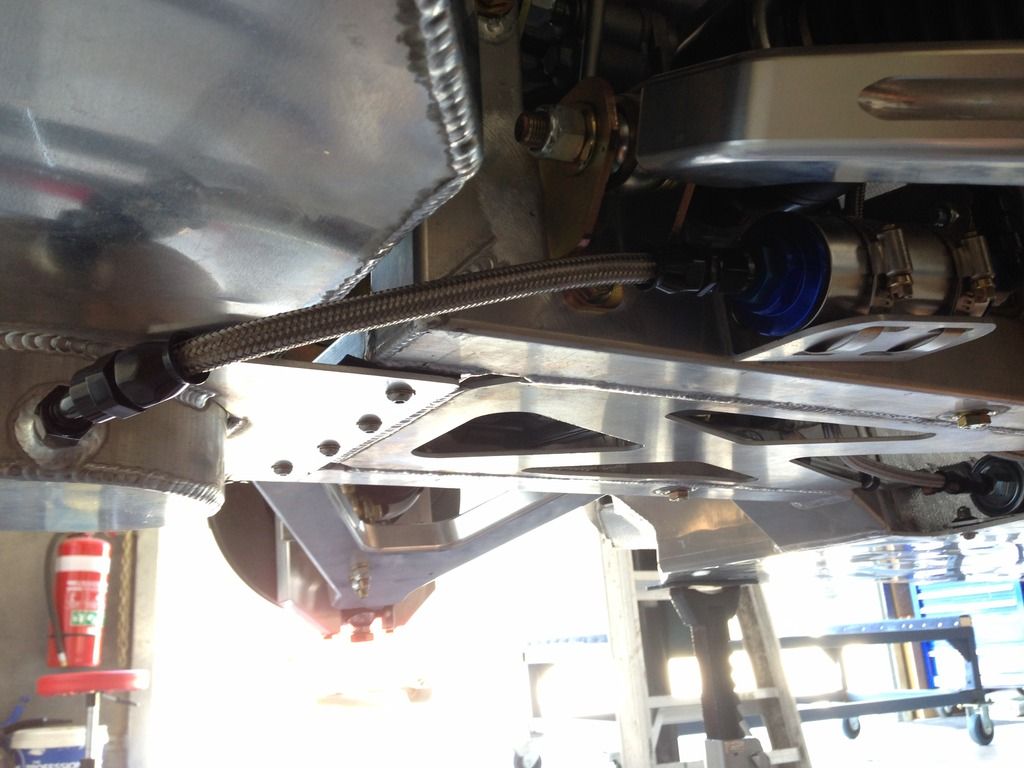
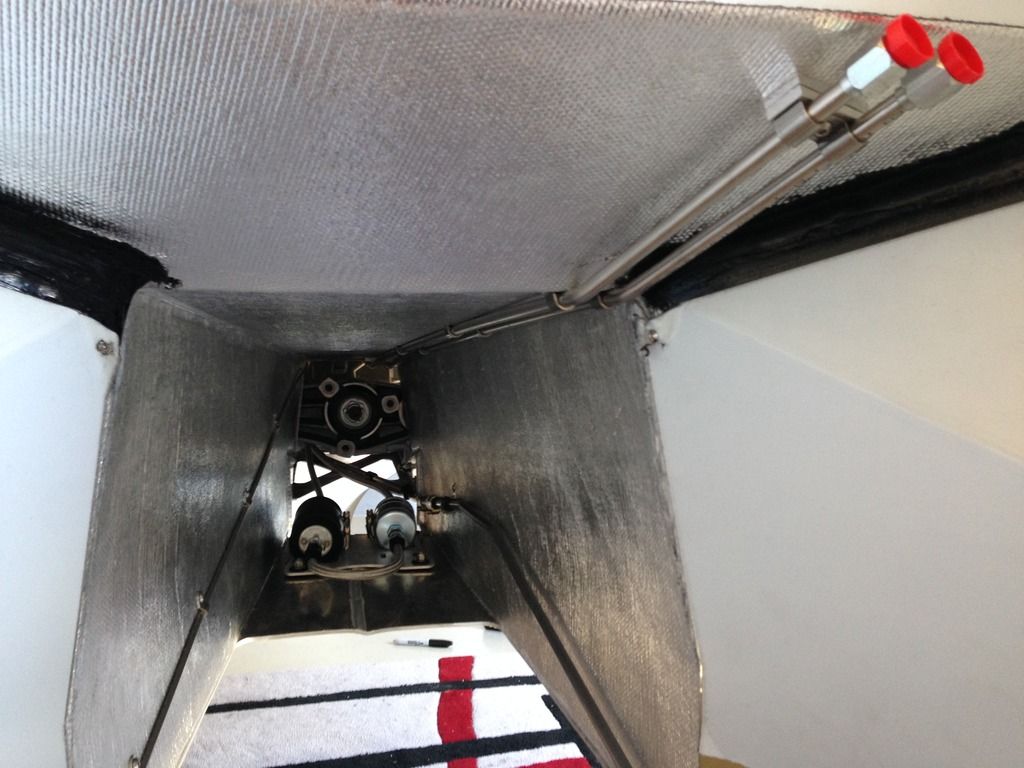
Have you out the aluminised cloth on top of the stainless steel heat shield in front of the drivers footbox? Or is that an optical illusion?
__________________
Guy
Cobra Progress guye-cobra.blogspot.com
|
11-16-2015, 01:35 AM
|
|
CC Member
|
|
|
Join Date: Sep 2012
Location: Maribyrnong,
Vic
Cobra Make, Engine: Cobra Replica, 5.0 Supercharged Coyote
Posts: 385
|
|
Not Ranked
Quote:
Originally Posted by guye

Looks excellent Darryl.
Have you out the aluminised cloth on top of the stainless steel heat shield in front of the drivers footbox? Or is that an optical illusion?
|
Thanks Guy, I've removed that heat shield to put the pedal box in and will replace it once I mount my drive by wire module, just waiting on a special part from the US. |
11-16-2015, 02:00 AM
|
|
CC Member
|
|
|
Join Date: Jan 2002
Location: Melbourne, Australia,
VIC
Cobra Make, Engine: AP Pace427 (AP4033) GM L77 6.0L TR6060
Posts: 838
|
|
Not Ranked
All good then. As you were. Carry on.
__________________
Guy
Cobra Progress guye-cobra.blogspot.com
|
11-16-2015, 02:37 AM
|
|
CC Member
|
|
|
Join Date: Jun 2012
Location: Naracoorte,
SA
Cobra Make, Engine: CR Cobra 3169
Posts: 818
|
|
Not Ranked
When I was working on gyro's the discussion was about anodizing, in the fact that the process did weaken the base material aluminium as the heat applied and that a very thin layer was weakened in the process. I don't think a chassis would be under such stress as to be a worry. But I thought I would bring it up.
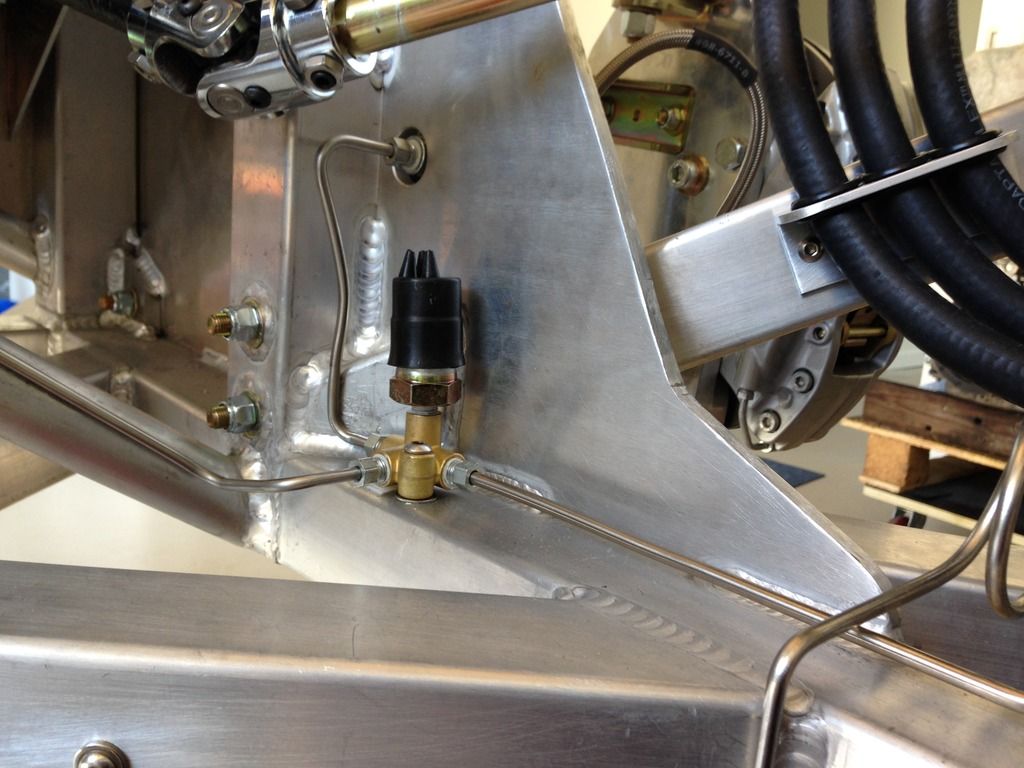
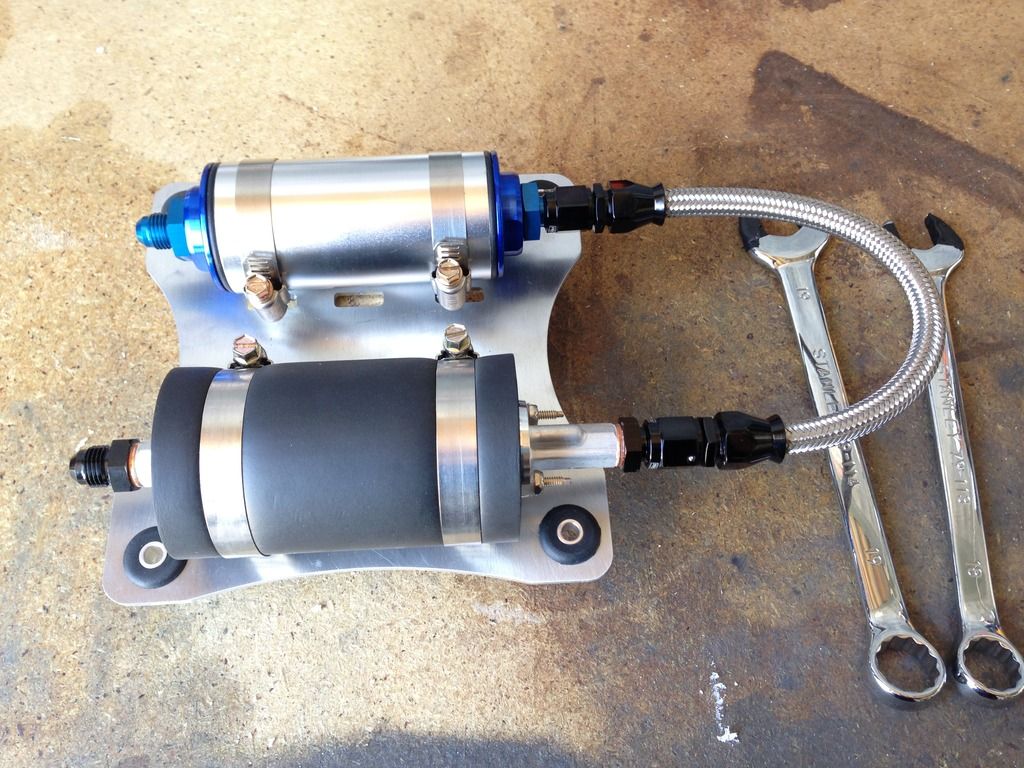
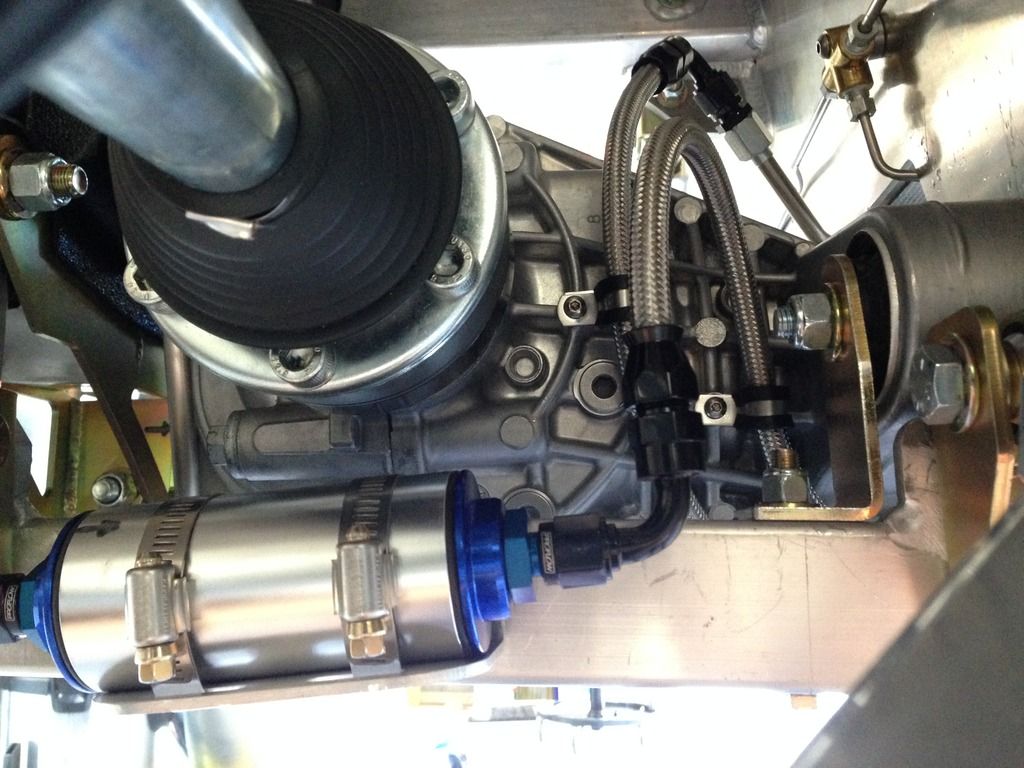
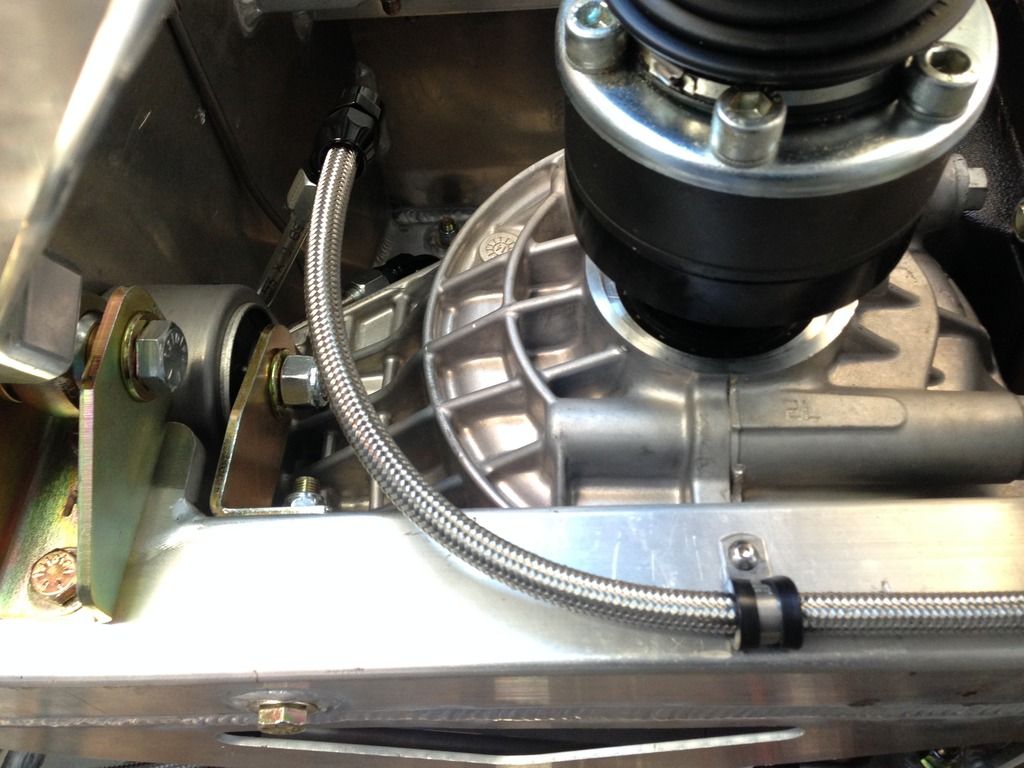
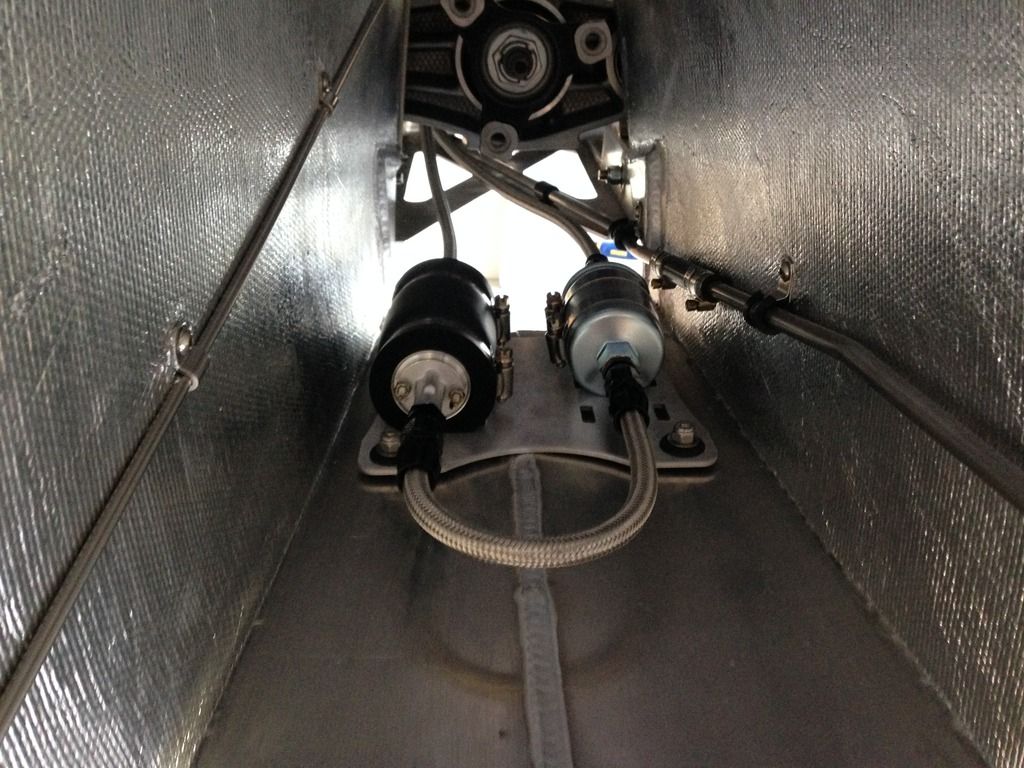
With regards to the twin master cylinder setup, It looks like if one side should fail for some reason , then the balance bar would kink over at such an angle that it would still push on the good master cylinder. That's why the 20 thou clearance and washers adjustment is important so it can only go a certain angle.
I assume that the switch near the master is the brake light switch? And the other on the chassis the fail?
I'm trying to work out how that is routed?
So could you now call a pace a true kit, seeing that just about all the components come in a big box? 
JD |
11-16-2015, 12:40 PM
|
|
CC Member
|
|
|
Join Date: Sep 2012
Location: Maribyrnong,
Vic
Cobra Make, Engine: Cobra Replica, 5.0 Supercharged Coyote
Posts: 385
|
|
Not Ranked
The 2 pressure switches trigger a brake fail warning lamp if either front or back brake circuits lose pressure. The system works on monitoring the differential between front and rear brake pressures. The same two pressures are also used to trigger the brake lights. That's my understanding on how the brake monitoring systems works.
|
11-16-2015, 01:26 PM
|
|
CC Member
|
|
|
Join Date: Jan 2012
Posts: 69
|
|
Not Ranked
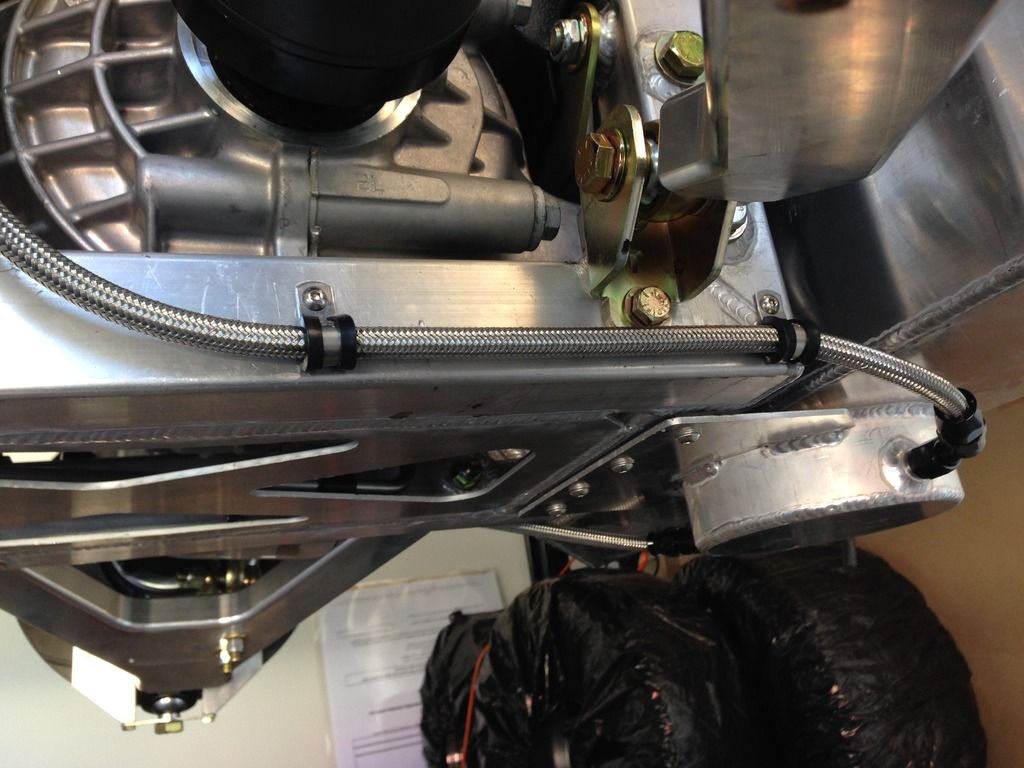
Was the bracket for brake/clutch lines included/manufactured or bought? Need to get me ones of these
__________________
I dont have a temper,I just react quickly to Bull*
|
11-16-2015, 01:52 PM
|
|
CC Member
|
|
|
Join Date: Jun 2001
Location: munno para west,
sa
Cobra Make, Engine: absolute pace chassis #50 L98 & 6 speed auto
Posts: 1,141
|
|
Not Ranked
Quote:
Originally Posted by mudbrick
Was the bracket for brake/clutch lines included/manufactured or bought? Need to get me ones of these
|
all the brackets come with the kit . wazza might be the bloke to help you out .
__________________
a cobra is a passion anything else is just a car
i dont care what the question is .. The answer is more power!!!
|
11-16-2015, 03:32 PM
|
|
CC Member
|
|
|
Join Date: Sep 2012
Location: Maribyrnong,
Vic
Cobra Make, Engine: Cobra Replica, 5.0 Supercharged Coyote
Posts: 385
|
|
Not Ranked
Quote:
Originally Posted by mudbrick
Was the bracket for brake/clutch lines included/manufactured or bought? Need to get me ones of these
|
I'm made it from a piece of aluminium angle, 30mm X 30mm X 3mm
The rubber grommets I found at supercheap auto. |
11-16-2015, 03:33 PM
|
 |
CC Member
|
|
|
Join Date: Oct 2014
Cobra Make, Engine: Pace 427
Posts: 95
|
|
Not Ranked
Quote:
Originally Posted by deano59
to me this is what a true kit car should be like . in regards it should come with as many components as possible . sure ive heard them called flat pack cars and lego cars amongst others .
lets face it how many kits in the past remained unfinished and pushed to the back of sheds and given up till sold for a bargain price to someone else with dreams to finish it .in my view the more that comes with the car and the easier it is to build the greater chance of it getting on the road by the original buyer .
ive been down the path of buying a kit that came with a basic chassis and body where you have had to put the doors / bonnet / boot together and then get all the gaps right a daunting task if you dont have body work skills . or they have the skills to do the body but dont have a mechanical mindset and end up buying a old jag front and rear and just clean it paint it and wack it in hoping for the best .
or people dont have the time to scrounge thru wreckers getting covered in grease and crap hoping to find what they need and a good price .
ive been there and done that and this time round had no interest at all in building another kitcar again hence my first plan was to look for a car with rego hop in and drive .
it was only after flying interstate a couple of times looking at cars that did not seem to meet the description in the add i was about ready to forget the idea of getting another cobra till i saw a add vert for the pace . it seemed to tick most of the boxes in what i wanted and after seeing them in the flesh at the factory decided i could def build one of these without the head aches i had in the past with my first kit .
ive prob gone off course with this post as it was just meant to agree with donunder about the beauty of these cars lol a clear body hell yeah put me down for that .
cheers dean
|
Totally agree! I've built multiple cars over the years including another brand of Cobra. It wasn't until I built my last car, 67 GT390 Mustang that I realised how great it is to be able to make a phone call knowing you can buy, NEW, any part you want for the car, ANY!!!!
The Pace Cobra is the same and the reason why I built another Cobra!! Used parts and 'wrecker grabbing' is old school and a thing of the past!!!!
And yes, I am off topic too but I love my Pace!!

|
11-22-2015, 04:15 AM
|
|
CC Member
|
|
|
Join Date: Jan 2002
Location: Melbourne, Australia,
VIC
Cobra Make, Engine: AP Pace427 (AP4033) GM L77 6.0L TR6060
Posts: 838
|
|
Not Ranked
Quote:
Originally Posted by d488y2
I'm made it from a piece of aluminium angle, 30mm X 30mm X 3mm
The rubber grommets I found at supercheap auto.
|
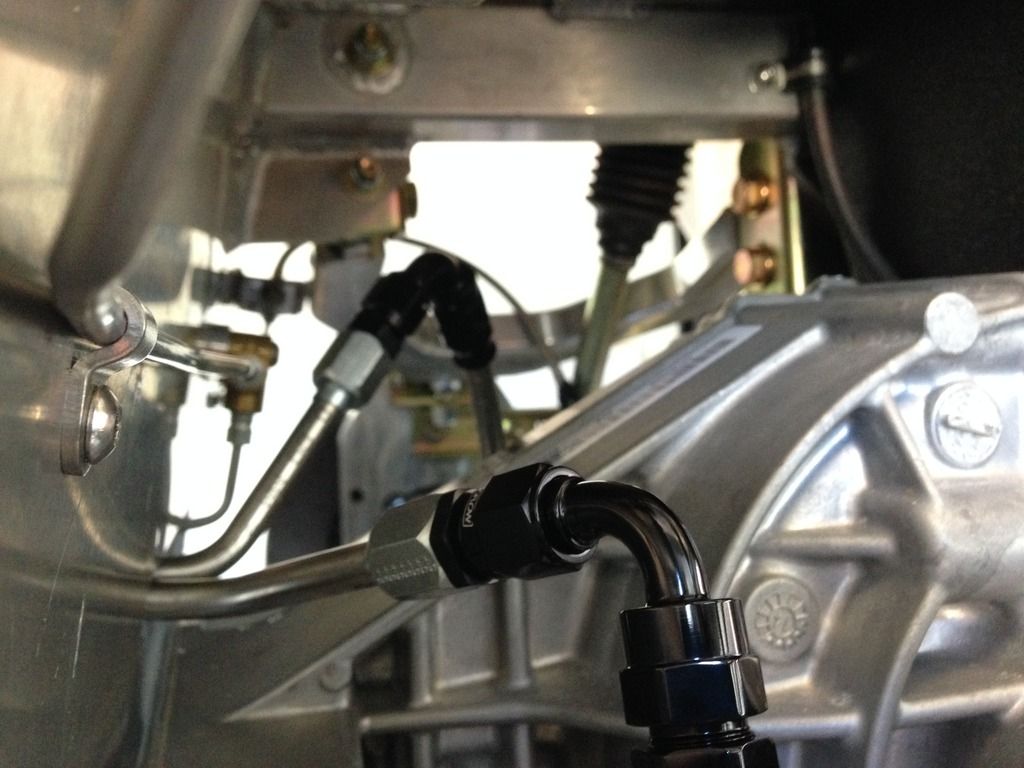
We've dubbed it the "Darryl Bracket". At least 3 Pace builders have now copied this revloutionary yet simple design feature!
__________________
Guy
Cobra Progress guye-cobra.blogspot.com
|
11-29-2015, 12:18 PM
|
|
CC Member
|
|
|
Join Date: Sep 2012
Location: Maribyrnong,
Vic
Cobra Make, Engine: Cobra Replica, 5.0 Supercharged Coyote
Posts: 385
|
|
Not Ranked
|
 Posting Rules
|
You may not post new threads
You may not post replies
You may not post attachments
You may not edit your posts
HTML code is Off
|
|
|
All times are GMT -7. The time now is 11:18 PM.
|
|


 Linear Mode


