 
 Main Menu
|
|
Nevada Classics
|
|
Advertise at CC
|
| S |
M |
T |
W |
T |
F |
S |
| |
1 |
2 |
3 |
4 |
5 |
6 |
| 7 |
8 |
9 |
10 |
11 |
12 |
13 |
| 14 |
15 |
16 |
17 |
18 |
19 |
20 |
| 21 |
22 |
23 |
24 |
25 |
26 |
27 |
| 28 |
29 |
30 |
|
|
|
|
|
|
CC Advertisers
|
|

01-04-2012, 02:38 PM
|
|
CC Member

|
|
|
Join Date: Jun 2008
Location: Fair Grove,
MO
Cobra Make, Engine: Hurricane HM2006 FE & Toploader
Posts: 58
|
|

 Not Ranked
Russ that looks great, I looked at the photos of the one that was done on Dean's car as a heat shield, but remember the original idea was to build something to protect from below (i.e. road debris taking out a MC or line) does that look like it would be a concern after all.
BTW. the wait to pick up HM 2006 is killing me.
Mark
|
01-05-2012, 06:27 AM
|
 |
CC Member
|
|
|
Join Date: Mar 2011
Location: Helotes,
TX
Cobra Make, Engine: HM-2005, Keith Craft 408W TKO 600 IRS
Posts: 70
|
|
Not Ranked
 Master Cylinders
Seems Hurricane is supplying the compact master cylinders from Wilwood with their kits. The ones shown in the picture from Lampe's HM-2002 were longer and looked like they protruded below the foot boxes. The compact ones are shorter and do not protrude.
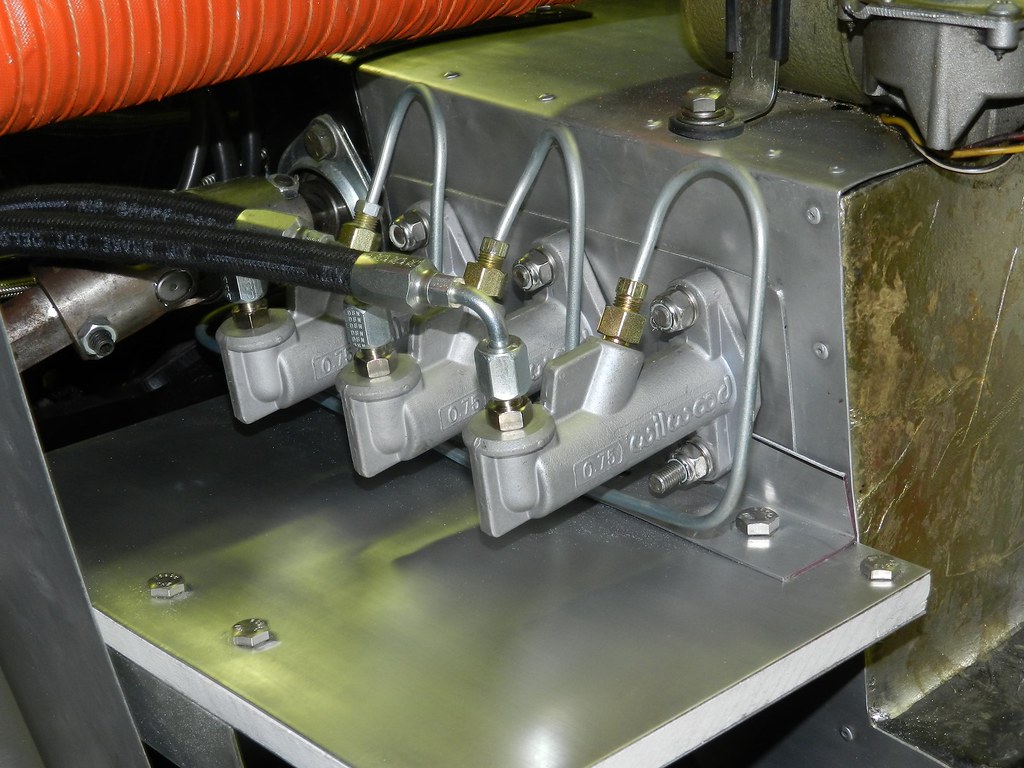
Here's a profile of the compact master cylinders without the heat shield.
You can see that there is a good bit of distance between the bottom of the foot box and the master cylinders. Something could of course be thrown up to hit/damage the cylinders or lines. I put 90 deg adapters so the lines are toward the top.
If necessary, a plate could be either welded or bolted to the bottom of the foot box to protrude forward to cover the cylinders/lines for protection. Bend an upturn on the front of the plate and should protect them pretty well. I'm not sure a plate is necessary though.
Hurricane is pretty fast in getting their kits out. I think mine was 6 weeks so your's should be ready soon. The wait was a killer for me too. Some guys wait a heck of alot longer from other manufacturers.
__________________
Russ
|
02-07-2012, 06:14 AM
|
 |
CC Member
|
|
|
Join Date: Oct 2000
Location: Midlothian,
TX
Cobra Make, Engine: Hurricane 427 Cobra #HM2008, Craft Performance 427w 600hp/600tq, TKO-600 close ratio, original Smiths gauges, lucas switches
Posts: 1,022
|
|
Not Ranked
Hey Rich, whats the latest with HM2005?
.
__________________
Bob Worley
Hurricane HM-2008 build is done!! (for now....)
Craft Perfomance 427W / 600hp / 600tq - TKO600
I love it and I need it I bleed it ~ Yeah it's a wild hurricane ~ Alright, hold tight, I'm a highway star!!
|
02-07-2012, 09:31 PM
|
|
CC Member
|
|
|
Join Date: Jul 2008
Location: Driftwood,
TX
Cobra Make, Engine: Contemporary Cobra, 427 side oiler
Posts: 1,850
|
|
Not Ranked
For you guys building Hurricanes, this compact master cylinder from Wilwood is worth a look. It does not use the plastic reservoir connector nipple thingy like the ones Hurricane has been using. Those plastic reservoirs don't leave many options for connecting your reservoir supply hoses, especially if you are going for something more original looking and long-term leak-proof. The pedal stroke is shorter and its a bit tricky to set up but it can be done.
While replacing these late last year I also built a heat shield using a product called Maranite, which replaced asbestos, sandwiched between two sheets of .080. The stuff is amazing at blocking radiant heat. All these changes have made a tremendous difference in my brake performance.
Last edited by elmariachi; 02-07-2012 at 09:40 PM..
|
02-08-2012, 03:57 PM
|
 |
CC Member
|
|
|
Join Date: May 2006
Location: Manchester,
MO
Cobra Make, Engine: Hurricane - FE
Posts: 627
|
|
Not Ranked
Other end
This is what goes on the other end of the hoses  (Shameless plug)

You can get these from PeriodCorrect.com A set (three reservoirs[two tall, one short], caps, brackets) run $175 and are available from Acton Custom, Period Correct or Hurricane Motorsports.
Paul
Last edited by PaulProe; 02-08-2012 at 04:04 PM..
|
02-09-2012, 07:05 AM
|
|
CC Member
|
|
|
Join Date: Mar 2011
Location: Helotes,
TX
Cobra Make, Engine: HM-2005, Keith Craft 408W TKO 600 IRS
Posts: 70
|
|
Not Ranked
Back to my HM-2005 build. The holidays, hunting, butchering time and making sausage has taken a good bit of my time. That's over now so I can devote more time to my build.
I connected the solid fuel line that runs down the frame rail with flex hose/fittings to the fuel tank and fuel pump. I used Aeroquip socketless fittings and hose. Makes a very neat installation. I could have used the braided stainless covered hose/fittings and also the teflon coated hose. There's plenty of discussion on this forum on the pros and cons of using the alternative hoses. The biggest issue is the ethanol in the fuel today and what it does to aluminum and rubber components (seal, hoses, etc.). Since my car has an aluminum fuel tank, aluminum fuel line, aluminum fuel pump, aluminum carb, I've already resigned to used the additivies that mitigate the effects of ethanol.
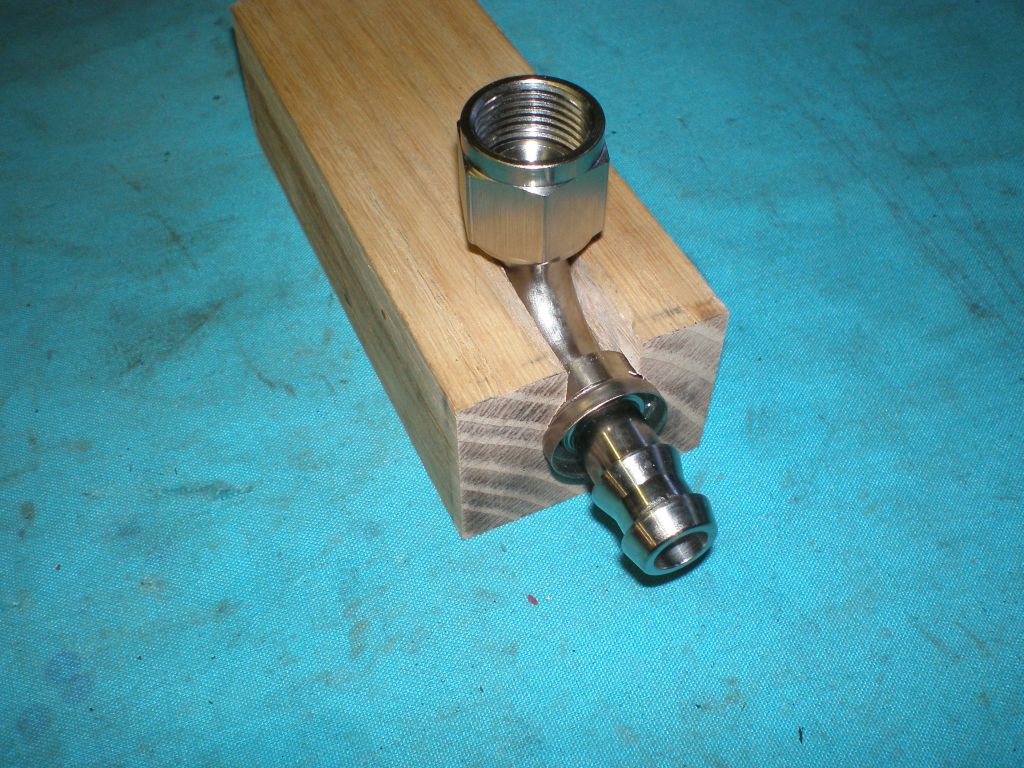
With all of that said, the Aeroquip socketless hose and fittings are relatively easy to assemble. There are plenty of other manufacturers that offer similar components. I needed two hose assemblies to connect the fuel tank and the fuel pump and 3 of the ends use 90 deg fittings. You have to exert a good bit of force to put the hose on the fittings. There are no clamps so the hose has to fit very snug. I made a holder out of wood to clamp in the vise so can push with the hose. Here's a pix of the holder.
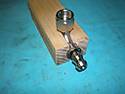
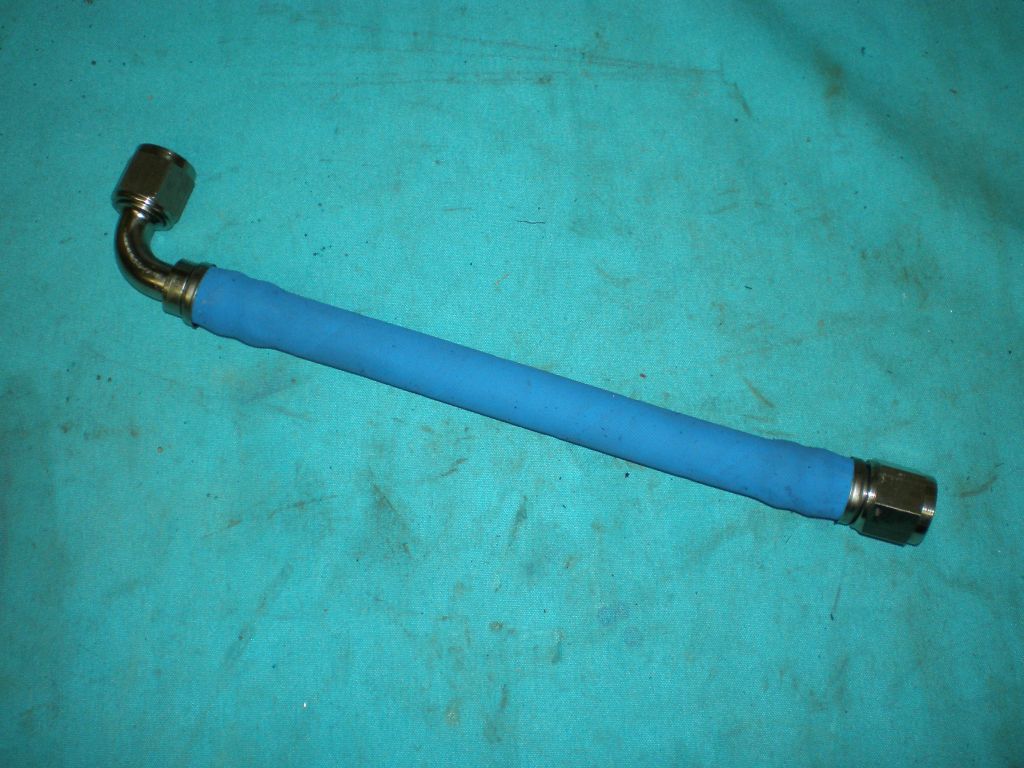
I put the hose in boiling water to soften it then pushed like hell to get it started. A little vaseline helps too. Then repeat the process enough times until the hose is fully seated. Some people use a heat gun to soften the hose. This hose and fittings are supposed to be good for 250 psi. Since this is on the vacuum side of the fuel pump, it should be sufficient. Here is a pix of the completed hose assembly.
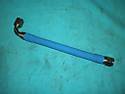
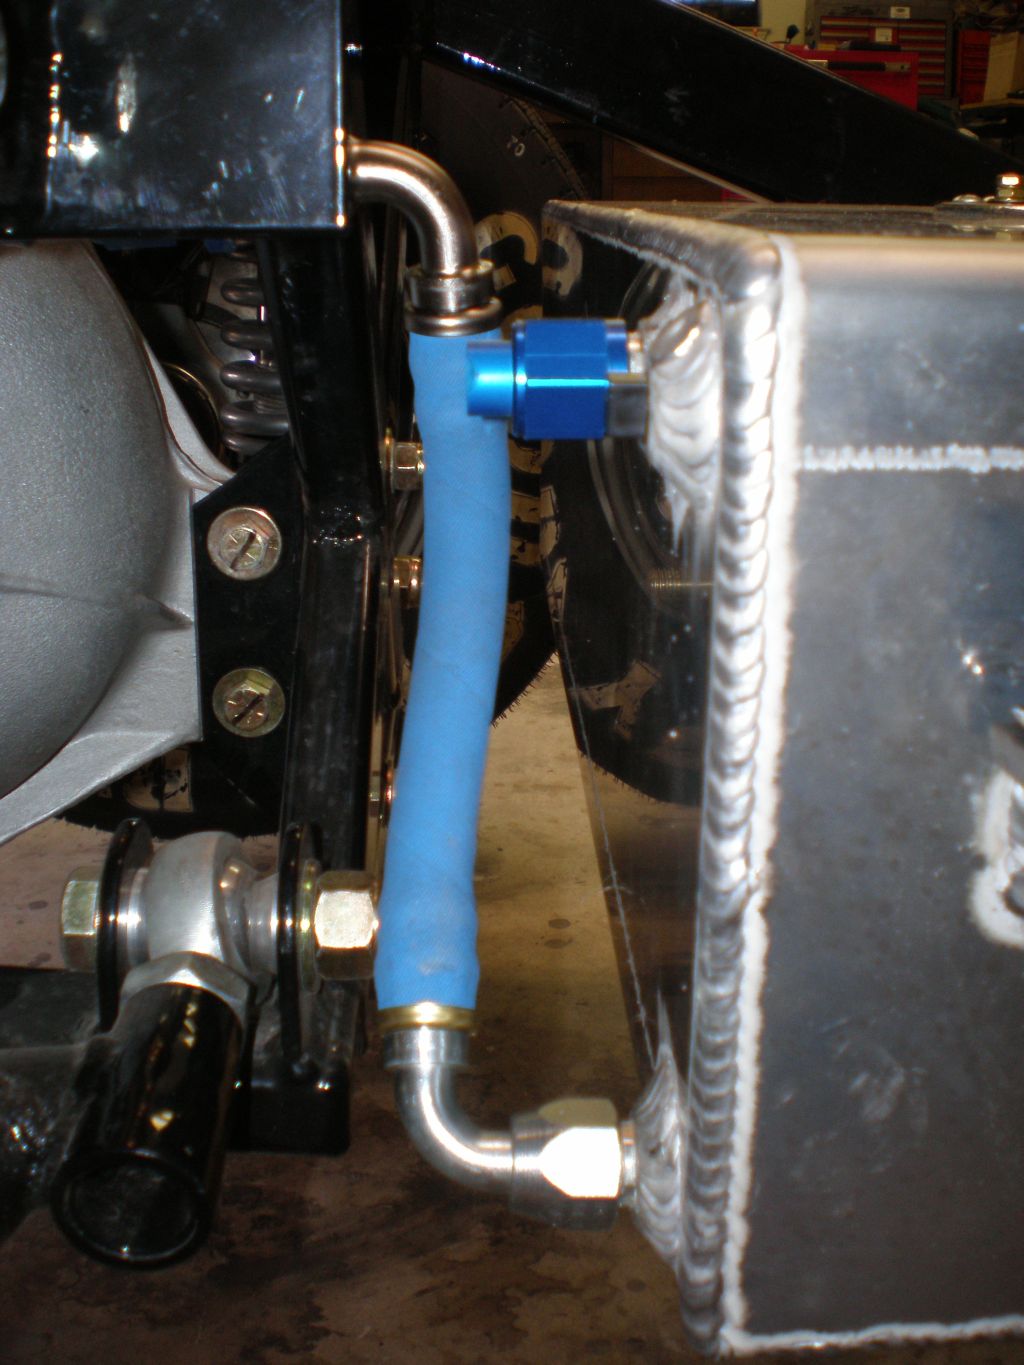
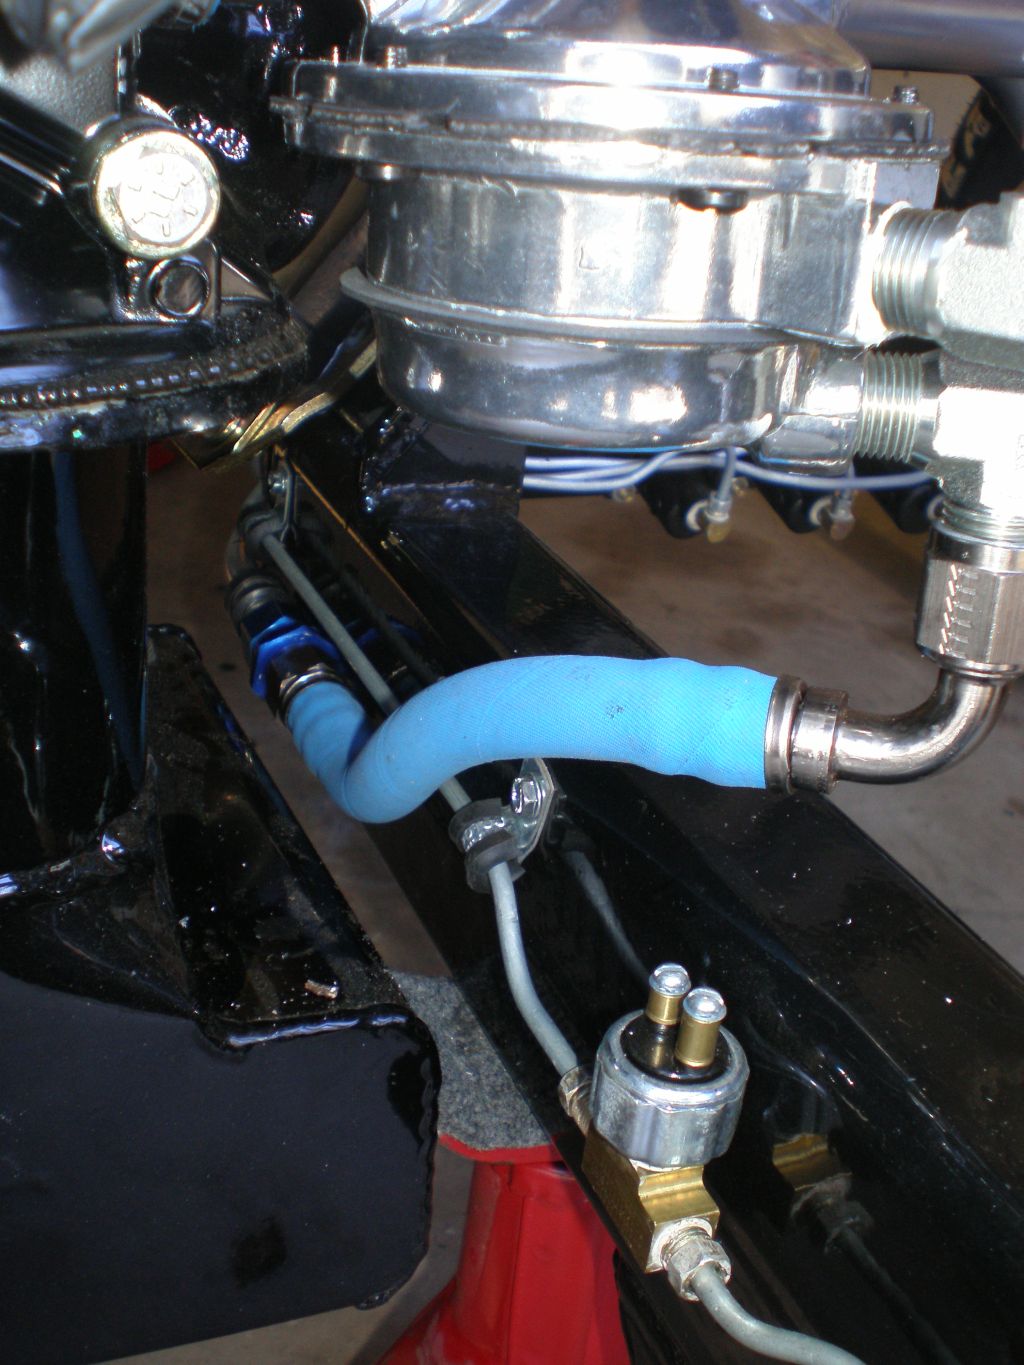
And, a couple of pix of the hoses installed on the fuel tank and fuel pump.

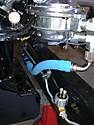
Makes a very neat installation. BTW, you can see in the last picture the brake light switch that is plumbed into the front brake line.
-- Russ
__________________
Russ
|
02-09-2012, 07:45 AM
|
|
CC Member
|
|
|
Join Date: Jun 2008
Location: Fair Grove,
MO
Cobra Make, Engine: Hurricane HM2006 FE & Toploader
Posts: 58
|
|
Not Ranked
That sure makes for a clean look. Did you use any filter between tank and fuel pump? I was panning on using the same, kind of rethinking going fuel injected with all the new self contained systems coming out, I know the socketless says good to 250psi but pressure side no clamp scares me some.
Mark
|
02-09-2012, 08:56 AM
|
|
CC Member
|
|
|
Join Date: Mar 2011
Location: Helotes,
TX
Cobra Make, Engine: HM-2005, Keith Craft 408W TKO 600 IRS
Posts: 70
|
|
Not Ranked
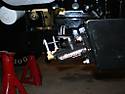
I used an inline fuel filter on the hard line that runs along the frame rail. You can get to it from underneath to change it out. You can see it in one of my pix from an earlier post that shows the clutch slave.
WRT the use of the socketless hose, a bunch of my hot rod buddies use it and swear by it. Easier assembly than the stainless braided hose, especially to cut to length. Not as bulky of fittings too. We have a huge automotive group here at work that runs engines on test stands 24 hrs a day. They use it too although some of those guys are hot rod buddies as well.
-- Russ
__________________
Russ
|
03-01-2012, 05:39 AM
|
|
CC Member
|
|
|
Join Date: Jun 2008
Location: Fair Grove,
MO
Cobra Make, Engine: Hurricane HM2006 FE & Toploader
Posts: 58
|
|
Not Ranked
Hey Russ how's your build coming? Getting my frame blasted today so we can paint this weekend, then start puting parts on. I want to keep up on yours so I reduce my chance of making costly mistakes.
Mark
|
06-10-2012, 04:42 PM
|
|
CC Member
|
|
|
Join Date: Oct 2000
Location: Midlothian,
TX
Cobra Make, Engine: Hurricane 427 Cobra #HM2008, Craft Performance 427w 600hp/600tq, TKO-600 close ratio, original Smiths gauges, lucas switches
Posts: 1,022
|
|
Not Ranked
Russ this build thread is overdue for an update  : 3DSMILE:
__________________
Bob Worley
Hurricane HM-2008 build is done!! (for now....)
Craft Perfomance 427W / 600hp / 600tq - TKO600
I love it and I need it I bleed it ~ Yeah it's a wild hurricane ~ Alright, hold tight, I'm a highway star!!
|
06-10-2012, 05:44 PM
|
 |
CC Member
|
|
|
Join Date: Jul 2004
Cobra Make, Engine: 347 Stroker Morrison Injection. Registered.
Posts: 1,440
|
|
Not Ranked
Double-rr, I love the master cylinders and reservoirs you used. I wish I had seen that setup before I went ahead with my setup. 
Great thread, please keep the pictures coming!
Regards.
__________________
Mando
|
06-11-2012, 06:19 AM
|
|
CC Member
|
|
|
Join Date: Mar 2011
Location: Helotes,
TX
Cobra Make, Engine: HM-2005, Keith Craft 408W TKO 600 IRS
Posts: 70
|
|
Not Ranked
Sorry guys, I've had way too many distractions that have held up progress. Just got done doing a front/rear alignment. Took alot of up front thought on how to get it done. Had to dig deep in my past engineering experience to make the trig calculations for what happens to the camber and/or toe in when you adjust the heim joints front and rear. Caster was pretty easy. I'll upload some pix and show how I did it. I think Paul Proefrock did a similar self alignment on his. My PhD boss that had the original Cobra plus the work that Paul did convinced me that you can do an alignment that would be pretty accurate. A really good front end alignment tech might be able to get it dialed in a little more accrurate with a good alignment machine. The method I used showed I had everything to spec with the camber on one rear wheel out 0.1*. Everything else was spot on after multiple rechecks.
It's good to be making progress again. I think the next step is to temporarily install the radiator and fire off the engine. Can't wait to hear the music. Got a 81 year old neighbor that has been "helping" me since day one. He provides lots of supervision and has been chomping at the bit to hear it run.
BTW, the master cylinders came with the car from Hurricane. Using the Girling cans for reservoirs. Not absolutely sure about the plastic caps that connect the flex tubing from the reservoirs but they will probably work OK.
-- Russ
__________________
Russ
|
06-11-2012, 07:32 AM
|
|
CC Member
|
|
|
Join Date: Jul 2008
Location: Driftwood,
TX
Cobra Make, Engine: Contemporary Cobra, 427 side oiler
Posts: 1,850
|
|
Not Ranked
Quote:
Originally Posted by double-rr

Sorry guys, I've had way too many distractions that have held up progress. Just got done doing a front/rear alignment. Took alot of up front thought on how to get it done. Had to dig deep in my past engineering experience to make the trig calculations for what happens to the camber and/or toe in when you adjust the heim joints front and rear. Caster was pretty easy. -- Russ
|
Russ, do you have the body on and all the sprung weight in place? If not, then your alignment will change. You also need to look into setting the corner weights on your car and getting your ride height established using the coil-overs. You really won't be able to get it properly aligned until you have all that done.
Keep us posted.
Jim |
06-11-2012, 08:13 AM
|
 |
Senior Club Cobra Member
|
|
|
Join Date: Feb 2004
Cobra Make, Engine:
Posts: 1,226
|
|
Not Ranked
Quote:
Originally Posted by elmariachi
Russ, do you have the body on and all the sprung weight in place? If not, then your alignment will change. You also need to look into setting the corner weights on your car and getting your ride height established using the coil-overs. You really won't be able to get it properly aligned until you have all that done.
Keep us posted.
Jim
|
As well as the above, I highly recommend that you put a few hundred miles on the car before the final alignment as your suspension will "settle in". |
06-11-2012, 01:38 PM
|
|
CC Member
|
|
|
Join Date: Mar 2011
Location: Helotes,
TX
Cobra Make, Engine: HM-2005, Keith Craft 408W TKO 600 IRS
Posts: 70
|
|
Not Ranked
Jim -- I agree. No the body is not on. I did make an attempt to set the ride heigth of the frame to be level. I wanted to get it somewhat aligned for the day when the first go-cart ride comes. Actually, I did put my 220 lbs on the very front and then the back to see what changes occurred to the camber and the caster. The front camber changed about 0.1* and the caster didn't change. The rear camber didn't change. Not bad. Once the body and other unsprung weight is on, I'll go thru the procedure again. What a PITA even with the body off. Major PITA when you have to do most from the bottom to get the heim joint bolts and spacers off.
JWD -- Also, I agree with putting a couple of hundred miles on it before setting the final alignment. This alignment should be close enough to get it on the road for the first time.
One thing I didn't do was check the 90* alignment of the front and rear axles to the frame for tracking. For example on the rear axle, there is a small amount of ajustment as you can adjust both heim joints either in or out when setting the toe in. I chose to move the rear heim out to increase toe in which moves the axle out a bit. You can move the front heim in to get the same effect which moves the axel in a bit. Or move one in and the other out. Once toe in was set then you do it again for camber only this time both hieims move the same amount. I haven't calculated what the amount of ajustment this makes to the center position of the axle when projected straight down but my suspition is it's pretty small (maybe 1/8" diameter).
-- Russ
__________________
Russ
|
 Posting Rules
|
You may not post new threads
You may not post replies
You may not post attachments
You may not edit your posts
HTML code is Off
|
|
|
All times are GMT -7. The time now is 02:52 PM.
Links monetized by VigLink
|


 Linear Mode


