 
 Main Menu
|
|
Nevada Classics
|
|
Advertise at CC
|
| S |
M |
T |
W |
T |
F |
S |
| |
|
|
1 |
2 |
3 |
4 |
| 5 |
6 |
7 |
8 |
9 |
10 |
11 |
| 12 |
13 |
14 |
15 |
16 |
17 |
18 |
| 19 |
20 |
21 |
22 |
23 |
24 |
25 |
| 26 |
27 |
28 |
29 |
30 |
|
|
|
|
CC Advertisers
|
|
 390Likes 390Likes

11-30-2016, 01:41 AM
|
 |
CC Member

|
|
|
Join Date: Aug 2009
Location: Adelaide,
SA
Cobra Make, Engine: AP 289FIA 'English' spec.
Posts: 13,152
|
|

 Neutral
 AP F289 Build log 'stage 2'
AP F289 build thread
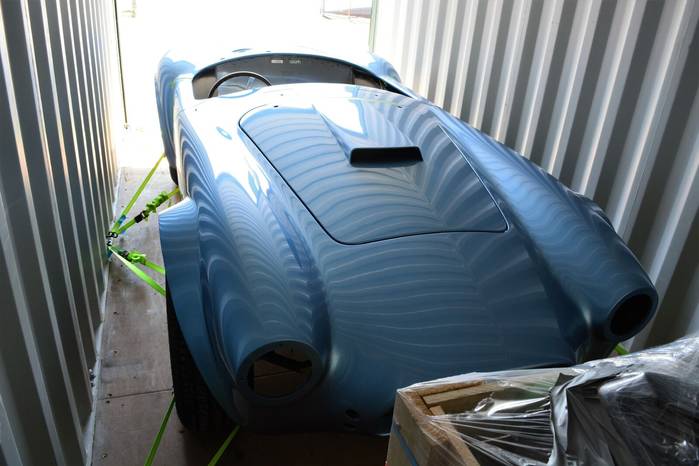
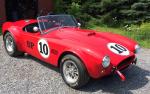
My car, AP F289, finally arrived a few weeks ago as a painted “rolling/steering” chassis/body.
It took two and a half years - there was significant development work involved in taking one of Bruce Chervenak’s very good FIA rear clips and a roadster front clip up to the standard where AP could use it to produce a quality splash mould for subsequent FIA replicas. Craig White’s guys have done an excellent job in producing a top quality FIA replica.
One of the cars that have given me ideas and inspiration for my build is COB6008.
It is one of the few original Cobras that left the AC factory with FIA rear flares and cut-back doors as part of their original build spec., and it may well be the only ‘cut-back doors’ car to also have RHD and drop-centre dash.
My car and its boxes of bits came by road and rail from Queensland to Adelaide. Anglia Containers did the job and get full marks from me.
Watching that container tilt close to 30 degrees before it overcame friction was unnerving….
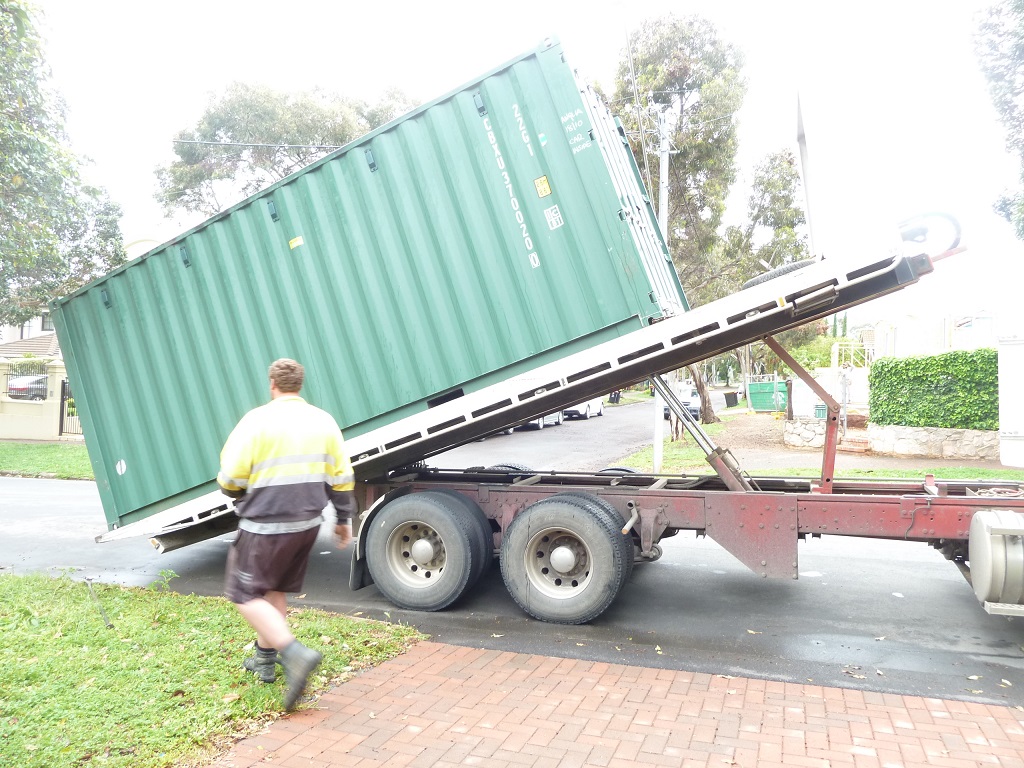
All good inside….
Now the fun bit starts.
Cheers,
Glen
Last edited by xb-60; 10-06-2023 at 10:43 PM..
Reason: Replacing Photobucket pictures
|
11-30-2016, 05:32 AM
|
 |
Senior Club Cobra Member
|
|
|
Join Date: Feb 2006
Location: Melbourne,
VIC
Cobra Make, Engine: RMC, carb 347 TopLoader and Jag running gear ~ so old school I time it with an hour-glass :D
Posts: 1,293
|
|
Not Ranked
Good luck Glen
We'll all be watching with interest
LoBelly  |
11-30-2016, 02:49 PM
|
 |
Senior Club Cobra Member
|
|
|
Join Date: Mar 2005
Location: Manchester,
NH
Cobra Make, Engine: AK1085 (302 Street), HTM111 (427 Comp), CSX2375R (289 Comp) and COB5999 (427 S/C)
Posts: 19,111
|
|
Not Ranked
More pics, whatta tease  |
11-30-2016, 10:19 PM
|
 |
Senior Club Cobra Member
|
|
|
Join Date: Dec 2007
Cobra Make, Engine: ERA FIA 'Street' Build
Posts: 2,129
|
|
Not Ranked
Glen,
Two and a half years, you are a patient man, but good things come to those who wait. Very well worth the wait indeed, as PACE has done a splendid job. I suspect you will be spending a lot of time in your garage, in the coming months. The wait is finally over, now it's your turn.  |
12-01-2016, 07:29 AM
|
 |
CC Member
|
|
|
Join Date: Apr 2005
Location: Tucson,
AZ
Cobra Make, Engine:
Posts: 5,391
|
|
Not Ranked
Very cool!
Larry
__________________
Alba gu bràth
|
12-05-2016, 03:25 AM
|
 |
CC Member
|
|
|
Join Date: Apr 2008
Location: Melbourne,
Vic
Cobra Make, Engine: Some polish thing... With some old engine
Posts: 2,286
|
|
Not Ranked
A week in.
You'd be about done right?
Cmon man I'm dying here... I'm looking forward to popping the champagne on this one.
I know how you've pined over every detail! |
12-06-2016, 03:20 AM
|
|
CC Member
|
|
|
Join Date: Aug 2009
Location: Adelaide,
SA
Cobra Make, Engine: AP 289FIA 'English' spec.
Posts: 13,152
|
|
Not Ranked
Quote:
Originally Posted by Dimis

....You'd be about done right? |
You've got to have the masses craving for more rather than flooding them with too much information. Translation.....umm...quality rather than quantity....how's that?
Cheers,
Glen |
12-12-2016, 05:50 AM
|
 |
CC Member
|
|
|
Join Date: Mar 2003
Location: McConnellsburg,
PA
Cobra Make, Engine: ERA FIA #2124
Posts: 687
|
|
Neutral
Congrats!
- Allen.
|
01-13-2017, 10:15 PM
|
|
CC Member
|
|
|
Join Date: Aug 2009
Location: Adelaide,
SA
Cobra Make, Engine: AP 289FIA 'English' spec.
Posts: 13,152
|
|
Not Ranked
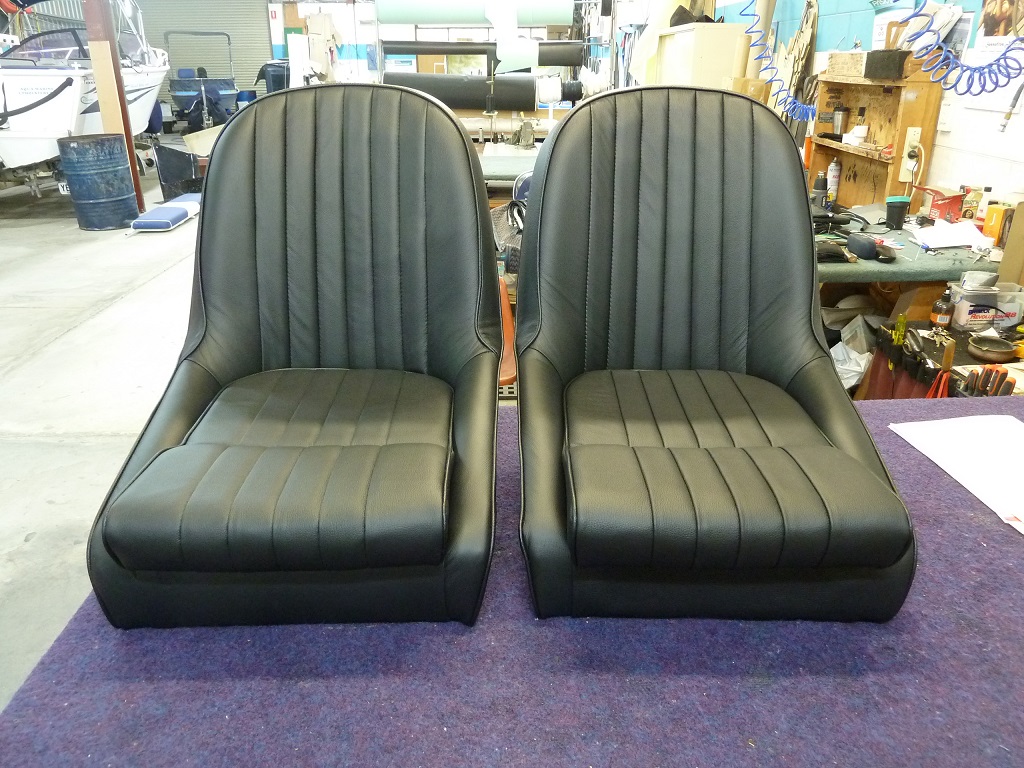
Seats are being upholstered. Here’s what they look like part way through….

Cheers,
Glen
Last edited by xb-60; 07-15-2017 at 10:28 PM..
Reason: Photobucket
|
01-14-2017, 05:45 AM
|
 |
CC Member
|
|
|
Join Date: Aug 2013
Location: Canandaigua,
NY
Cobra Make, Engine: SPF MKII Riverside Racer FIA
Posts: 2,504
|
|
Not Ranked
Glen,
Looking nice. It is nice to be able to start checking things off your to do list. Can't wait to hear more about your build and watch it's progress.
Jim
__________________

|
01-26-2017, 01:25 PM
|
|
CC Member
|
|
|
Join Date: Aug 2009
Location: Adelaide,
SA
Cobra Make, Engine: AP 289FIA 'English' spec.
Posts: 13,152
|
|
Neutral
Seats are finished. We have done a minor deviation from standard with the addition of a ‘pillow’ at the front of the seat. The rest is as close as we could get to pictures of original seats.
Cheers,
Glen
Last edited by xb-60; 07-15-2017 at 10:22 PM..
Reason: Photobucket
|
01-26-2017, 01:31 PM
|
|
CC Member
|
|
|
Join Date: Aug 2013
Location: Canandaigua,
NY
Cobra Make, Engine: SPF MKII Riverside Racer FIA
Posts: 2,504
|
|
Not Ranked
Glen,
The seats look nice and that pillow in the front will come in handy on long drives. Will make them more comfortable. Sometimes we must make exceptions, even originals had little changes along the way to meet owner needs.
Keep up the high quality work.
Jim
__________________
|
06-17-2017, 08:54 PM
|
|
CC Member
|
|
|
Join Date: Jun 2001
Location: munno para west,
sa
Cobra Make, Engine: absolute pace chassis #50 L98 & 6 speed auto
Posts: 1,141
|
|
Not Ranked
I had some grommets made by a fella in the states they come up really nice im happy to lend them to you to see if they fit your car ok ?
__________________
a cobra is a passion anything else is just a car
i dont care what the question is .. The answer is more power!!!
|
06-18-2017, 03:00 AM
|
|
CC Member
|
|
|
Join Date: Aug 2009
Location: Adelaide,
SA
Cobra Make, Engine: AP 289FIA 'English' spec.
Posts: 13,152
|
|
Not Ranked
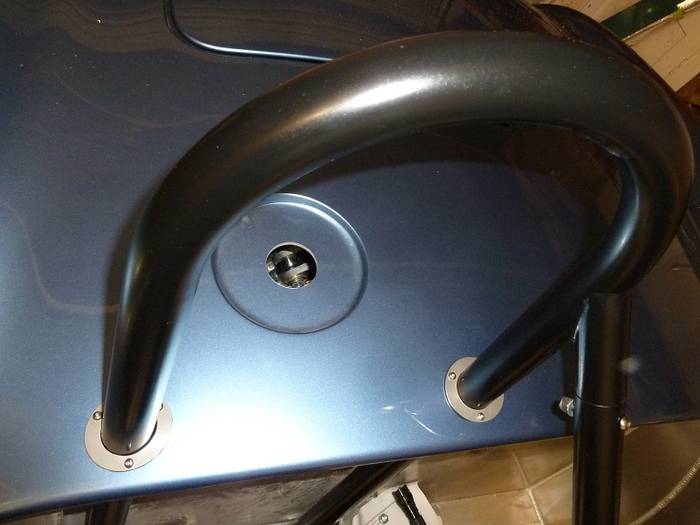
Thanks for the offer Dean, and Jim for the suggestions. I did actually find some grommets that I thought would work (they were designed to fit a 1/4" thick panel, and surprisingly, sourced here in Adelaide) but my main problem was that the holes in the bodywork were incorrectly positioned ....one was too far forward and the other was too far aft. Result was - no amount of available juggling would enable me to use the grommets without gaps showing. I hadn't wanted to use the supplied SS 'washers', but had to concede that their use was my only option. Even still, one washer-securing screw and nyloc out of three for each leg is hanging in the breeze (but you can't see it, and it doesn't matter). The end result is visually quite good - I'll take a pic of it tomorrow and post it here.
How is progress on your AP427? I hope my comment about 5-speed autos in another thread was taken in the manner it was offered 
Cheers,
Glen
Last edited by xb-60; 06-18-2017 at 03:26 AM..
|
06-18-2017, 03:11 AM
|
|
CC Member
|
|
|
Join Date: Aug 2009
Location: Adelaide,
SA
Cobra Make, Engine: AP 289FIA 'English' spec.
Posts: 13,152
|
|
Not Ranked
Paint quality
I was at the local shopping centre recently, and there was a Maserati Ghibli on display there. This was the first example I had actually seen in the metal, so I had a good look (what a great looking car!). One of the options listed for this particular car was something special about the paint, so I had a close look at that. I have to say that the amount of orange peel evident was surprising, and compared to the beautiful smooth and consistent finish on my FIA (that was done by a Gold Coast boatyard ), the Ghibli did not rate that well.
Got to say though....what a great looking car!
Cheers,
Glen |
06-20-2017, 04:19 PM
|
|
CC Member
|
|
|
Join Date: Aug 2009
Location: Adelaide,
SA
Cobra Make, Engine: AP 289FIA 'English' spec.
Posts: 13,152
|
|
Not Ranked
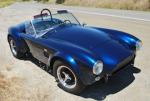
Finally got the roll bar install to the point where I am happy with it. I reckon it took 20 hours (  ) to get it right.
Every thing is all bolted down tight....and it's not coming out again.
Cheers,
Glen |
06-20-2017, 04:43 PM
|
|
CC Member
|
|
|
Join Date: Aug 2013
Location: Canandaigua,
NY
Cobra Make, Engine: SPF MKII Riverside Racer FIA
Posts: 2,504
|
|
Not Ranked
Well done!
__________________
|
12-21-2021, 11:12 AM
|
|
CC Member
|
|
|
Join Date: Oct 2021
Location: Woodland Hills,
Ca
Cobra Make, Engine: Aurora GRX
Posts: 104
|
|
Not Ranked
Quote:
Originally Posted by xb-60
Finally got the roll bar install to the point where I am happy with it. I reckon it took 20 hours ( ) to get it right.
Every thing is all bolted down tight....and it's not coming out again.
Cheers,
Glen |
Looks amazing!
Viking Blue is very close to Princess BLue is it not?
thx |
06-22-2017, 11:02 PM
|
|
Senior Club Cobra Member
|
|
|
Join Date: Dec 2007
Cobra Make, Engine: ERA FIA 'Street' Build
Posts: 2,129
|
|
Neutral
Nice work Glen, great attention to detail. What's next on the list? Are you waiting on any parts or do you have plenty to keep you busy?
|
06-25-2017, 07:05 PM
|
|
CC Member
|
|
|
Join Date: Aug 2009
Location: Adelaide,
SA
Cobra Make, Engine: AP 289FIA 'English' spec.
Posts: 13,152
|
|
Not Ranked
Thanks Tim. I have almost all required parts now, although there is still a short list of parts that are yet to be supplied by AP.
What's next? I need to fit the diff. and half shafts, then the fuel tank, and then I can start fitting the sheetmetal panels in the boot/trunk. Logically, after that, I should fit the panels under the hood and also start insulating.
Currently I'm doing what should be an easy one - modifying the alloy 'filter' panel so that it will fit in the hood scoop. It's supplied as a blank panel, so I will probably use the ERA FIA hole pattern rather than the larger holes that LP's CSX2259 uses.
Cheers,
Glen
Last edited by xb-60; 06-25-2017 at 07:09 PM..
|
 Posting Rules
|
You may not post new threads
You may not post replies
You may not post attachments
You may not edit your posts
HTML code is Off
|
|
|
All times are GMT -7. The time now is 06:45 AM.
Links monetized by VigLink
|


 Hybrid Mode

