Welcome to Club Cobra! The World's largest
non biased Shelby Cobra related site!
- » Representation from nearly all
Cobra/Daytona/GT40 manufacturers
- » Help from all over the world for your
questions
- » Build logs for you and all members
- » Blogs
- » Image Gallery
- » Many thousands of members and nearly 1
million posts!
YES! I want to register an account for free right now!
p.s.: For registered members this ad will NOT show
 
 Main Menu
|
|
Nevada Classics
|
|
Advertise at CC
|
|
December 2025
|
| S |
M |
T |
W |
T |
F |
S |
| |
1 |
2 |
3 |
4 |
5 |
6 |
| 7 |
8 |
9 |
10 |
11 |
12 |
13 |
| 14 |
15 |
16 |
17 |
18 |
19 |
20 |
| 21 |
22 |
23 |
24 |
25 |
26 |
27 |
| 28 |
29 |
30 |
31 |
|
|
|
|
|
CC Advertisers
|
|
 2Likes 2Likes

06-30-2007, 02:32 PM
|
 |
CC Member

|
|
|
Join Date: Mar 2001
Location: Provo,
Ut
Cobra Make, Engine: Kirkham, 427
Posts: 6,990
|
|

 Not Ranked
Left side wiring going forward.
Engine compartment side:
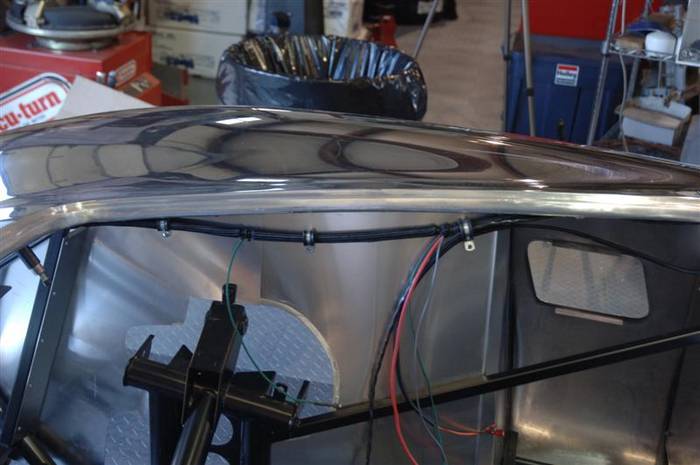
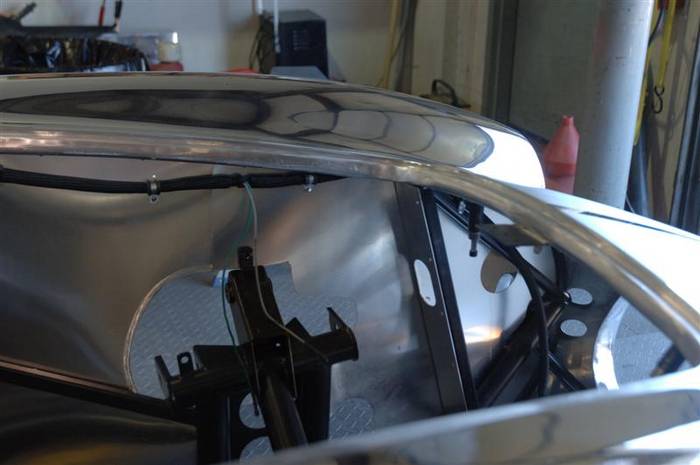
Cockpit view left side. You can see we have already run the wiper tube, but I can't type as fast as they are installing the parts! We will get the the wiper system shortly.
Last edited by David Kirkham; 06-30-2007 at 05:07 PM..
|
06-30-2007, 02:37 PM
|
|
CC Member
|
|
|
Join Date: Mar 2001
Location: Provo,
Ut
Cobra Make, Engine: Kirkham, 427
Posts: 6,990
|
|
Not Ranked
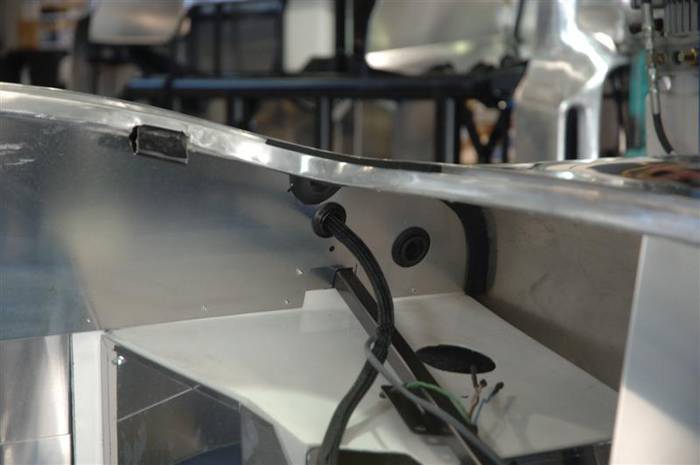
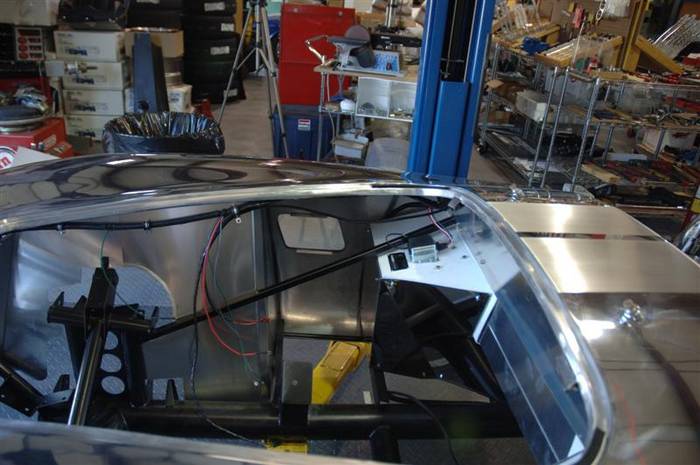
Right side wiring.
Engine compartment view, right side:
Cockpit view. At this time, if you are running a MSD (we recommend the Digital 6 Plus) then you will need to run the coil leads and the distributor lead out along with the rest of the wires.
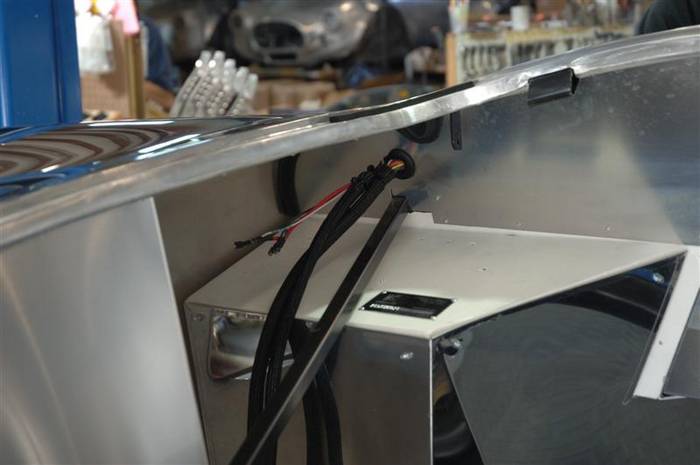
Now let's get the fuse box, power outlet, and main bus fuse (very important) bolted up to the under side of the right foot box.
Now you can bolt in your MSD box.

Last edited by David Kirkham; 07-03-2007 at 09:07 AM..
|
06-30-2007, 03:27 PM
|
|
CC Member
|
|
|
Join Date: Mar 2001
Location: Provo,
Ut
Cobra Make, Engine: Kirkham, 427
Posts: 6,990
|
|
Not Ranked

Now that we are on the MSD (and if you don't want to be stuck on the side of the road with burned out points (and Corvette guys laughing at you), you SHOULD have an MSD), we should take a few moments to show you how to hook it up so you don't turn the key and wonder why your motor isn't running (or why your tach isn't working) while your friends start laughing at you.
Now for the question that has been asked us at least a million times. How do I hook up my MSD box?
To begin with, you will need to cut the blue and pink wires that come out of the box by the distributor lead. The distributor lead has the plastic fitting on the end (you can see it in the picture). You will also need to snip the green wire in half. (It comes as a loop from MSD). We heat shrink all those wires together to the distributor lead so they can't short out on something.

Coil wire hook up on MSD is as follows. This works if you are using a MSD distributor.
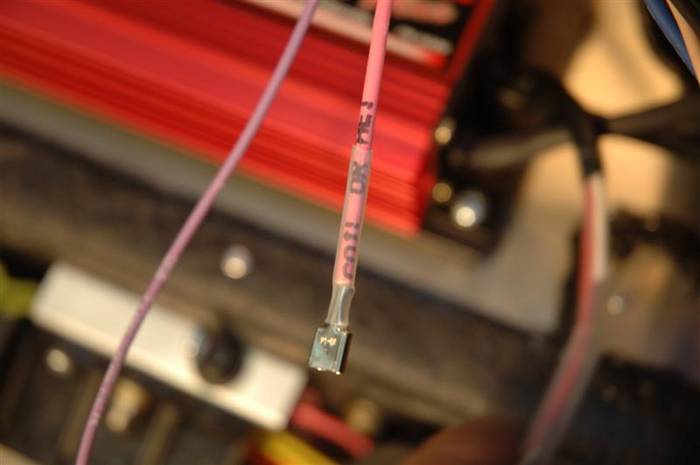
Find the pink and white wires that come out of the middle of the MSD box--they are covered in a plastic sheath. Cut them off to about 6 inches long and remove the plastic sheathing so you can see the wires and work with them. Cut the white wire off to about 3 inches long. Put a male 1/4 spade connector on the end of the pink wire (which is hopefully still 6 inches long). Make sure you heat shrink the junction between the spade and the wire to give it strength so it will not fatigue out over time.
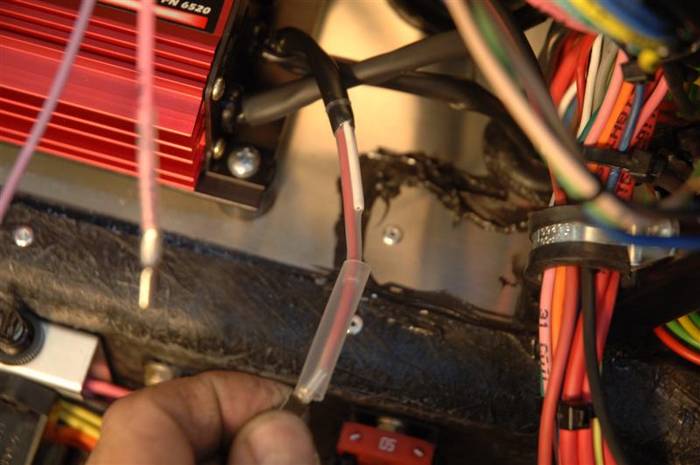
Take the pink wire labeled "Coil" from the wiring harness and...
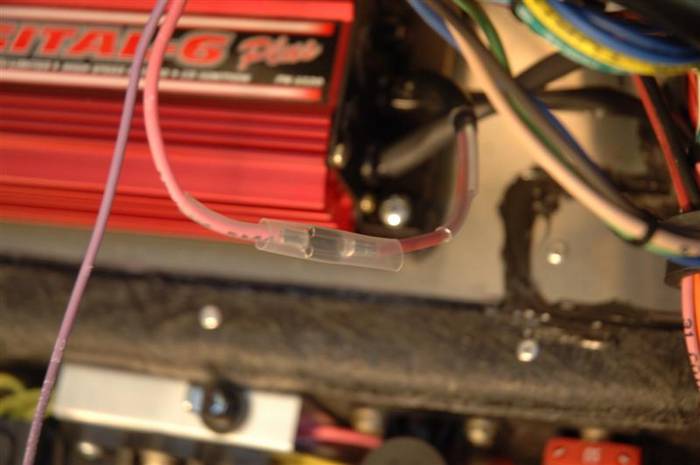
Then, connect it to the pink wire from the MSD box you just put the 1/4 male spade on (complete with the recommended heat shrink on the wire to connector joint). Notice how we put an additional heat shrink over the entire joint to make sure it can't come apart or short out somewhere. (We have not yet "shrunk" the heat shrink tubing in the bottom picture.) Almost ALL electrical failures are failures of connections--not failures of the part that is "not working."
Last edited by David Kirkham; 07-02-2007 at 08:22 AM..
|
06-30-2007, 03:31 PM
|
|
CC Member
|
|
|
Join Date: Mar 2001
Location: Provo,
Ut
Cobra Make, Engine: Kirkham, 427
Posts: 6,990
|
|
Not Ranked
See the purple wire in the above picture? (Right next to the pink wire we just plugged in).
Here is it...that wire is labeled tachometer--albeit upside down.
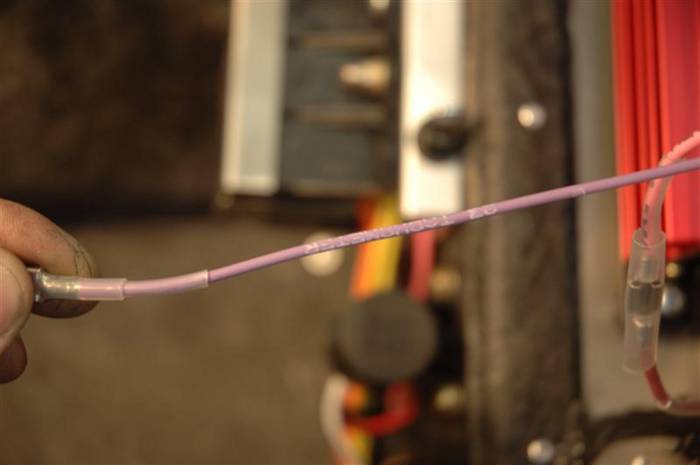
That wire plugs in right here on the MSD box.

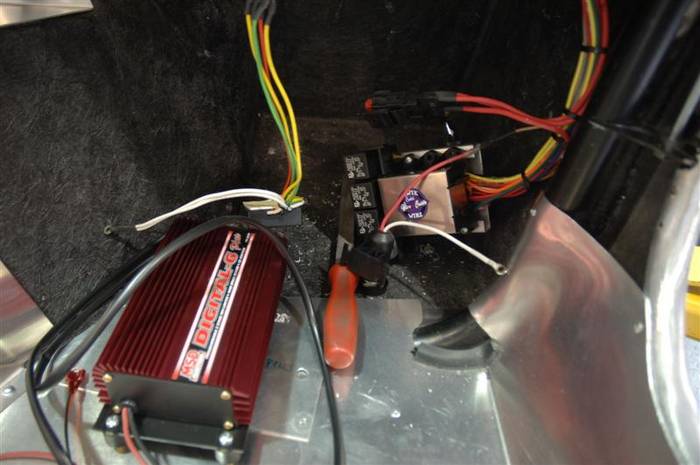
There is a BIG red wire that comes off of the other side of the MSD box. We are holding on to the wire in the picture. The wire comes from the opposite side of the MSD box from where we just plugged in the tach. This wire is hooked up to switched power. We conveniently have switched power right here at the main bus fuse. Hook it up.

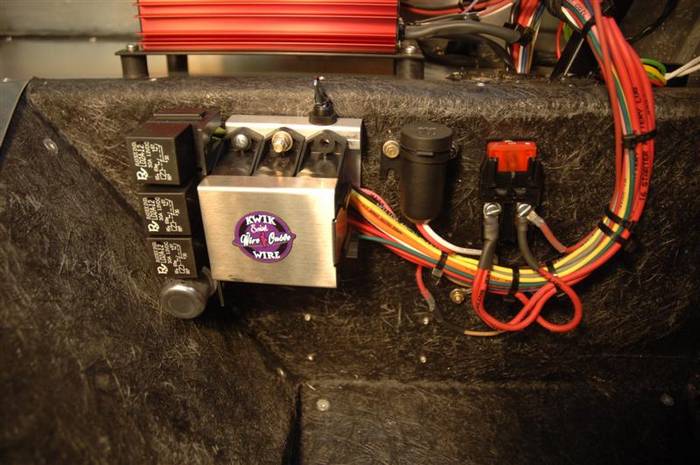
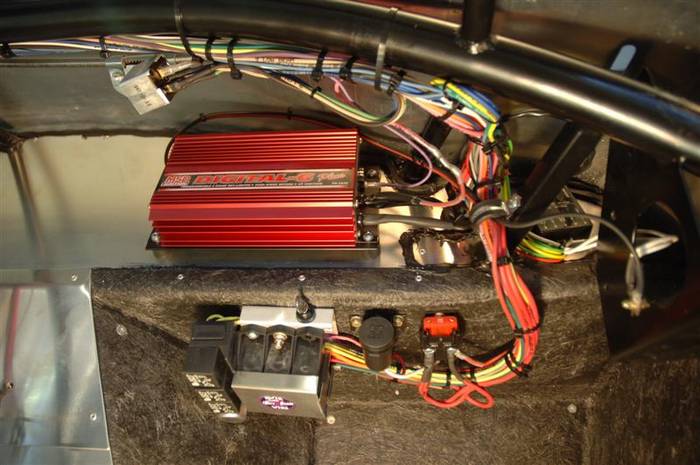
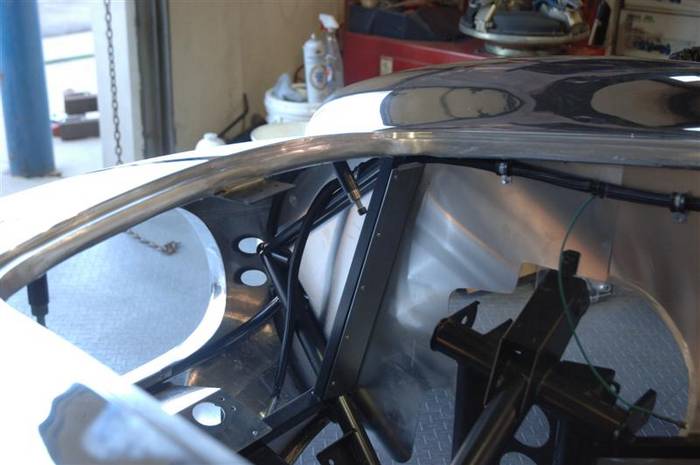
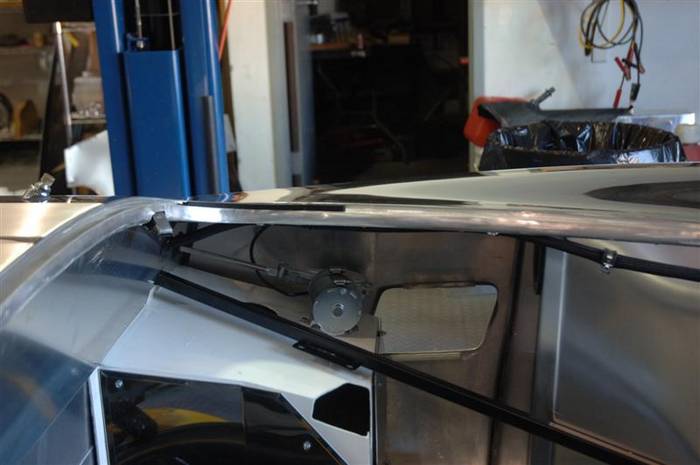
Finally, you need to hook up your MSD ground. We do that by drilling a hole in the windshield bracket (right side) and bolting the wire to the bracket. Be sure to grind the powder coating off of the bracket so you get a good ground. (This is not necessary for those who have stainless chassis cars.) In the picture, we also bolted the stop/turn signal flasher relay (2 white wires) to the same grounding spot. You can see the relay in the upper right hand portion of the picture.

Here is a picture of everything hooked up and bolted down. Notice the power outlet we provide for you in the car. Very handy for cell phone chargers or anything else you may need power for.
Last edited by David Kirkham; 07-03-2007 at 09:16 AM..
|
06-30-2007, 05:44 PM
|
|
CC Member
|
|
|
Join Date: Mar 2001
Location: Provo,
Ut
Cobra Make, Engine: Kirkham, 427
Posts: 6,990
|
|
Not Ranked
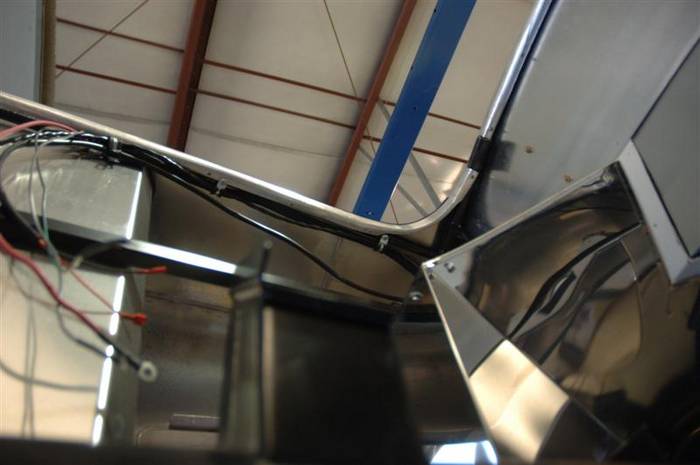
The wiring now runs down the sides of the engine compartment. We use adell clamps to hold the wiring in place. We rivet the adell clamps in place.
Here we have just run the right side wiring down the edge of the engine compartment.
Here is the middle of the engine compartment.
Here is the front of the engine compartment.
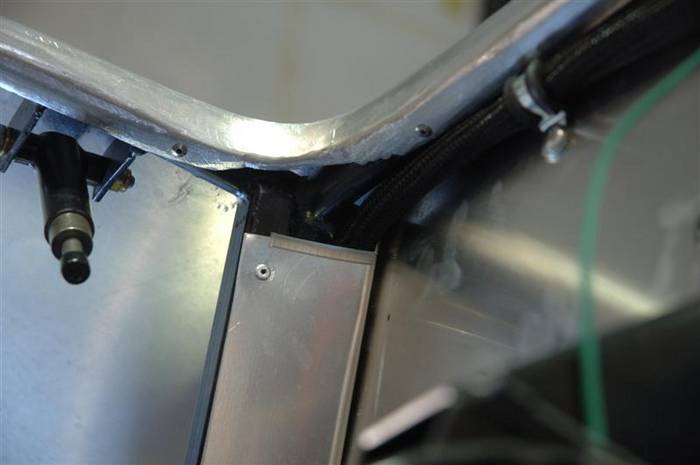
Then we passed the wiring over the aluminum panel at the front edge of the engine compartment. Notice we put a piece of plastic over the sharp edge of the aluminum panel to prevent chaffing of the wiring over time as you DRIVE your car with a BIG smile. Chaffing = electrical shorts = you are caught with your shorts down by electrical gremlins = your friends laughing at you again. So to keep yourself smiling (and driving), we recommend protecting your wiring harness at every corner.
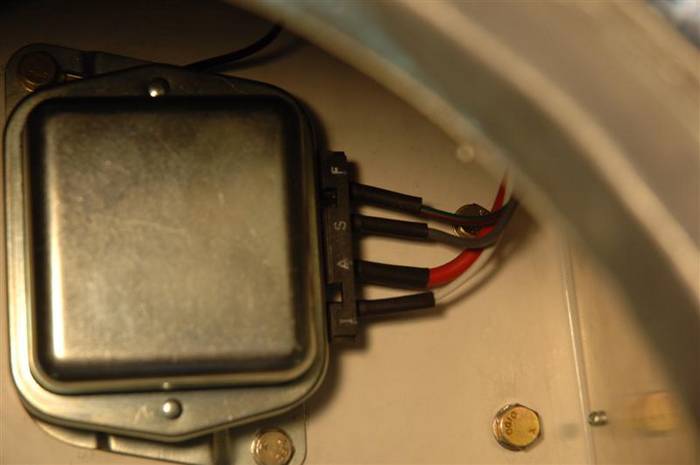
Now you can hook up your voltage regulator! Unless you have right-angled fingers, it is MUCH easier to connect the voltage regulator BEFORE you bolt it down.
I took a little white paint and tried to bring out the letters on the regulator. They read (bottom up)
I= white wire (from ignition)
A= big red wire (from alternator)
S = grey wire (goes to stator on alternator)
F = green wire with brown stripe (goes to field on alternator) I always remember this because "Fields are Green."
Now you can bolt down your voltage regulator.
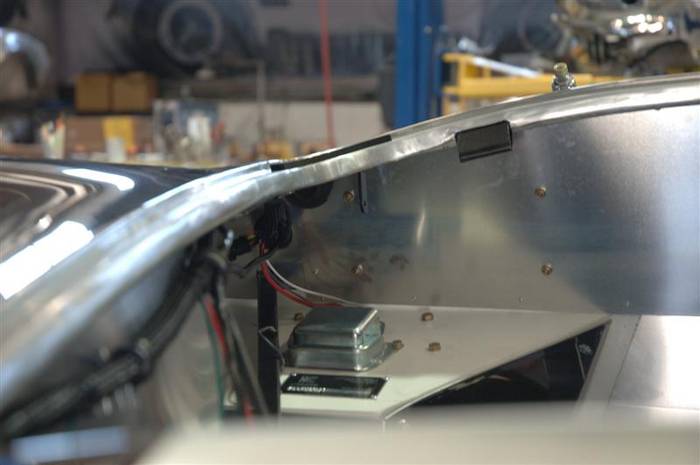
This is how we rivet the wiring harness in place just as it leaves the firewall. You are looking up from the bottom of the car through the engine compartment.
Last edited by David Kirkham; 07-03-2007 at 09:18 AM..
|
06-30-2007, 06:23 PM
|
|
CC Member
|
|
|
Join Date: Mar 2001
Location: Provo,
Ut
Cobra Make, Engine: Kirkham, 427
Posts: 6,990
|
|
Not Ranked
Last edited by David Kirkham; 06-30-2007 at 06:26 PM..
|
06-30-2007, 06:29 PM
|
|
CC Member
|
|
|
Join Date: Mar 2001
Location: Provo,
Ut
Cobra Make, Engine: Kirkham, 427
Posts: 6,990
|
|
Not Ranked
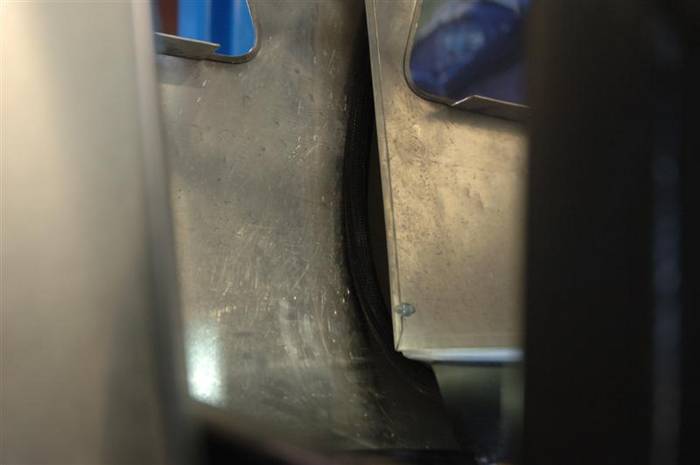
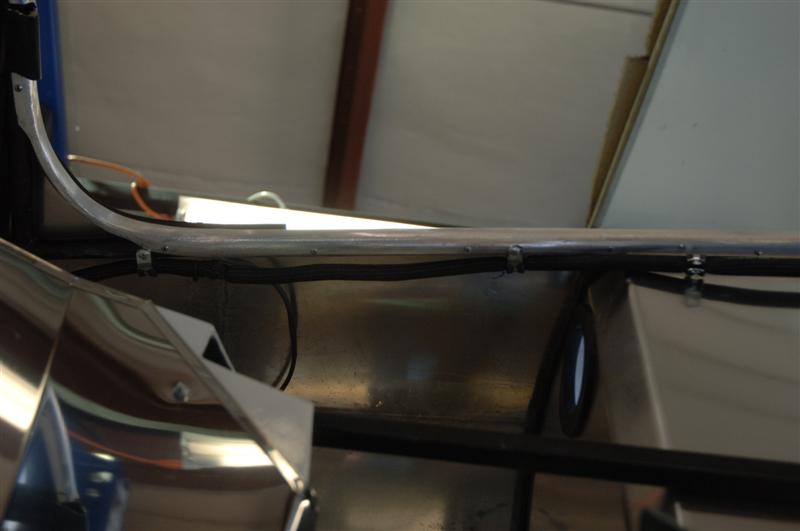
Back to the right side of the car.
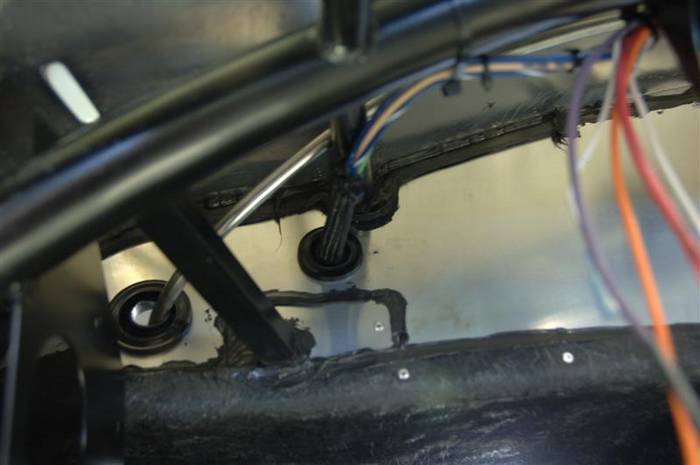
The REAR wiring harness makes a sharp turn as it exits the firewall and runs down on the outside of the foot box to a cross lower cross member.

Last edited by David Kirkham; 07-02-2007 at 10:11 AM..
|
 Posting Rules
|
You may not post new threads
You may not post replies
You may not post attachments
You may not edit your posts
HTML code is Off
|
|
|
All times are GMT -7. The time now is 10:27 PM.
|
|


 Hybrid Mode

