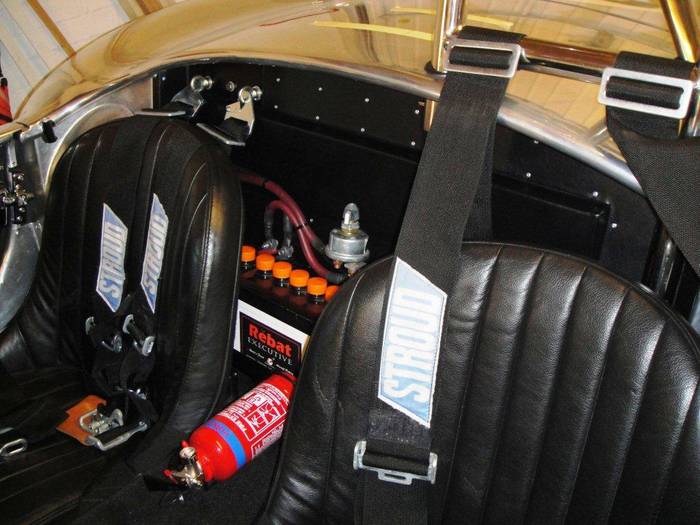
I really wanted the look of twin Rebat G-35 batteries located behind the passenger seat as found in the 427 S/C cars. But I didnt want real batteries located there for the various obvious reasons. So, I began a search of what I could find out about reproducing excellent faux period correct looking G-35s. I was inspired by what a few folks on the various Cobra forums had done, put that info together, and added some of my own. Heres how I did it and what I ended up with for my build. Hope you enjoy the story.
Obtaining the dead G-35 Batteries:
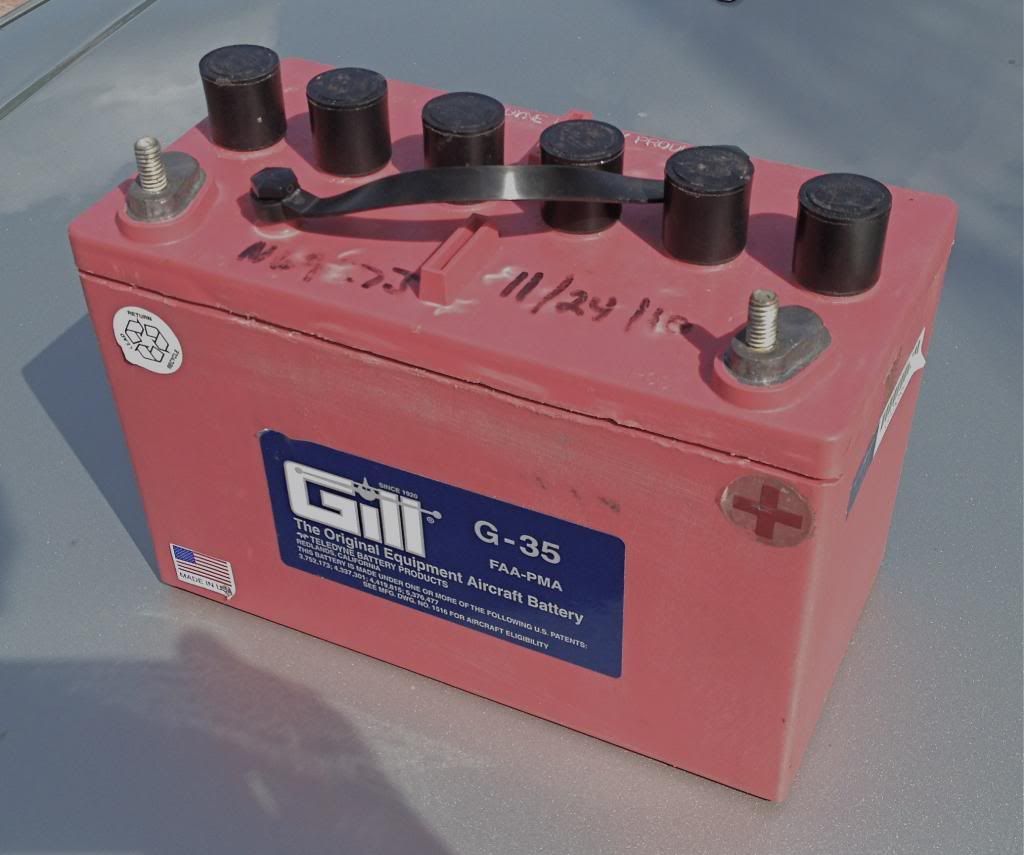
The G-35s are currently manufactured by the Gill Battery, a Division of Teledyne, for use in light aircraft. As batteries last only so long, and light aircraft maintenance is a serious matter, used batteries can be had relatively easy at local private airports all over the US (and I presume the world). The batteries are worth a few bucks each in scrap value. I obtained two dead G-35s in this manner and offered to pay a reasonable scrap price. In the end, the aircraft mechanic who helped me out asked for a case of beer in exchange for two dead batteries. No problem! When you obtain the dead ones, try to make sure that you get the original wing nuts that are unique and period correct. The washers and split washers are nothing special and could be sourced at any hardware store if they dont come along for the ride. Heres what a started with:
Gutting the Battery:
The opening and gutting of a battery is a matter requiring some planning and caution. In all honesty, the process was much easier than I had thought, and fundamental and obvious precautions should keep you safe. WEAR SAFETY GLASSSES. REPEAT - WEAR SAFETY GLASSES. On the first battery I poured the acid out into a plastic bucket with water that had a LARGE amount of regular household baking soda (sodium bicarbonate) already added to it. Bicarb is cheap and an excellent natural buffer. The reaction of bicarb and sulfuric (battery) acid results in the production of CO2 gas, which bubbles off harmlessly, and plain salt water (dissolved NaCl). For the second battery I got smarter and I poured the dry bicarb powder into the six separate cells of the battery through the battery cap openings. By the way, dead batteries taken out of service are not necessarily really dead (where voltage = 0). For my two batteries, one had a charge of 7 volts and the other about 4. I connected the two terminals together by laying a metal file across them. They slowly drained down and I felt good about proceeding when the voltage was below 2. I guess that I could have hooked up an automotive light bulb to each and the process of draining them might have gone faster. When the CO2 bubbles no longer continue to form, the acid is neutralized and the major danger is over.
Cutting the battery open is a bit of a painstaking job, but not difficult. There is a 1/8 groove about ½ down from the top of the G-35 battery. This is the point near where the top is sealed to the case (bottom part with cells) during manufacture. With the battery resting on its side, I used a sharp utility knife to slice through the wall along the groove. I learned that it is best to angle the blade tip toward the top of the battery. This will make sense later. I turned the battery going along all four sides. Unfortunately, the top will NOT just simply pop off. There are partitions that represent the cell separators that go from the top to the bottom of the battery. The razor blade is way too short to cut all the way through from side to side. So, when you have gone around the entire circumference of the battery to the depth of the blade (about ¾ inch), its time to use more force! With the battery laying on its side, I slipped a flat screwdriver into the groove at the point of each of the five internal cell separator walls. Then you must pry down (end of screwdriver blade angled to the top of the battery) to break the rib at the attachment point to the underside of the battery top. Be VERY careful to not deform the plastic along groove with the blade of the screwdriver. If you pry too hard you will mess up the cut edges. If you break through the top with the tip of the screwdriver, or deform it badly, you will have a tricky repair job on your hands. If all is going well, you will hear a distinct pop as each plastic rib breaks loose from the top. When one side is done, flip the battery over and do the other side. There are a total of 10 rib connections to break in all. The two battery terminals also need to be cut from the underside. This can happen in one of two ways. If the battery lead is badly corroded, the whole terminal rod will simply break loose from the battery plates below. Success. If it doesnt go easy, you will need to take a hacksaw blade and cut the terminal post on the undersurface of the top. With the ribs broken and the battery top loose, you can pull up and see the battery terminal posts from underneath in the event that the hacksaw procedure is required.
Once the top is free, you can use a pair of needle-nose pliers to pull each of the 6 lead plate units out of the 6 cells. The good news is that the lead is recyclable and should be recycled in an appropriate manner by taking to a local scrap buyer. I made $11 selling the lead!! Woo-Who!! Paid for half of the beer so the two batteries actually cost me about $12 total!! The last process was really the worst of all taking out the partitions between the cells. I debated just leaving them in there but the top edges looked so raggedy and I wanted to use the cases as storage for small tools, emergency repair parts, etc. so I decided to cut them out. It took about 45 minutes per battery and I lost a unit of blood from my knuckles. Theres no good way to cut them out. And you cant be too aggressive or you can bruise the inside of the case to the point where you can see it on the outside. I used a razorblade knife, pliers, hacksaw blade, and enough foul language to keep your neighbors away for the rest of your life. All is all it worked fine but came at a high cost. The case was now an empty pink box.
The battery caps:
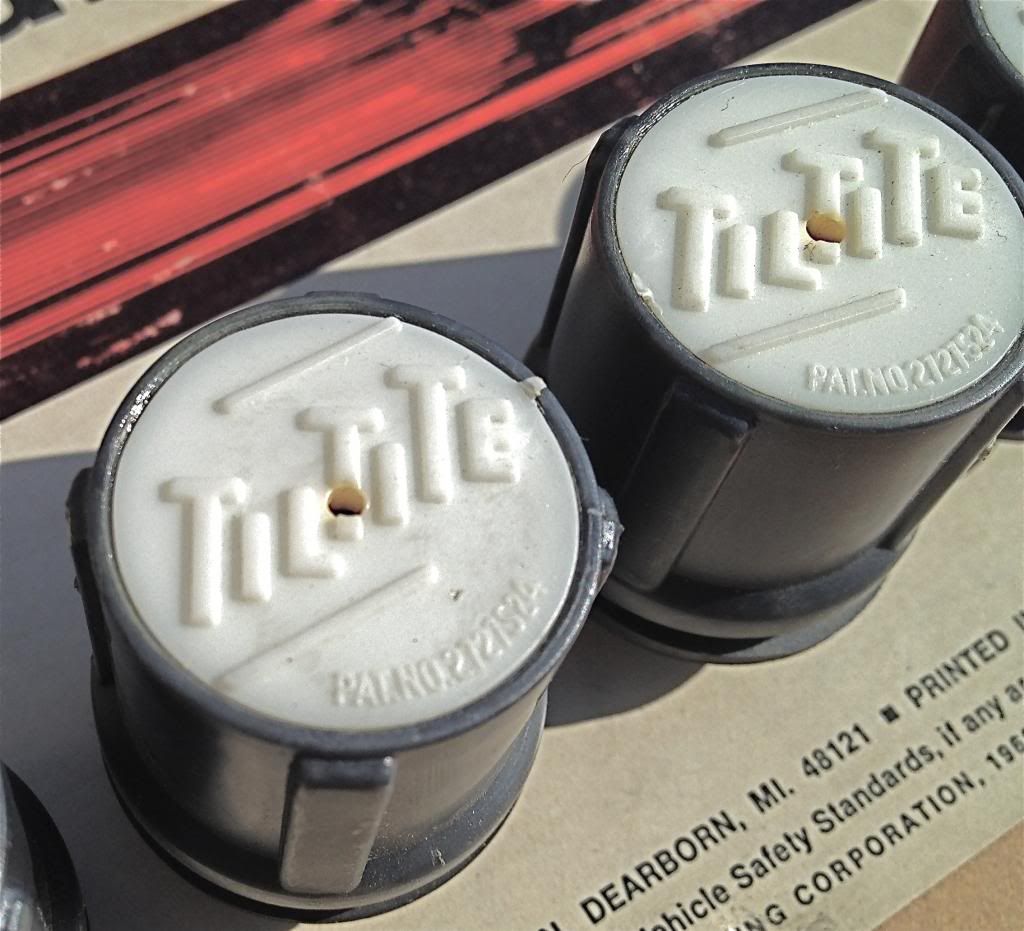
The battery caps that come with the modern G-35s just dont look right to me and they are labeled Gill - Teledyne Battery Products on the tops. Since I was going with the black battery tops on the white cases (see more on original color schemes below), I thought that the vintage Autolite/Motorcraft Tiltite battery caps were perfect because they are black with white inset tops, are labeled Tiltite, and look very period. Perfect.
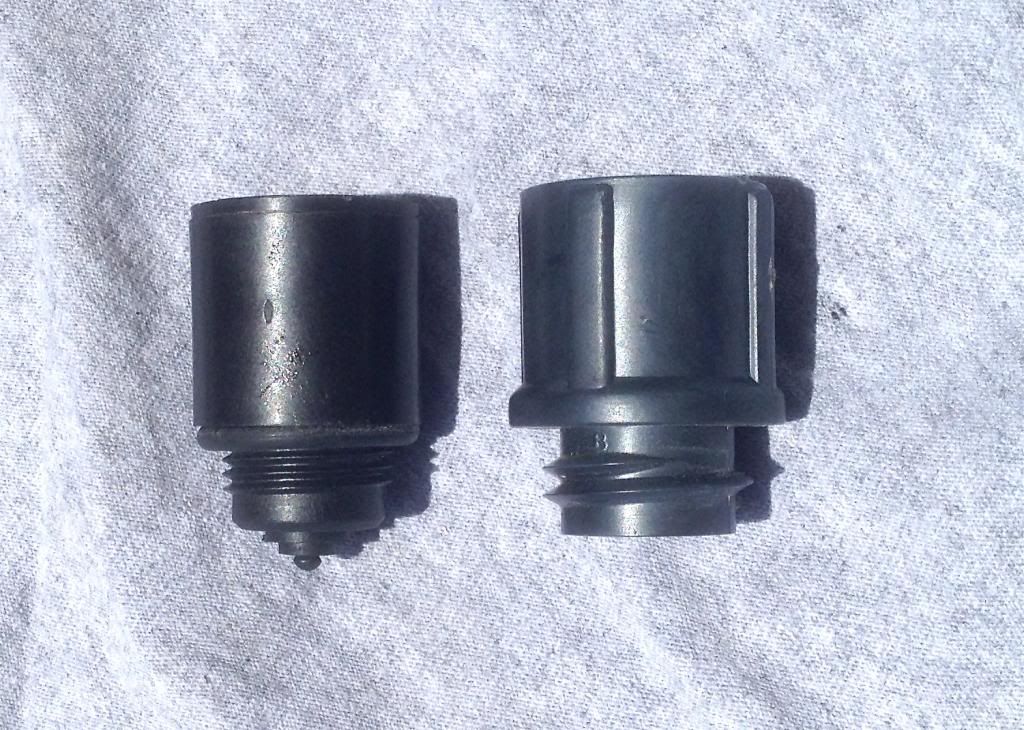
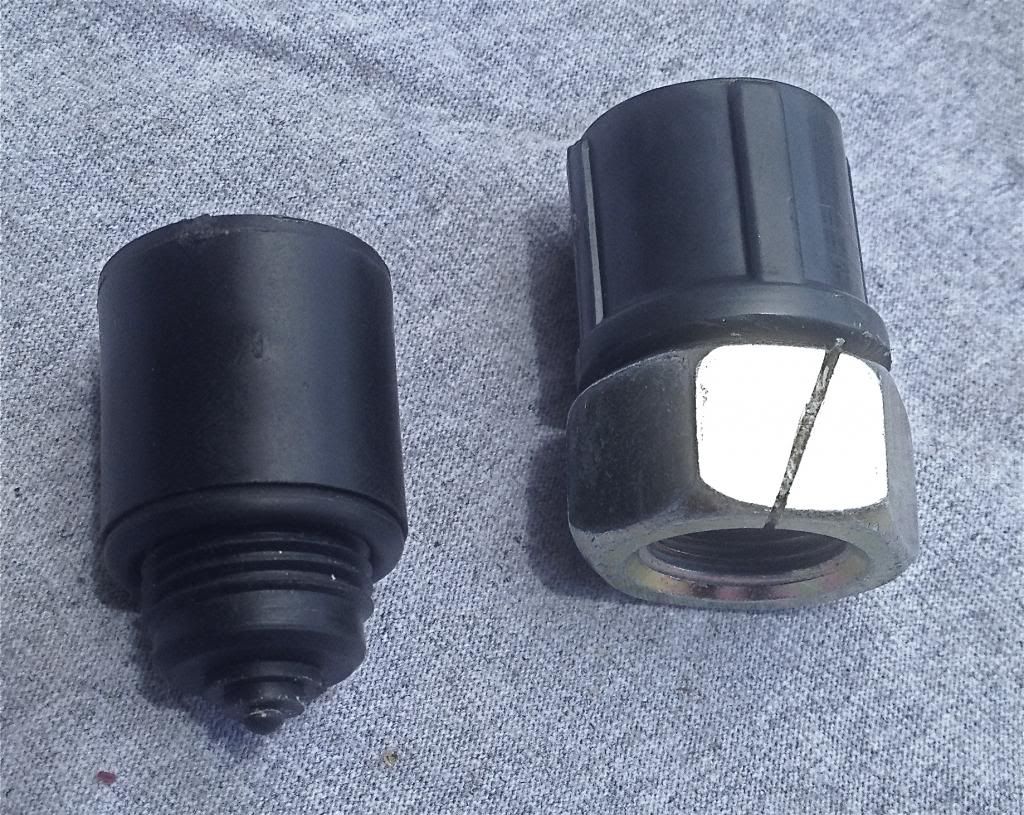
Well, not exactly perfect, as the threads of these are VASTLY different from the threads of the modern G35s. You can see the Rebat cap on the left and the unmolested Tiltite on the right big difference.
This does raise the question as to whether the vintage Rebats had a different thread size? Well, I serious doubt that someone would look at the car and the batteries and say that those caps were never intended to be used with that battery case, so I just went ahead and formulated a plan to rethread the Tiltites. It was easy to get the thread size from the G-35 battery caps using a thread sizing tool. I was going to order a thread cutting die the right size but then it dawned on me that I might be able to do the same thing with the right sized nut. A trip to Ace Hardware gave me what I needed. I remembered an old spark plug thread-chasing trick where you take a used spark plug and cut a slot through the threaded portion of the plug to use as a thread chaser, especially if you have aluminum heads. So I did this, sort of in reverse by cutting an angled slot through one flat of the nut. This then became the thread cutter (=die). But I still needed to get the diameter of the Tiltite battery caps down to the right size before beginning the thread cutting process. This was easily done by using a flat file and with a little trial and error I found out that removing just the threads down to the base diameter of the battery cap provided the correct starting diameter for the thread cutting process. I used a doubled-up shop rag to protect the battery cap top while I clamped the battery cap in the bench vise.
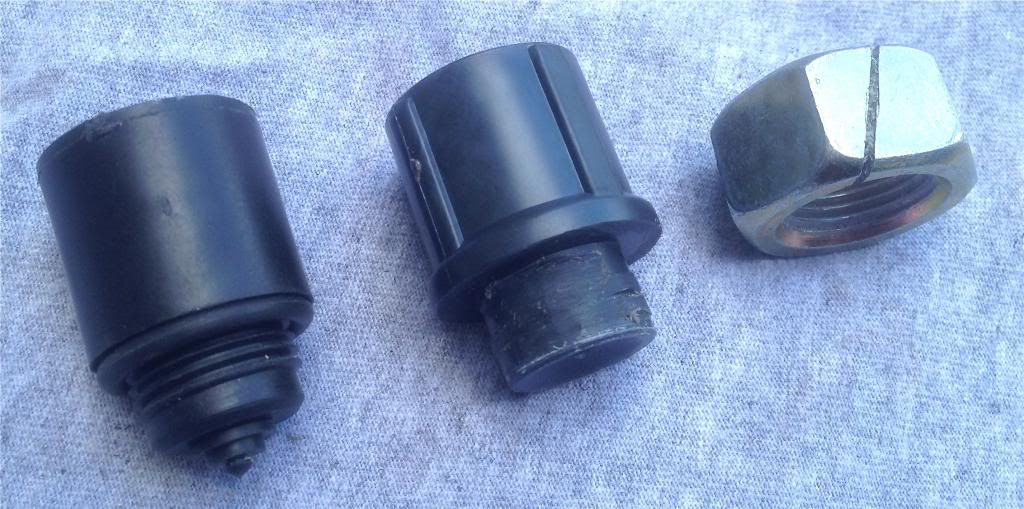
Then I used the improvised thread cutting tool to cut the threads. It worked pretty much like cutting threads under normal circumstances. Start it square, turn one or two turns and back it off, clear out the chips, repeat. It took about 5 minutes a cap to cut the threads.
You can see in the picture that this method doesnt cut threads all the way down (up?) to the base of the cap shoulder.
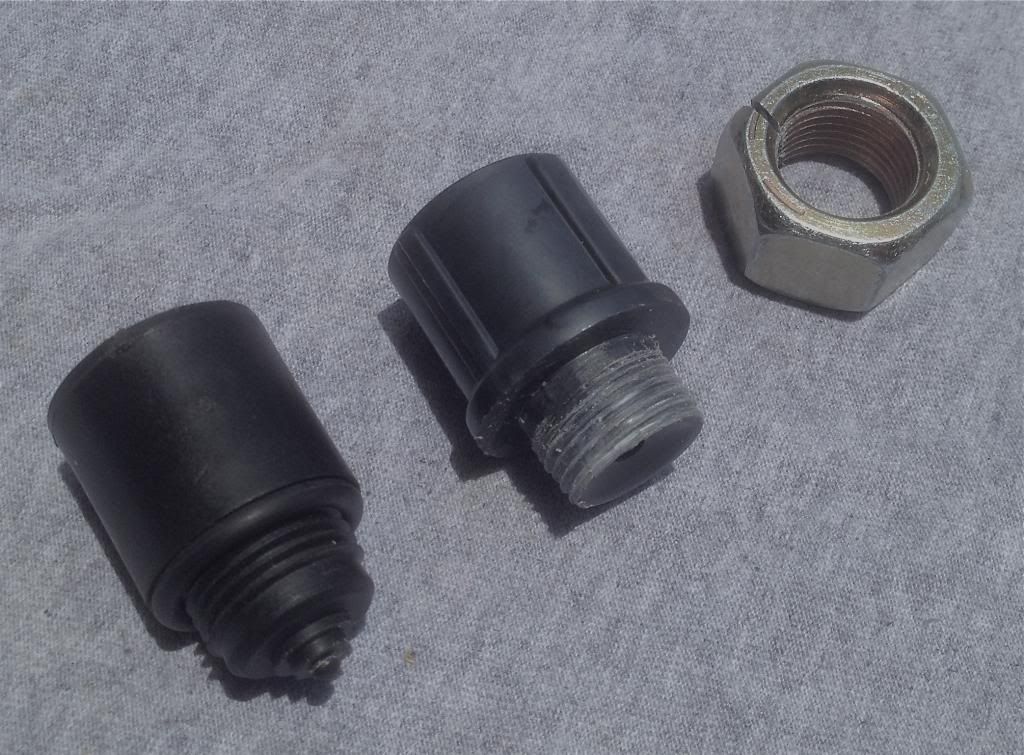
This is not a problem as the Tiltite washer is pretty thick and takes up some space. Also, the female threads in the battery case top are located down a bit from the top of the case.
Putting in alignment pegs:
It became immediately apparent that the battery top and the battery case could easily become misaligned because there is no overlap edge (like on a shoebox) to hold them together. After much thought I came up with a solution that looked like it will go the distance. I glued short fiberglass pegs, about 1.5 long into each of the four corners of the base using 5 min epoxy. The top ends of the pegs extend about 3/16 above the level of the cut edge. The battery top then slips over the top of the case and is held in place by the 4 corner pegs. Worked so well that you can actually turn the battery on its side and the top will not fall off. This is more than enough to get the job done. A couple of the pegs can be seen here:

Painting the battery cases and tops:
There is considerable debate on the various Cobra websites as to the correct color scheme for the original Rebat G-35s. The two variants appear to be: 1) all black (case and top) and 2) black case with white top. The all black variant appears to be correct with (hugger) orange caps. Some people believe that the white cases were used in earlier years of Cobra production and by about 1965 or 1966 the all black batteries were correct. I relied on a famous picture of CSX 2196, the famous 427 prototype car, otherwise known as the turd, as my inspiration. This flip-top configured racecar clearly shows a pair of white case/black top Rebats mounted in the rear.
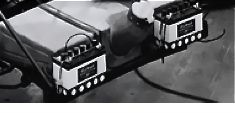
As the turd was built/modified in 1964, I believe that white case/black top batteries could certainly be correct for the 427 S/C cars, which were built as race cars in 1965 and then offered for sale as the detuned S/C version in 1966. I may be wrong here, but it doesnt really matter anyway, as I liked the white case better for a variety of reasons: will stand out a bit more than the black cases to draw attention to them being there; match well with the white topped tiltite caps; and I just like them better.
I used Krylon Fusion Gloss White spray paint for the cases and Krylon Fusion Gloss Black for the tops. Took about three coats to get them where I wanted them. As with all painting, preparation is the key. You can use 120 grit sandpaper to smooth down the cases prior to painting. Be sure to clean them off very well to get off the grease/
oil. I waited one week between coats. The Krylon is also sandable with wet/dry if needed between coats. I ran into one minor issue. When you paint the cases white, the small groove that you cut along to separate the tops from the cases is painted white which means that when you are done spray painting, the groove is two tone, part white, part black. This looked terrible. I fixed this by spraying some of the black spray paint into a small jar and used a small hobby artists brush to hand paint black over the white along the groove, including the lower edge. With care and not too much coffee on board, this went well and took only 5 mins per battery. Now when the top is placed over the case, the cut line between the two is lost in the center of the groove that is now all black. The front facing grooves of the battery when installed are covered by the hold down angle bracket anyway, so if it is slightly less than perfect dont sweat it too much. Only the groove on the driver side of one battery is actually visible once in the car and bolted down.
Making and installing the rope handle:
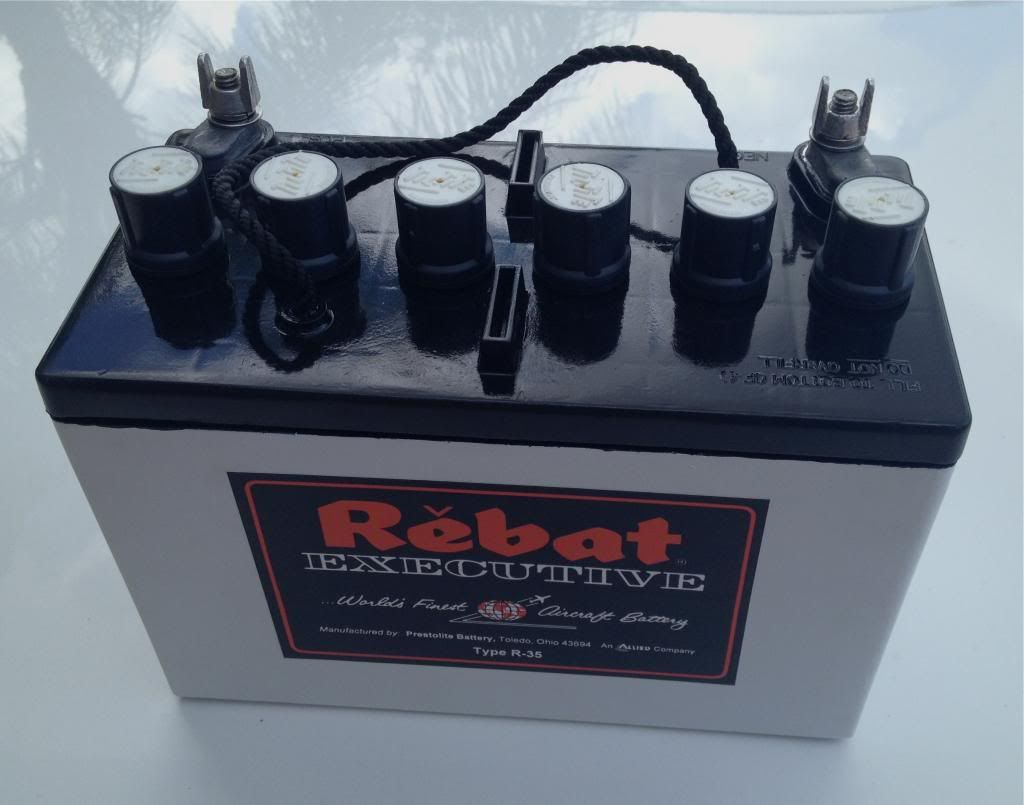
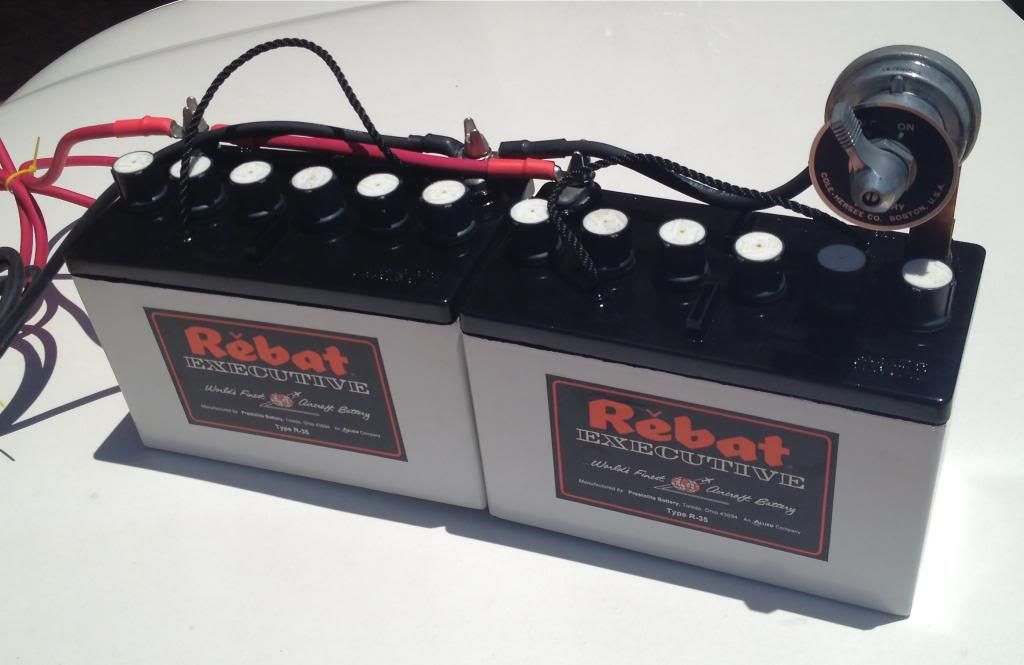
The modern Rebats have a plastic handle that is screwed into the top with two plastic shouldered bolts. This looks awful if originality is your goal. The original handles were twisted rope but the good news is the two ends appear to have been mounted in the same position as the threaded holes in the modern versions. I was able to obtain the black rope at West Marine, which to me appears to be a very close replica of the original. It is 3/16 black Nylon. I cut good clean ends and used 5-minute 2-part epoxy to seal the rope into the holes. I put a few drops of the epoxy into each hole and then twisted the rope in while pushing down. The epoxy pushed up and made a nice rounded bead at the top. Perfect. I have reason to believe that the original rope ends were leaded into the top but my method looks good and works perfectly. I do not expect an originality challenge.
Reproduction Rebat labels:
The Rebat labels I sourced from a Cobra guy named Sal for $30 for the pair, shipped. His email address is
marmoramustang@comcast.net and he was great to deal with.
They are excellent quality with a peel off backing for self-stick. Be careful and get them placed exactly where you want them the first time. If you try to peel them up to correct the angle or move them, you will likely destroy them. Good adhesive!
Making the cables:
I wanted period-looking battery cables and I found 4 gauge rubber insulated welding cable fit the bill perfectly. I used the appropriate sized tinned 5/16 end cable connectors. I soldered the cables into the connectors and applied shrink tubing to complete the cables. The welding cable had various product markings stamped on the rubber sheath. I used 600 grit wet/dry paper to sand off all of the markings except Made in USA, which looked sort of cool and period to me.
Cut-off switch:
The cut-off switch is a Taylor Vertex part No. 1032 (2 post) and the faceplate is a
Cole Hersee 82065. I bought both off of EBay for much less than the standard vendors. I used a doubled-up piece of copper bar stock, 1/8 thick by ¾ wide to make the cut-off switch support bracket. I drilled a hole in one end to fit the terminal on the battery and a larger hole in the other end for the post on the cut-off. The bracket (used as sort of a buss bar) is bent at 90 degrees near the base.
All in all:
So there you have it. Took a few too many hours but each step had some learning curve involved. I hope that I may have saved you some time by moving you along that curve, at least a little bit. I am totally pleased with the look.
Hope that you agree. Good luck with your own project.
Regards,
Ron


 Linear Mode


