Club Cobra Keith Craft Motorsports  

Go Back   Club Cobra > Manufacturers, Engine Builders, tools, and parts. > BackDraft Racing ---

MMG Superformance
Nevada Classics
MMG Superformance
Main Menu
Module Jump:
Nevada Classics
Nevada Classics
MMG Superformance
Advertise at CC
Banner Ad Rates
Keith Craft Racing
Keith Craft Racing
Keith Craft Racing
April 2024
S M T W T F S
  1 2 3 4 5 6
7 8 9 10 11 12 13
14 15 16 17 18 19 20
21 22 23 24 25 26 27
28 29 30        

Kirkham Motorsports

Like Tree1Likes
  • 1 Post By ASO544

Reply
 
LinkBack Thread Tools Rate Thread Display Modes
  #1 (permalink)  
Old 07-30-2015, 10:53 AM
CC Member
Visit my Photo Gallery

 
Join Date: May 2014
Location: Tavares, FL
Cobra Make, Engine: Backdraft #832
Posts: 227
Not Ranked     
Default Turn & Tail Light Groomet

This is the part Backdraft left off. This finishes the space between the light housing and the body. I have made several and it really adds to the look and seals the light at the base. I am attaching a picture of the light with the grommet installed. if interested contact me.
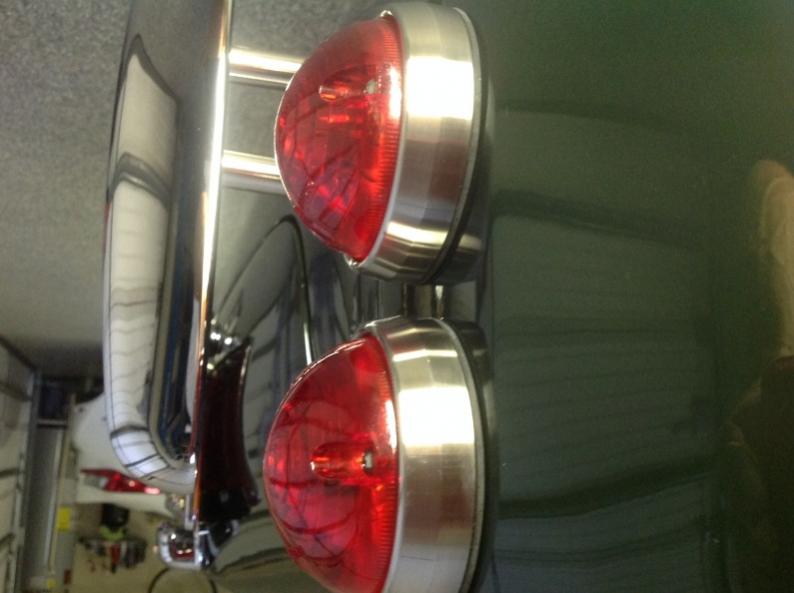
 Name:  LIGHT GROMMET.jpg
Views: 499
Size:  44.0 KB
Reply With Quote
  #2 (permalink)  
Old 08-11-2015, 09:44 AM
CC Member
Visit my Photo Gallery

 
Join Date: Jul 2014
Location: St Auustine, Fl
Cobra Make, Engine: Backdraft
Posts: 46
Not Ranked     
Default

Bought a set of these and I have to say they made a big difference. There were gaps
between the bottom of the tail lights and the body that spoiled the look. These filled
in the gaps that varied in size from light to light. Inexpensive way to correct a manufacturing defect.
Reply With Quote
  #3 (permalink)  
Old 08-14-2015, 07:31 AM
CC Member
Visit my Photo Gallery

 
Join Date: May 2014
Location: Tavares, FL
Cobra Make, Engine: Backdraft #832
Posts: 227
Not Ranked     
Default

I have had a lot of response to the light housing grommets. If you would reply to my email address: jimbo01@embarqmail.com. I check this mail address daily.
Reply With Quote
  #4 (permalink)  
Old 08-20-2015, 09:08 AM
Sledge's Avatar
CC Member
Visit my Photo Gallery

 
Join Date: Apr 2004
Location: Long Beach, CA
Cobra Make, Engine: BDR #168 427W 66+K miles and counting
Posts: 335
Not Ranked     
Default

I also purchased a set from Jimbo and am very pleased with the fit and finished look the gaskets/grommets give the light housings.
__________________
Bill


"If your work speaks for itself, don't interrupt"
Reply With Quote
  #5 (permalink)  
Old 10-27-2015, 07:23 AM
CC Member
Visit my Photo Gallery

 
Join Date: Dec 2012
Posts: 122
Not Ranked     
Default

Jim what is involved in installing these again?
Reply With Quote
  #6 (permalink)  
Old 11-04-2015, 11:36 AM
CC Member
Visit my Photo Gallery

 
Join Date: May 2014
Location: Tavares, FL
Cobra Make, Engine: Backdraft #832
Posts: 227
Not Ranked     
Default Turn & Tail Light Groomet

Please send any request for installing the grommets to my email. I will be happy to assist you.
Reply With Quote
  #7 (permalink)  
Old 11-04-2015, 12:08 PM
ASO544's Avatar
CC Member
Visit my Photo Gallery

 
Join Date: Jun 2004
Posts: 204
Not Ranked     
Default

I got mine on today. Really cleans up the lights. I never noticed how sloppy the gaps were. My only suggestion for improvement might be a even thicker piece of rubber as some gaps are more than others. GREAT IDEA !!! THANKS jimbo01 !!!

This is how I did it... Took about 30'minutes

1. Unplug lights (white connectors)
2. Remove plastic lens (I did this to get at bolt head to remove and install 7mm nuts easier)
3. Remove 3 - 7mm nuts from rear of each each housing
4. Pull out housing and unconnected wire
5. Put rubber grommet on light housing and re-install
6. Tighten 7mm nuts ( use flat head on bolt head to get solid tight fit)
7. Re-install lens
8. Plug in connectors ( I did one at a time to ensure right plugs were connected)
9. Test all lights

ASO544
eunosracr likes this.

Last edited by ASO544; 11-04-2015 at 04:48 PM..
Reply With Quote
  #8 (permalink)  
Old 11-04-2015, 12:37 PM
CC Member
Visit my Photo Gallery

 
Join Date: Dec 2012
Posts: 122
Not Ranked     
Default

Quote:
Originally Posted by ASO544 View Post
I got mine on today. Really cleans up the lights. I never noticed how sloppy the gaps were. My only suggestion for improvement might be a even thicker piece of rubber as some gaps are more than others. GREAT IDEA !!! THANKS !!!

This is how I did it... Took about 30'minutes

1. Unplug lights (white connectors)
2. Remove plastic lens (I did this to get at bolt head to remove and install 7mm nuts easier)
3. Remove 3 - 7mm nuts from rear of each each housing
4. Pull out housing and unconnected wire
5. Put rubber grommet on light housing and re-install
6. Tighten 7mm nuts ( use flat head on bolt head to get solid tight fit)
7. Re-install lens
8. Plug in connectors ( I did one at a time to ensure right plugs were connected)
9. Test all lights

ASO544
Thank you !
Reply With Quote
Reply


Posting Rules
You may not post new threads
You may not post replies
You may not post attachments
You may not edit your posts

BB code is On
Smilies are On
[IMG] code is On
HTML code is Off
Trackbacks are On
Pingbacks are On
Refbacks are On


All times are GMT -7. The time now is 05:01 AM.


Powered by vBulletin® Version 3.8.0
Copyright ©2000 - 2024, Jelsoft Enterprises Ltd.
Search Engine Friendly URLs by vBSEO 3.6.0
The representations expressed are the representations and opinions of the clubcobra.com forum members and do not necessarily reflect the opinions and viewpoints of the site owners, moderators, Shelby American, any other replica manufacturer, Ford Motor Company. This website has been planned and developed by clubcobra.com and its forum members and should not be construed as being endorsed by Ford Motor Company, or Shelby American or any other manufacturer unless expressly noted by that entity. "Cobra" and the Cobra logo are registered trademarks for Ford Motor Co., Inc. clubcobra.com forum members agree not to post any copyrighted material unless the copyrighted material is owned by you. Although we do not and cannot review the messages posted and are not responsible for the content of any of these messages, we reserve the right to delete any message for any reason whatsoever. You remain solely responsible for the content of your messages, and you agree to indemnify and hold us harmless with respect to any claim based upon transmission of your message(s). Thank you for visiting clubcobra.com. For full policy documentation refer to the following link: CC Policy
Links monetized by VigLink