 
 Main Menu
|
|
Nevada Classics
|
|
Advertise at CC
|
|
May 2026
|
| S |
M |
T |
W |
T |
F |
S |
| |
|
|
|
|
1 |
2 |
| 3 |
4 |
5 |
6 |
7 |
8 |
9 |
| 10 |
11 |
12 |
13 |
14 |
15 |
16 |
| 17 |
18 |
19 |
20 |
21 |
22 |
23 |
| 24 |
25 |
26 |
27 |
28 |
29 |
30 |
| 31 |
|
|
|
|
|
|
|
|
CC Advertisers
|
|

05-22-2009, 11:45 AM
|
|
CC Member

|
|
|
Join Date: Jul 2008
Location: Driftwood,
TX
Cobra Make, Engine: Contemporary Cobra, 427 side oiler
Posts: 1,850
|
|

 Not Ranked
Quote:
Originally Posted by damdfw

But George Anderson is. Here is a tech tip about about the Rear Main Cap Modifications you may require for the windage tray to clear.
|
I had read that previously and asked Armondo about it and he said he had provided for stud and bolt head clearance on his later pans. Apparently not on this one he sent me. |
05-22-2009, 03:27 PM
|
 |
CC Member
|
|
|
Join Date: May 2001
Location: California,
Ca
Cobra Make, Engine: NAF 289 Slabside Early Comp Car with 289 Webers and all the goodies. Cancelling the efforts of several Priuses
Posts: 6,592
|
|
Not Ranked
Sounds like time for a little manipulation with a Ball Peen Hammer??? Or shorten the studs & use 12pt nuts which are a little shorter.
__________________
Rick
As you slide down the Banister of Life, may the splinters never be pointing the wrong way 
Last edited by Rick Parker; 05-22-2009 at 03:59 PM..
|
05-22-2009, 03:40 PM
|
 |
Senior Club Cobra Member
|
|
|
Join Date: Jan 2004
Location: St. Louis,
Mo.
Cobra Make, Engine: 427 S.O. Dual Quad / Cobra undecided
Posts: 1,380
|
|
Not Ranked
I thought that was your tool of choice Rick? 
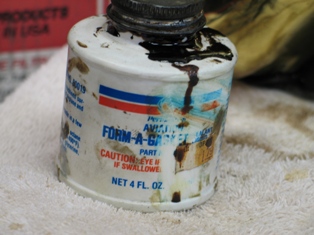
Try this stuff, Aviation form a gasket. I have rebuilt 3 british engines using it with zero failure. Its serious stuff, don't get in on you.
 |
05-22-2009, 04:33 PM
|
|
CC Member
|
|
|
Join Date: May 2002
Location: Ashburton, New Zealand,
..
Cobra Make, Engine: UK Ram SC. KC-Yates 373, Jerico 5 speed.
Posts: 1,240
|
|
Not Ranked
 Oil pan sealing.
I have used Permatex black which seems to be ok, on my aluminium dry sump pan.
I have used Loctite Master Gasket this can go a bit hard. My oil pan has no end rubbers so I made some alloy strips to fit in this reduces the amount of silicone or whatever in those areas. Sounds like you have a problem with one or more surfaces and if the oil pan is a problem try glueing the gasket to that first.
I have also found using slippery uncured gasket compounds on each side of the gasket material can be a recipe for disaster and promote gasket squish!
I would ask a Motorcycle shop as my friend who has the Honda dealership uses special gasket compounds, as they can have issues with farm, race and other old motorcycle oil leaks so with alloy castings being old and thin the need for a real good product. We have just done my 8.8" diff up and we will be using the sealer on that and my Jerico tail housing.
I would be careful with oil pans though because if you use something to much like a glue you will have trouble removing it and the compound needs to be not to brittle otherwise if it comes off possibly cause problems. You might want to do one side of the gasket to oil pan then bolt on to the engine being careful not to have any compound on the engine side, let it dry and then remove and do the other side.........!
__________________
A J. Newton
The 1960's rocked!
|
05-22-2009, 05:08 PM
|
|
CC Member
|
|
|
Join Date: Jul 2008
Location: Driftwood,
TX
Cobra Make, Engine: Contemporary Cobra, 427 side oiler
Posts: 1,850
|
|
Not Ranked
Quote:
Originally Posted by Rick Parker
Sounds like time for a little manipulation with a Ball Peen Hammer??? Or shorten the studs & use 12pt nuts which are a little shorter.
|
Absolutely.
Quote:
Originally Posted by lineslinger
I thought that was your tool of choice Rick?
Try this stuff, Aviation form a gasket. I have rebuilt 3 british engines using it with zero failure. Its serious stuff, don't get in on you. |
Three British CAR engines or three British aviation engines??? Either way, you sure are hard on yourself trying to mate two British-engineered surfaces together and then expect no leaks. 
Last edited by elmariachi; 05-22-2009 at 05:11 PM..
|
05-22-2009, 05:32 PM
|
|
CC Member
|
|
|
Join Date: Oct 2003
Posts: 4,078
|
|
Not Ranked
El,
Per Barry R's instructions I used the Motorcraft gray diesel silicone the following way:
Make a sandwich of 2 gaskets and the windage tray. (Be sure to flatten tray and pan rail and check on a plate of glass for flatness)
Apply silicone with a credit card as squeegee to one gasket and attach to tray. Lay on glass with weight. I gave it about an hour but less will work. Attach second gasket to other side of tray the same way. Spread the silicone evenly but get a nice coverage so you can just barely see the gasket through it. Weight and wait again.
Now take this assembly, coat the gasket again, attach to pan, invert again on glass and weight the pan. I used a few studs as alignment 'tools' so all the holes line up as it dries.
When dry, coat the last gasket surface and attach the pan/tray assembly to the block trying not to smear the silicone. Having studs to locate the pan helps. Of course, the block surface should be hospital clean and dry. Use acetone or lacquer thinner.
Torque by feel as evenly as you can but don't 'kill' them. They'll take maybe a quarter tun again after you run it and cool it.
This is what worked for me.
__________________
Chas.
Last edited by ERA Chas; 05-22-2009 at 05:34 PM..
|
05-22-2009, 07:49 PM
|
|
CC Member
|
|
|
Join Date: Jul 2008
Location: Driftwood,
TX
Cobra Make, Engine: Contemporary Cobra, 427 side oiler
Posts: 1,850
|
|
Not Ranked
Quote:
Originally Posted by ERA Chas
El,Per Barry R's instructions I used the Motorcraft gray diesel silicone the following way
|
I used the Motorcraft gray and I used Rick's High-Tack to glue the two gaskets to the windage tray. I feel like its right now, and I hereby dare it to leak. I dared lightning to strike me a few years ago and that hadn't happened, so...................
I've run it a couple hours pretty hard tonight and so far so good. Now I am going to drink a bunch of beer and forget about it.
Last edited by elmariachi; 05-22-2009 at 07:52 PM..
|
05-23-2009, 06:18 AM
|
|
CC Member
|
|
|
Join Date: Oct 2003
Posts: 4,078
|
|
Not Ranked
Great news, your garage floor will love you. Just check the nuts for snug in a while.
Remember, beer adds weight-you'll need more HP...
__________________
Chas.
|
05-31-2009, 12:19 PM
|
 |
CC Member
|
|
|
Join Date: Jun 2003
Location: Palma de Mallorca, Spain,
ESP
Cobra Make, Engine: Contemporary with 482 KC/SO, TKO600,IRS Jag/AMP, 3.54 Salisbury PL,
Posts: 582
|
|
Not Ranked
I do stick bothe gaskets with black RTV sealant on both sides of the windage tray, and cover the surfaces on block and oilpan with heavy grease. Work very well and you can remove the oilpan without having to get all the hardened sealant off every time. An old mechanics tip which helped me a lot.
__________________
Nothing sounds better than a Cobra in a Tunnel !
|
05-31-2009, 12:25 PM
|
|
CC Member
|
|
|
Join Date: Oct 2003
Posts: 4,078
|
|
Not Ranked
Quote:
Originally Posted by Eljaro
I do stick bothe gaskets with black RTV sealant on both sides of the windage tray, and cover the surfaces on block and oilpan with heavy grease. Work very well and you can remove the oilpan without having to get all the hardened sealant off every time. An old mechanics tip which helped me a lot.
|
Thank you. I use the grease method on the valve covers and it works very well.
Been afraid to use it on the pan. You have no leaks?
I just got it sealed using the diesel silicone and it works very well so far.
__________________
Chas.
|
05-31-2009, 03:22 PM
|
 |
Stolen Avitar
|
|
|
Join Date: Oct 2004
Location: Brunswick,
GA
Cobra Make, Engine: BDR 1311 428PI
Posts: 3,044
|
|
Not Ranked
Quote:
Originally Posted by ERA Chas
Just check the nuts for snug in a while.
|
Like a pro baseball player?  |
05-31-2009, 03:53 PM
|
|
CC Member
|
|
|
Join Date: Jun 2003
Location: Palma de Mallorca, Spain,
ESP
Cobra Make, Engine: Contemporary with 482 KC/SO, TKO600,IRS Jag/AMP, 3.54 Salisbury PL,
Posts: 582
|
|
Not Ranked
no leaks around oil pan with the grease!
__________________
Nothing sounds better than a Cobra in a Tunnel !
|
05-31-2009, 04:36 PM
|
|
CC Member
|
|
|
Join Date: Oct 2003
Posts: 4,078
|
|
Not Ranked
Quote:
Originally Posted by Eljaro
no leaks around oil pan with the grease! |
Thank you my friend from the beautiful country!
__________________
Chas.
|
05-31-2009, 04:35 PM
|
|
CC Member
|
|
|
Join Date: Oct 2003
Posts: 4,078
|
|
Not Ranked
Quote:
Originally Posted by lovehamr
Like a pro baseball player? |
I was thinking more like a handyman in a womens prison...
__________________
Chas.
|
03-31-2010, 09:11 AM
|
 |
CC Member
|
|
|
Join Date: Apr 2009
Location: Bethesda,
MD
Cobra Make, Engine: CSX 6022, navy blue, period correct 427 SO
Posts: 2,154
|
|
Not Ranked
Thanks, that's helpful.
Of course it would also have been helpful if Canton could manage to get the pan straight in the first place... 
__________________
There are only three sports: bullfighting, motor racing, and mountaineering; all the rest are merely games.
www.partskeeper.com
(Less time searching, more time wrenching & driving)
|
03-31-2010, 09:17 AM
|
|
CC Member
|
|
|
Join Date: Oct 2003
Posts: 4,078
|
|
Not Ranked
Quote:
Originally Posted by dcdoug
Thanks, that's helpful.
Of course it would also have been helpful if Canton could manage to get the pan straight in the first place... |
Virtually none of them do unless you buy a billet pan from Stefs, Milodon or Jeff Johnson.
__________________
Chas.
|
03-31-2010, 09:27 AM
|
|
CC Member
|
|
|
Join Date: Apr 2009
Location: Bethesda,
MD
Cobra Make, Engine: CSX 6022, navy blue, period correct 427 SO
Posts: 2,154
|
|
Not Ranked
What I'd really like to have is an Aviad pan, but I can't live with a solution that requires me to pull the engine to get the pan off, which is my understanding on the CSX cars.
__________________
There are only three sports: bullfighting, motor racing, and mountaineering; all the rest are merely games.
www.partskeeper.com
(Less time searching, more time wrenching & driving)
|
03-31-2010, 09:43 AM
|
|
CC Member
|
|
|
Join Date: Oct 2003
Posts: 4,078
|
|
Not Ranked
Quote:
Originally Posted by dcdoug
What I'd really like to have is an Aviad pan, but I can't live with a solution that requires me to pull the engine to get the pan off, which is my understanding on the CSX cars.
|
Not sure but that may have a fluted, stamped rail too. I know Armando's does.
__________________
Chas.
|
 Posting Rules
|
You may not post new threads
You may not post replies
You may not post attachments
You may not edit your posts
HTML code is Off
|
|
|
All times are GMT -7. The time now is 09:09 PM.
|


 Hybrid Mode

