Welcome to Club Cobra! The World's largest
non biased Shelby Cobra related site!
- » Representation from nearly all
Cobra/Daytona/GT40 manufacturers
- » Help from all over the world for your
questions
- » Build logs for you and all members
- » Blogs
- » Image Gallery
- » Many thousands of members and nearly 1
million posts!
YES! I want to register an account for free right now!
p.s.: For registered members this ad will NOT show
 
 Main Menu
|
|
Nevada Classics
|
|
Advertise at CC
|
|
December 2025
|
| S |
M |
T |
W |
T |
F |
S |
| |
1 |
2 |
3 |
4 |
5 |
6 |
| 7 |
8 |
9 |
10 |
11 |
12 |
13 |
| 14 |
15 |
16 |
17 |
18 |
19 |
20 |
| 21 |
22 |
23 |
24 |
25 |
26 |
27 |
| 28 |
29 |
30 |
31 |
|
|
|
|
|
CC Advertisers
|
|
 2Likes 2Likes

08-03-2007, 07:45 PM
|
 |
CC Member

|
|
|
Join Date: Mar 2001
Location: Provo,
Ut
Cobra Make, Engine: Kirkham, 427
Posts: 6,990
|
|

 Not Ranked
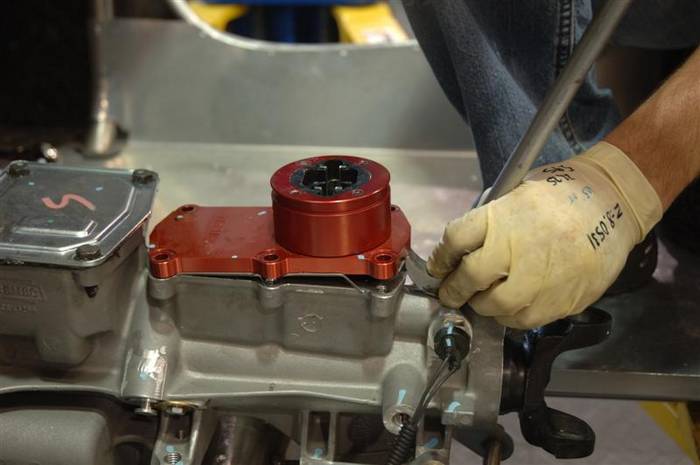
Here it comes up. You can also GENTLY hit the side of the shift box with a rubber mallet to loosen it up.
 |
08-03-2007, 07:47 PM
|
|
CC Member
|
|
|
Join Date: Mar 2001
Location: Provo,
Ut
Cobra Make, Engine: Kirkham, 427
Posts: 6,990
|
|
Not Ranked
Here the shift box is removed. Notice the yummy silicon that we have to CLEAN off! Also, notice there are 2 sockets that can be used for the shift lever! We just pulled the shift lever out of the rear socket and we are about to put it into the front socket. All you have to do is turn the shift box around and you mover the shifter forward. We are now going to move the shift lever from the rear socket to the front socket.
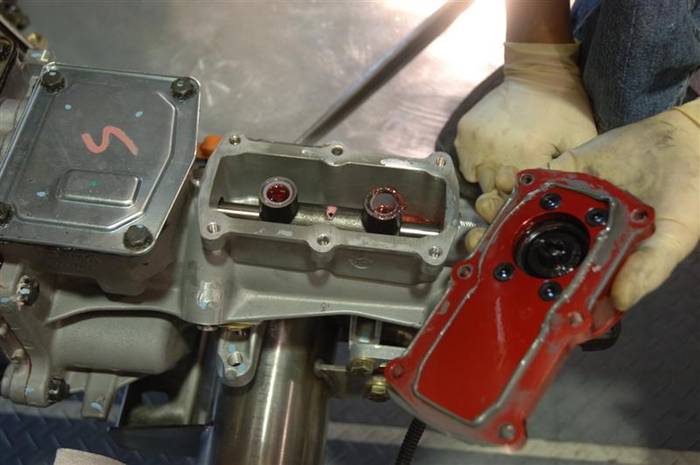
Last edited by David Kirkham; 08-04-2007 at 01:21 PM..
|
08-03-2007, 07:50 PM
|
|
CC Member
|
|
|
Join Date: Mar 2001
Location: Provo,
Ut
Cobra Make, Engine: Kirkham, 427
Posts: 6,990
|
|
Not Ranked
BUT FIRST!!! We must CLEAN!!! That is our FAVORITE thing to do! Take a razor and clean the silicon off the shift box. (Be careful not to clean the skin off your fingers while you are at it.) 
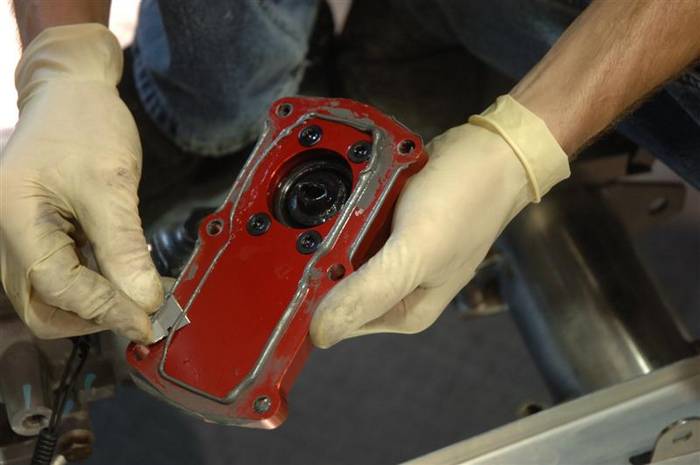
Last edited by David Kirkham; 08-03-2007 at 10:57 PM..
|
08-03-2007, 07:51 PM
|
|
CC Member
|
|
|
Join Date: Mar 2001
Location: Provo,
Ut
Cobra Make, Engine: Kirkham, 427
Posts: 6,990
|
|
Not Ranked
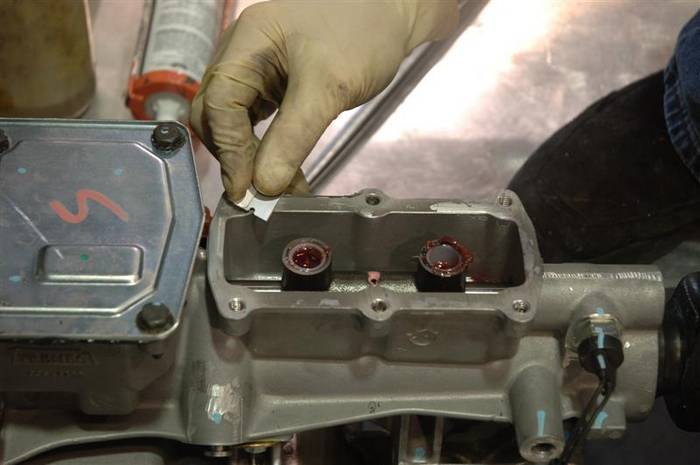
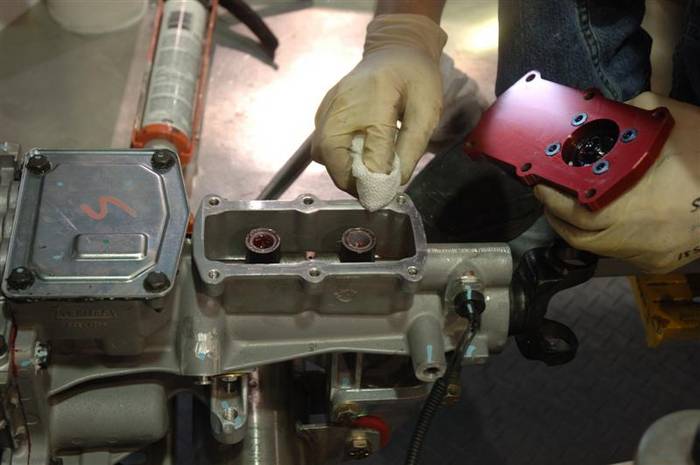
Now you need to clean the silicon off the transmission too.
Last edited by David Kirkham; 08-03-2007 at 10:12 PM..
|
08-03-2007, 07:55 PM
|
|
CC Member
|
|
|
Join Date: Mar 2001
Location: Provo,
Ut
Cobra Make, Engine: Kirkham, 427
Posts: 6,990
|
|
Not Ranked
Now clean EVERYTHING off with lacquer thinner or something else that removes grease. I guess I should tell you that lacquer thinner is EXTREMELY flammable and the fumes can make you sick so make sure you do this in a well ventilated area (or better yet, get a buddy to do it for you while you graciously offer to go out and get some cold ones...) ")
Last edited by David Kirkham; 08-16-2007 at 11:37 AM..
|
08-25-2007, 01:54 PM
|
|
CC Member
|
|
|
Join Date: Mar 2001
Location: Provo,
Ut
Cobra Make, Engine: Kirkham, 427
Posts: 6,990
|
|
Not Ranked

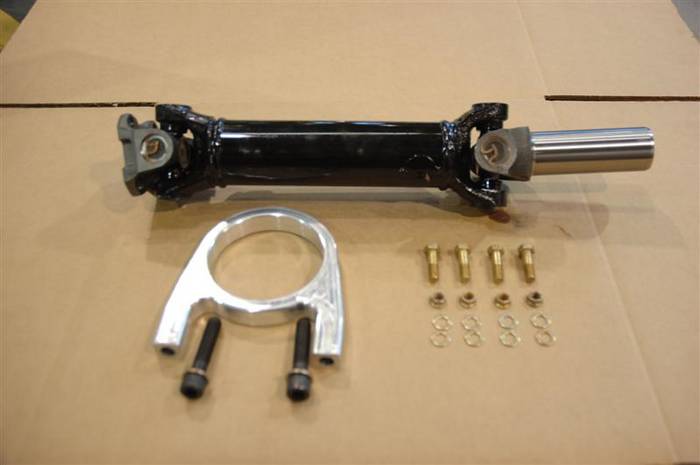
DRIVE SHAFT INSTALLATION
Here are the goodies you are going to need to put in your drive shaft. You MUST pull the tunnel out to take the drive shaft out! (We are working on a fix for that, but I am not sure we will get it done in this life time).
This is what you will need:
Drive shaft
Drive shaft bolts (we only use aircraft bolts here--and throughout most of the car for that matter). Notice the cool looking 3/8 jet nuts. They have a reduced head on them to make them easier to get a wrench on in those tight places.
New cool BILLET drive shaft safety loop. Notice we connected the bottom of the safety hoop together at the bottom so we could safely run the ebrake cables (and other things) through the bottom of the loop and still have them protected from the drive shaft in case of drive shaft breakage. We have seen many kit cars (and original cars too!) that run fuel lines, brake lines, electrical lines and who knows what else RIGHT NEXT TO THE DRIVE SHAFT!!! IF THE DRIVE SHAFT BREAKS, THE FUEL LINES WILL BE CUT AND THE RESULTING SHOWER OF SPARKS WILL TURN YOU INTO A 4TH OF JULY BBQ--ONLY THIS TIME, YOU ARE THE ONE ON THE GRILL. But you can always look at the bright side...you will be FAMOUS within 3 days as you will have over a million views on You Tube
Last edited by David Kirkham; 08-25-2007 at 01:57 PM..
|
08-25-2007, 02:00 PM
|
|
CC Member
|
|
|
Join Date: Mar 2001
Location: Provo,
Ut
Cobra Make, Engine: Kirkham, 427
Posts: 6,990
|
|
Not Ranked
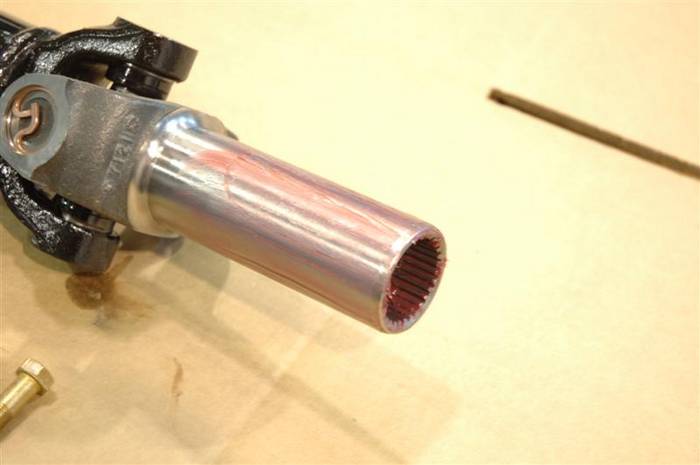
Make sure you grease up the input shaft on the transmission before you put it in. Make sure you grease up the INSIDE splines as well. You do NOT want the seal on the outside to start rubbing on a dry shaft--you will tear the seal out. You want grease on the inside because even though your chariot of fire has an independent rear suspension, there is still a tiny bit of movement on the splines as you step on the gas to pass that VETTE 
 |
08-04-2007, 09:23 AM
|
|
CC Member
|
|
|
Join Date: Mar 2001
Location: Provo,
Ut
Cobra Make, Engine: Kirkham, 427
Posts: 6,990
|
|
Not Ranked
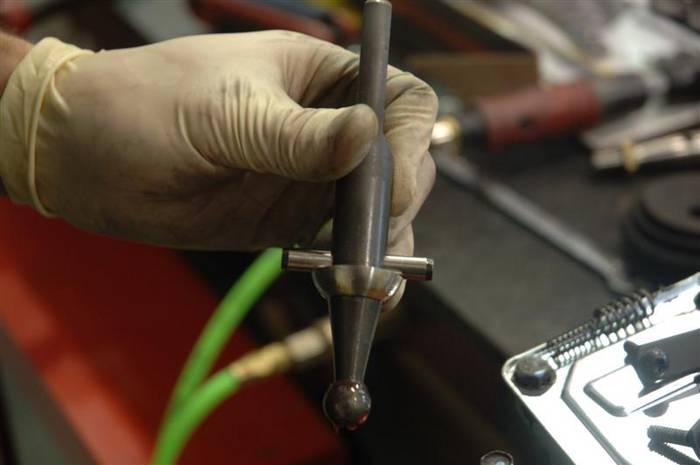
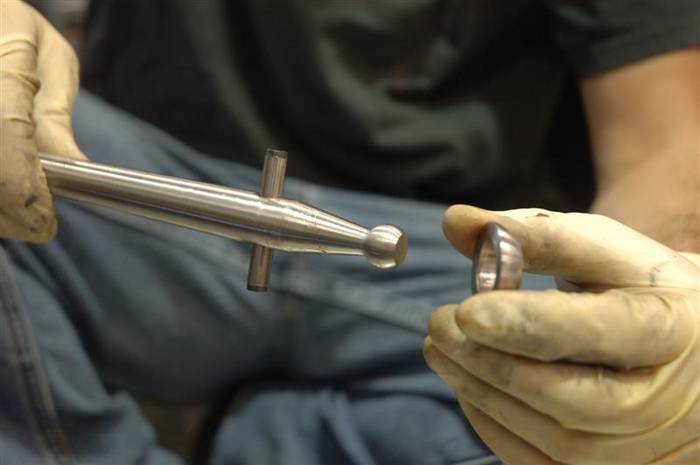
Remember this pin??? We need it now. Drive it out and put it into...
 |
08-04-2007, 09:27 AM
|
|
CC Member
|
|
|
Join Date: Mar 2001
Location: Provo,
Ut
Cobra Make, Engine: Kirkham, 427
Posts: 6,990
|
|
Not Ranked
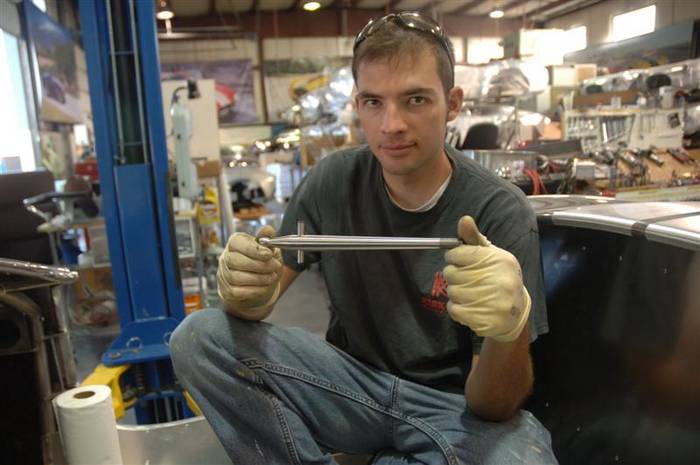
your new billet stainless shift lever. See, even Sandwich is smiling because he makes such cool parts...or, maybe it was that longgggg lunch...
Last edited by David Kirkham; 08-04-2007 at 04:09 PM..
|
08-04-2007, 09:30 AM
|
|
CC Member
|
|
|
Join Date: Mar 2001
Location: Provo,
Ut
Cobra Make, Engine: Kirkham, 427
Posts: 6,990
|
|
Not Ranked
Put the 1/2 ball back on the shifter.
 |
 Posting Rules
|
You may not post new threads
You may not post replies
You may not post attachments
You may not edit your posts
HTML code is Off
|
|
|
All times are GMT -7. The time now is 04:45 PM.
|
|


 Hybrid Mode

