Welcome to Club Cobra! The World's largest
non biased Shelby Cobra related site!
- » Representation from nearly all
Cobra/Daytona/GT40 manufacturers
- » Help from all over the world for your
questions
- » Build logs for you and all members
- » Blogs
- » Image Gallery
- » Many thousands of members and nearly 1
million posts!
YES! I want to register an account for free right now!
p.s.: For registered members this ad will NOT show
 
 Main Menu
|
|
Nevada Classics
|
|
Advertise at CC
|
|
May 2026
|
| S |
M |
T |
W |
T |
F |
S |
| |
|
|
|
|
1 |
2 |
| 3 |
4 |
5 |
6 |
7 |
8 |
9 |
| 10 |
11 |
12 |
13 |
14 |
15 |
16 |
| 17 |
18 |
19 |
20 |
21 |
22 |
23 |
| 24 |
25 |
26 |
27 |
28 |
29 |
30 |
| 31 |
|
|
|
|
|
|
|
|
CC Advertisers
|
|
 6Likes 6Likes

11-18-2012, 05:40 AM
|
 |
CC Member

|
|
|
Join Date: Jan 2001
Location: Sunbury,
VIC
Cobra Make, Engine: Rat Rod Racer, LS1 & T56
Posts: 5,391
|
|

 Not Ranked
 Fiberglass Bodywork
Hi All,
I'm getting stuck back into the bodywork. I really want the car in paint this summer.
To me the bodywork is a bit overwhelming at times. I'm much happier welding and machining things. I'm now breaking it down into smaller jobs and attacking a bit at a time so it doesn't seem so bad. This is probably boring stuff to most but posting it up here helps me stay motivated.
I finally got back to the passengers door sill. I had welded in an extra side intrusion brace in that linked the dash hoop to the door lock pillar. This helps stiffen up the door hinge and lock area and also provide a scaffold to build a door sill on.
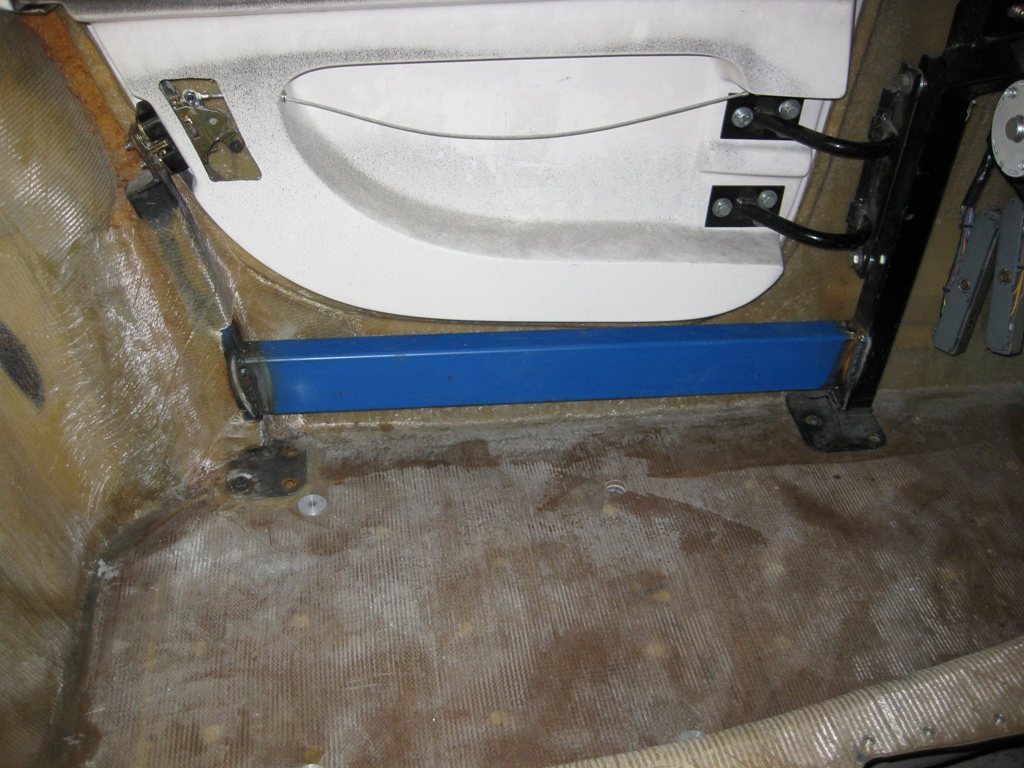
I had finished the drivers side but never got back to the passengers side. Well I got stuck in on Saturday and got it all foamed, sanded to shape and then glassed in. Just got to hit it with some filler and a bit of sanding now.
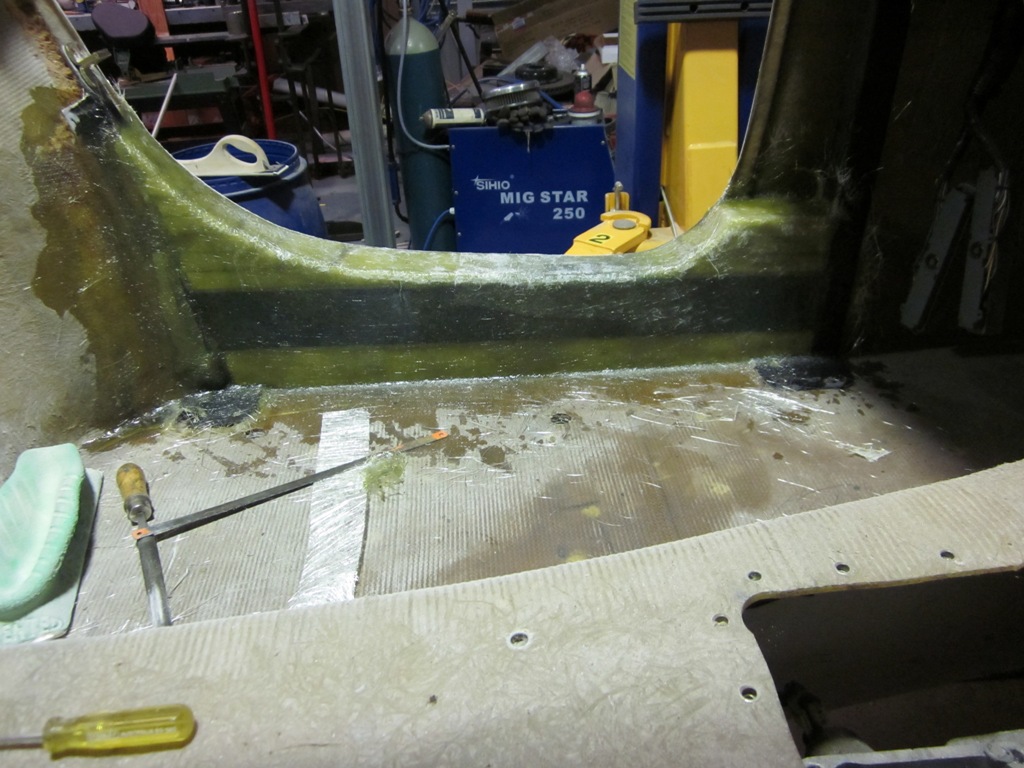
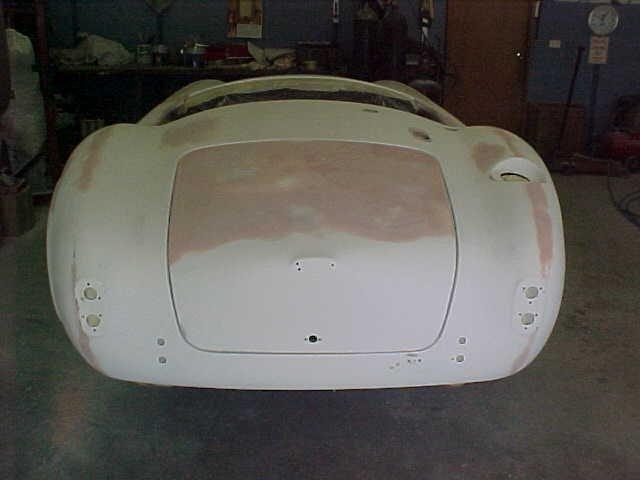
The other job that I've been working on is getting the boot lid to fit nice. Mine was pretty horrible and it looked like the boot lid was just the wrong shape or something as it wouldn't align properly no matter what I did. I decided what it needed was the back of the body pushed out a bit to match the curve of the boot lid.
I cut the join between the back edge of the boot floor and the body and flexed it out about 6mm and then glassed it back together.
Once the fiberglass had set I pulled the spacer block out and it now fit's much better. I've got to put another couple of layers of mat in there to make sure it's strong and cover up the gap where the wood block was.
The boot lid is fitting in much better with the body curve more closely matching the lid.
The next thing to sort out is the panel gap around the boot lid. It's huge at the moment.
I'll grind the edge of the boot lid and extend the lip with a strip of fiberglass all around. I can then cut it to more closely fit the boot opening.
Cheers
__________________
Mike Murphy
Melbourne Australia
|
11-18-2012, 11:31 AM
|
 |
CC Member
|
|
|
Join Date: Mar 2010
Location: Gold Coast,
QLD
Cobra Make, Engine: Arntz, TKO600, 460
Posts: 818
|
|
Not Ranked
Quote:
Originally Posted by Aussie Mike

This is probably boring stuff to most but posting it up here helps me stay motivated.
|
Not boring at all.
Note to anyone...... I for one cant get enough of this stuff, don't hesitate to put anything like this up.
Thanks for posting and looks good. |
11-18-2012, 12:27 PM
|
 |
CC Member
|
|
|
Join Date: Jul 2004
Cobra Make, Engine: 347 Stroker Morrison Injection. Registered.
Posts: 1,440
|
|
Not Ranked
Mike, that's a pretty big gap between the bonnet and body. Did it come that way from the factory?
Regards.
__________________
Mando
|
11-18-2012, 12:36 PM
|
|
CC Member
|
|
|
Join Date: Jan 2001
Location: Sunbury,
VIC
Cobra Make, Engine: Rat Rod Racer, LS1 & T56
Posts: 5,391
|
|
Not Ranked
Yep, that's the factory fit. Not real good. I think the boot fit is better on the newer bodies.
Cheers
__________________
Mike Murphy
Melbourne Australia
|
11-18-2012, 01:20 PM
|
 |
CC Member
|
|
|
Join Date: Jan 2009
Location: Tynong North, Melbourne,,
Vic
Cobra Make, Engine: Classic Revival CR3514, LS3, Dual Quads, Holley Dominator EFI, TR6060, VE 3.7 LSD, AP Racing Brakes, 17x8 & 10 Custom Dragway Billet Wheels.
Posts: 601
|
|
Not Ranked
Hi Mike,
I'm the same, much more comfortable machining and welding stuff.
I find the body side of things overwhelming as well, my boot and bonnet seems a good fit as does the passenger door, but the fit of the drivers door is a disappointment to me.
I havent approached the body yet and maybe i'm fretting for nothing.
Great work on the sills, i too intend to bolster up the side for a better look like this.
Its not boring at all, i think think this is one of the main attractions to this forum, should be more of it.
as usual, "Love your work"
Dave
__________________
http://cobra-cr3514.blogspot.com/
|
11-18-2012, 01:25 PM
|
 |
CC Member
|
|
|
Join Date: Aug 2001
Location: Melbourne, Australia,
Vic
Cobra Make, Engine: G-Force Mk I, 5L Windsor, TKO 600, enhanced Jag / Koni suspension & LSD Diff.
Posts: 2,304
|
|
Not Ranked
Mike
That's excellent work and as you say it's not that hard just fiddly. But at the end of the day it does improve the look and functional use of the car. The real trick is to do this all pre-paint.
Having in the last year rebuilt both a powerboat and lightweight racing dinghy, none of it is difficult.
Although I have to say trying to maintain minimum hull weight on the race boat was a real test. It only gained 0.5kg from a full internal reskin and I was happy and relieved by that result.
You going to widen any wheel arches while your at it Mike - lol??
Cheers
Steve
__________________
slowy
|
11-18-2012, 03:10 PM
|
 |
CC Member
|
|
|
Join Date: Jul 2011
Location: Sydney,
NSW
Cobra Make, Engine: Puckett 250 GTO - LS1
Posts: 567
|
|
Not Ranked
The GTO kits are notorious for the poor alignment of the bonnet (hood) but the latest kit I have seems to have come up with a technique to address this. The bonnet (and the boot lid) are incorporated into the major bodywork components and cut out later along a groove in the pattern - There is white powder (fibreglass dust I assure you!) shown in the groove in the photo.
On top of that a strengthening frame is moulded to the inside of the bonnet and boot lid, and further, the hinges are fibreglassed into position. In theory... when the bonnet and boot lid are cut out they should (re)assemble perfectly with the major panels.
This is probably not of much interest to kit builders, more kit suppliers, but the technique is something to keep in mind generally.
Next thing is to figure out how to keep rain out of the boot!
Mike, on that last point might you consider which profile sealing strip you propose to use for the boot and temporarily fit it prior to modifying your panels to ensure the gap mates with the sealing strip?
Last edited by PeterAllen; 11-18-2012 at 03:15 PM..
|
11-18-2012, 04:02 PM
|
|
CC Member
|
|
|
Join Date: Jul 2011
Location: Sydney,
NSW
Cobra Make, Engine: Puckett 250 GTO - LS1
Posts: 567
|
|
Not Ranked
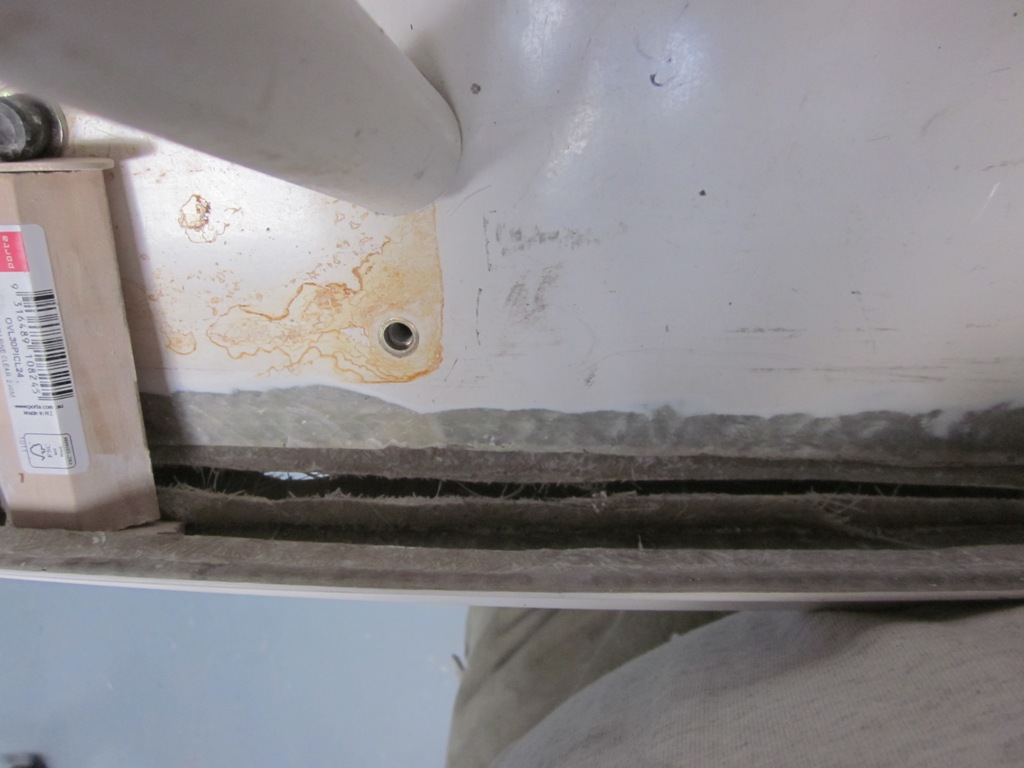
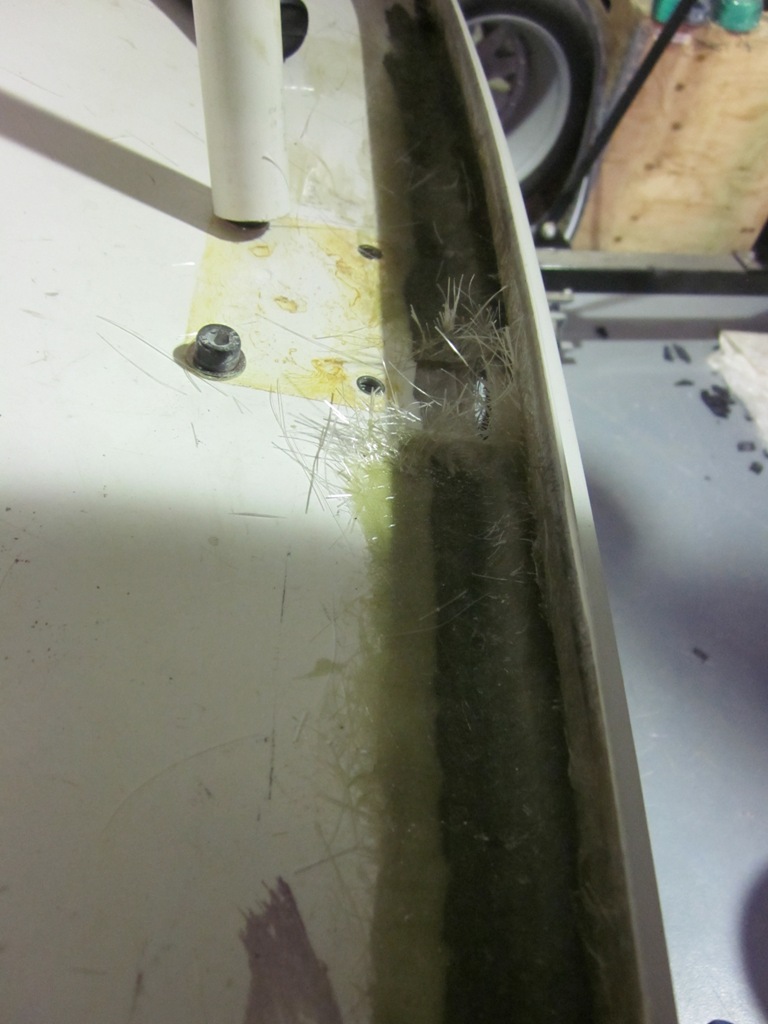
Something I forgot to comment on previously. You have shown where you laid fiberglass over the 6mm gap you created and I can see that you correctly chamfered the two edges back but you have not indicated whether you also laid fiberglass of the reverse side. This is a very important process to avoid cracks appearing later on. You MUST sandwich the join not simply build it up from one side.
Here is an example of how I blocked off side vents. You can see how laying from one side will create a stress concentrate along the edge (photo 3). You need to dress and chamfer (if possible) and layer from the other side as well to alleviate this.
|
11-18-2012, 05:59 PM
|
|
CC Member
|
|
|
Join Date: Jan 2001
Location: Sunbury,
VIC
Cobra Make, Engine: Rat Rod Racer, LS1 & T56
Posts: 5,391
|
|
Not Ranked
Thanks guys,
That's nice work Peter. Why did you block off the vents? Were they in the wrong spot or wrong shape?
I do plan to reinforce both sides of the new join. I'll have to wait to do the underside when I take the body off again in a couple of weeks. I've got some other repairs to do under there too. I'm moving the reverse light to another spot so need to glass that hole up plus I messed up a bit when drilling one of the holes for my quick jacks.
You read my mind on the boot seal. I've sourced a few different samples of pinchweld seal and ground down the esge of the boot opening so the seal fits over. The edge does need to be tweeked a bit to make it fit nice but it's looking pretty good so far. I'll post up some more details shortly.
Cheers
__________________
Mike Murphy
Melbourne Australia
Last edited by Aussie Mike; 11-18-2012 at 06:01 PM..
|
11-18-2012, 08:13 PM
|
|
CC Member
|
|
|
Join Date: Jul 2011
Location: Sydney,
NSW
Cobra Make, Engine: Puckett 250 GTO - LS1
Posts: 567
|
|
Not Ranked
Quote:
Originally Posted by Aussie Mike
...Peter. Why did you block off the vents? Were they in the wrong spot or wrong shape?...
|
A bit of both (see photos). The Datsun is 100mm shorter in the wheelbase than the Ferrari and the vents on the red body did nothing to try and disguise that fact. The different vents on other body are, I feel, better but still could be improved so I recreated them on the red body.
I made a whole new door and the first photo shows the papier mache mock-up I made to see if it looked okay and the new door is in the second photo. |
11-18-2012, 06:32 PM
|
 |
CC Member
|
|
|
Join Date: Nov 2009
Location: Cheltenham,
Vic
Cobra Make, Engine: Classic Revival CR3516, LS3, Aussie Mike'd T-56, 3.70 LSD, AP brakes, Penske shocks
Posts: 1,616
|
|
Not Ranked
Like Dave the fit on my bonnet and boot look very good, but I have a reversed door problem - drivers door is good while passenger door is a disappointment.
Nice work Mike and Peter
__________________
BUILD-BLOG: http://cobrablog.holnet.net
Ben in AU
|
11-18-2012, 07:35 PM
|
|
CC Member
|
|
|
Join Date: Jan 2001
Location: Sunbury,
VIC
Cobra Make, Engine: Rat Rod Racer, LS1 & T56
Posts: 5,391
|
|
Not Ranked
My drivers door was pretty horrible. It's got quite a twits in it. It doesn't look too bad now. The passengers door is better but I haven't looked at it too seriously yet.
__________________
Mike Murphy
Melbourne Australia
|
11-18-2012, 08:00 PM
|
|
CC Member
|
|
|
Join Date: Jan 2009
Location: Tynong North, Melbourne,,
Vic
Cobra Make, Engine: Classic Revival CR3514, LS3, Dual Quads, Holley Dominator EFI, TR6060, VE 3.7 LSD, AP Racing Brakes, 17x8 & 10 Custom Dragway Billet Wheels.
Posts: 601
|
|
Not Ranked
Mike,
Got any pics of your quick jacks and mountings ?
Dave
__________________
http://cobra-cr3514.blogspot.com/
|
11-18-2012, 09:36 PM
|
|
CC Member
|
|
|
Join Date: Jan 2001
Location: Sunbury,
VIC
Cobra Make, Engine: Rat Rod Racer, LS1 & T56
Posts: 5,391
|
|
Not Ranked
Quote:
Originally Posted by DaveW
Mike,
Got any pics of your quick jacks and mountings ?
Dave
|
Hi Dave,
The quick jacks are home made. A friend has an engineering firm that does work for a water jet cutting company. He got some profiles cut from 6mm aluminium plate. I welded them together with my MIG when I was experimenting with getting it working on aluminium.
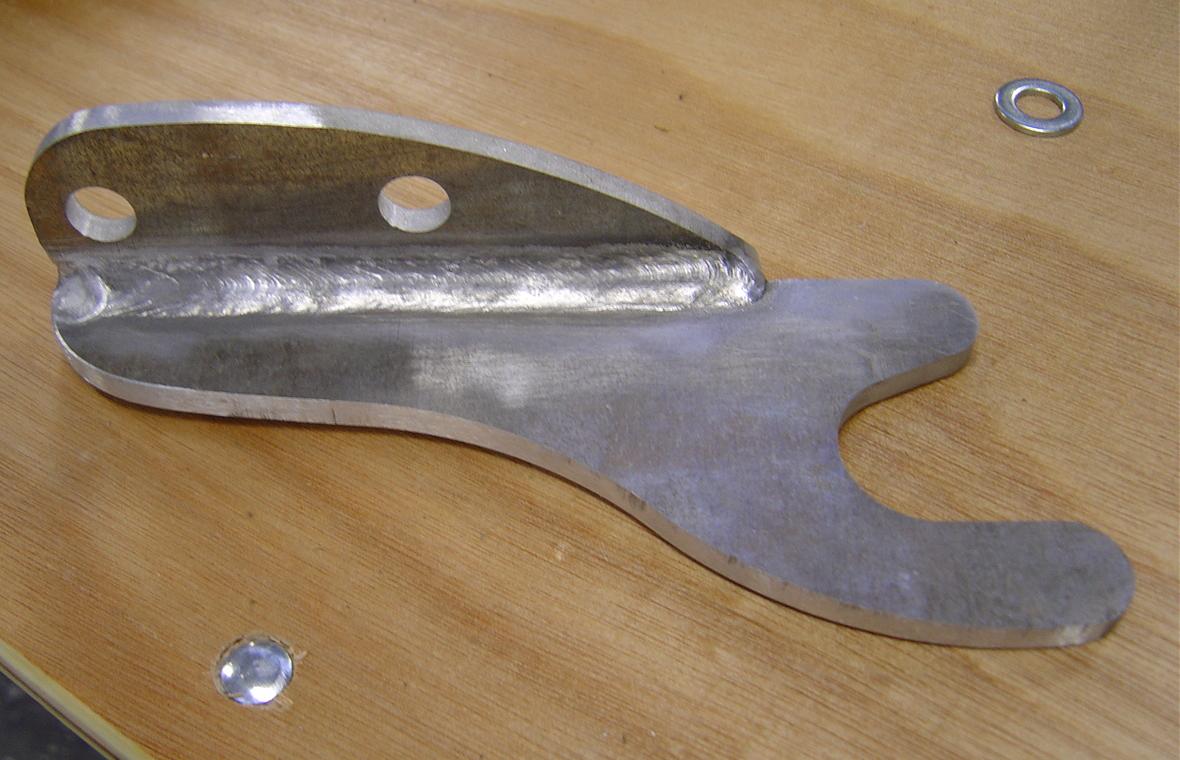
For the mounting instead of using all-thread and tube like most seem to, I machined up some standoffs in the right length from 3/4" aluminum rod. I drilled and tapped the ends with 10mm threads and used some big stainless button head cap screws on the outside to bolt the quick jack to the stand off.
On the chassis I just ran a regular 10mm bolt throuhg the bracket. I made a change to the chassis mounting holes. They were just a hole through the box section but I was concerned about not having a crush tube in there. I drilled out one side of the box section and welded a steel bushing in there. In theory I reckon you could lift the car with these quick jacks.
I'll try and dig them out and take some pictures. Or post pics when I do the fiberglass repairs as I will have to refit them to get the holes right.
Cheers
__________________
Mike Murphy
Melbourne Australia
Last edited by Aussie Mike; 11-18-2012 at 09:40 PM..
|
11-18-2012, 09:27 PM
|
|
CC Member
|
|
|
Join Date: Jan 2001
Location: Sunbury,
VIC
Cobra Make, Engine: Rat Rod Racer, LS1 & T56
Posts: 5,391
|
|
Not Ranked
Hi Peter,
It'll be a great looking car when it's all done. I've been keen to do one of them myself for a long time.
I remeber reading on GTO build thread where they streched the wheel base on the Datsun by 100mm. It didn't look too hard to do as they just cut the front rails and sheet metal and extended them out with a jig holding the cross member bolts in the right spot.
Cheers.
__________________
Mike Murphy
Melbourne Australia
|
11-18-2012, 09:50 PM
|
|
CC Member
|
|
|
Join Date: Jan 2009
Location: Tynong North, Melbourne,,
Vic
Cobra Make, Engine: Classic Revival CR3514, LS3, Dual Quads, Holley Dominator EFI, TR6060, VE 3.7 LSD, AP Racing Brakes, 17x8 & 10 Custom Dragway Billet Wheels.
Posts: 601
|
|
Not Ranked
Thanks Mike, they look great, Your welding looks top notch too.
Dave
__________________
http://cobra-cr3514.blogspot.com/
|
11-18-2012, 10:08 PM
|
|
CC Member
|
|
|
Join Date: Jul 2004
Cobra Make, Engine: 347 Stroker Morrison Injection. Registered.
Posts: 1,440
|
|
Not Ranked
DaveW, I had the same problem with my drivers door which sat about 40mm higher than the body. To fix it my fiberglass guy had to remove the glass encasing the square tube the door striker is bolted to, cut it of, reposition and then re-weld it.
The curved section behind the square tube came nearly flush with the rolled edge of the body. To get the glass to sit back so the carpet wouldn't protrude from the body lip above, my guy cut the glass into 10-15mm vertical strips, pushed the wall into the new position then re-glassed everything up again. He did a brilliant job!
Regards.
__________________
Mando
|
11-19-2012, 12:21 AM
|
|
CC Member
|
|
|
Join Date: Oct 2007
Location: Darwin,
NT
Cobra Make, Engine: Classic Revival Kobra,LS7 427
Posts: 380
|
|
Not Ranked
My drivers side door was so bad I was going to send it back to Ian and get a new one! In the end I sanded it through the matting and re glassed it. My doors and boot, bonnet took a lot of work to line up with the body. I was very dissapointed with my panels of my CR. I still have a 20 mm offset from left guard to right that I havent worked out how to fix, I moved the body to the right 10 mm and still have to run more camber on my right wheel so it sit inside the guard to pass rego
|
11-19-2012, 12:54 AM
|
|
CC Member
|
|
|
Join Date: Jan 2001
Location: Sunbury,
VIC
Cobra Make, Engine: Rat Rod Racer, LS1 & T56
Posts: 5,391
|
|
Not Ranked
My body shell doesn't fit too bad left to right. Not perfect but good enough for government work.
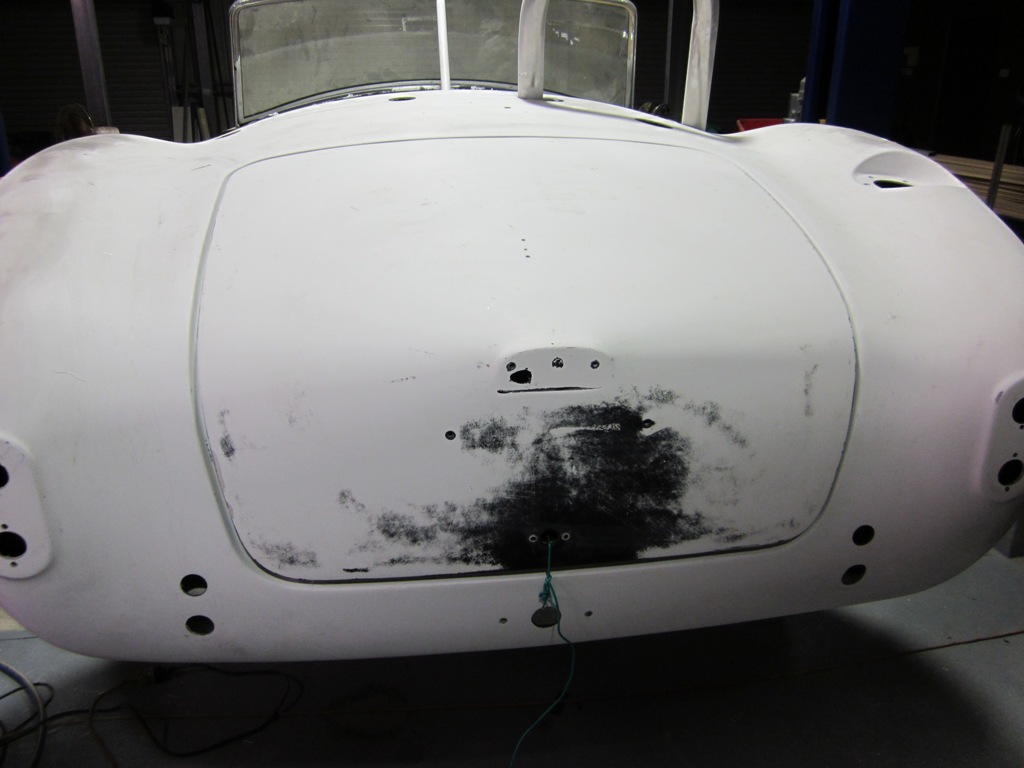
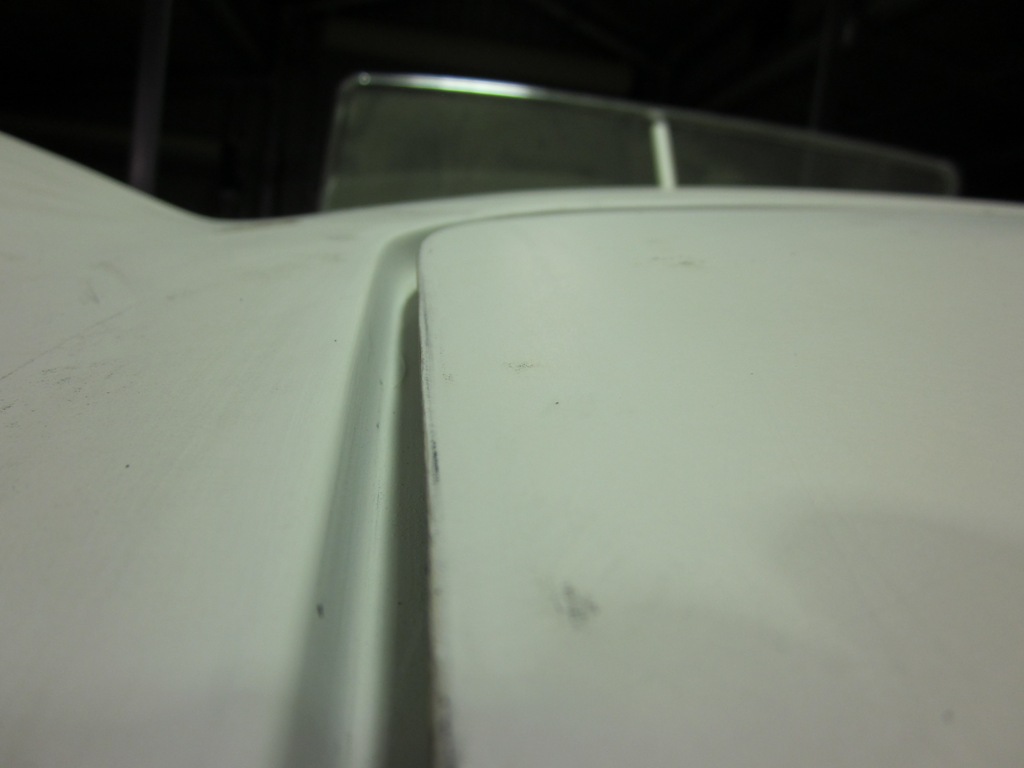
The drivers door has a fair bit of filler in it. More than I rould like. It's probably 1/8" thick near the bottom. The top edge where it meets the body near the windscreen was really bad. I split the top edge of the door away and wedged it in place then glassed up the gap.
Here's what the drivers door looks like now. You can see where it needed a lot of filler.

This area needed a lot of work. This is where I had to split the door and lift the top front edge up.

The panel gap on the doors was huge too. Lots of filling and sanding and it's a lot closer now.
You can see the line of filler along the bottom edge of the door opening to see how wide the original gap was. It was even worse before I lifted the top of the door.

Cheers
__________________
Mike Murphy
Melbourne Australia
Last edited by Aussie Mike; 11-19-2012 at 12:59 AM..
|
11-19-2012, 02:43 AM
|
 |
CC Member
|
|
|
Join Date: Apr 2008
Location: Melbourne,
VIC
Cobra Make, Engine: Classic Revival CR 3505, LS1, T56 6 Speed, VE 3.45 LSD Rear, 6 Spot AP Fronts, 4 Spot Wilwood Rears
Posts: 1,121
|
|
Not Ranked
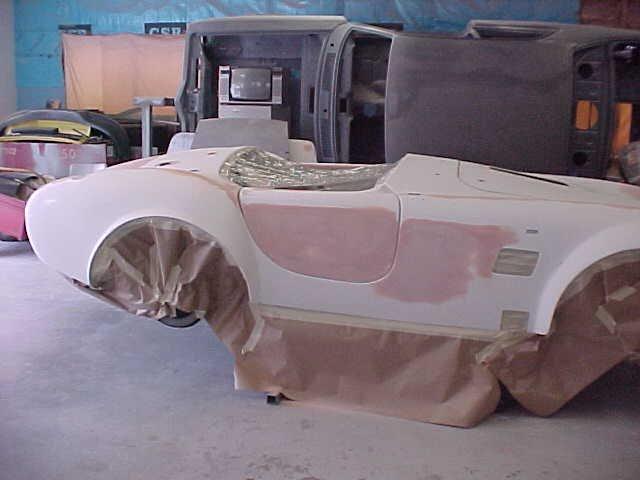
You're not alone, here's how much filler my door and side panel had and Boot in second Pic.
I think each body varies.
 |
| Thread Tools |
|
|
| Display Modes |
Rate This Thread |
 Hybrid Mode Hybrid Mode
|
|
 Posting Rules
|
You may not post new threads
You may not post replies
You may not post attachments
You may not edit your posts
HTML code is Off
|
|
|
All times are GMT -7. The time now is 07:48 AM.
|
|


