Welcome to Club Cobra! The World's largest
non biased Shelby Cobra related site!
- » Representation from nearly all
Cobra/Daytona/GT40 manufacturers
- » Help from all over the world for your
questions
- » Build logs for you and all members
- » Blogs
- » Image Gallery
- » Many thousands of members and nearly 1
million posts!
YES! I want to register an account for free right now!
p.s.: For registered members this ad will NOT show
 
 Main Menu
|
|
Nevada Classics
|
|
Advertise at CC
|
|
June 2026
|
| S |
M |
T |
W |
T |
F |
S |
| |
1 |
2 |
3 |
4 |
5 |
6 |
| 7 |
8 |
9 |
10 |
11 |
12 |
13 |
| 14 |
15 |
16 |
17 |
18 |
19 |
20 |
| 21 |
22 |
23 |
24 |
25 |
26 |
27 |
| 28 |
29 |
30 |
|
|
|
|
|
|
CC Advertisers
|
|
 341Likes 341Likes

09-27-2014, 01:59 PM
|
|
CC Member

|
|
|
Join Date: Sep 2010
Location: Beerwah,
QLD
Cobra Make, Engine:
Posts: 218
|
|

 Not Ranked
Great to see another build thread kicking off. Will be watching with interest. Murray
|
-
Advertising

09-27-2014, 02:03 PM
|
|
CC Member
|
|
|
Join Date: Feb 2013
Location: Ormiston,
QLD
Cobra Make, Engine: Absolute Pace 427 SC
Posts: 461
|
|
Not Ranked
Hi Simon
A nice thing that I should have done when was putting in the insulation was to trim the insulation material 15 MM narrower than the stainless panel then you would be able to see that there is an Aluminium Chassis between the Stainless Panels.
Another thing to consider is to seal the edges of the insulation material with heat resistant Silastic so it won't fray and run .
Also remove the protective material from around the bolt holes in the stainless panels before you fit them to the engine bay.
This will stop the being little bits of the plastic covering poking out from under the heads of the Stainless Button Head bolts when you fix them to the bulkhead.
That's all for now and well done.
Cheers
Brad
__________________
There is nothing better than a cold beer
|
09-27-2014, 02:26 PM
|
|
CC Member
|
|
|
Join Date: Jun 2001
Location: munno para west,
sa
Cobra Make, Engine: absolute pace chassis #50 L98 & 6 speed auto
Posts: 1,141
|
|
Not Ranked
This is what i like all the little time saving tips discovered by those before us andwho are willing to share there finds with the rest of us
Cheers dean
__________________
a cobra is a passion anything else is just a car
i dont care what the question is .. The answer is more power!!!
|
09-27-2014, 04:25 PM
|
|
CC Member
|
|
|
Join Date: Jul 2012
Location: Melbourne,
Vic
Cobra Make, Engine: Pace 427SC. LSA Supercharged with 6sp TR-6060 trans.
Posts: 463
|
|
Not Ranked

Quote:
Originally Posted by Cobra01

Hi Simon
A nice thing that I should have done when was putting in the insulation was to trim the insulation material 15 MM narrower than the stainless panel then you would be able to see that there is an Aluminium Chassis between the Stainless Panels.
Another thing to consider is to seal the edges of the insulation material with heat resistant Silastic so it won't fray and run .
Also remove the protective material from around the bolt holes in the stainless panels before you fit them to the engine bay.
This will stop the being little bits of the plastic covering poking out from under the heads of the Stainless Button Head bolts when you fix them to the bulkhead.
That's all for now and well done.
Cheers
Brad
|
Thanks Brad...and to the compliments/interest from others too.
Yes, the manual does present the option to trim the insulation panels 5-10mm inside the line, but after seeing that some of the panels didn't quite fit the shape of my engine bay, we decided it was a smarter option to fit them in place as they were cut, then overlay the polished panels because when they were fitted they would firm the 'reference' that you'd want to trim the insulation panels to.
The manual also suggests to use the Parfix grey roof and gutter silicone to seal the edges, not the (clear) high temp silicone. So I'll be using the former.
Another tip that I recommend is to have a little notebook handy to write down reminders as you observe them. Case in point, when we took the body off, we found two aluminium shims fitted to the right side sill. There was no mention of these in the build manual....so I made a note to reinstall these when the body goes back on. It'd be an easy thing to forget in the grand scheme of things.
__________________
www.paintwerks.com.au
|
09-27-2014, 04:49 PM
|
 |
CC Member
|
|
|
Join Date: Apr 2010
Location: Hobart,
TAS
Cobra Make, Engine: ?????
Posts: 494
|
|
Not Ranked
Good pointers Simon.
It will be good to see all this experience add to the already significant build manual.
I hope you guys had the grand final playing in the background. Nice win for the 'Tassie' Hawks...!
Cheers
Tony
__________________
The road to hell is paved with good intentions
|
09-27-2014, 04:53 PM
|
|
CC Member
|
|
|
Join Date: Feb 2013
Location: Ormiston,
QLD
Cobra Make, Engine: Absolute Pace 427 SC
Posts: 461
|
|
Not Ranked
Yes you are right Simon
You have the advantage of the build manual and I have the disadvantage of a poor performing memory.
Another tip get yourself and your helpers some cotton gloves for handling the polished Aluminium bits because sweaty hands leave a tell tale on the polished alloy.
There is a brake line fitting that screws into a master cylinder be careful that you get the right thread into the master cylinder.
Something my memory remembered.
Cheers
Brad
__________________
There is nothing better than a cold beer
|
09-27-2014, 05:07 PM
|
 |
CC Member
|
|
|
Join Date: Sep 2010
Location: redcliffe,
qld
Cobra Make, Engine: venom motorsports /ls1 auto
Posts: 500
|
|
Not Ranked
how did you get your wife to let you use the dinning table as a cut/ work table
whats the trick
rob
__________________
not all your babies are your children
|
09-27-2014, 05:59 PM
|
|
CC Member
|
|
|
Join Date: Jul 2012
Location: Melbourne,
Vic
Cobra Make, Engine: Pace 427SC. LSA Supercharged with 6sp TR-6060 trans.
Posts: 463
|
|
Not Ranked
Brad, thanks for the tip re the brake fitting. The manual has some detail and I know Craig has been working his backside off on the latest version and when that eventually comes through it will be really helpful, however since I haven't built an ICV before, I really value your input since you've "been there, done that". So, thanks for putting up with my phone calls! I promise to ring you only after I've scratched my head so hard, it hurts (or even bleeds)!!
Tony, we actually had Gold 104.3 on in the background. TBH, call me un-Australian if you may, but I couldn't care less for the footy. Guess that's why we were building a Cobra on Grand Final day in the first place! 
Rob, it's a kitchen/dining table...but I don't think my wife thought anything of it. Besides, we'd just gotten back from a small vacation and all she wanted to do was get into bed. So, I just made sure everything was nice and clean after I'd finished. I actually think that's the secret (making sure you leave no reminder that you'd been there)!
It's funny...I ordered my Cobra 2 years ago and received it late last December. It has sat idle in my factory collecting dust for the past near-on 10 months while I worked my ass off to earn money to buy parts. Now that I've started the build, all I want to do is get to my factory to 'do something, do anything' on the car! Can't stop thinking about it.  Alas, family commitments do get in the way!
At least I can go in a few hours early each morning, and spend my lunch break on her as well. It may be my famous last words, but I don't see the Pace 427SC as taking all that long to build (especially that mine is at a roller stage).
Cheers,
Sime
__________________
www.paintwerks.com.au
|
09-27-2014, 07:21 PM
|
 |
CC Member
|
|
|
Join Date: Feb 2008
Cobra Make, Engine: HARRISON, FORD 302, SOLD
Posts: 771
|
|
Not Ranked
Quote:
It's funny...I ordered my Cobra 2 years ago and received it late last December. It has sat idle in my factory collecting dust for the past near-on 10 months while I worked my ass off to earn money to buy parts. Now that I've started the build, all I want to do is get to my factory to 'do something, do anything' on the car! Can't stop thinking about it. Alas, family commitments do get in the way!
At least I can go in a few hours early each morning, and spend my lunch break on her as well. It may be my famous last words, but I don't see the Pace 427SC as taking all that long to build (especially that mine is at a roller stage).
|
That's my problem too, prioritising work V's building my toys....
I live and work from home, my shed has the hoist with my latest build on it surrounded by all the work machinery. Every time I head into the shed it's the same decision.....work or toy, work or toy 
BTW great thread as well!!
__________________
Greg
Last edited by byroncobra; 09-27-2014 at 07:24 PM..
|
09-27-2014, 07:47 PM
|
 |
CC Member
|
|
|
Join Date: Sep 2012
Location: Maribyrnong,
Vic
Cobra Make, Engine: Cobra Replica, 5.0 Supercharged Coyote
Posts: 385
|
|
Not Ranked
Hey Sime it was a great way to spend Saturday. Lucky the Pace body is so light  |
09-27-2014, 08:12 PM
|
|
CC Member
|
|
|
Join Date: Jul 2012
Location: Melbourne,
Vic
Cobra Make, Engine: Pace 427SC. LSA Supercharged with 6sp TR-6060 trans.
Posts: 463
|
|
Not Ranked
Thanks Darryl. I really appreciated you and Russell coming on down to help me out, and I'm glad you had fun. I only wish there was more time in the day!
__________________
www.paintwerks.com.au
|
09-28-2014, 12:10 AM
|
 |
CC Member
|
|
|
Join Date: Oct 2012
Location: Geelong,
VIC
Cobra Make, Engine: Pace 427S, Coyote Aluminator
Posts: 122
|
|
Not Ranked
It was a great day and I was surprised at how easy it was to remove the body. I will build a mobile cradle this week to carry the body on mine so I can move it around for more room.
I have now worked out where some plates go that I have sitting around but I cant find the rear shocker sealing plate, must be there somewhere.
Cheers
Russell
|
09-28-2014, 03:23 AM
|
 |
CC Member
|
|
|
Join Date: Jan 2002
Location: Melbourne, Australia,
VIC
Cobra Make, Engine: AP Pace427 (AP4033) GM L77 6.0L TR6060
Posts: 838
|
|
Not Ranked
Great detail Sime. Sorry I couldn't get there. Next time.
I'm having a lovely holiday in FNQ for what it's worth.
__________________
Guy
Cobra Progress guye-cobra.blogspot.com
|
11-16-2014, 02:17 AM
|
|
CC Member
|
|
|
Join Date: Jul 2012
Location: Melbourne,
Vic
Cobra Make, Engine: Pace 427SC. LSA Supercharged with 6sp TR-6060 trans.
Posts: 463
|
|
Not Ranked
Things have been really busy both on the work and home front so I haven't had as much time as I would have liked for the build.
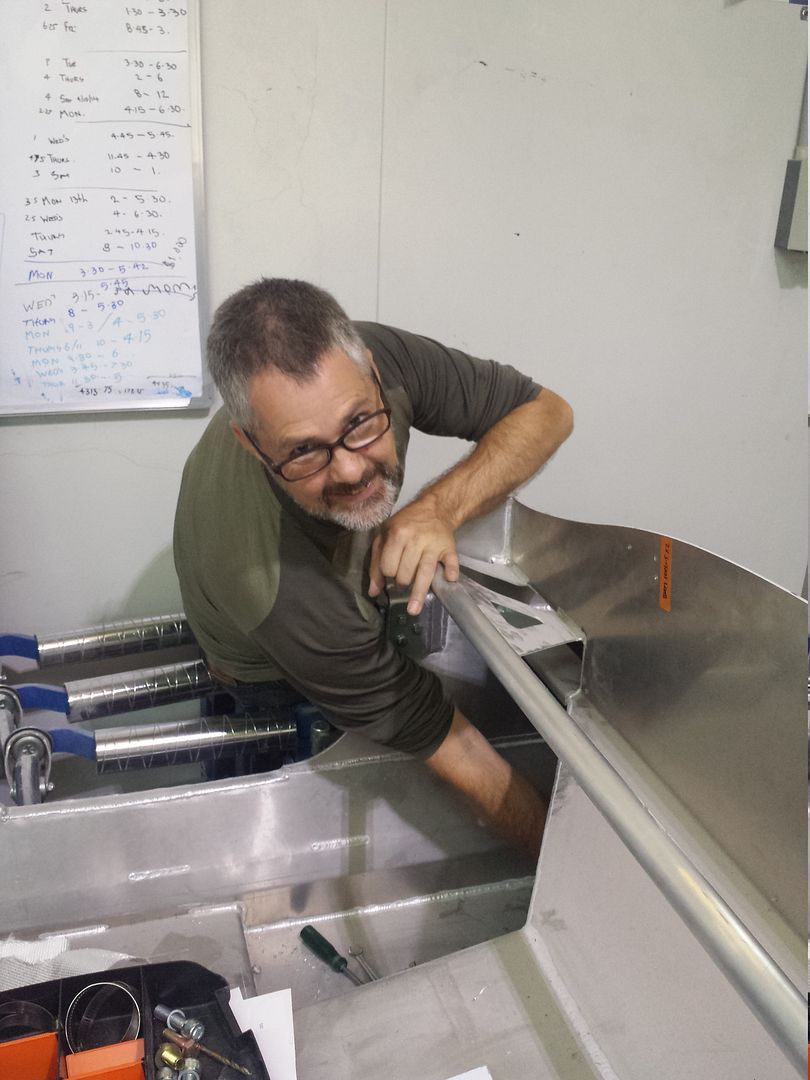
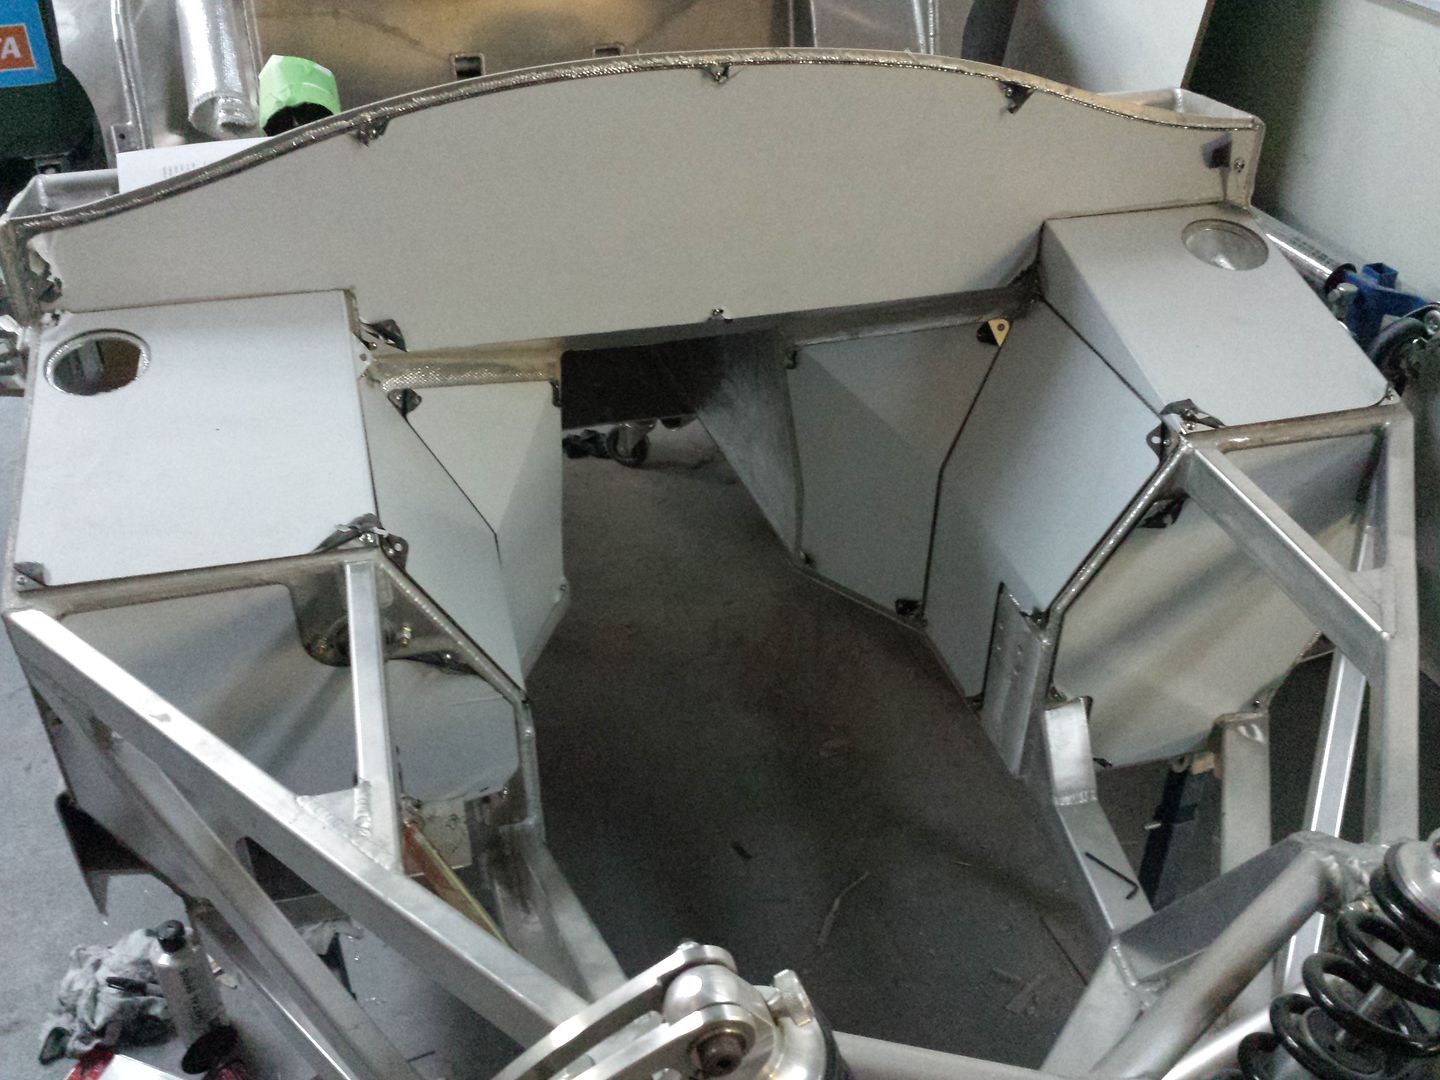
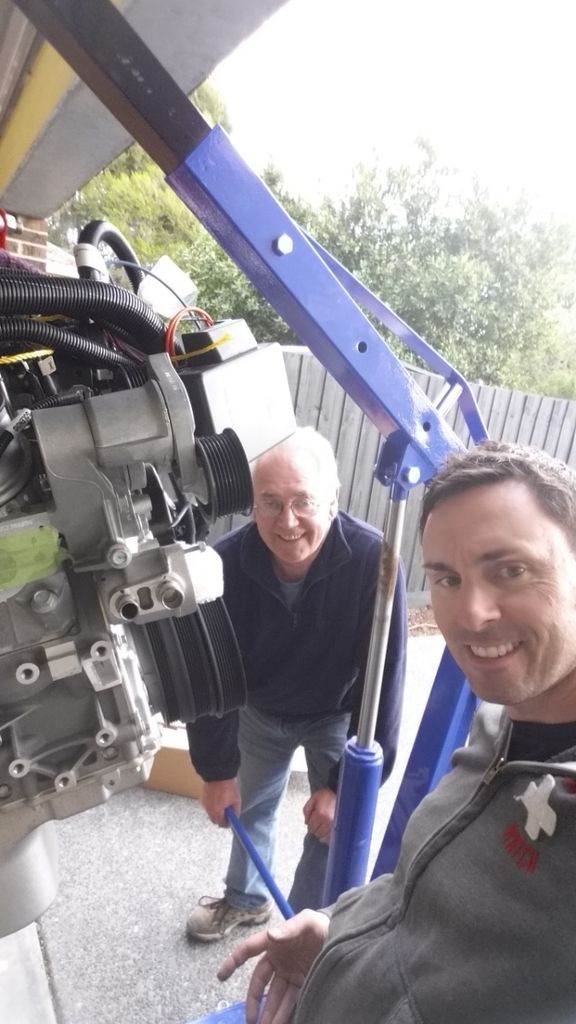
However, this afternoon, Guy came over and helped me get stuck into finishing the fitting of the mirror polished stainless heat shield panels. I had already completed fitting the driver side panels, so we tackled the passenger side ones.
Everything went very smoothly except you need to be careful that you have the passenger side vertical stainless panel (@ the end of the footbox) oriented in the correct way. It's almost a symmetrical design, but not quite symmetrical by just a smidge! We found that where the bolts call for placement through the chassis so the nut faces outwards, you can use a slightly larger drill bit in order that you can set up some adjustment of the panel in order to get everything to line up nicely.
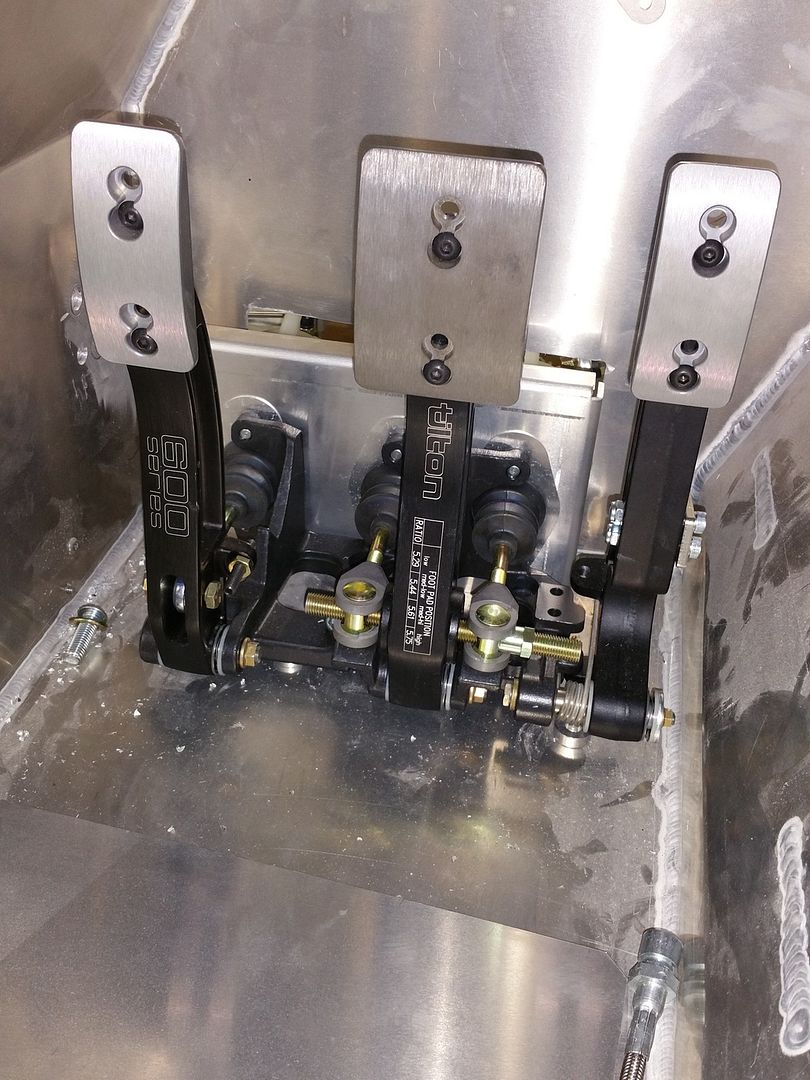
Next, I'm going to assemble the pedal box and fit that along with the GM drive-by-wire throttle unit, and then it's on to the brake lines and charcoal line. Will start on the interior insulation as well.
If I can find the time and I receive all the parts I need, my goal is to have the car as a running 'go cart' by the end of the year. I may be a little overly-ambitious however! 
Guy hard at work:
And the finished product! Very happy with the way it has turned out.
__________________
www.paintwerks.com.au
Last edited by Paintwerks; 11-16-2014 at 02:25 AM..
|
11-16-2014, 02:25 AM
|
|
CC Member
|
|
|
Join Date: Apr 2010
Location: Hobart,
TAS
Cobra Make, Engine: ?????
Posts: 494
|
|
Not Ranked
Looks good Simon.
Coming along well...
__________________
The road to hell is paved with good intentions
|
11-16-2014, 03:05 AM
|
|
CC Member
|
|
|
Join Date: Jan 2002
Location: Melbourne, Australia,
VIC
Cobra Make, Engine: AP Pace427 (AP4033) GM L77 6.0L TR6060
Posts: 838
|
|
Not Ranked
__________________
Guy
Cobra Progress guye-cobra.blogspot.com
Last edited by guye; 11-16-2014 at 03:07 AM..
|
04-14-2015, 09:02 AM
|
|
CC Member
|
|
|
Join Date: Jul 2012
Location: Melbourne,
Vic
Cobra Make, Engine: Pace 427SC. LSA Supercharged with 6sp TR-6060 trans.
Posts: 463
|
|
Not Ranked
My apologies for the delay in posting updates. Work and family life have taken up most of my time and I have found it difficult to work on the car. However, approx. 4 weeks ago I brought the Pace back home from my factory which is great as it's easy to head out into the garage to do some wrenching.
So, the latest updates are:
Assembled pedal box and drive by wire bell crank however couldn't fit the DBW and pedal box until I fit a new pedal box ceiling panel (being an early example, my car had a little over-exuberance in the lightning department where I ended up having nowhere to bolt one of the DBW bolts. Pace have since sent me the correct panel and it will be TIG welded in over the next week.
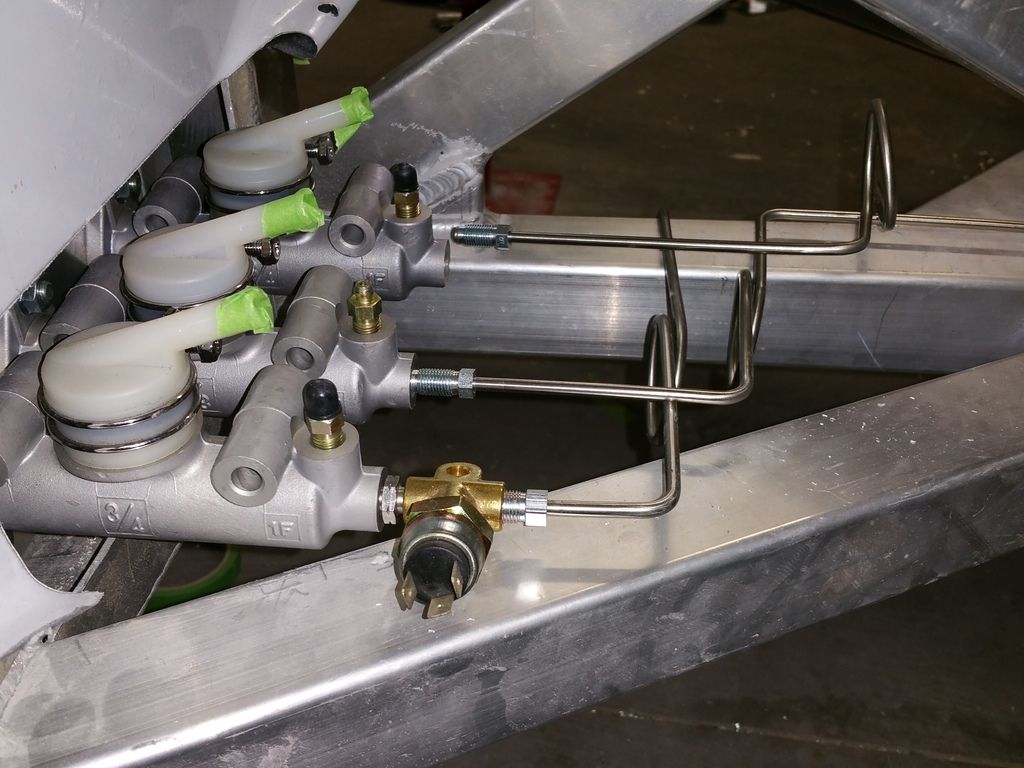
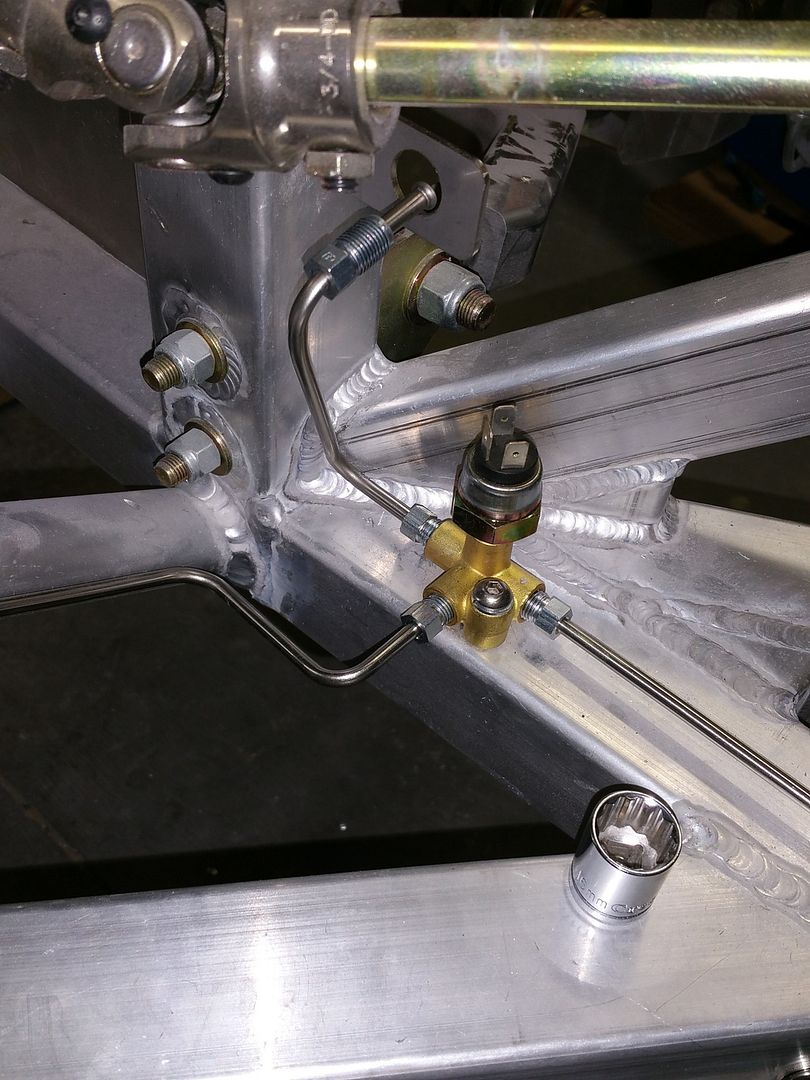
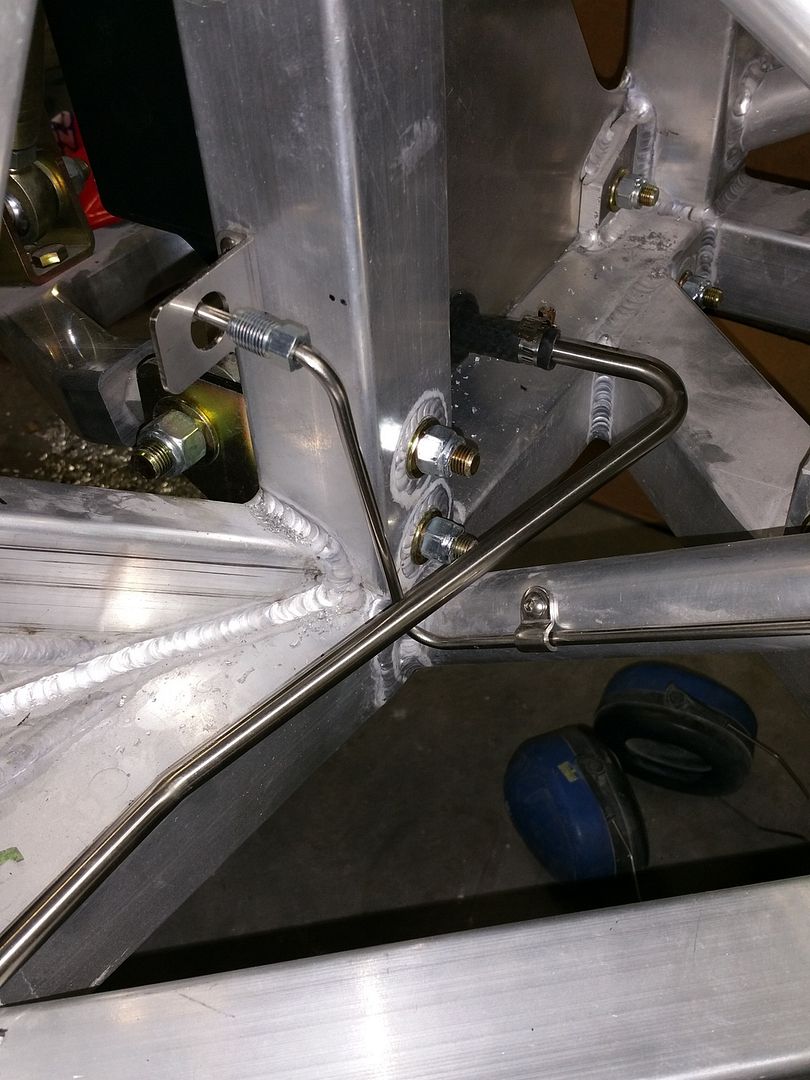
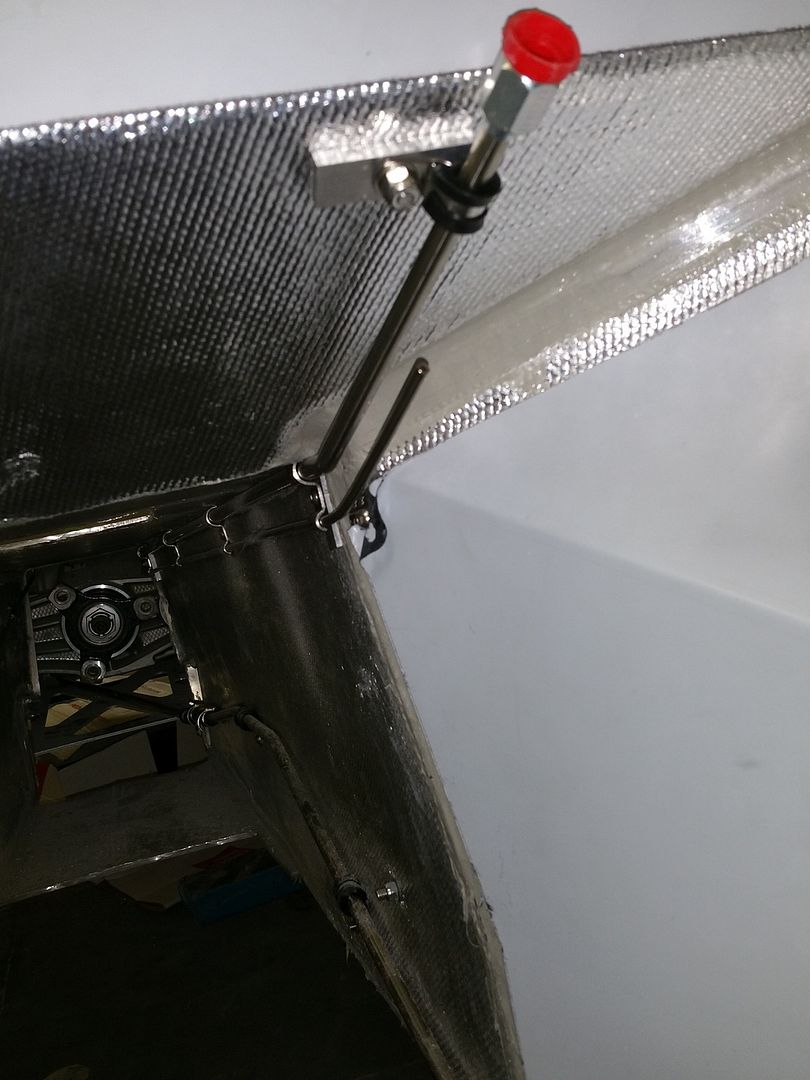
Installed all the hard brake lines, unions and pressure switches:

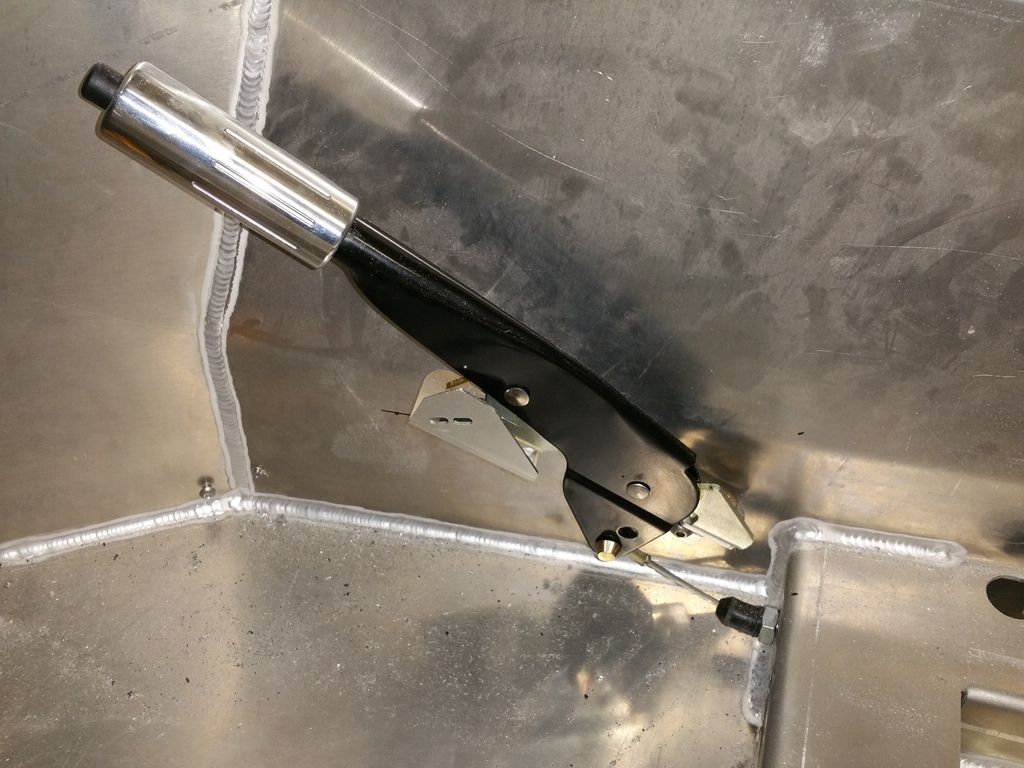
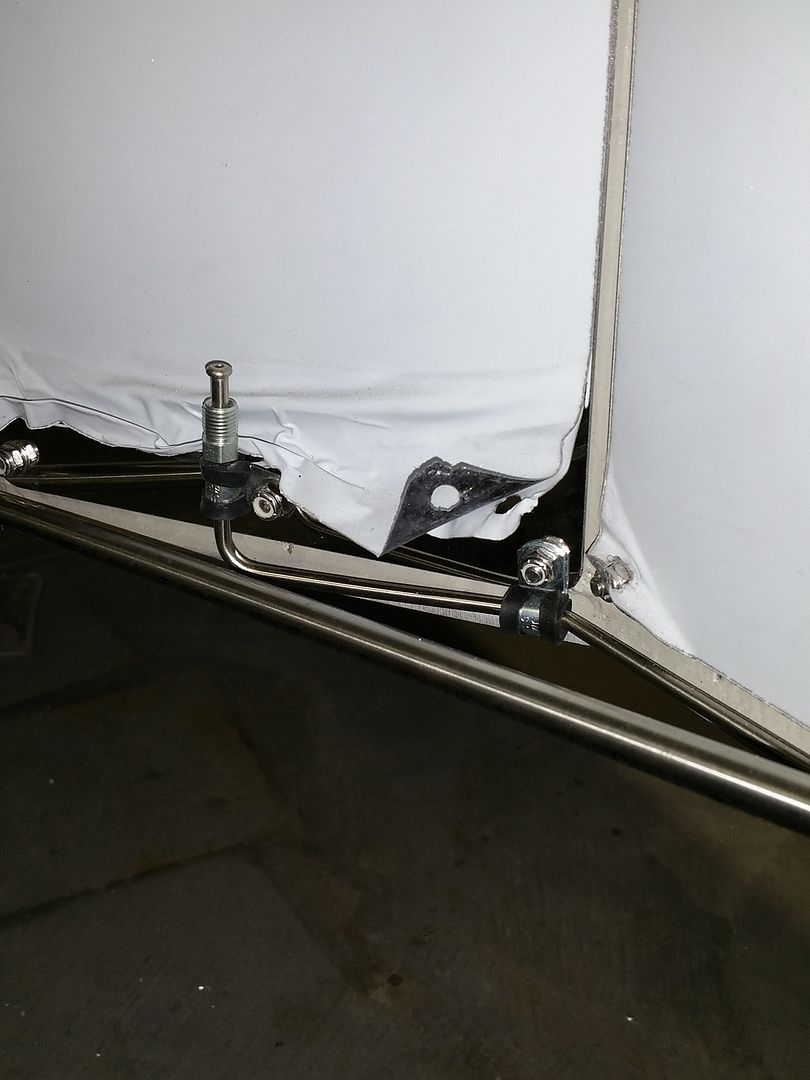
Installed the handbrake handle, cables and linkage:

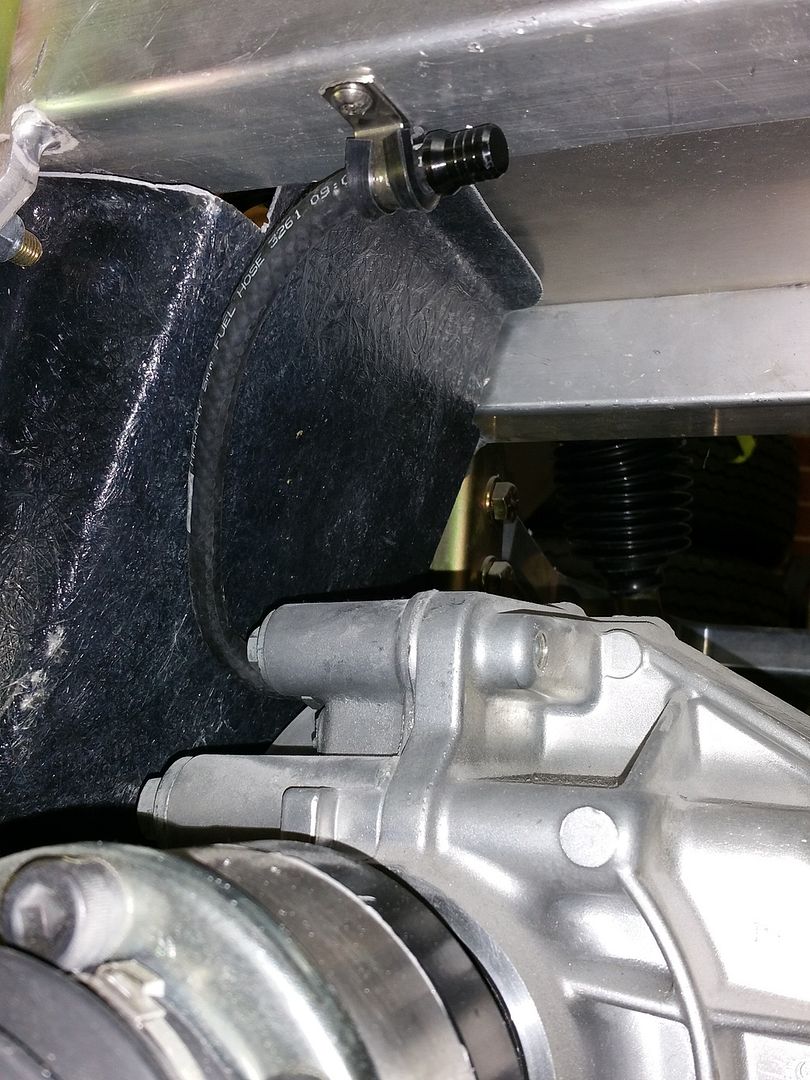
Installed fuel hard line and vacuum line:
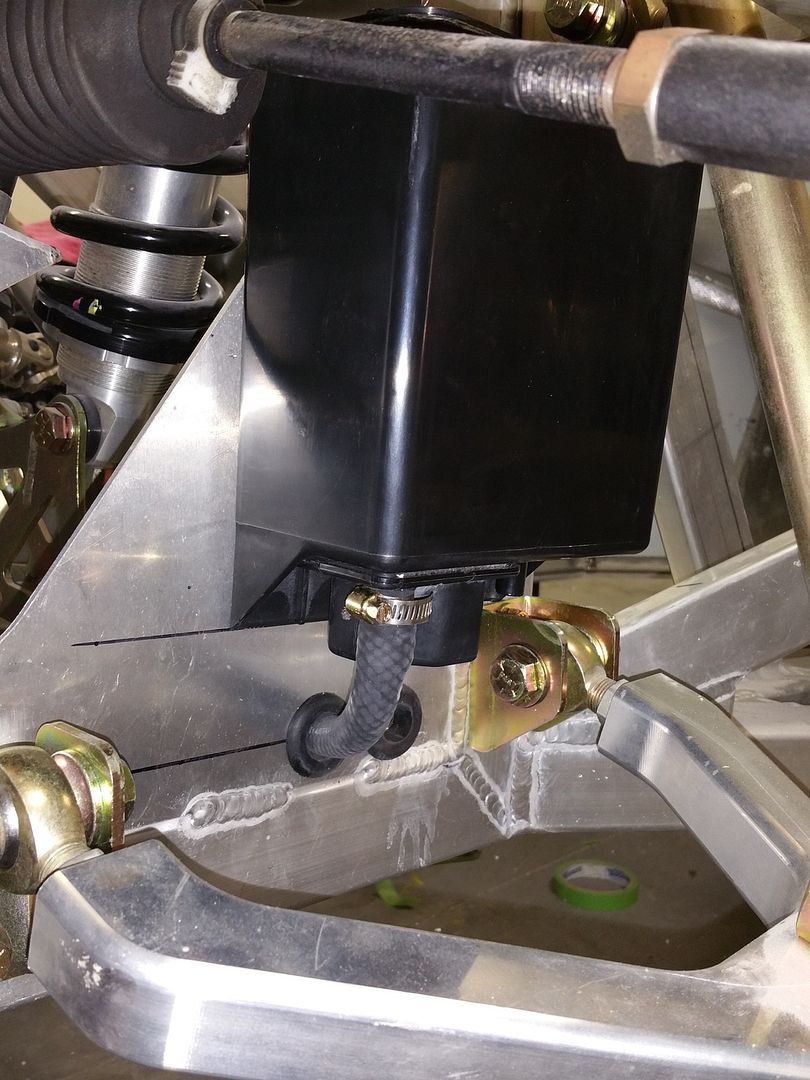
Installed charcoal cannister and fuel vapour vent hard line. The trick to fit the 10mm hose over the barb is to sand the barb right down to within an inch of it's life, chamfer the inside of the hose, heat the hose in boiling water, apply a little grease to the hose end and most importantly....push like a mother:

Installed clutch line stand-off:
Installed rear pushrod seals:

Fitted differential breather:
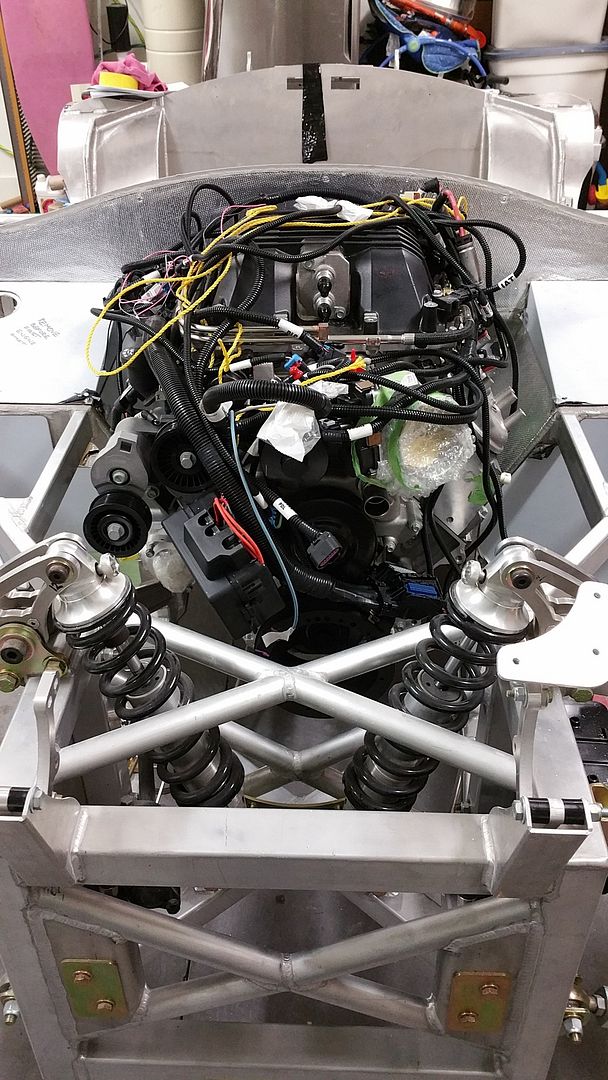
Guy, Russell and myself attempted to fit the LSA V8 and transmission a couple weekends ago but we ran into some issues with the clearance of the clutch feed line, plus it appears my engine mount holes were incorrectly drilled when my car was made. So they need to be TIG-weld plugged up and new holes drilled. Here's the motor/trans with the engine wiring harness fitted ready to be dropped in.
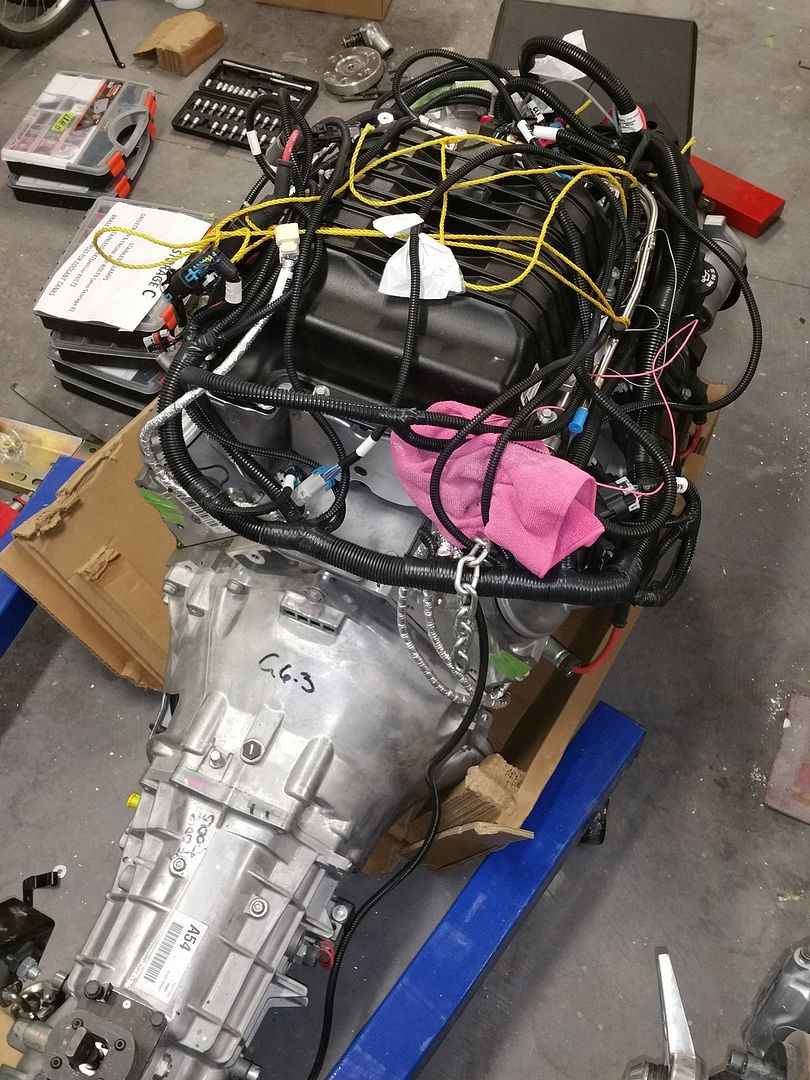 .
Well, there you have it. Progress has been made. Just have to keep at it one thing at a time....that's the key to success here!
__________________
www.paintwerks.com.au
Last edited by Paintwerks; 04-14-2015 at 09:06 AM..
|
04-14-2015, 11:59 AM
|
 |
CC Member
|
|
|
Join Date: Mar 2010
Location: Gold Coast,
QLD
Cobra Make, Engine: Arntz, TKO600, 460
Posts: 818
|
|
Not Ranked
Good work on the update.
I know that the pace manual is very complete and a great reference source for builders, but updates like this have got to be gold for you pace guys as well with actual quality pics.
Keep it up, great to see the progress.
|
05-11-2015, 10:54 PM
|
|
CC Member
|
|
|
Join Date: Jul 2012
Location: Melbourne,
Vic
Cobra Make, Engine: Pace 427SC. LSA Supercharged with 6sp TR-6060 trans.
Posts: 463
|
|
Not Ranked
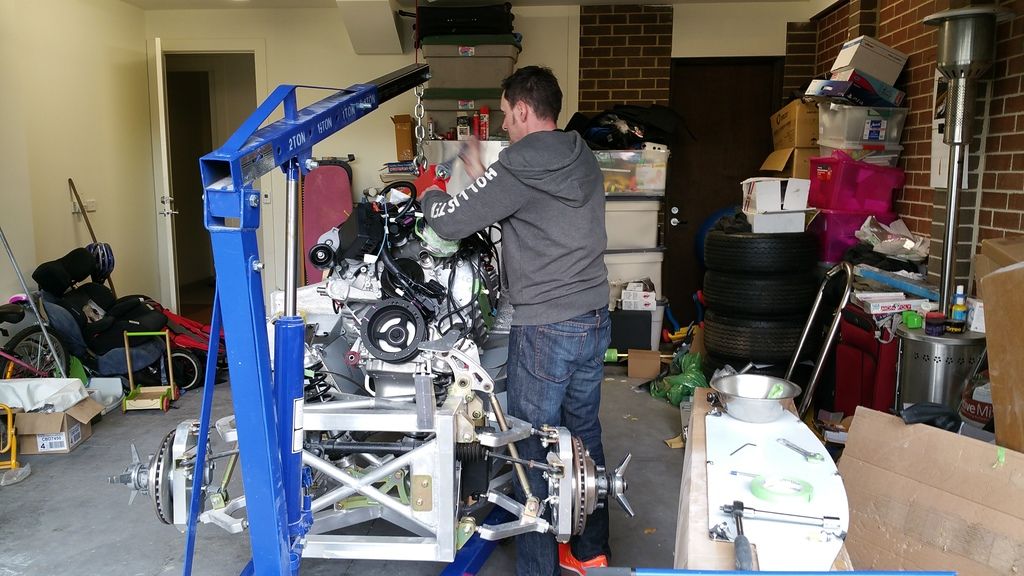
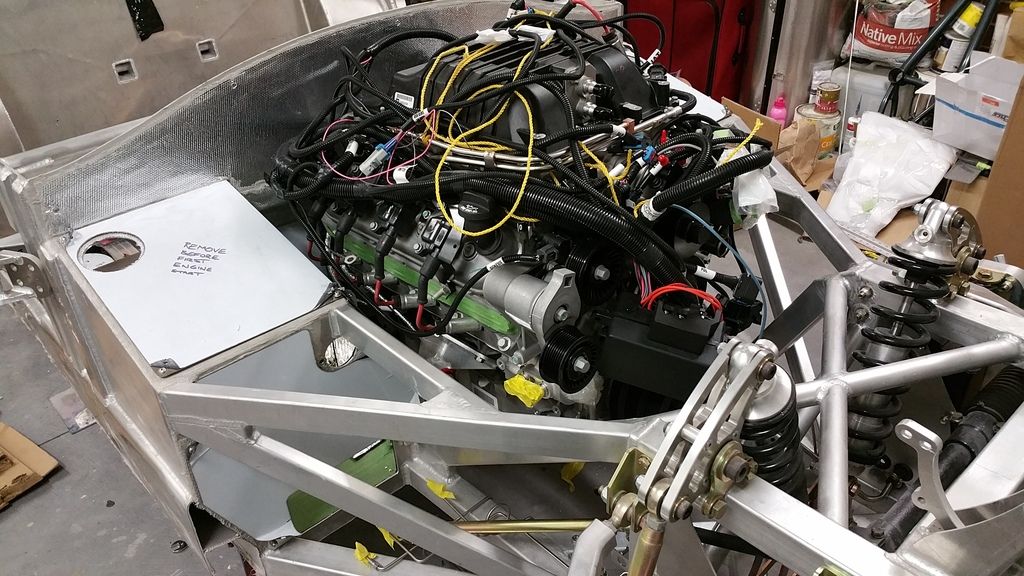
More updates...the mighty LSA and MG9 TR6060 are in!
The fitment went reasonably easily although as my particular leveler only had 2 chains (in hindsight, 4 would have been better), the engine was canted to the passenger side. So I had to remove the passenger engine side mount, lower the engine on that side below the chassis mount, bolt up the drivers side mount then raise the motor and pivot off the driver side mount where I could then slide the engine mount into the chassis mount and bolt it to the engine.
Thanks to Russell for his help that day!!
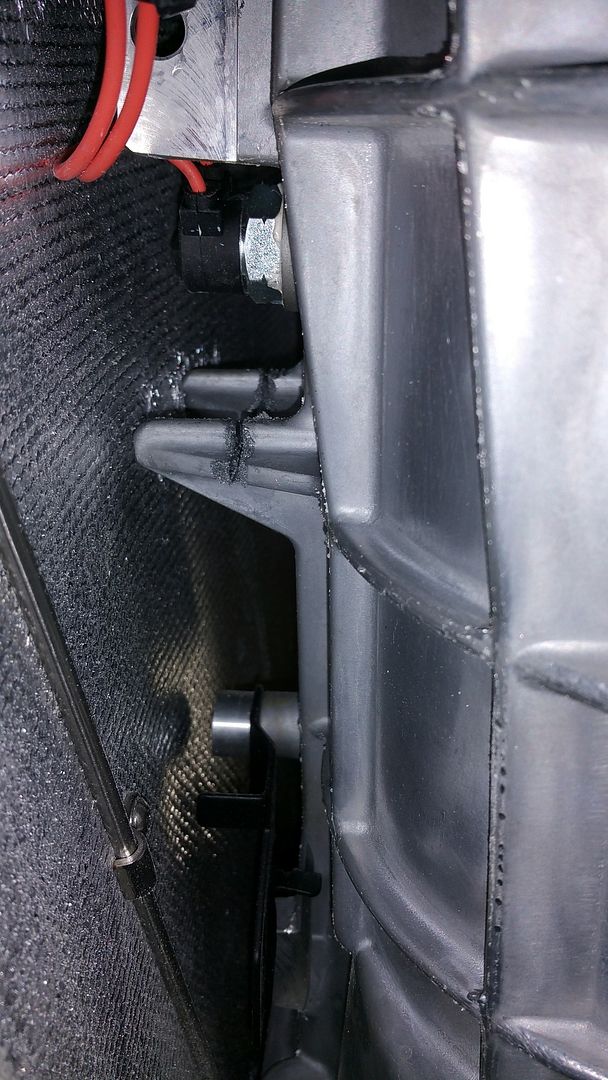
The MG9 transmission requires a few mods to fit the Pace. You need to clearance a few of the ribs on the passenger side to allow for the transmission cooler assembly plumbing.

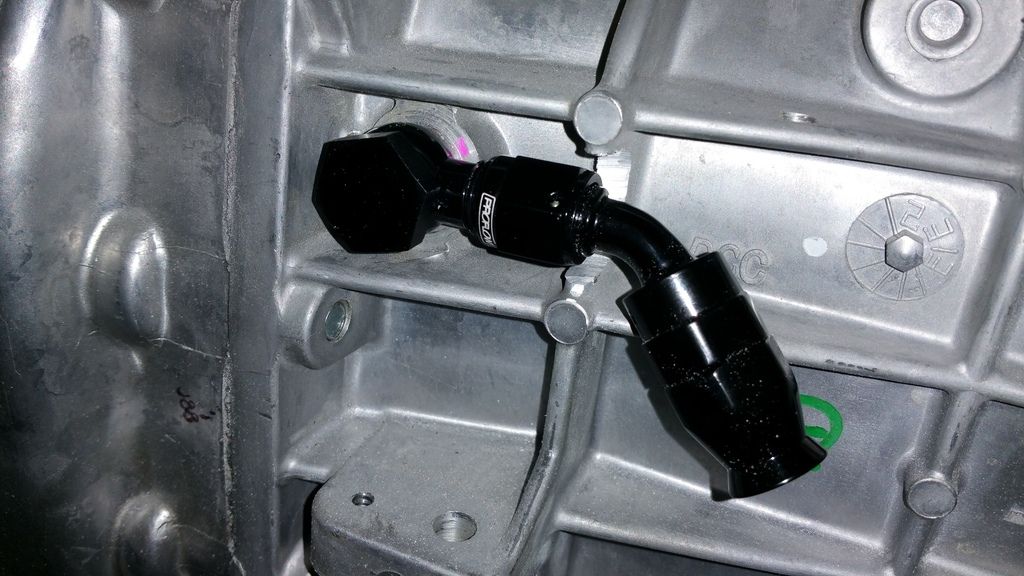
There also is a bracket on the driver's side which you need to remove (at least I did with my car). You can see where I started cutting in with a hand saw.
And here she is:

Also test-fitted the heater. This is normally where the battery goes, however I'll likely be moving the battery to the boot and put the stereo, mounted vertically in a hidden box (with hinged lid) behind the passenger seat. I'll likely fit 2 speakers in the back firewall between the seats.
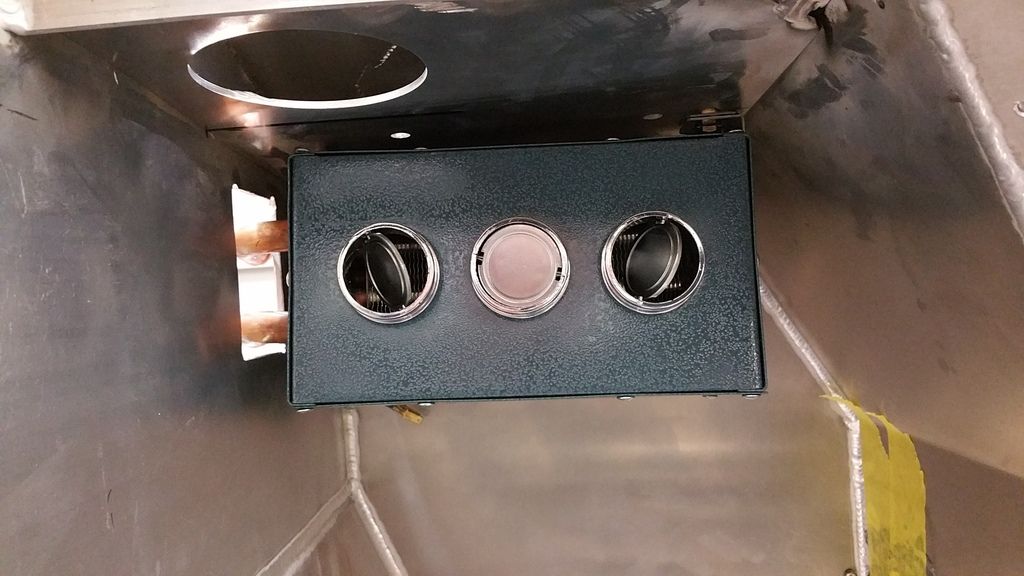

The heater will sit level once bolted in and I will be cleaning up the opening too.
Next up is to mount the pedal assembly and DBW unit, mount the fuel tank, assemble the fuel system and fit the radiator.
__________________
www.paintwerks.com.au
Last edited by Paintwerks; 05-11-2015 at 11:05 PM..
|
05-12-2015, 12:46 PM
|
|
CC Member
|
|
|
Join Date: Mar 2010
Location: Gold Coast,
QLD
Cobra Make, Engine: Arntz, TKO600, 460
Posts: 818
|
|
Not Ranked
Well documented.
When your finished you will look back through this and realize all that you have accomplished.
Must be nice working with nice clean and new parts, and then solving little issues along the way.
|
 Posting Rules
|
You may not post new threads
You may not post replies
You may not post attachments
You may not edit your posts
HTML code is Off
|
|
|
All times are GMT -7. The time now is 02:27 PM.
|
|


 Linear Mode


