Welcome to Club Cobra! The World's largest
non biased Shelby Cobra related site!
- » Representation from nearly all
Cobra/Daytona/GT40 manufacturers
- » Help from all over the world for your
questions
- » Build logs for you and all members
- » Blogs
- » Image Gallery
- » Many thousands of members and nearly 1
million posts!
YES! I want to register an account for free right now!
p.s.: For registered members this ad will NOT show
 
 Main Menu
|
|
Nevada Classics
|
|
Advertise at CC
|
|
May 2026
|
| S |
M |
T |
W |
T |
F |
S |
| |
|
|
|
|
1 |
2 |
| 3 |
4 |
5 |
6 |
7 |
8 |
9 |
| 10 |
11 |
12 |
13 |
14 |
15 |
16 |
| 17 |
18 |
19 |
20 |
21 |
22 |
23 |
| 24 |
25 |
26 |
27 |
28 |
29 |
30 |
| 31 |
|
|
|
|
|
|
|
|
CC Advertisers
|
|

07-14-2010, 07:52 PM
|
 |
CC Member

|
|
|
Join Date: Aug 2001
Location: Melbourne, Australia,
Vic
Cobra Make, Engine: G-Force Mk I, 5L Windsor, TKO 600, enhanced Jag / Koni suspension & LSD Diff.
Posts: 2,304
|
|

 Not Ranked
 Chasing wiring route ideas
Folks
Am still struggling to get on with my rebuild, mainly through a lack of time, but am getting some success including re-routing of my wiring to particularly hide it in the engine bay area.
Have had some good results so far, particularly with my loom to the motor now coming in through the tunnel and up behind the engine to hide this loom.
Have been also working on the ancillaries loom for the rest of the engine bay, lights, horns etc. and it is the routing of this bundle of wires that is giving me some decision grief.
This loom comes out of the firewall above the driver's footbox and close to the outside body skin. I've mounted loom attachment hangers to the underside of the body that now lead to a grommet I've fitted through the rear wall of the front wheel arch to pass the loom into the arch area above the front driver's wheel.
So it is from here that I have issues.
The engine bay up front here is seriously uncluttered and even with the radiator in place I don't seem to have too many hiding places to run the loom totally hidden. Upper chassis frames have some gap to any nearby bodywork too.
What suggestions can anyone fire at me to be able to traverse the loom to the passenger side?
I spent a good hour last night playing with some flex to see how I might make this traverse and at the moment the best I would get is having two small sections of loom visible transferring between each wheel guard side panel.
For those somewhat familiar with the GForce / RMC radiator set up, this has now been replaced with a Kennmer style radiator mount, so very upright and surrounded atop by a fixed frame and below by the removable component.
I will take some pictures tonight to help provide some visual description to all this.
However any thoughts in advance would be appreciated.
It can only help me speed up the rebuild!
Thanks Team
__________________
slowy
|
07-14-2010, 08:05 PM
|
 |
CC Member
|
|
|
Join Date: Jan 2007
Location: Melbourne,
VIC
Cobra Make, Engine: Harrison, 6.0L Chev
Posts: 2,513
|
|
Not Ranked
Slowy, I'm also grappling with the last bits of my wiring. Fortunately I have plenty of areas to run conduit. But how about in your case, get some steel/alum section and attach it to the underside of the frame and run the wires through - like a conduit - then paint it to match the frame? Without seeing photos I'm not sure how effectively it will blend in. Surely it will look better than a stack of ribbed conduit and cable ties all over the place.
By the way, that Kenmer radiator mount has just doubled your crash protection rating, you realise that! Solid work.
|
07-14-2010, 08:31 PM
|
|
CC Member
|
|
|
Join Date: May 2004
Location: Melbourne,
Vic
Cobra Make, Engine: Cobra RMC 377ci Windsor, Harrison Daytona Coupe, Ford XC Coupe.
Posts: 1,588
|
|
Not Ranked
Hey Sparky
|
07-14-2010, 08:26 PM
|
|
CC Member
|
|
|
Join Date: Aug 2001
Location: Melbourne, Australia,
Vic
Cobra Make, Engine: G-Force Mk I, 5L Windsor, TKO 600, enhanced Jag / Koni suspension & LSD Diff.
Posts: 2,304
|
|
Not Ranked
Thanks Paul might start by looking at this option. Given I painted the chassis in POR15 it does make for an easy addition if it is do-able.
Will post up some pictures to help with the description and hopefully responses.
And given its over two years since bang, I'm in no rush for further off road excursions.
Have to admit the newer radiator system wasn't as easy a fit as I was hoping. It looked like the radiator was just going to be capable of being lifted into place but instead it has to be backed into place somewhat as normal as the GF fittment.
Still the supporting structure is far more superior and I've got an alloy jobbie out of this effort too.
Cheers
__________________
slowy
|
07-14-2010, 09:34 PM
|
 |
CC Member
|
|
|
Join Date: Jun 2007
Location: Sunshine Coast Qld,
QLD
Cobra Make, Engine: Harrison # 80; Ford 5.0L HO Trickflow heads, cam and rockers and MassFlow EFI
Posts: 3,482
|
|
Not Ranked
Just had mine all re-routed Stephen to do what you are talking about. The engine harness comes thru the passenger side upper footwell and to the area behind the motor and under the start of the tunnel (as you have done). As much as possible of the harness is now inside the firewall. The lighting and ancillaries are in the engine bay and clipped under the edges of the body moulding around the sides of the bonnet (if that makes sense). Others have gone thru chassis rails. Anyway post some pics and we can see where you are at.
__________________
Merv
Ford Cobra
Harrison #80.
Peregian Beach
Sunshine Coast Qld.
|
07-14-2010, 09:59 PM
|
|
CC Member
|
|
|
Join Date: Aug 2001
Location: Melbourne, Australia,
Vic
Cobra Make, Engine: G-Force Mk I, 5L Windsor, TKO 600, enhanced Jag / Koni suspension & LSD Diff.
Posts: 2,304
|
|
Not Ranked
Thanks Merv
Just had a quick look at your gallery and can see that large grommet and harness out of the footwell, looks neat fro where it is located. Mine actually exits in the tunnel and will run forward to the main plug and beyond but same idea generally.
Had looked at the bonnet opening surround as there is some form of natural (inverted) depression but it does shallow out in a few spots on my body. So despite planning to replace the pinchseal rubbers, I am not sure there is enough depth there for attachment hangers and loom to all be effectively hidden.
Would be ideal though as the two inside edges of each wheel arch would allow a loom to neatly traverse in to this area I think. May have to dig out the old pinchseal and test how well it does help hide this stuff.
Thanks.
__________________
slowy
|
07-14-2010, 10:29 PM
|
 |
CC Member
|
|
|
Join Date: Feb 2002
Location: Alice Springs, central Australia,
NT
Cobra Make, Engine: Classic revival kit (CR3181), gen III engine, T56 6 speed box, AU XR8 lsd diff
Posts: 5,699
|
|
Not Ranked
Slowy, without pictures it did not happen 
__________________
Cruising in 5th

---------------------------------------------
Never be afraid to do something new, Remember, Amateurs built the Ark: Professionals built the Titanic.
|
07-14-2010, 10:39 PM
|
|
CC Member
|
|
|
Join Date: Aug 2001
Location: Melbourne, Australia,
Vic
Cobra Make, Engine: G-Force Mk I, 5L Windsor, TKO 600, enhanced Jag / Koni suspension & LSD Diff.
Posts: 2,304
|
|
Not Ranked
Dave
On this occasion the reverse is true, but by a quirk of fate you are in fact still correct!
Don't need pictures as it hasn't happened.
But I do need pictures to help make it happen!! Or so it might appear.
Make sense - No. I'll take a picture to explain more then.
Cheers
__________________
slowy
|
07-14-2010, 10:55 PM
|
|
CC Member
|
|
|
Join Date: Feb 2002
Location: Alice Springs, central Australia,
NT
Cobra Make, Engine: Classic revival kit (CR3181), gen III engine, T56 6 speed box, AU XR8 lsd diff
Posts: 5,699
|
|
Not Ranked
I thought you had already done a heap of work and modifications?
You mentioned radiators and wireing done?
__________________
Cruising in 5th
---------------------------------------------
Never be afraid to do something new, Remember, Amateurs built the Ark: Professionals built the Titanic.
|
07-15-2010, 04:26 AM
|
 |
CC Member
|
|
|
Join Date: Feb 2002
Location: Dadeville,
AL
Cobra Make, Engine: Sold my EM.
Posts: 2,459
|
|
Not Ranked
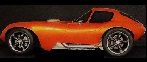
I can't help answer your question about wire routing, but I may be able to provide a little inspiration with the following photo. It's a hotrod I saw a few years ago. At first glance I thought the owner had put one of those mock up plastic engines in place until he could finish the car. On closer examination, I discovered it was a finished and fully functional car. Everything that could be hidden out of sight (e.g., radiator, water pump, coolant lines, fuel pump and lines, oil filter, ignition lines and components, fuel tank and filler, etc.) appeared to be missing. I've seen engine bays that looked clean because they had all sorts of covers on them, but this was the cleanest one I've seen that was out in the open.
[IMG] 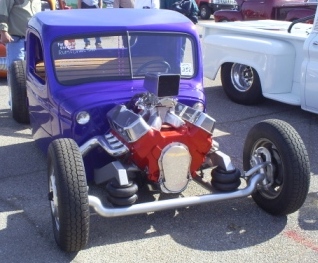 [/IMG]
__________________
Tommy
Cheetah tribute completed 2021 (TommysCars.Weebly.com)
Previously owned EM Cobra
"Never attribute to malice that which is adequately explained by stupidity." - Hanlon's Razor
|
07-15-2010, 04:43 AM
|
|
CC Member
|
|
|
Join Date: Aug 2001
Location: Melbourne, Australia,
Vic
Cobra Make, Engine: G-Force Mk I, 5L Windsor, TKO 600, enhanced Jag / Koni suspension & LSD Diff.
Posts: 2,304
|
|
Not Ranked
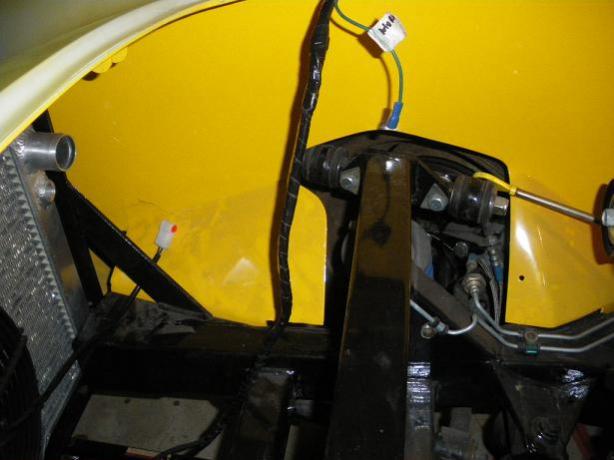
so now a few photos to help, I hope
View forward
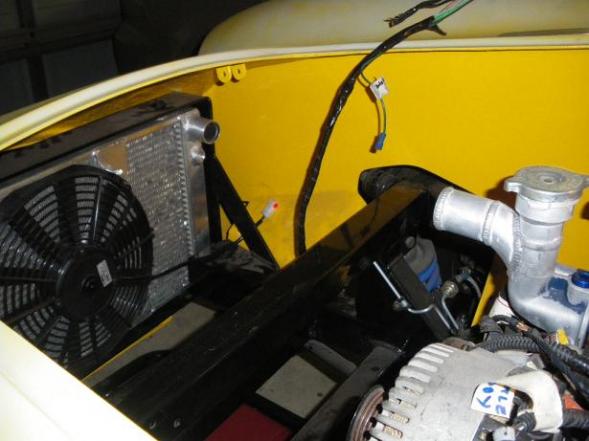
View of chassis
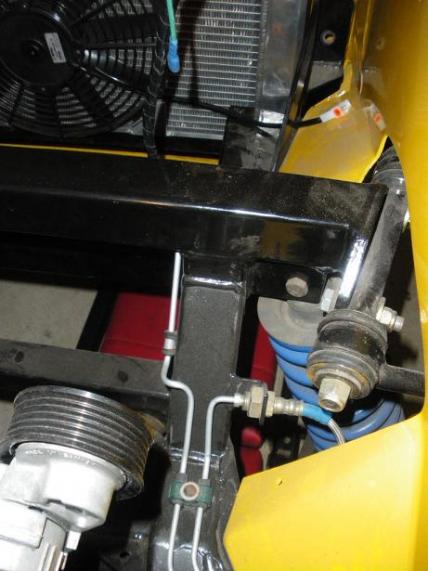
View of radiator attachments
View chassis cross memeber
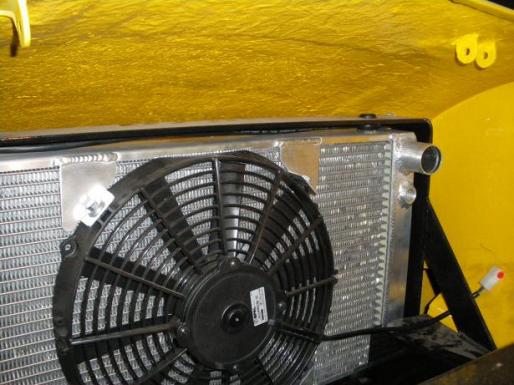
View of nose & radiator from front

Pics aren't ideal but give some idea of gaps I am trying to work with.
Just refitted the old pinchweld seals to the bonnet lip but realised if I add in the stick on mounts that I have (and these are quite small anyway) the loom will be very marginally hidden behind the seal.
I'm not keen on this if I can't get a good result.
Had also considered drilling into the ends of the cross members to run through the steel work. Don't know if I'd have to drill through two walls on each side though and it brings the loom close to the working suspension which may not be an ideal situation.
Keen for more feedback please on any options to get my loom accross the engine bay.
I'd prefer to not do this by splitting the loom and running a parallel line down the passenger's side too.
Cheers
__________________
slowy
Last edited by stephen low; 07-15-2010 at 04:57 AM..
Reason: further options
|
07-15-2010, 06:51 PM
|
|
CC Member
|
|
|
Join Date: May 2004
Location: Melbourne,
Vic
Cobra Make, Engine: Cobra RMC 377ci Windsor, Harrison Daytona Coupe, Ford XC Coupe.
Posts: 1,588
|
|
Not Ranked
Wiring
Slowly,
I looked at mine yesterday ( repairing the radiator ) and the wiring
goes under the crossmember at the front. Looks OK but you see it when it comes around the upright member.
STIFFY
|
07-19-2010, 06:59 AM
|
 |
CC Member
|
|
|
Join Date: Mar 2005
Location: Perth,
wa
Cobra Make, Engine: Pace Alumina 427 #69
Posts: 1,615
|
|
Not Ranked
Hey Slowy
Where did you get your radiator from? I need to get a new radiator for mine.
__________________
RF12 414 Windsor 8 stack ,6spd, Avons
|
07-19-2010, 05:02 PM
|
|
CC Member
|
|
|
Join Date: Aug 2001
Location: Melbourne, Australia,
Vic
Cobra Make, Engine: G-Force Mk I, 5L Windsor, TKO 600, enhanced Jag / Koni suspension & LSD Diff.
Posts: 2,304
|
|
Not Ranked
Dave
Marty of Kenmer sourced it as part of the insurance and though I recall some branding I don't recall the name, so I'll let you know tonight when I get home and can have a look.
Thanks to all for the general comments, I am currently running my wiring to the other side of the engine bay behind the lip on the scuttle at the top of the bay. I'm going to seperate the earthing too and run earth lines to chassis mounting bolts. This way there are only the four active wires traversing the engine bay for the LH items.
Out of curiousity where have you guys tended to hang your horns in the engine bay too?
I got some FIAM electric horns originally but having swapped the crappy horn in my current XR8 for one of the Stebel compact horns it is very loud and does get the attention. Am contemplating the same for the cobra but it is only a single and I wonder if the twin horns with alternate frequencies might be a tad better again.
Anyway would like to mount whatever I get nicely into the bay so suggestions would again be appreciated.
Cheers
__________________
slowy
|
07-20-2010, 05:47 AM
|
|
CC Member
|
|
|
Join Date: Aug 2001
Location: Melbourne, Australia,
Vic
Cobra Make, Engine: G-Force Mk I, 5L Windsor, TKO 600, enhanced Jag / Koni suspension & LSD Diff.
Posts: 2,304
|
|
Not Ranked
Dave
PM sent on radiator details.
Cheers
__________________
slowy
|
07-21-2010, 02:55 AM
|
|
CC Member
|
|
|
Join Date: Jun 2006
Location: Newcastle, Warners Bay,
NSW
Cobra Make, Engine: RMC . 393 Dart alloy block Stroked 351 alloy heads ..all the goodies plus a pre oiler. al
Posts: 1,495
|
|
Not Ranked
I've run all my wires through the chassis....it pokes out where it's required.
|
 Posting Rules
|
You may not post new threads
You may not post replies
You may not post attachments
You may not edit your posts
HTML code is Off
|
|
|
All times are GMT -7. The time now is 12:14 PM.
|
|


 Hybrid Mode

