Welcome to Club Cobra! The World's largest
non biased Shelby Cobra related site!
- » Representation from nearly all
Cobra/Daytona/GT40 manufacturers
- » Help from all over the world for your
questions
- » Build logs for you and all members
- » Blogs
- » Image Gallery
- » Many thousands of members and nearly 1
million posts!
YES! I want to register an account for free right now!
p.s.: For registered members this ad will NOT show
 
 Main Menu
|
|
Nevada Classics
|
|
Advertise at CC
|
|
April 2026
|
| S |
M |
T |
W |
T |
F |
S |
| |
|
|
1 |
2 |
3 |
4 |
| 5 |
6 |
7 |
8 |
9 |
10 |
11 |
| 12 |
13 |
14 |
15 |
16 |
17 |
18 |
| 19 |
20 |
21 |
22 |
23 |
24 |
25 |
| 26 |
27 |
28 |
29 |
30 |
|
|
|
|
CC Advertisers
|
|
 268Likes 268Likes

10-18-2014, 01:27 AM
|
 |
CC Member

|
|
|
Join Date: Jan 2001
Location: Sunbury,
VIC
Cobra Make, Engine: Rat Rod Racer, LS1 & T56
Posts: 5,391
|
|

 Not Ranked
Nice fab work there peter. Very creative. I like how you did the knurl.
Cheers
__________________
Mike Murphy
Melbourne Australia
|
-
Advertising

10-18-2014, 09:42 AM
|
 |
CC Member
|
|
|
Join Date: Mar 1999
Location: Redding,
CA
Cobra Make, Engine: Cobra Maker
Posts: 722
|
|
Not Ranked
You should do a book in detail on your proces. It would be a grate tool for any home builder.
__________________
Bill Emerson
|
02-09-2015, 04:41 PM
|
 |
CC Member
|
|
|
Join Date: Jul 2011
Location: Sydney,
NSW
Cobra Make, Engine: Puckett 250 GTO - LS1
Posts: 567
|
|
Not Ranked

Bill I actually do prepare a quarterly diary for a few mates and interested parties but it is approaching War and Peace in length, In honor of Jerry and Elaine I'm thinking of calling it War: what is it good for?
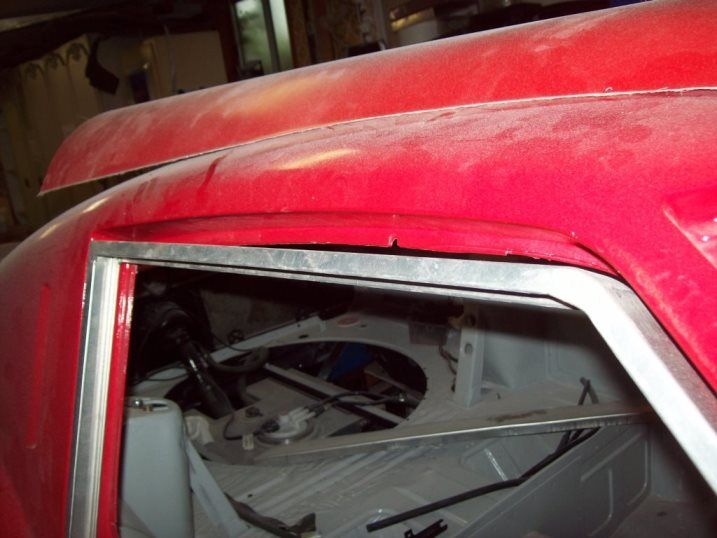
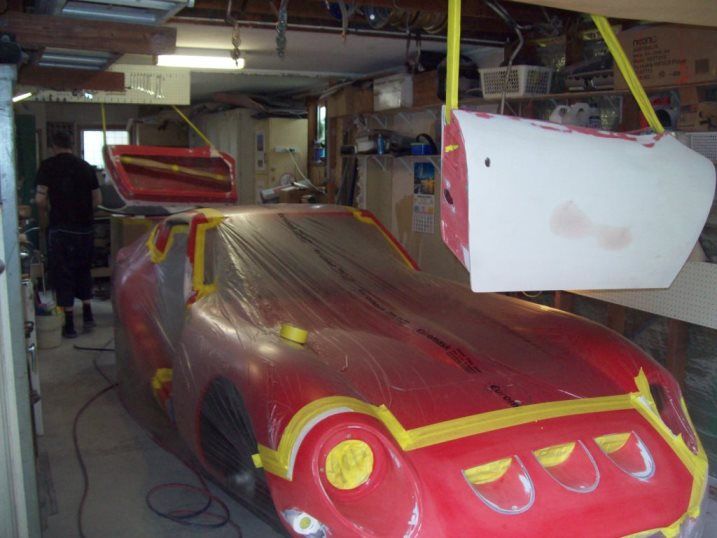
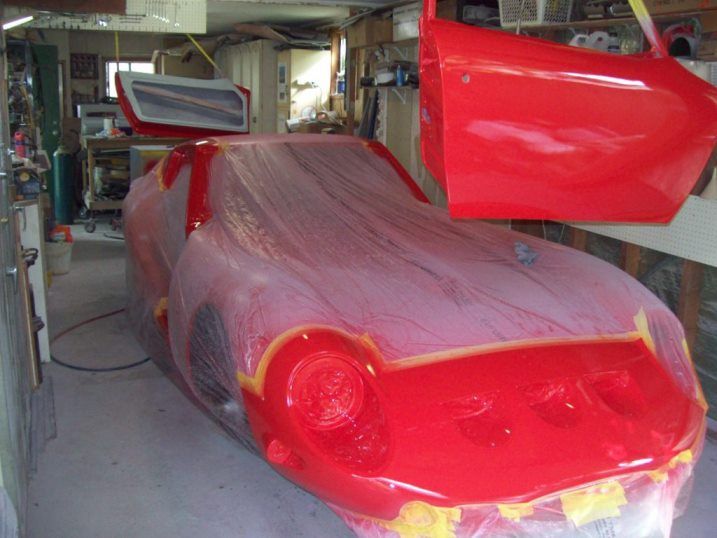
It has been a while since I posted but I have been steadily working away. The engine and most of the drivetrain are fitted - just finished the drive shafts yesterday. The devil sure is in the detail on these projects, while I carefully designed and completed a trial fit of all the components I'm finding lots of limited access or interference issue when everything is bolted together.
Some of the components are also having a last minute design change. For example I have changes the parking calliper mounting design. For the clutch I used the original GM clutch hard line and it was a PITA due to the narrow clearance to the transmission tunnel - I'll swap to a flexible line next time i drop the gearbox.
I could go on and on about the numerous install problems I've encountered but it's easier to say that the number of holes in the shed walls caused by a tool being hurled through them just about corresponds with the number of fit issues I've encountered!
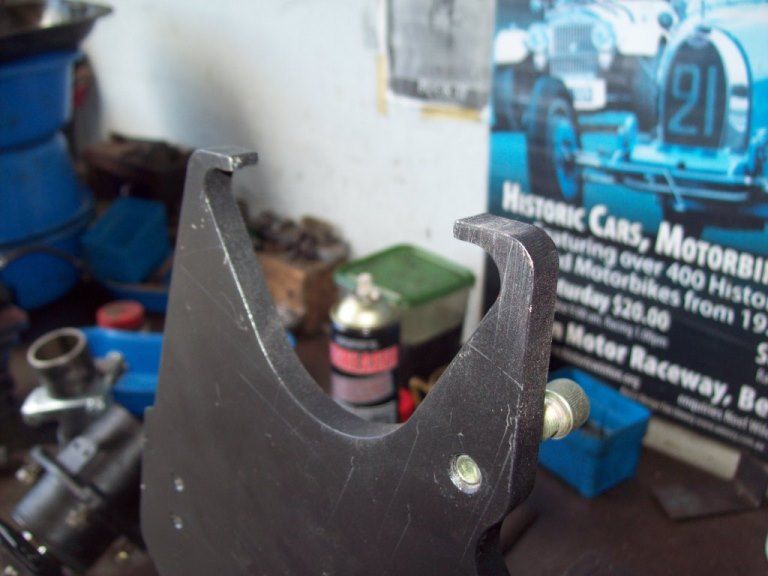
Original parking brake mount.
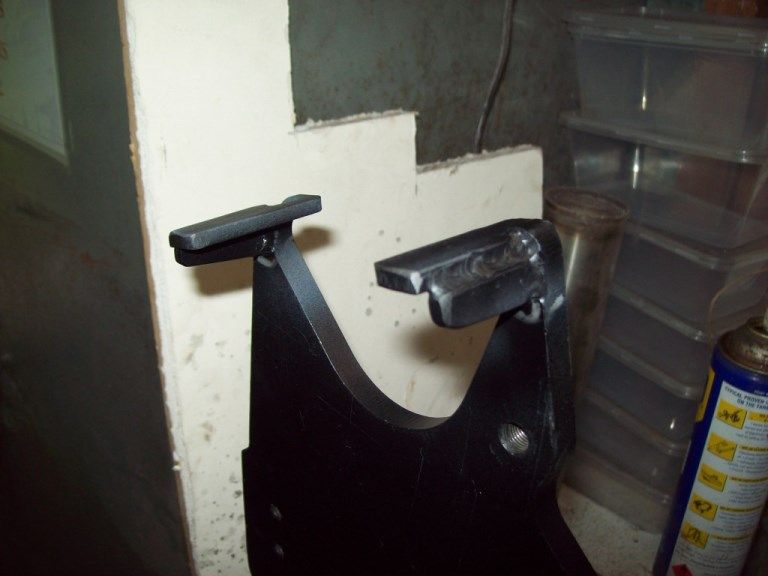
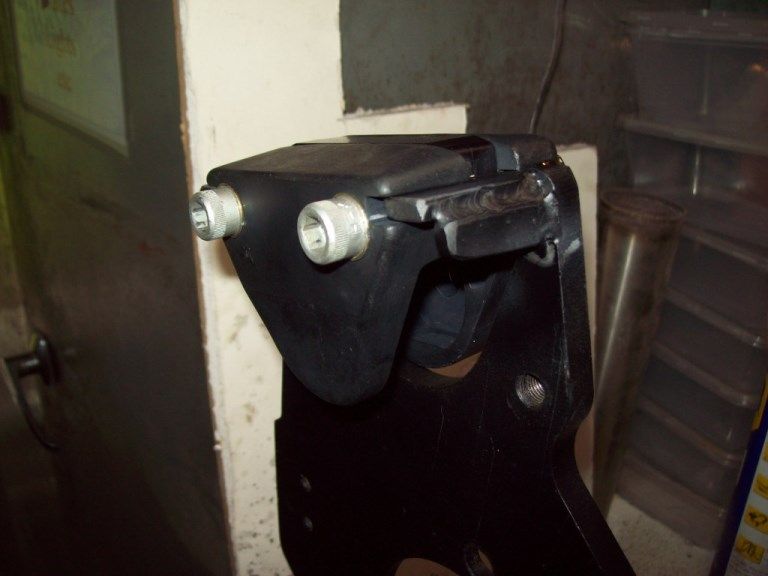
Modified mount
Over length axles
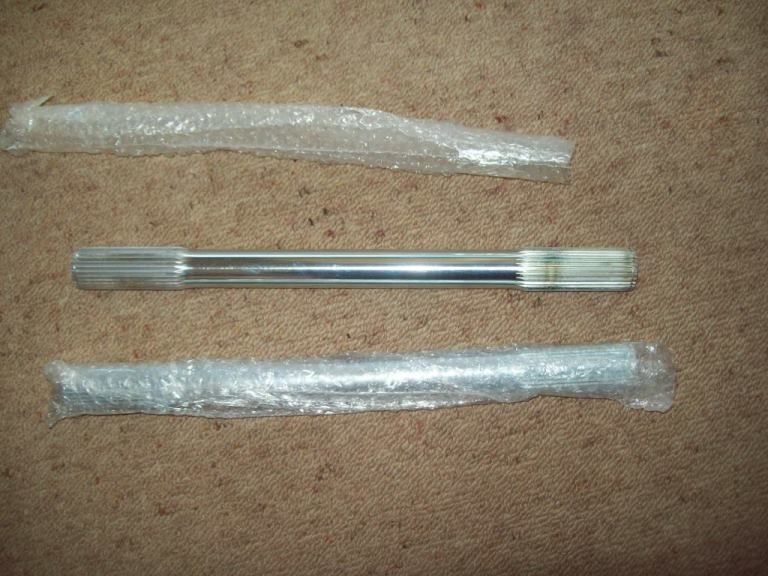
Machined to length and circlip grooves cut.
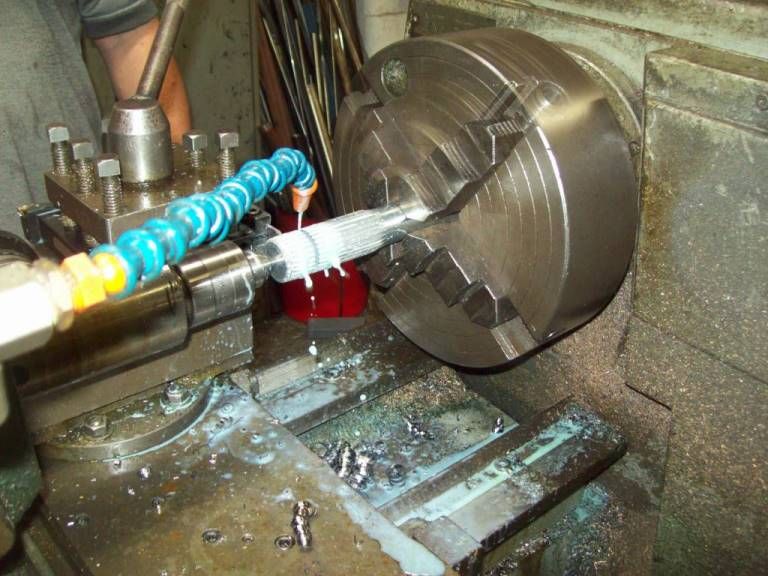
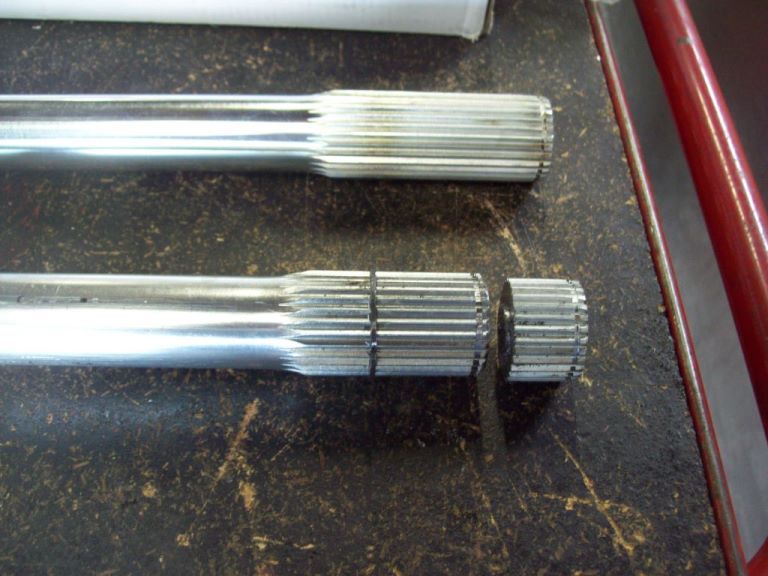
Ready to install
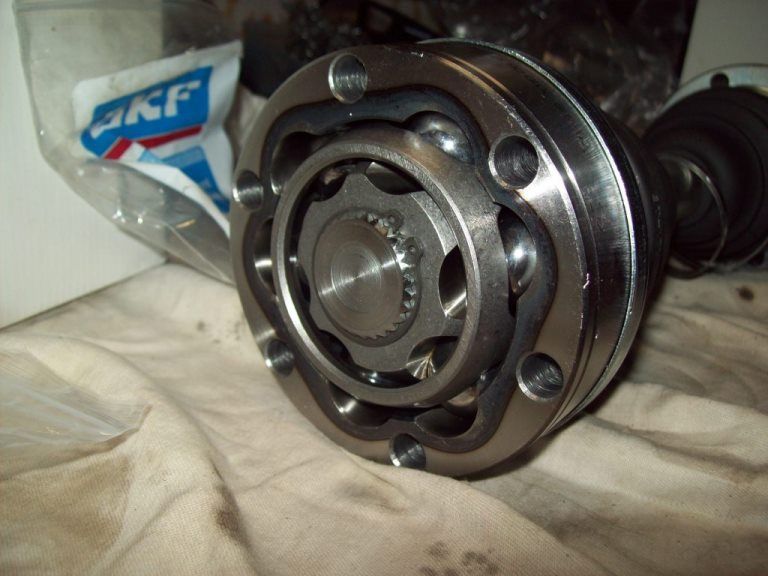
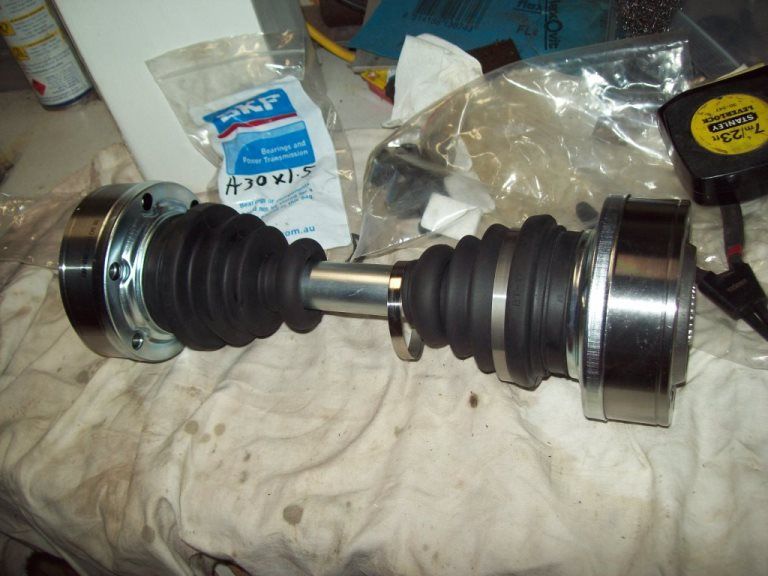
Postscript - I dropped into the local GM dealer to buy 8 new circlips for the CVs. The chap said he would have to get them in and quoted $16... EACH! I said "I only wanted the circlip not the bloody CV". Lucky for his building I wasn't holding a metal object. I dropped into the local bearing shop and purchased 9 circlips for under $5.

|
02-09-2015, 08:43 PM
|
|
CC Member
|
|
|
Join Date: Jan 2005
Location: Hillsboro,
OR
Cobra Make, Engine: Scratch built CSX style frame, Carbon fiber body, 393 Stroker, T-bird IRS, T5
Posts: 1,623
|
|
Not Ranked
Are those Porsche 930 CV's? ( I believe the 911 Turbos are the same)
Bob
|
02-09-2015, 09:29 PM
|
 |
CC Member
|
|
|
Join Date: Nov 2009
Location: Cheltenham,
Vic
Cobra Make, Engine: Classic Revival CR3516, LS3, Aussie Mike'd T-56, 3.70 LSD, AP brakes, Penske shocks
Posts: 1,616
|
|
Not Ranked
VE cvs are over 500 each new
Looking good Peter
__________________
BUILD-BLOG: http://cobrablog.holnet.net
Ben in AU
|
02-09-2015, 09:45 PM
|
|
CC Member
|
|
|
Join Date: Jul 2011
Location: Sydney,
NSW
Cobra Make, Engine: Puckett 250 GTO - LS1
Posts: 567
|
|
Not Ranked
Quote:
Originally Posted by Three Peaks

Are those Porsche 930 CV's? ( I believe the 911 Turbos are the same)
Bob
|
Yes, 930 CVs. standard fit on Holden and Pontiac GTO
Last edited by PeterAllen; 02-09-2015 at 09:51 PM..
|
02-10-2015, 12:40 AM
|
|
CC Member
|
|
|
Join Date: Mar 1999
Location: Redding,
CA
Cobra Make, Engine: Cobra Maker
Posts: 722
|
|
Not Ranked
It looks to me that you are winning this War. Your celebration should be Epic my friend.
__________________
Bill Emerson
|
02-10-2015, 07:22 PM
|
 |
CC Member
|
|
|
Join Date: Nov 2008
Location: Brisbane Australia. Cobra:Arntz Chev 454,
Posts: 847
|
|
Not Ranked
Hey PA do you have chooks in your shed too, or is this a purely Kiwi thing?
https://grrc.goodwood.com/road/news/...a-shed-scratch
__________________
Don.
|
02-10-2015, 08:32 PM
|
|
CC Member
|
|
|
Join Date: Jul 2011
Location: Sydney,
NSW
Cobra Make, Engine: Puckett 250 GTO - LS1
Posts: 567
|
|
Not Ranked
Don. No chooks, but funnily enough I'm often accused of 'feeding the chooks'!
Those Kiwis are pretty handy at knocking up GTOs
http://www.car-restoration.com/coach...GTO/index.html
Last edited by PeterAllen; 02-12-2015 at 03:18 AM..
|
04-14-2015, 02:36 AM
|
|
CC Member
|
|
|
Join Date: Jul 2011
Location: Sydney,
NSW
Cobra Make, Engine: Puckett 250 GTO - LS1
Posts: 567
|
|
Not Ranked
Last edited by PeterAllen; 04-14-2015 at 04:10 AM..
|
04-14-2015, 11:36 AM
|
 |
CC Member
|
|
|
Join Date: Mar 2010
Location: Gold Coast,
QLD
Cobra Make, Engine: Arntz, TKO600, 460
Posts: 818
|
|
Not Ranked
Looking good.
What a guy can accomplish in a shed can be remarkable.
Keep the updates flowing.
|
05-05-2015, 12:59 PM
|
 |
CC Member
|
|
|
Join Date: Apr 2015
Location: Prescott,
AZ
Cobra Make, Engine: Classic Roadsters
Posts: 209
|
|
Not Ranked
GTO fan (in addition to my CR Cobra)
@Peter: I too am a 250 GTO fan. I decided to build mine from scratch. I have a build thread here: C5 gto - All MetalShaping
Mine is LS powered as well but also has supercharger and converted to SOHC. I considered a 240Z base but decided to custom build a space frame. This decision has added years to the build but it's all about the journey and less about the destination 
Thumbs up to your build!!!
__________________
Thanks,
Joel Heinke (early 90's CRL Cobra)
|
05-06-2015, 02:21 AM
|
|
CC Member
|
|
|
Join Date: Jul 2011
Location: Sydney,
NSW
Cobra Make, Engine: Puckett 250 GTO - LS1
Posts: 567
|
|
Not Ranked
Joel - email sent.
|
05-07-2015, 09:52 AM
|
|
CC Member
|
|
|
Join Date: Apr 2015
Location: Prescott,
AZ
Cobra Make, Engine: Classic Roadsters
Posts: 209
|
|
Not Ranked
GTO kindred spirits
Peter,
I finally got a chance to read through the whole thread last night. The thing that occurs to me is that we're kindred spirits in the 250 GTO brotherhood 
My applause on your ability to rise to the challenge and the resilience you've had when issues arise!!
Here's a story for you to give context to the Puckett body parts. I made a trip down to San Diego, CA to visit the Puckett facility back when I was in the early planning stages of my GTO project. When I had talked to Charlie Puckett on the phone for an appointment, he gave me the impression that he was working from a modest but suitable facility in making his kits. When I finally found it, his fiberglass facility was a dirt/sand lot enclosed in a chain link fence and the only structures were makeshift tents/shades made of tarps on poles. There were random fiberglass parts and molds strewn about the lot, very much in junk yard fashion.
My first and lasting impression of Charlie can be summed up in 2 words, "Odd duck". He had a few of Z's in various stages of conversion, all of them very rough. He was loading bondo on a Cobra body by the gallon saying that he was going to make the "perfect" Cobra mold and add Cobra bodies to his product line. The more he talked, the more he lost the credibility I had given him prior to our meeting. My impression is that he went out of business because of quality issues and not so much legal issues (well maybe legal issues stemming from poor quality products).
I was there with a long time friend and custom car builder. After about 30 minutes, we both looked at each other, shook our heads, and thanked Charlie for his time. It was at this point I ruled out ever using any Puckett parts in my project.
I tell this story, not to convey anything negative about Peter's project, but to let others know the beauty they see in the finished car has little to do with the base parts and everything to do with the work he's done. I hope my words of encouragement help Peter to the project finish line.
Ok, back to the project. Do you plan to put a "finish ring" in the radiator opening? I think it's a piece of bling that really adds to the finished look. I made one for my GTO and it was fairly easy. If you can make the headlight fairing rings, you certainly have the skills to make this piece. I can give you some pointers if you'd like them.
__________________
Thanks,
Joel Heinke (early 90's CRL Cobra)
|
05-07-2015, 07:34 PM
|
|
CC Member
|
|
|
Join Date: Jul 2011
Location: Sydney,
NSW
Cobra Make, Engine: Puckett 250 GTO - LS1
Posts: 567
|
|
Not Ranked
Thanks Joel. I'll send you some information I received from the people who purchased from Mr Puckett and the legal issues involved.
(edit) I had to join the metalwork forum to see the photos of your build but it was well worth it. An amazing effort and there were lots of issues relevant to my build - in particular, you've got me panicking about insulation - thanks! It seem that even with your relatively freer self-construction requirements you still have plenty of hoops the jump through.
I would be very keen to know of a technique for the nose trim. I had one go at making it in aluminium but was disappointed with the outcome and shelved it. In particular, I had trouble trying to create the slight curve in the horizontal plane. The workshop I used (TAFE) has dropped the course so I now don't have access the shrinkers and stretchers.
I trust the Cobra fraternity will bear with us on this.
Last edited by PeterAllen; 05-08-2015 at 05:45 PM..
|
05-08-2015, 02:06 AM
|
 |
CC Member
|
|
|
Join Date: Nov 1999
Location: Brisbane, Australia,
Q
Cobra Make, Engine: Contemporary CCX3117 427FE
Posts: 4,381
|
|
Not Ranked
Not just bearing with it; lapping it up!
__________________
Craig
|
05-09-2015, 03:25 PM
|
|
CC Member
|
|
|
Join Date: Apr 2015
Location: Prescott,
AZ
Cobra Make, Engine: Classic Roadsters
Posts: 209
|
|
Not Ranked
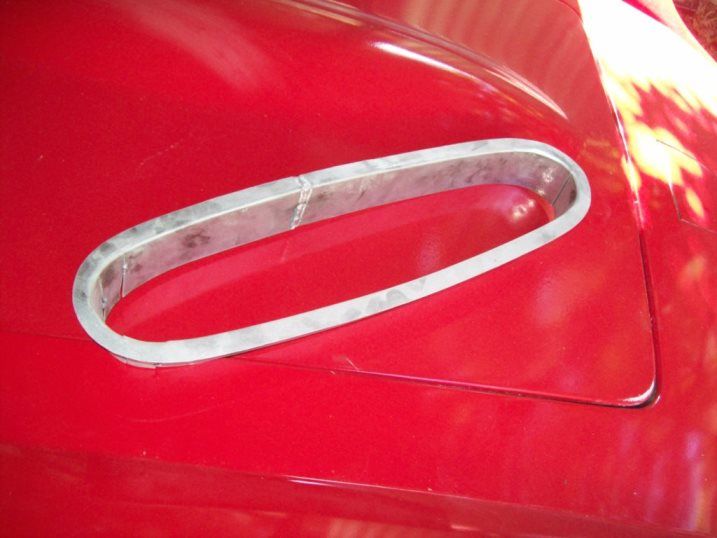
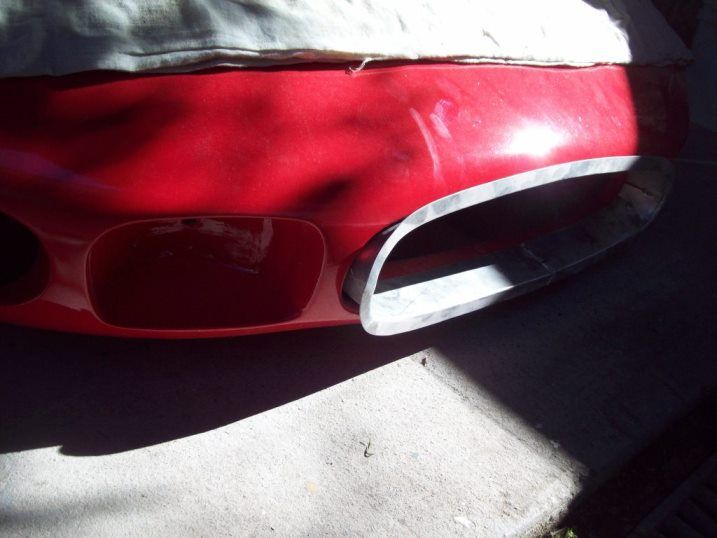
GTO radiator trim ring
So here's a couple of pictures of actual GTO trim rings:
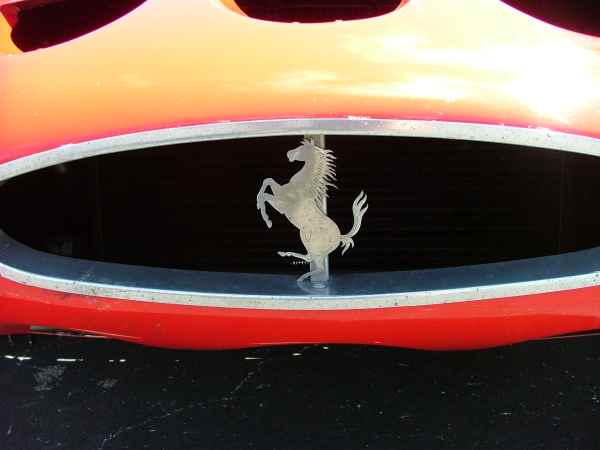
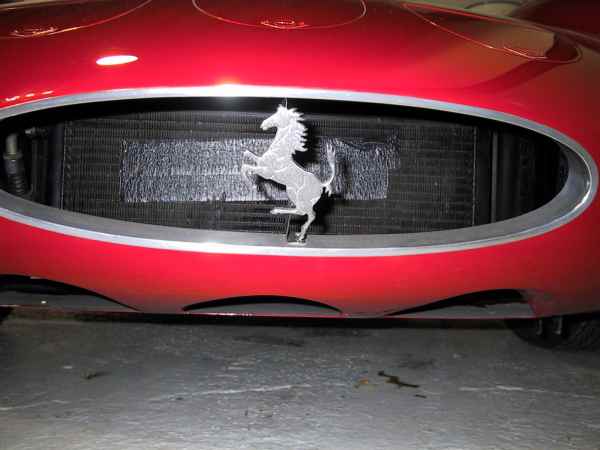
And here's a pic of the trim ring I made for my GTO:
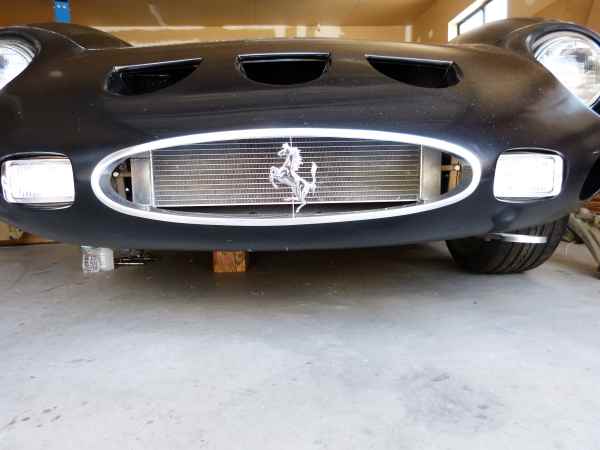
Ok, what follows are detailed instructions on how to make the GTO radiator opening trim ring. I'm providing the detail, not because I think Peter needs it, but because it will give others the insight into how to make a trim ring for on opening in a compound curved surface.
The GTO radiator opening trim piece can be made from a single piece of aluminum sheet. By doing this it will only have a single weld seam to finish out. I used .050 3003 H14 when I made mine. You could probably use thinner or a bit thicker sheet but I would stick to the soft alloy's, in other words stay away from 5XXX and 6XXX. The reason for using a soft alloy is to be able to make the slight curve in the horizontal plain would be much harder with the stiffer alloys. In addition, 3003 polishes out nice to a mirror finish.
The length of the sheet will vary based on the size of the opening. Original GTOs had various size openings and thus replicas also follow suit. Make the length a couple inches longer than needed as you'll cut to actual length after inital forming. A key thing is to make the width you start with about 3/4" to 1" wider than the desired width on the finished piece. I used a piece about 3" wide. More on why later.
Step 1 is to put a 90 degree bend the length of the sheet to form the outside lip. I made the outside lip on mine 1/2". This is probably best done with a sheet metal break or bead roller depending on tools available. The lip angle will be fine tuned to the opening later so getting it a perfect 90 is not necessary. You may also think about how sharp you want the bend. I wanted mine a bit rounded so I used a bead roller with a rounded tipping wheel. You can achieve the same on a sheet metal break with different fingers and spacing. If none of these tools are available, you can also use a straight table or workbench edge and rubber mallet to make the bend.
Step 2 is to form the rounded edges/corners that will turn the long straight sheet into an oval. You'll need to take measurements as you'll most likely want the seam in the middle. I put the seam in the middle top on mine where it would be least visible. To round the edges, you'll need to do linear stretching on the outside lip. This can be done with a planish, power, or handheld hammer depending on tools available. For a handheld bodyhammer, linear stretch can be done with the hammer face that's about 1/2" by 1/16" and flat across. Be sure to hammer on the back side only and use a flat die or dolly on the visible side. This will minimize the marking. Use light hammer hits as the aluminum will easily stetch to form the rounded oval shape. Check your work against the opening often so you can see where more stetch is required to get a nice even oval shape.
Step 3 is to cut and weld the seam. You should make sure the oval fits snuggly in the opening prior to marking and cutting. I'd suggest the weld be metal finished flat but not fully dressed yet. You'll now have an oval that should fit snugly in the opening but the outside lip will have a gap away from the body on both the left and right ends.
Step 4 is to curve the trim ring to remove the gap on outside lip to body. The GTO nose is curved when viewed from the top and thus the trim ring needs to be adjusted to this curve. This is where the extra material is used and you'll need a "shrinking" tool. A Lancaster style shrinker works best for this. Lancaster style shrinkers are the most common kind and they grab and shrink near the sheetmetal edge. Shrink on the "extra" metal at the back of the trim ring. Do many small shrinks and check the trim ring in the opening often. The gap should go away as the trim ring is now curved from the shrinking.
Step 5 is to cut off the metal marked from the shrinking. The shrink extends into the metal beyond where the jaws grabbed. The marked metal can be cut away and the trim ring will retain the shape. If you're worried about some spring back, you might curve it a bit more than needed but I didn't experience much spring back at all on mine. The inside lip on mine is 1 1/2" and I used aviation snips to cut off the marked metal.
Step 6 is to place the trim ring into the opening and flatten the outside lip to the body behind it using a rubber mallet. The body comes into the trim ring at various angles in different places around the oval and this should bring trim ring up tight to body everywhere.
Step 7 is to polish out the trim ring. I had some marking from linear stretching so the first part was to file off the marking before starting with sand paper. For me, polishing the metal is the least fun part. I used a small cotton buffing wheel on a drill motor for the final polish.
Step 8 is to fabricate a vertical bar for mounting the Ferrari stallion. On original GTOs, some have the thick side showing and some the thin/edge. I wanted this piece to be as invisible as possible so I did it edge showing. I cut it such that I could bend a couple of 90 degree tabs for the studs on back of stallion to mount to. I made slits in the top and bottom of trim ring and welded the vertical bar in. I'd suggest aluminum braze or solder if you have it just because it's much easier and lower heat causes less distortion. You'll also need to re-polish the heat affected areas but that's much easier than polishing the whole thing after the vertical bar is in place. The vertical bar can be attached via screws or rivets (like on most original GTOs) but that is less appealing to me.
There you have it. You've now got a trim ring that's as good or better than the original. Mine fits the opening snug enough that I don't think it needs anything to secure it. To be sure, I'll probably run a bead of silicon on the backside once it's installed for the final time.
Peter: if you don't have access to a Lancaster shrinker, I'd suggest you post something on All Metal Shaping asking about someone in the Sydney area that does. I know there's several good metal shapers from Australia that frequent that forum.
__________________
Thanks,
Joel Heinke (early 90's CRL Cobra)
|
05-09-2015, 03:58 PM
|
 |
CC Member
|
|
|
Join Date: Jan 2002
Location: Melbourne, Australia,
VIC
Cobra Make, Engine: AP Pace427 (AP4033) GM L77 6.0L TR6060
Posts: 838
|
|
Not Ranked
Fantastic Joel. Very informative. As much of my cobra is aluminium, I've picked up some applicable tips from your post. Thanks!
__________________
Guy
Cobra Progress guye-cobra.blogspot.com
|
05-09-2015, 04:44 PM
|
|
CC Member
|
|
|
Join Date: Nov 1999
Location: Brisbane, Australia,
Q
Cobra Make, Engine: Contemporary CCX3117 427FE
Posts: 4,381
|
|
Not Ranked
Great stuff Joel!
__________________
Craig
|
06-02-2015, 08:42 PM
|
|
CC Member
|
|
|
Join Date: Jul 2011
Location: Sydney,
NSW
Cobra Make, Engine: Puckett 250 GTO - LS1
Posts: 567
|
|
Not Ranked
Just when I thought asking prices couldn't get any sillier along come this.
Tell him he's dreamin'.
Specialty Sales Classics |
 Posting Rules
|
You may not post new threads
You may not post replies
You may not post attachments
You may not edit your posts
HTML code is Off
|
|
|
All times are GMT -7. The time now is 10:03 AM.
|
|


 Linear Mode


