 
 Main Menu
|
|
Nevada Classics
|
|
Advertise at CC
|
| S |
M |
T |
W |
T |
F |
S |
| |
|
|
1 |
2 |
3 |
4 |
| 5 |
6 |
7 |
8 |
9 |
10 |
11 |
| 12 |
13 |
14 |
15 |
16 |
17 |
18 |
| 19 |
20 |
21 |
22 |
23 |
24 |
25 |
| 26 |
27 |
28 |
29 |
30 |
|
|
|
|
CC Advertisers
|
|
 23Likes 23Likes

09-16-2013, 12:57 PM
|
 |
Half-Ass Member

|
|
|
Join Date: Jun 2005
Cobra Make, Engine: ERA #732, 428FE (447 CID), TKO600, Solid Flat Tappet Cam, Tons of Aluminum
Posts: 22,025
|
|

 Not Ranked
Dang, it's starting to look like a real car....  |
10-06-2013, 08:11 PM
|
|
CC Member
|
|
|
Join Date: Apr 2012
Location: Bay Area (Peninsula),
CA
Cobra Make, Engine: ERA 427, 427/487 side-oiler
Posts: 1,248
|
|
Not Ranked

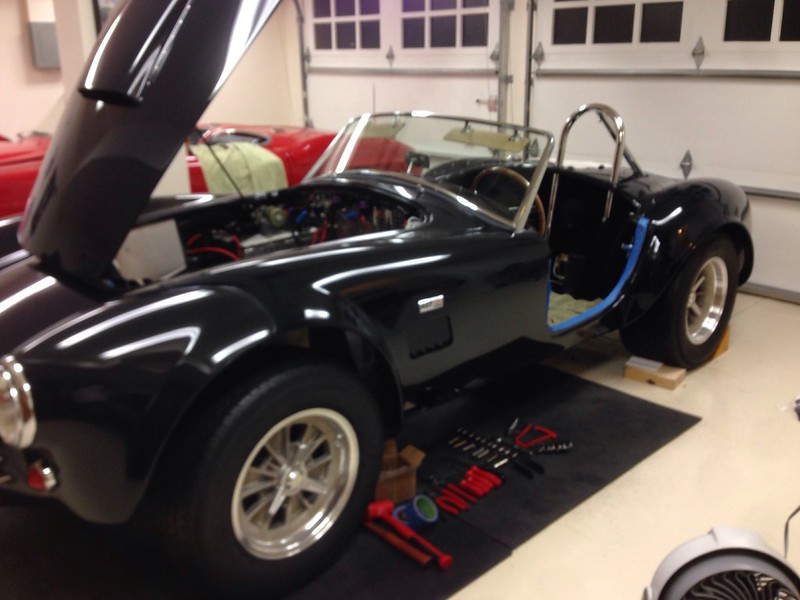
Update since my last post:
- The stereo took quite a bit of time to get right (at least I hope it's right). I wired up the rear crossovers and installed them, and then I installed the amp with the wiring completely hidden
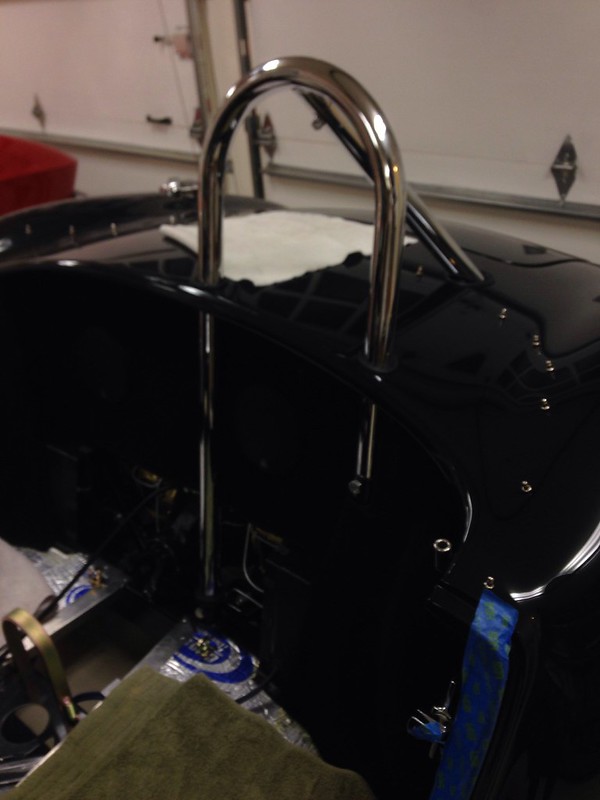
- Installed the roll bar
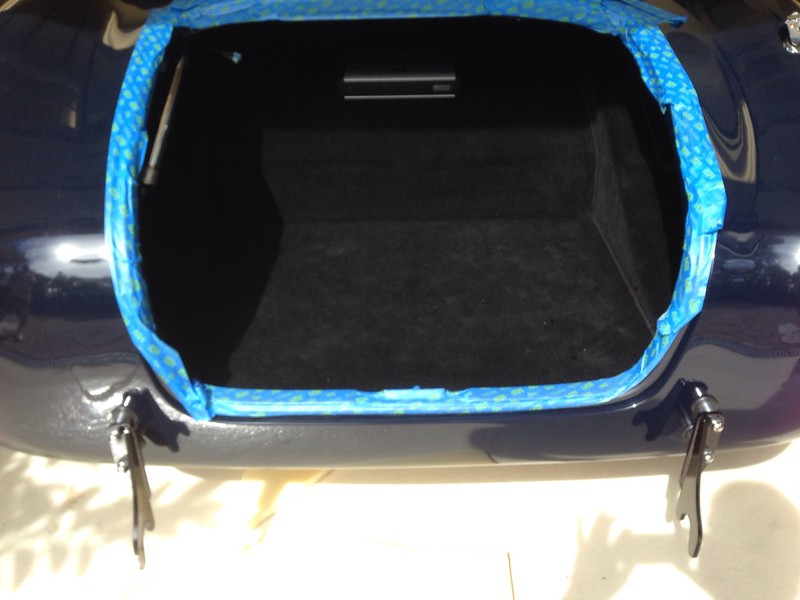
- Carpeted the trunk. I "hung" the bulkhead piece of carpet so it hides the speakers and crossovers, rather than glueing it completely to the rear bulkhead and cutting holes for the speakers. One other comment: the trunk doesn't have Cool-it insulation/sound dampener like the interior. After installing the carpet on the bare metal in the trunk, I realized the carpet doesn't do a great job dampening the aluminum. Not a big problem in the trunk but I'm *really* glad I used Cool-it on the interior panels. It really deadens the sound, and it doesn't make the carpet installation difficult like I heard it might.
- Installed the fuel tank hoses.
- Replaced one panel of interior carpet (the compound curved piece behind the driver's seat over the rear wheel well). It turned out much better than the first time. Most of the carpet is really easy to install, but those panels are a b*tch because of the curves.
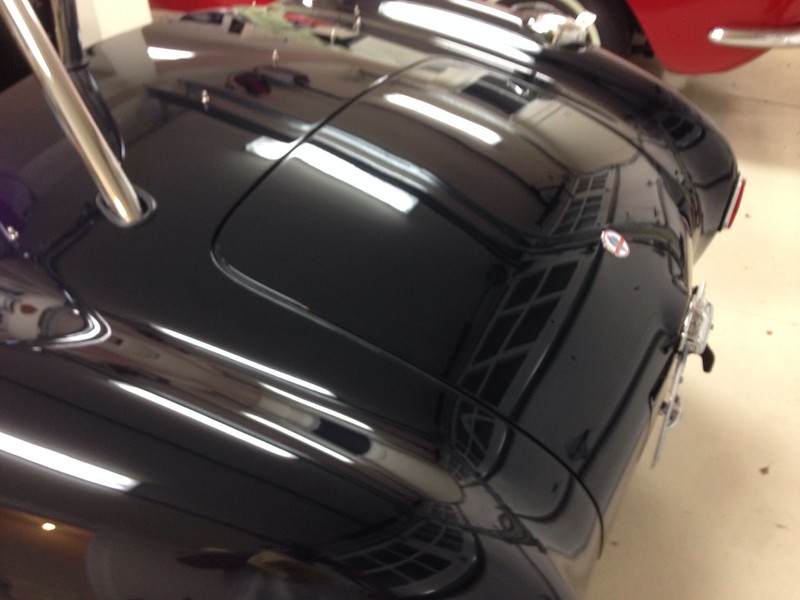
- Finished the wiring in the trunk, and reinstalled the trunk. I shimmed the hinges to get a better fit. The gaps are perfect, but there is one length where that doesn't seal completely against the weatherstripping (about 12" along the left side). Any hints? Should I even worry about this?
- Shimmed the pedal assembly to take lateral play out
- Safety wired the rear wheels. The fronts will have to come off so I didn't do them yet
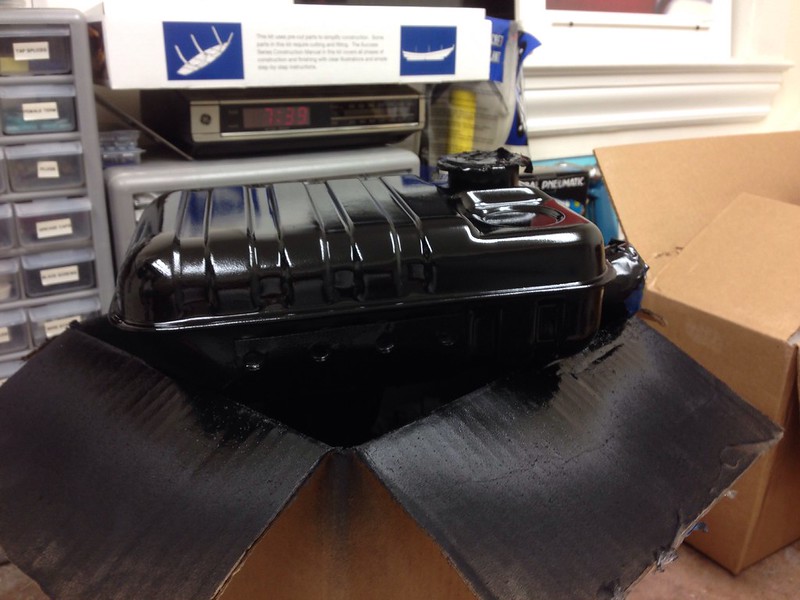
- Started to paint the expansion tank. I began with a VHT "epoxy" paint that I later learned isn't really epoxy, and it didn't adhere. So I stripped it chemically (nasty stuff from Home Depot) and re-primed it with real 2-part epoxy primer from Eastwood
- Installed and "leveled" the rear quick jacks
- Applied 3M Paint Defender to rear fenders/spats. Excellent stuff. Went on perfectly and looks great.
- Installed all of the door hardware, side pockets, weather stripping, etc.


Last edited by lippy; 10-06-2013 at 08:32 PM..
|
10-07-2013, 11:42 PM
|
 |
CC Member
|
|
|
Join Date: Aug 2009
Location: Adelaide,
SA
Cobra Make, Engine: AP 289FIA 'English' spec.
Posts: 13,152
|
|
Not Ranked
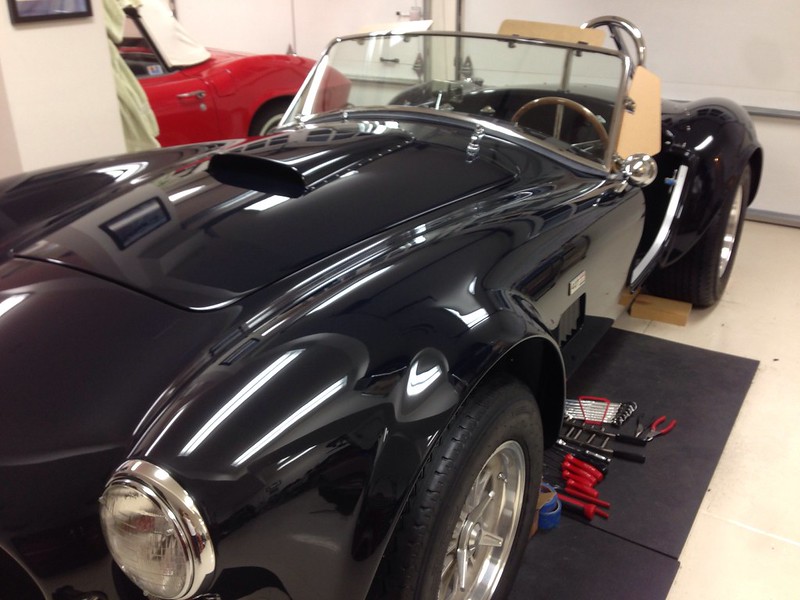
Lippy - I had forgotten you were using FIA wheels.....that looks great!
Cheers,
Glen
|
10-09-2013, 01:20 PM
|
 |
CC Member
|
|
|
Join Date: Apr 2009
Location: Little Rock area,
AR
Cobra Make, Engine: ERA Street Roadster #782 with 459 cu in FE KC engine, toploader, 3.31
Posts: 4,533
|
|
Not Ranked
Lippy - your garage is far too neat!! Mine started out looking like that 3 years ago. Now it looks ready for an episode of American Pickers.
You are one of the first who has tried 3M Defender and posted positive comments. Care to share any tips and lessons learned?
I doubt there is much you can do at this point about the area of the trunk lid not sealing well. You could add a strip of 1/4 inch wide x 1/8 inch thick sealant strip to the underside of the trunk lid edge in that area. It would probably not be real visible with a black car but it may bother you evey time you see it. I see where you shimmed the trunk. I did the same with washers under the hinges on the body side. Since you loosened the hinges, you might also look at the gaps forward and at the bottom. I found on mine during the body work phase that I had to be careful to always get the trunk lid reinstalled in exactly the same position as a 1/16 of an inch forward or backwards changed how the lid fit flush to the body by quite a bit.
I agree with XB-60, I really like those FIA wheels. Whole car looks nice.
Dan

|
10-09-2013, 01:42 PM
|
|
CC Member
|
|
|
Join Date: Apr 2012
Location: Bay Area (Peninsula),
CA
Cobra Make, Engine: ERA 427, 427/487 side-oiler
Posts: 1,248
|
|
Not Ranked
Dan,
Thanks for the tips on the trunk. It never sat completely flush on one side but I'll mess with the forward/back position as you mention. I may just have to live with it. It looks good but just doesn't seal completely on one side.
On the Paint Defender, check out my comment and pix here: 3M Paint defender kit. For this application, it was very easy to get good results. For a larger area that is horizontal, it may be problematic. Not sure. PM me if you want me to talk you through what I did.
The reason my garage is so clean is that I won't do much on the car without my kids, but I still like to be around it to look and think what I can do next/better. So I end up neatening up often late at night when the kids are sleeping. Plus I've only been in this house two years, so the garage hasn't had time to get crapped up yet. |
10-10-2013, 04:09 AM
|
|
CC Member
|
|
|
Join Date: Apr 2009
Location: Little Rock area,
AR
Cobra Make, Engine: ERA Street Roadster #782 with 459 cu in FE KC engine, toploader, 3.31
Posts: 4,533
|
|
Not Ranked
On the trunk I probably could have explained a little better. I built a very slightly larger panel gap at the leading edge of the hood and trunk so that there was no chance of the panels hitting when opening and closing - hard to see but a gap about 1/32 wider than the 3/16 I used around the rest of the panels. Sometimes when I reinstalled the trunk I would forget about that and install it with the 3/16 gap at the front and then realize what I had down because the rest of the trunk along the sides was no longer perfectly flush with the body and was very slightly higher. I would re-adjust the front gap for that slight amount and then the trunk would flush out again. It could have been something unique to my car but it kind of makes sense considering the nearly 90 deg curvature as it rolls down to the bumper area.
It may just be something to live with - the panel molding tolerances on fiberglass just aren't close to what they can do with production sheet metal. I think I have a couple places on my doors where the weatherstripping gap is irregular and may be to narrow/wide. Owning an old Corvette I know you are familiar with fiberglass irregularities.
I'll study the link on the 3M Defender - I must have missed it when it was first posted (or just forgot about it).
thanks
|
11-10-2013, 12:10 PM
|
|
CC Member
|
|
|
Join Date: Apr 2012
Location: Bay Area (Peninsula),
CA
Cobra Make, Engine: ERA 427, 427/487 side-oiler
Posts: 1,248
|
|
Not Ranked
We are ready for the engine. We've completed everything we could think of at this point. Since the last post:
- Installed the batter and checked all of the electical and stereo functions. After correcting a couple of easy to fix bugs, everything works and the stereo sounds great.
- Polished out all of the transport damage and scuffs with a Griot's orbital buffer and their #3 polish. I would highly recommend it.
- Finished a bunch of small things like rerouting the parking brake cable, installing the wiper blades, replacing some of the fasteners with aircraft-grade ones, etc.
Brent plans to dyno the engine on the 22nd and I should have it right after Thanksgiving. with any luck I'll have the car on the road in January, and I plan on going through the CA SB100 process in early January.

 |
11-10-2013, 12:31 PM
|
 |
CC Member
|
|
|
Join Date: Dec 2011
Location: West Chester,
PA
Cobra Make, Engine: ERA #795 427 S/C completed Jan. '14 - '68 FE 427 side oiler
Posts: 1,064
|
|
Not Ranked
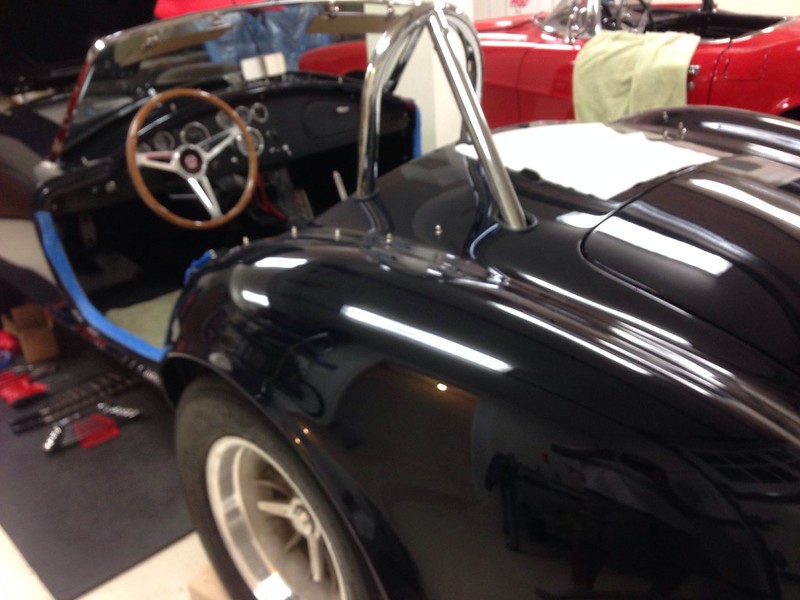
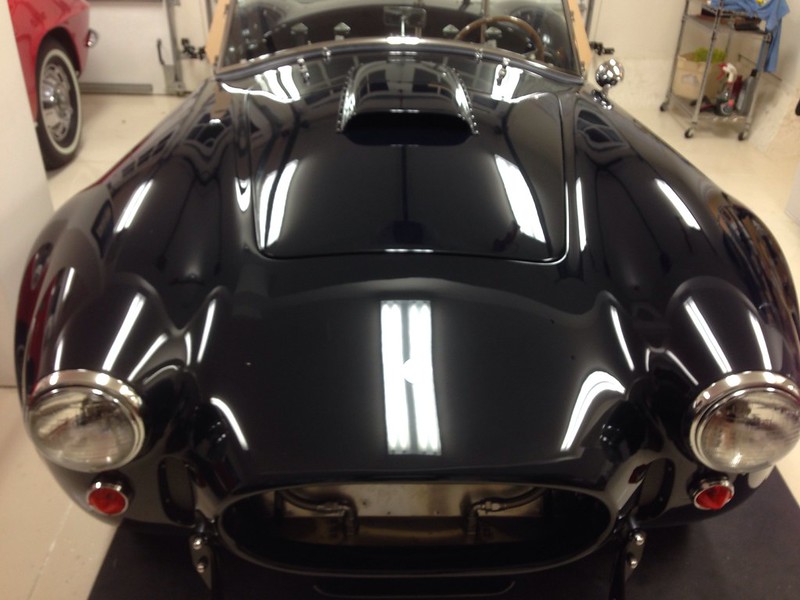
Looks awesome and you're making great progress. The rivited hood scoop looks good on black.
Kevin
__________________
"Anyone who drives faster than you is a maniac and anyone who drives slower than you is an idiot" - George Carlin
|
11-10-2013, 12:38 PM
|
|
CC Member
|
|
|
Join Date: Apr 2012
Location: Bay Area (Peninsula),
CA
Cobra Make, Engine: ERA 427, 427/487 side-oiler
Posts: 1,248
|
|
Not Ranked
Quote:
Originally Posted by kevins2

Looks awesome and you're making great progress. The rivited hood scoop looks good on black.
Kevin
|
Thanks! It looks like black sometimes but it's a dark non-metallic blue (Ferrari Blu Pozzi). |
11-10-2013, 12:57 PM
|
|
CC Member
|
|
|
Join Date: Dec 2011
Location: West Chester,
PA
Cobra Make, Engine: ERA #795 427 S/C completed Jan. '14 - '68 FE 427 side oiler
Posts: 1,064
|
|
Not Ranked
Quote:
Originally Posted by lippy
Thanks! It looks like black sometimes but it's a dark non-metallic blue (Ferrari Blu Pozzi).
|
Now that you mention it, I think you've explained that before  . Still goes - the rivited hood scoop looks great on the dark color...
__________________
"Anyone who drives faster than you is a maniac and anyone who drives slower than you is an idiot" - George Carlin
|
11-11-2013, 09:36 AM
|
|
CC Member
|
|
|
Join Date: Apr 2012
Location: Bay Area (Peninsula),
CA
Cobra Make, Engine: ERA 427, 427/487 side-oiler
Posts: 1,248
|
|
Not Ranked
I'm really happy with the look of the car and options I chose. The only thing I might've done differently is Smith's instruments.
|
11-11-2013, 04:16 PM
|
|
CC Member
|
|
|
Join Date: Apr 2009
Location: Little Rock area,
AR
Cobra Make, Engine: ERA Street Roadster #782 with 459 cu in FE KC engine, toploader, 3.31
Posts: 4,533
|
|
Not Ranked
Lippy - your car is looking great. You have done a great job in getting it together. I installed the front carpet and those aluminum threshold strips this weekend on mine and that aluminum is a bear since it pretty much needs to be bent in 3 dimensions to fit. I don't think mine came out as nice as yours appears in the pictures.
Did you roll the carpet around the front of the transmission tunnel per the instructions? If so, any problems getting the tunnel to fit all the way down over the footbox sides with the extra material?
Looking forward to the engine install.
|
11-11-2013, 04:52 PM
|
|
CC Member
|
|
|
Join Date: Apr 2012
Location: Bay Area (Peninsula),
CA
Cobra Make, Engine: ERA 427, 427/487 side-oiler
Posts: 1,248
|
|
Not Ranked
Quote:
Originally Posted by DanEC
Did you roll the carpet around the front of the transmission tunnel per the instructions? If so, any problems getting the tunnel to fit all the way down over the footbox sides with the extra material?
|
Dan, that was a b*tch, but I did it. All of the carpet went in very easily, except the curved portion behind the seats on the front of the rear footwells (I had to do one side over and it still isn't absolutely perfect, but it is good), and the front of the tunnel. On the tunnel, there were too many compound curves so I had to make one strategic cut and it turned out nice. Make sure you follow their directions exactly and work from the top down, and let the glue on the top portion dry before doing the sides. |
11-11-2013, 05:26 PM
|
|
CC Member
|
|
|
Join Date: Dec 2011
Location: West Chester,
PA
Cobra Make, Engine: ERA #795 427 S/C completed Jan. '14 - '68 FE 427 side oiler
Posts: 1,064
|
|
Not Ranked
Hi Dan,
Since I just recently did all that stuff as well I'll add my two cents. Agree with Lippy regarding the tunnel carpet - do it in sections just as outlined in the manual. I made extensive use of wax paper to keep the carpet from sticking until I was ready. I was able to position the carpet exactly where I wanted it in that way. With the carpet wrapped around the front edge of the tunnel, it does require a bit of 'persuasion' to get it in place. Grab the back of the tunnel and wiggle it up and down and side to side a bit as you push the front forward and down to get it to go into place.
As Lippy described, the carpet is difficult to get over the curved areas on the bulkhead. Although it isn't an area that shows, I spent the time to get it as good as I could. I had two small wrinkles that just wouldn't come out so I took a pair of scissors and trimmed the nap of the carpet down and the wrinkle essentially disappeared. Again, not an area that can be seen once the seat went in but I wasn't sure of that at the time.
Kevin
__________________
"Anyone who drives faster than you is a maniac and anyone who drives slower than you is an idiot" - George Carlin
|
11-12-2013, 04:45 AM
|
|
CC Member
|
|
|
Join Date: Apr 2009
Location: Little Rock area,
AR
Cobra Make, Engine: ERA Street Roadster #782 with 459 cu in FE KC engine, toploader, 3.31
Posts: 4,533
|
|
Not Ranked
Thanks guys - the reason I asked is because my tunnel is already a pretty snug fit when installed over the edge of the footboxes. I've trimmed all the insulation and dampproofing out of the way but still tight. If it just won't go I may have to form a carpet overlap at the front and fold the carpet back on itself to give a finished appearance. I plan to do the rear bulkhead in all vinyl per the street cars so than will be a real challenge. I'll have to keep the heat gun handy.
Those aluminum thresholds are the only thing I'm kind of disappointed in so far - couldn't get them to fit very tight to the fiberglass in some of the curved areas.
Dan
|
11-12-2013, 05:25 AM
|
|
CC Member
|
|
|
Join Date: Dec 2011
Location: West Chester,
PA
Cobra Make, Engine: ERA #795 427 S/C completed Jan. '14 - '68 FE 427 side oiler
Posts: 1,064
|
|
Not Ranked
Hi Dan,
I started my door sills on my own and had the same problem. I wasn't happy with the fit so before I drilled any more holes I removed it, filled the hole with JB Weld and waited for my son to come home to help. Much easier with two people. Also, the manual states "the top edge of the sill should extend about 2 1/2" past the center of the latch." That is a mistake. I spoke with Jack at ERA because that just didn't seem right to me and he confirmed that the sill should start as high as it can - right up where the door edge curves downward.
So, if you're not happy with them they can be removed and reshaped if there are no kinks. If you decide to do that, I really recommend a helper to hold the strip tightly in place and push it against the curve while you drill the holes and put screws in one at a time.
Kevin
__________________
"Anyone who drives faster than you is a maniac and anyone who drives slower than you is an idiot" - George Carlin
|
11-12-2013, 06:23 AM
|
|
CC Member
|
|
|
Join Date: Apr 2009
Location: Little Rock area,
AR
Cobra Make, Engine: ERA Street Roadster #782 with 459 cu in FE KC engine, toploader, 3.31
Posts: 4,533
|
|
Not Ranked
Quote:
Originally Posted by kevins2
Hi Dan,
I started my door sills on my own and had the same problem. I wasn't happy with the fit so before I drilled any more holes I removed it, filled the hole with JB Weld and waited for my son to come home to help. Much easier with two people. Also, the manual states "the top edge of the sill should extend about 2 1/2" past the center of the latch." That is a mistake. I spoke with Jack at ERA because that just didn't seem right to me and he confirmed that the sill should start as high as it can - right up where the door edge curves downward.
So, if you're not happy with them they can be removed and reshaped if there are no kinks. If you decide to do that, I really recommend a helper to hold the strip tightly in place and push it against the curve while you drill the holes and put screws in one at a time.
Kevin
|
Yes, an extra pair of hands might have helped but with the body curving this way and that, the moldings pretty much need to be bent in at least two planes. I covered it in tape and worked on the outside edge with a rubber mallet on the car to try and sstretch it (or beat it into submission) but that didn't help much. finally installed an extra screw on both sides at a particularly troublesome area on the rear curve. I did disregard the 2 1/2" and started up as high as I could. I also started at the sill and screwed them down and then worked both ends up the sides - which is contrary to the manual - don't know if that would have made any difference.
Dan
|
11-12-2013, 09:03 AM
|
|
CC Member
|
|
|
Join Date: Apr 2012
Location: Bay Area (Peninsula),
CA
Cobra Make, Engine: ERA 427, 427/487 side-oiler
Posts: 1,248
|
|
Not Ranked
Dan,
If you are not satisfied with the door sills, get another set from ERA and try again. Small potatoes, and they'll turn out better the second time around.
-Jeff
|
11-12-2013, 10:39 AM
|
|
CC Member
|
|
|
Join Date: Apr 2009
Location: Little Rock area,
AR
Cobra Make, Engine: ERA Street Roadster #782 with 459 cu in FE KC engine, toploader, 3.31
Posts: 4,533
|
|
Not Ranked
Quote:
Originally Posted by lippy
Dan,
If you are not satisfied with the door sills, get another set from ERA and try again. Small potatoes, and they'll turn out better the second time around.
-Jeff
|
Lippy - that is definately on the option list. But first I will have to come up with a better approach. I spent nearly the whole day on them yesterday so the effort was there. My door sills were probably not trimmed all the way back like they should have been and I didn't try to correct during the bodywork phase that thinking it wouldn't matter. So my carpet actually comes up and wraps over the top and then the sill sits down on top of the carpet which holds it up and keeps it from sitting tight to the fiberglass - primarily in the front and rear curves. It doesn't all fit exactly as Bob drew it in the manual illustration.
Dan |
11-12-2013, 11:16 AM
|
|
CC Member
|
|
|
Join Date: Apr 2012
Location: Bay Area (Peninsula),
CA
Cobra Make, Engine: ERA 427, 427/487 side-oiler
Posts: 1,248
|
|
Not Ranked
Dan,
I glued the carpet vertically up to the door sill and trimmed it around the curve. The aluminum trip pieces have lips that overlap the carpet very neatly, just as Bob drew in the manual. I'm not sure it will work the same way if the carpet wraps over the top. Let me know if you need a closer photo.
|
 Posting Rules
|
You may not post new threads
You may not post replies
You may not post attachments
You may not edit your posts
HTML code is Off
|
|
|
All times are GMT -7. The time now is 11:34 PM.
Links monetized by VigLink
|


 Linear Mode


