Welcome to Club Cobra! The World's largest
non biased Shelby Cobra related site!
- » Representation from nearly all
Cobra/Daytona/GT40 manufacturers
- » Help from all over the world for your
questions
- » Build logs for you and all members
- » Blogs
- » Image Gallery
- » Many thousands of members and nearly 1
million posts!
YES! I want to register an account for free right now!
p.s.: For registered members this ad will NOT show
 
 Main Menu
|
|
Nevada Classics
|
|
Advertise at CC
|
|
March 2026
|
| S |
M |
T |
W |
T |
F |
S |
| 1 |
2 |
3 |
4 |
5 |
6 |
7 |
| 8 |
9 |
10 |
11 |
12 |
13 |
14 |
| 15 |
16 |
17 |
18 |
19 |
20 |
21 |
| 22 |
23 |
24 |
25 |
26 |
27 |
28 |
| 29 |
30 |
31 |
|
|
|
|
|
|
CC Advertisers
|
|

11-12-2011, 07:08 AM
|
 |
CC Member

|
|
|
Join Date: May 2010
Location: Birmingham,
AL
Cobra Make, Engine: Kirkham 289 FIA, 363 Stroker
Posts: 751
|
|

 Not Ranked
Quote:
Originally Posted by kgs365

Can you post a picture of the fuel log set up you have...please..I'm not liking the set up I have it doesn't look right under the turkey pan
|
I made my own fuel log and after purchasing all of the reducers, etc. i could have easily bought one, but the problem i ran into is that nobody makes a fuel log which has -8 line that feeds into the -6 lines on the carb. So, i ended up using -8 to -6 reducers on the ends and -6 t fittings. |
-
Advertising

11-12-2011, 07:11 AM
|
|
CC Member
|
|
|
Join Date: May 2010
Location: Birmingham,
AL
Cobra Make, Engine: Kirkham 289 FIA, 363 Stroker
Posts: 751
|
|
Not Ranked
Quote:
Originally Posted by Avmaviator
Ironman is spectacular! Like Chris said, I flew down to Birmingham on Thursday to see the car and enjoy a nice AL fall day (it was cool but much warmer then the 31* in Chicago with light snow  ) Thanks again Chris!
Chris did a fantastic job putting this car together. It looks great, sounds fantastic, and it is a beast. It is quite something to be seated behind 527 screaming cids! Once the car hooks ups all the way (usually in second gear it seems, but it got grip in first too), you can feel it grip/squat down, and bang, you just got launched off a canon.
I have pictures, and good videos too, but I need to figure out how to go from a dvd to youtube. |
Thanks Arnaud! It's good to have approval from a fellow car enthusiast that understands the amount of time that goes into a build like this. |
11-15-2011, 10:36 PM
|
|
CC Member
|
|
|
Join Date: May 2010
Location: Birmingham,
AL
Cobra Make, Engine: Kirkham 289 FIA, 363 Stroker
Posts: 751
|
|
Not Ranked
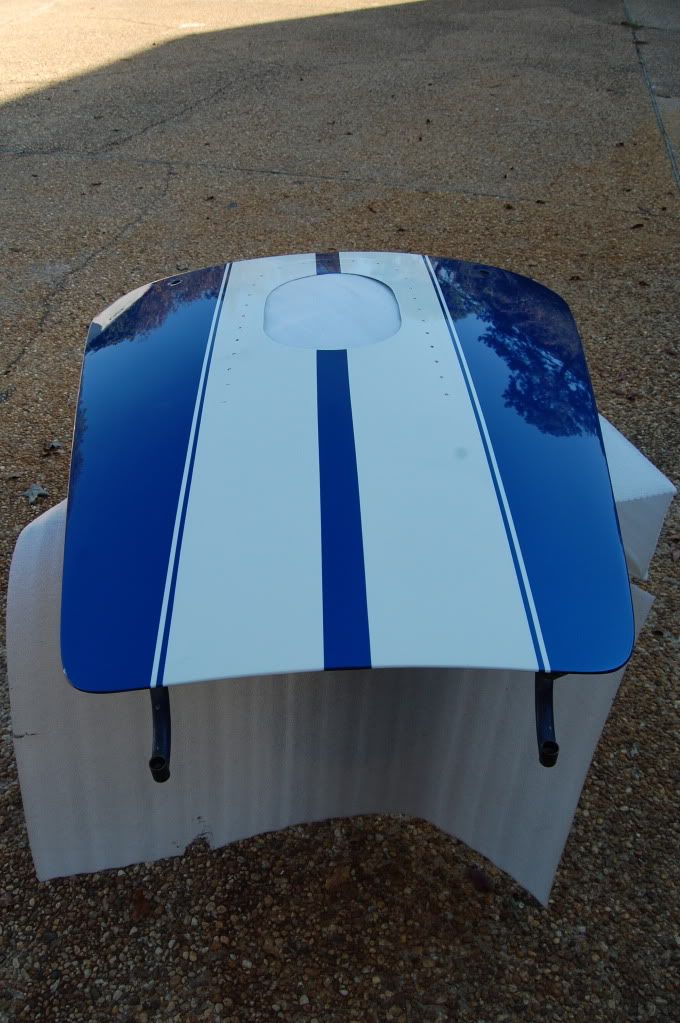
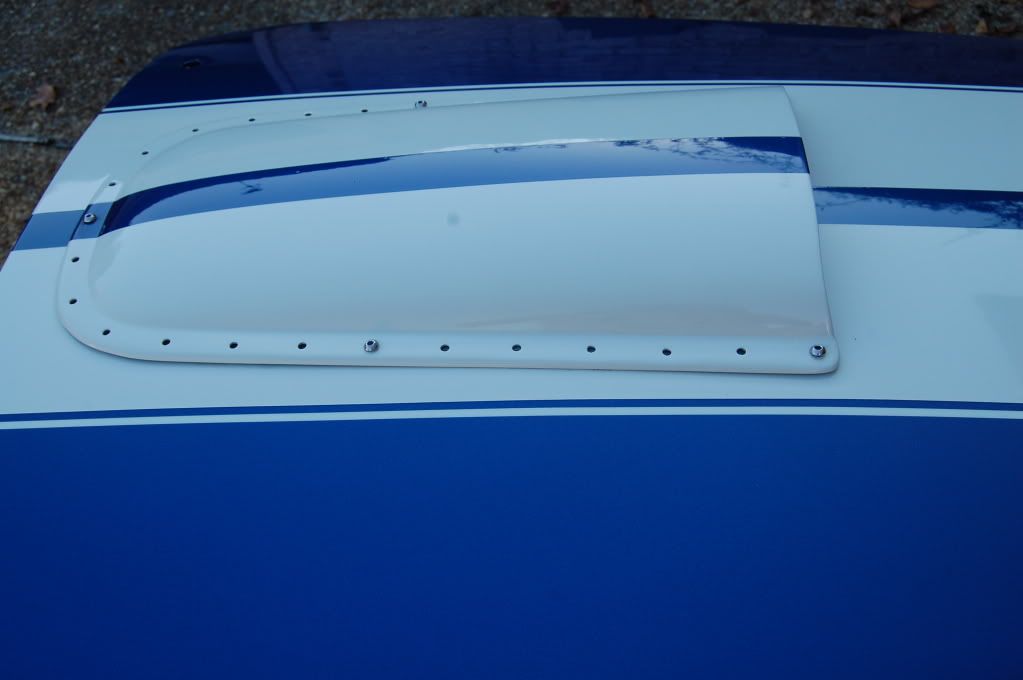
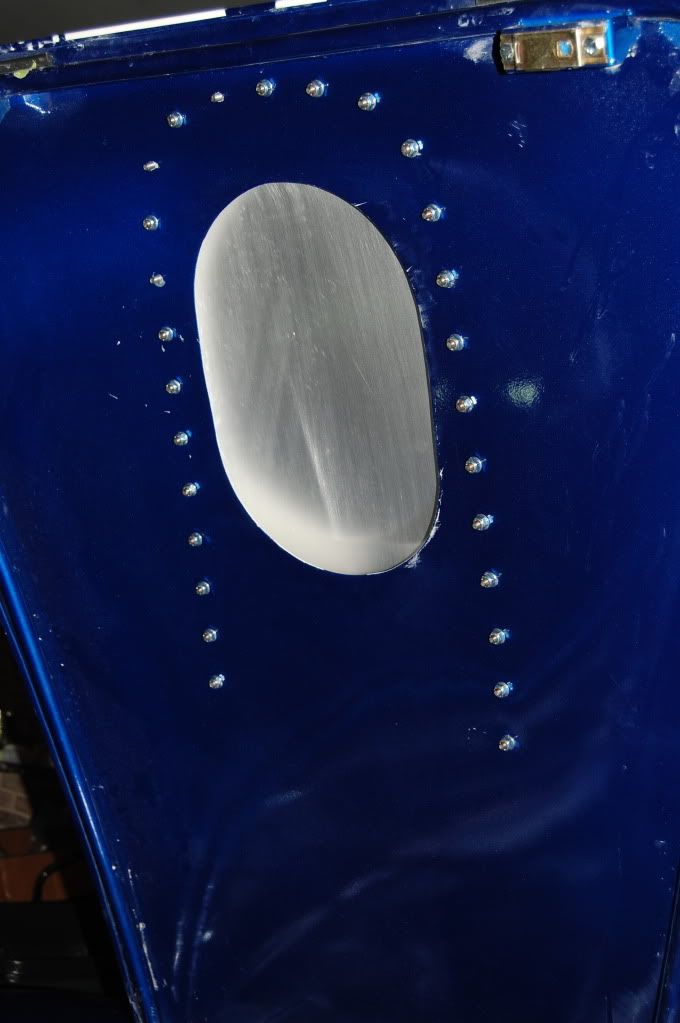
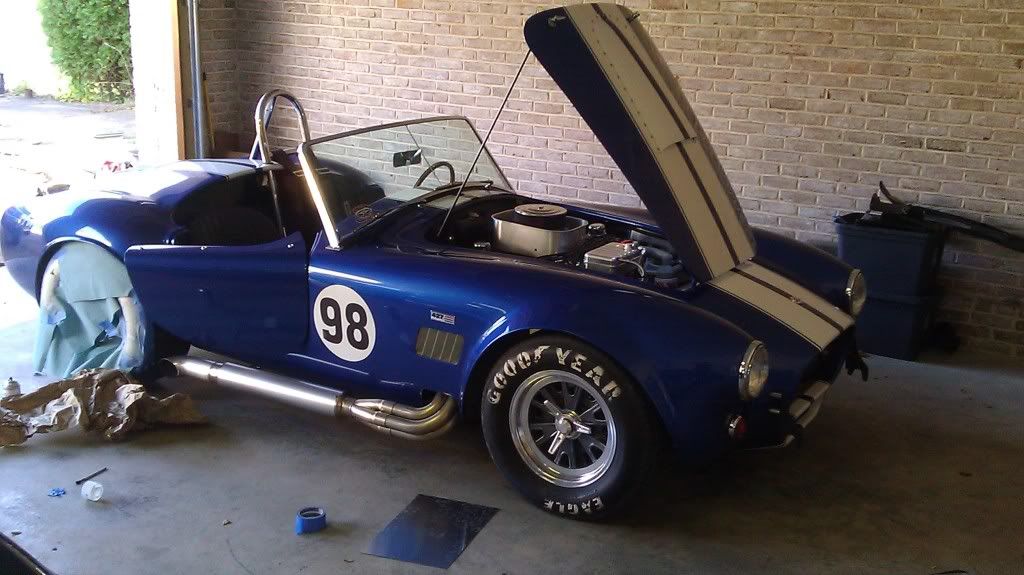
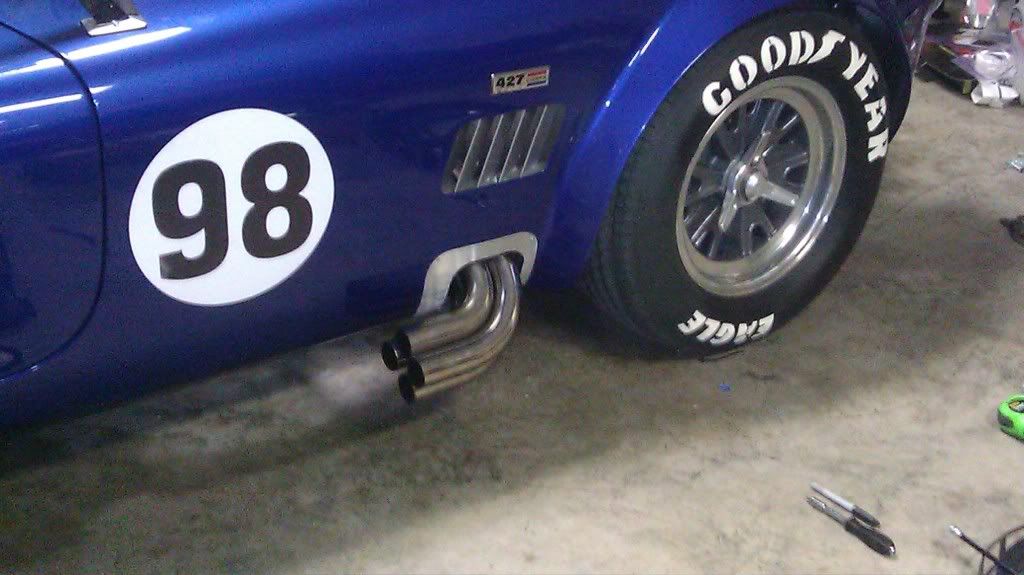
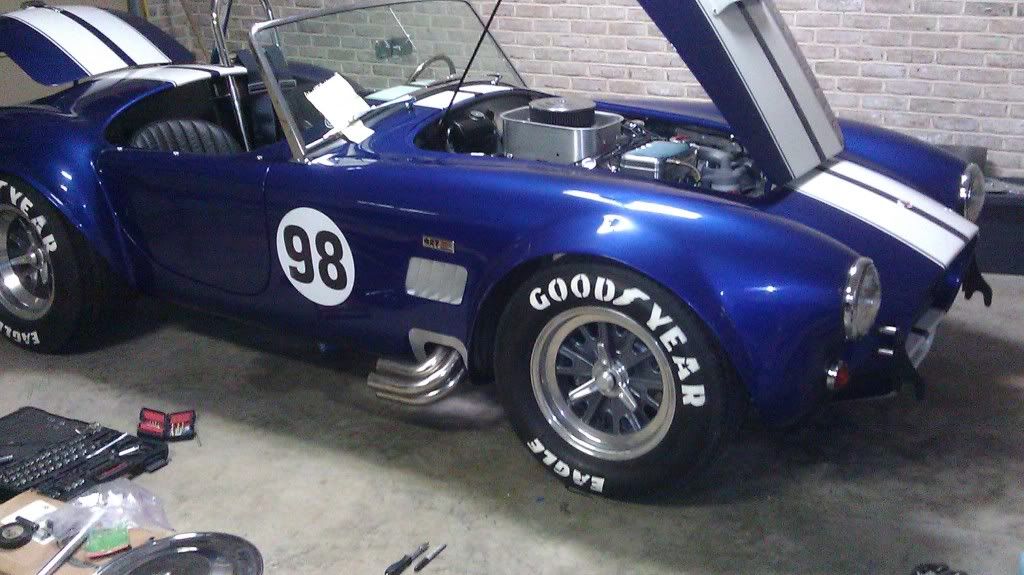
 Finishing Touches
Last edited by RestoCreations; 11-16-2011 at 05:06 AM..
|
11-15-2011, 10:44 PM
|
|
CC Member
|
|
|
Join Date: May 2010
Location: Birmingham,
AL
Cobra Make, Engine: Kirkham 289 FIA, 363 Stroker
Posts: 751
|
|
Not Ranked
Last edited by RestoCreations; 11-16-2011 at 07:09 AM..
|
11-16-2011, 03:55 AM
|
 |
CC Member
|
|
|
Join Date: Oct 2002
Location: Eagle,
Ne.
Cobra Make, Engine: 1966 Lone Star 427SC.
Posts: 4,310
|
|
Not Ranked
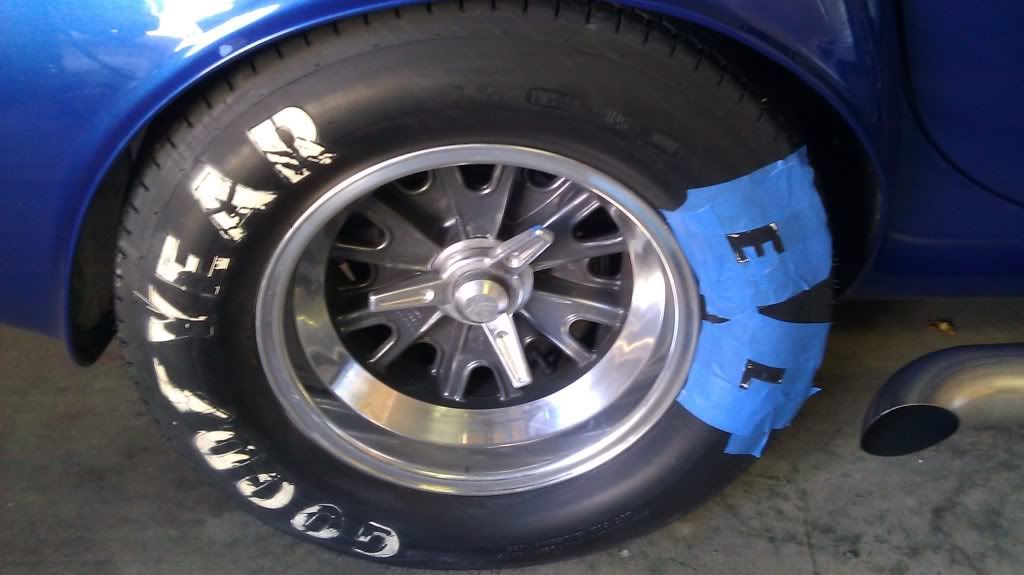
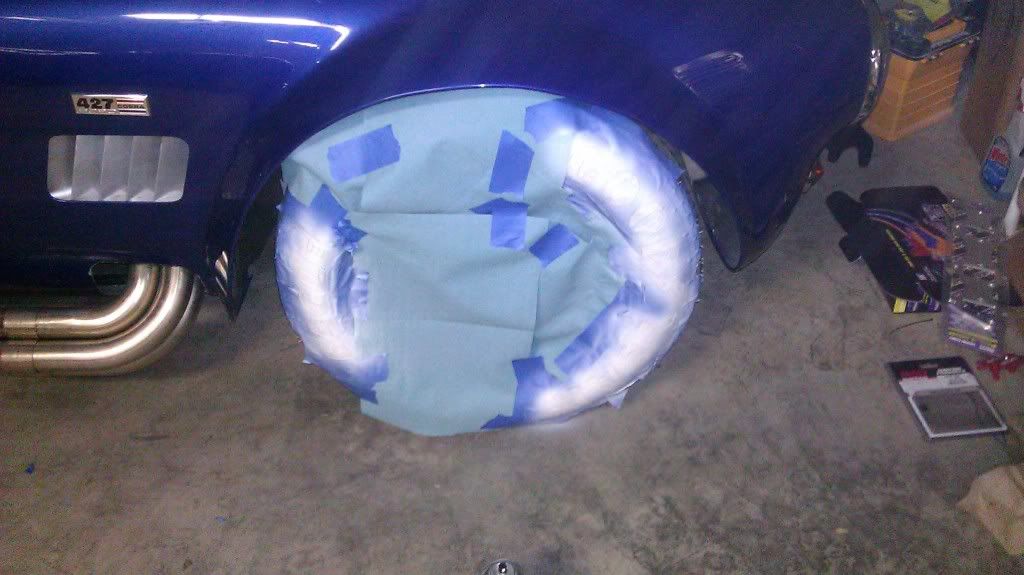
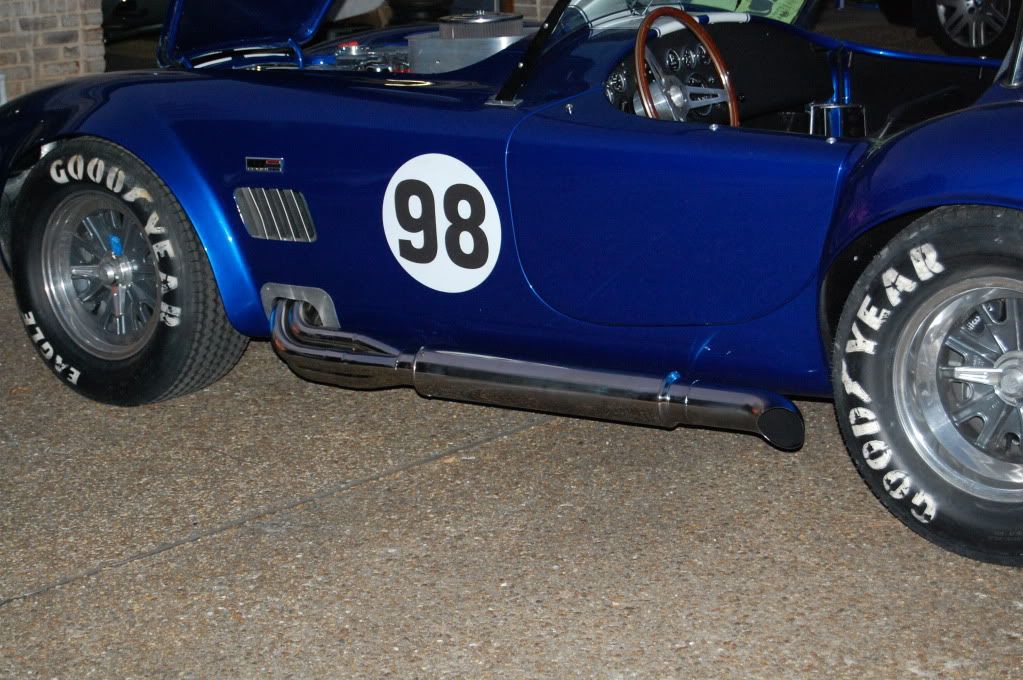
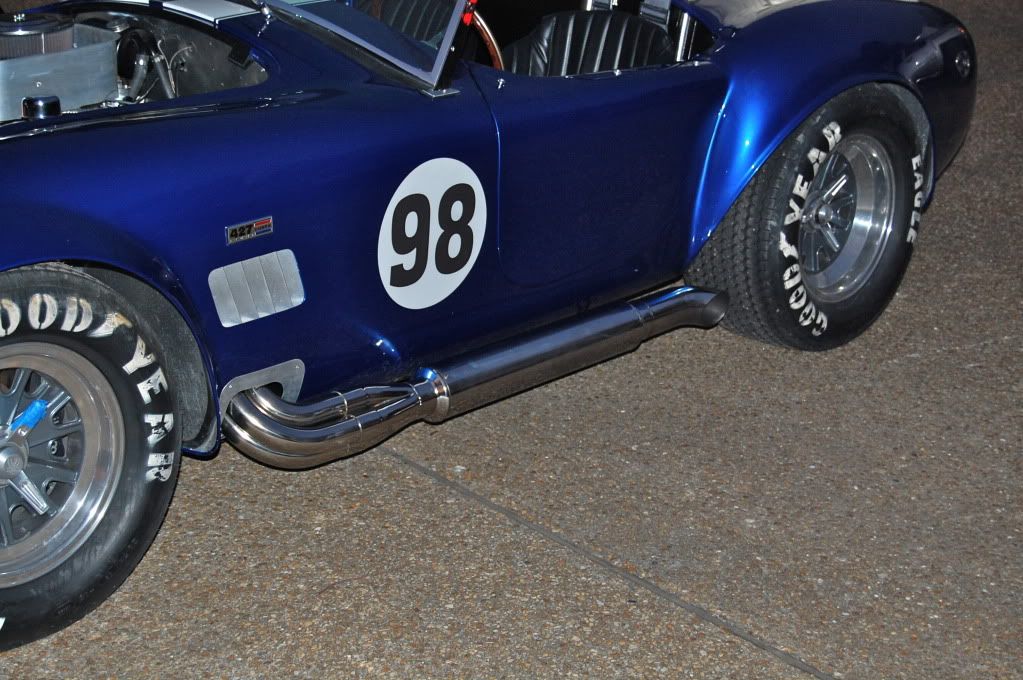
Who's tire paint did you go with ?
I have the paint from Ranger, but haven't used it yet.
Also, how did you adhere the heat shields ?
Ranger Tire Paint — Testimonials
__________________
Regards,
Kevin
Last edited by FUNFER2; 11-16-2011 at 04:03 AM..
|
11-16-2011, 05:14 AM
|
|
CC Member
|
|
|
Join Date: May 2010
Location: Birmingham,
AL
Cobra Make, Engine: Kirkham 289 FIA, 363 Stroker
Posts: 751
|
|
Not Ranked
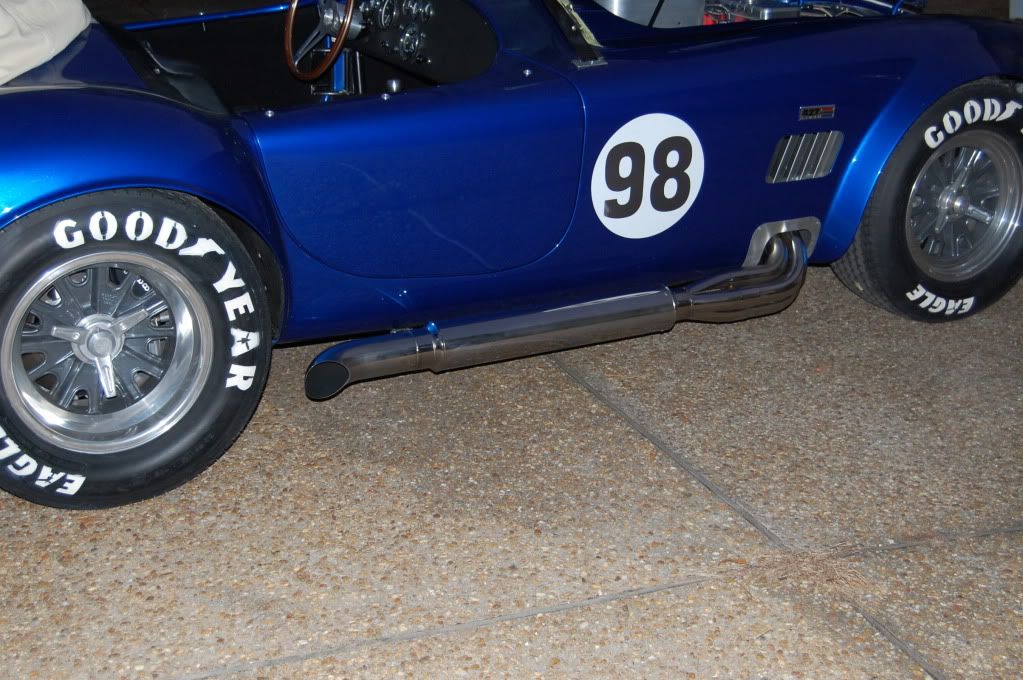
I used stencil paint that was left over from a midyear Corvette restoration. It adhered really well, surprisingly. I tried some of the tire paint that comes in a pen and brush paint from the hobby store, but both were too thick, looked clumpy, and showed brush marks.
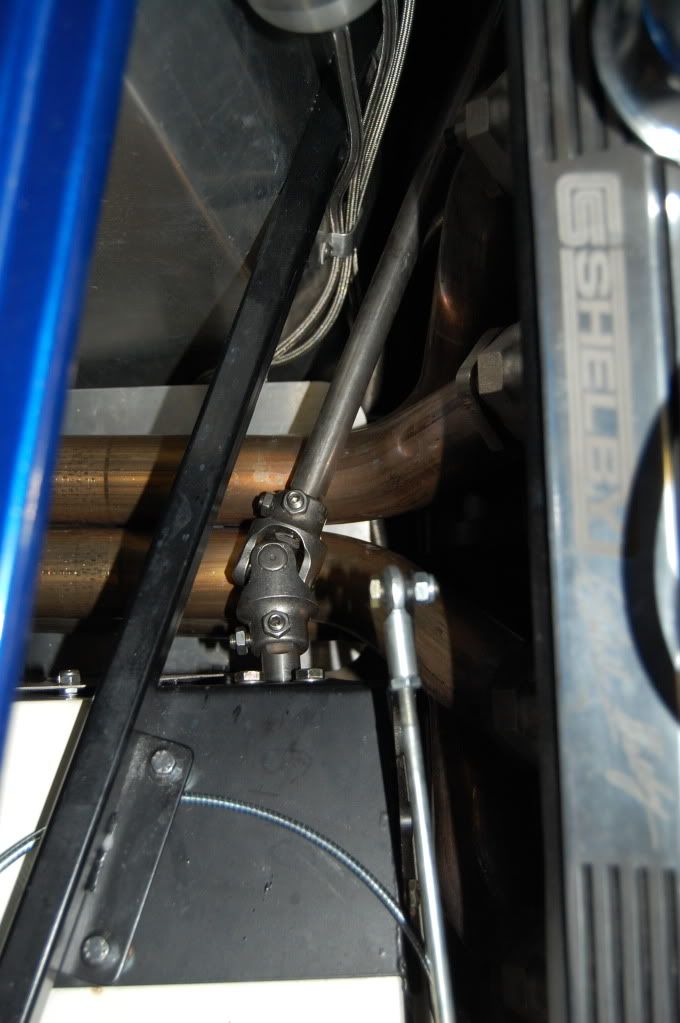
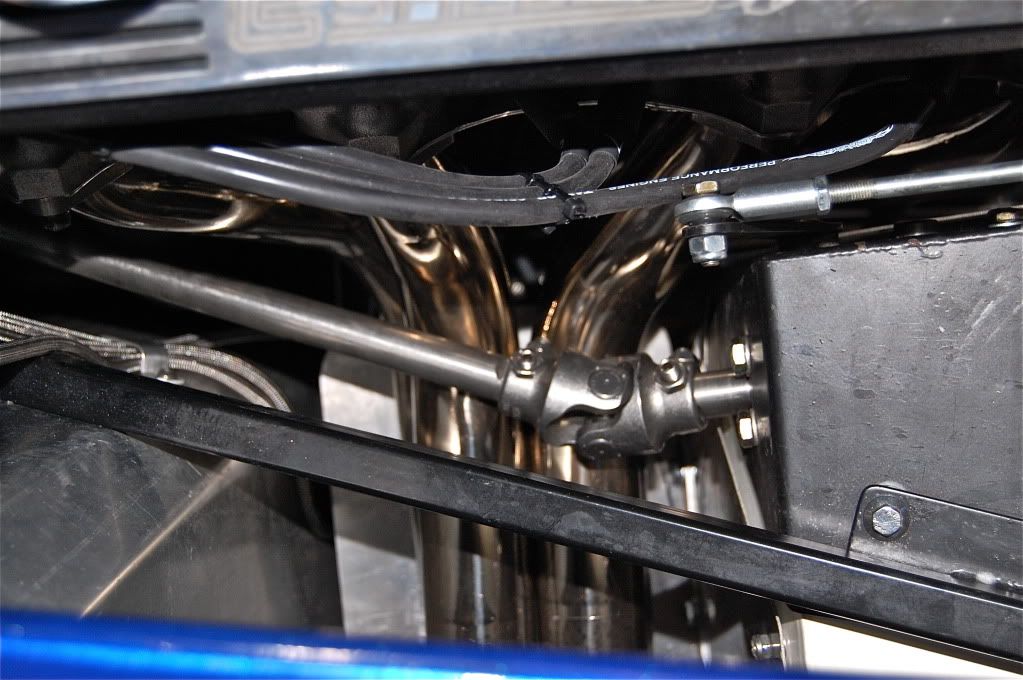
The heat shields are currently held in place by 4 screws, one at each corner. I plan on using small pop rivets to secure them once the pipes are fully polished and assembled.
|
11-16-2011, 05:38 AM
|
|
CC Member
|
|
|
Join Date: Oct 2002
Location: Eagle,
Ne.
Cobra Make, Engine: 1966 Lone Star 427SC.
Posts: 4,310
|
|
Not Ranked
Since I have the Ranger paint, I'll follow their instructions, so lets keep in touch and see what works best. I don't know when I'll get around to paint them ?
__________________
Regards,
Kevin
|
11-22-2011, 06:57 AM
|
|
CC Member
|
|
|
Join Date: May 2010
Location: Birmingham,
AL
Cobra Make, Engine: Kirkham 289 FIA, 363 Stroker
Posts: 751
|
|
Not Ranked
|
11-22-2011, 07:28 AM
|
|
CC Member
|
|
|
Join Date: Oct 2002
Location: Eagle,
Ne.
Cobra Make, Engine: 1966 Lone Star 427SC.
Posts: 4,310
|
|
Not Ranked
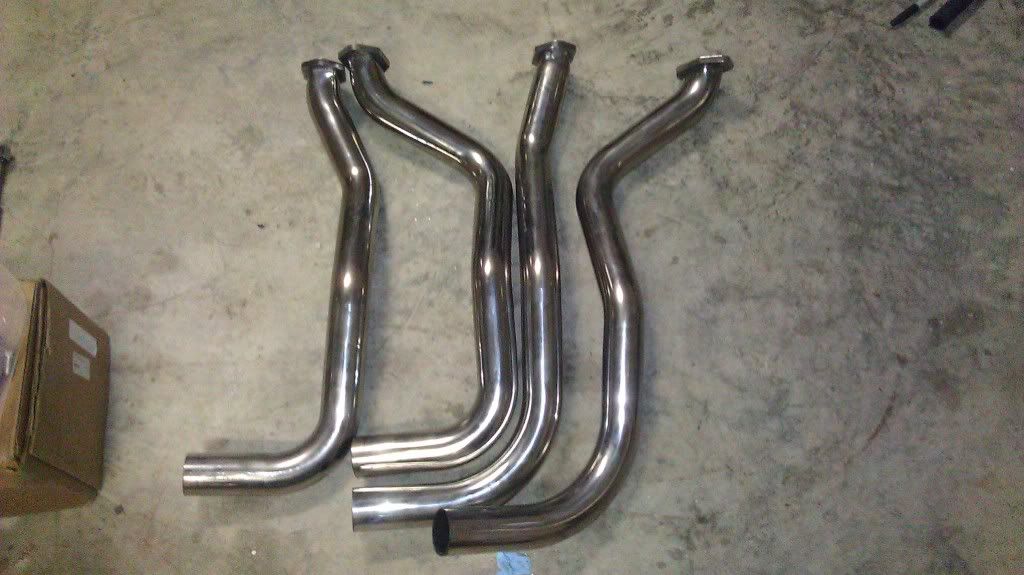
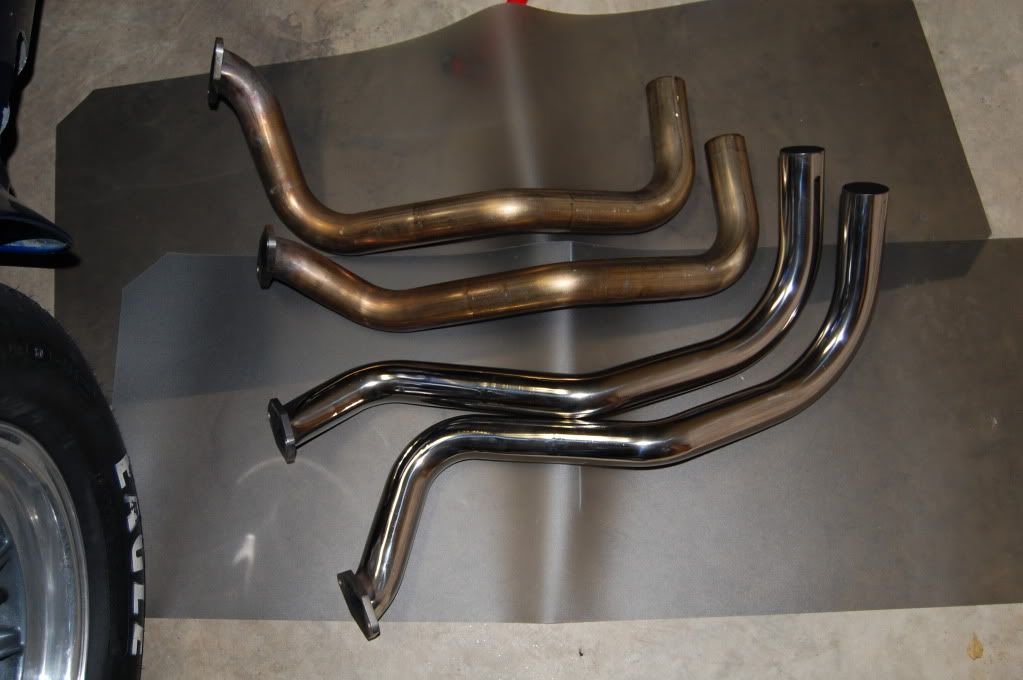
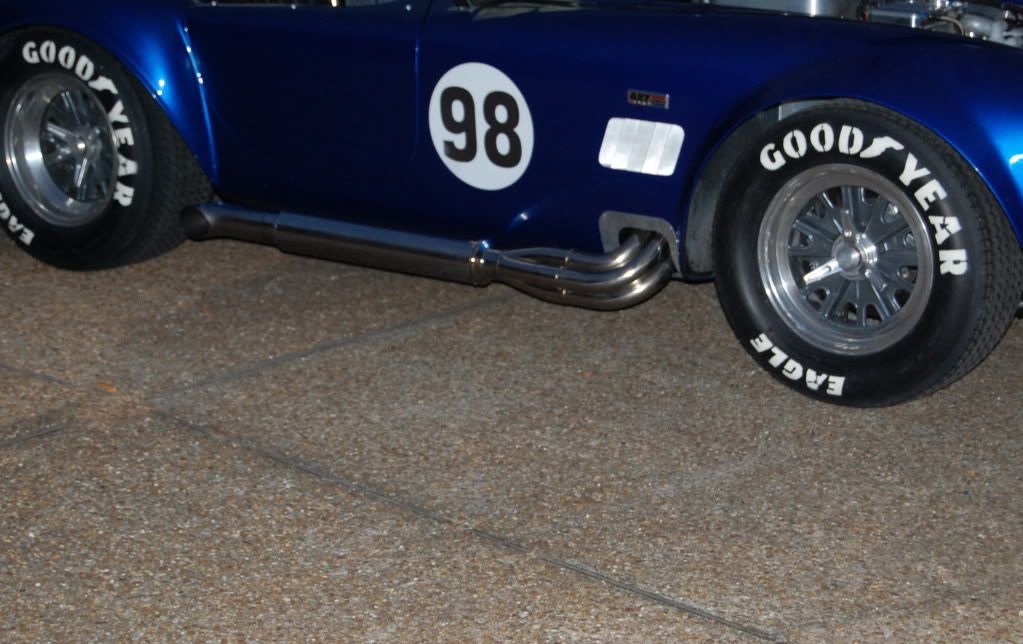
You'll love the stainless as I do, over mild steel. What's inside the muffler ?
Mine are louvers. I build these highly polished 304 stainless in a kit form for any cobra, vette, hot rod etc. I think they clean up easier than a coating. They will last for many,....years over mild steel.
Anyway, they look great buddy.  Gilmore Side Pipe Kit pictures by 427HISS - Photobucket


__________________
Regards,
Kevin
|
11-22-2011, 08:13 AM
|
|
CC Member
|
|
|
Join Date: May 2010
Location: Birmingham,
AL
Cobra Make, Engine: Kirkham 289 FIA, 363 Stroker
Posts: 751
|
|
Not Ranked
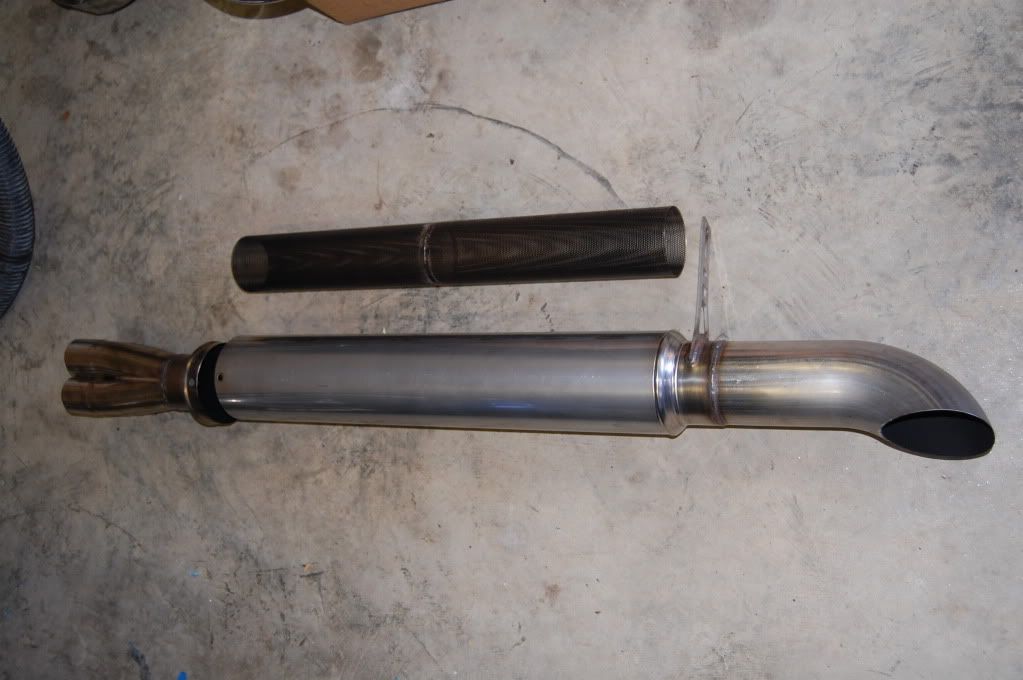
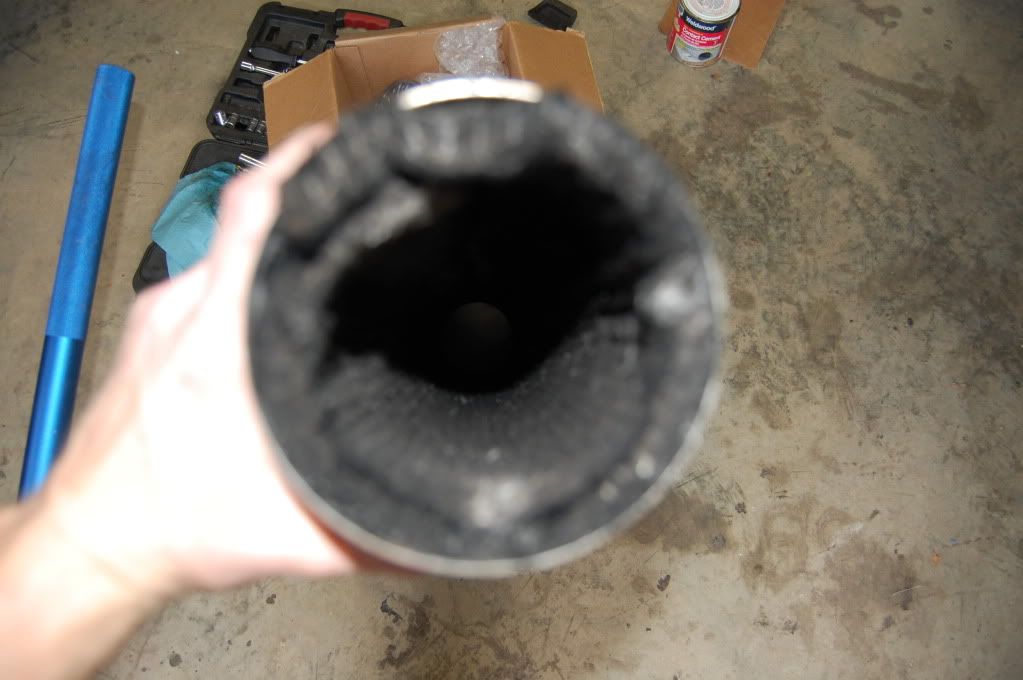
That piece sitting next to the muffler tube is all that is inside. Just a screen that inserts into the material inside of the muffler. I am not sure if it is fiberglass packing inside of the muffler or something else.
|
11-22-2011, 08:20 AM
|
|
CC Member
|
|
|
Join Date: Oct 2002
Location: Eagle,
Ne.
Cobra Make, Engine: 1966 Lone Star 427SC.
Posts: 4,310
|
|
Not Ranked
The photo of what ever's inside the muffler looks restrictive. One of my customers muffler had this inside. Wow, talk about restrictive. 

__________________
Regards,
Kevin
|
11-22-2011, 11:15 AM
|
 |
CC Member
|
|
|
Join Date: Mar 2011
Location: Sleepy Hollow,
IL
Cobra Make, Engine: Kirkham #647 brushed
Posts: 412
|
|
Not Ranked
I believe the packing is stainless steel wool if I remember correctly from my Kirkham visit. It is supposed to last longer and not break down like fiber glass does.
The pipes look really good Chris. Looks like a lot of work but totally worth it when you see the result.
|
11-22-2011, 12:06 PM
|
|
CC Member
|
|
|
Join Date: Oct 2007
Cobra Make, Engine:
Posts: 176
|
|
Not Ranked
Very nice built ! Congrats ! Where did you get this sidepipe- kit from ? Looks perfect !
|
11-22-2011, 12:50 PM
|
|
CC Member
|
|
|
Join Date: Oct 2002
Location: Eagle,
Ne.
Cobra Make, Engine: 1966 Lone Star 427SC.
Posts: 4,310
|
|
Not Ranked
Do you mean me ?
If so, we make them. The primaries extra long for a custom fit. All you need is your 4-hole flange to match the one on your headers. Like Chris mentioned, stainless is expensive, but they last much longer, look and sound great. If you want more info, PM or email me as I don't want to work over his thread.
Gilmore Side Pipe Kit pictures by 427HISS - Photobucket
Again Chris- beautiful cobra build and great workmanship !
__________________
Regards,
Kevin
Last edited by FUNFER2; 11-22-2011 at 12:55 PM..
|
11-22-2011, 12:51 PM
|
|
CC Member
|
|
|
Join Date: May 2010
Location: Birmingham,
AL
Cobra Make, Engine: Kirkham 289 FIA, 363 Stroker
Posts: 751
|
|
Not Ranked
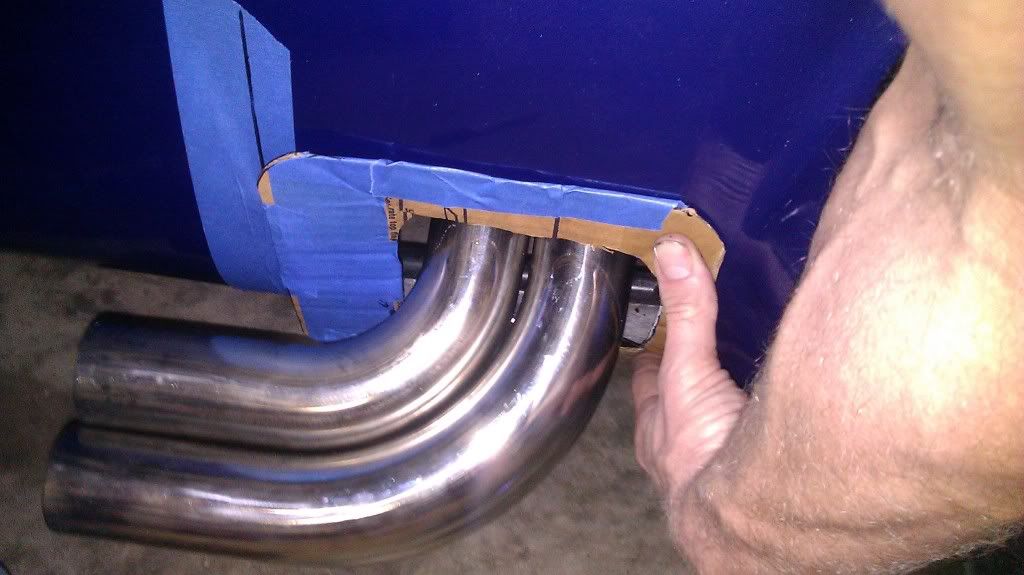
Its just a straight through pipe with packing material around it. It really isnt restrictive at all. I guess my fuzzy pictures is showing the wrong thing. Look at the picture of the pipe on the ground. At the front of the pipe is the collector that i removed and next to the sidepipe is the mesh tube that inserts into the stainless pipe. It simply slides down inside of the stainless steel pipe and has sound dampening material around it. The mesh pipe appeared to be around 2-1/4 to 2-1/2 in diameter and is straight through. The design gives the exhaust a nice low rumble, but it still loud and does get very loud under full acceleration, but it is not like some of the glasspacks that are in my opinion obnoxious and will make you want to rip your ears off. Also, the mesh does not produce a flappy sound at idle while cruising, it keeps that nice low pitch. However, it does flap when backpressure is present, but it isnt terrible.
|
11-22-2011, 12:54 PM
|
|
CC Member
|
|
|
Join Date: Oct 2002
Location: Eagle,
Ne.
Cobra Make, Engine: 1966 Lone Star 427SC.
Posts: 4,310
|
|
Not Ranked
It is pretty fuzzy. lol
Doesn't the stainless sound great over mild steel !
What did you do for hangers ?
My first ones were just 1/4" thick straight stock welded to the outer shell of the muffler. It ripped out after 20 miles, so we changed to out present hanger that conforms to the muffler and about 3" long. No issues now.

__________________
Regards,
Kevin
Last edited by FUNFER2; 11-22-2011 at 01:08 PM..
|
11-22-2011, 01:12 PM
|
|
CC Member
|
|
|
Join Date: May 2010
Location: Birmingham,
AL
Cobra Make, Engine: Kirkham 289 FIA, 363 Stroker
Posts: 751
|
|
Not Ranked
You I didnt even think about the stainless contributing to the sound, but now that you mention it, i am sure it makes a difference. I certainly know there is a big difference in how an internal fuel pump sounds inside of an aluminum gas tank vs a stainless tank.
|
11-22-2011, 01:18 PM
|
|
CC Member
|
|
|
Join Date: Oct 2002
Location: Eagle,
Ne.
Cobra Make, Engine: 1966 Lone Star 427SC.
Posts: 4,310
|
|
Not Ranked
Yes, much deeper and raspy tone. I would have never thought about a pump sound difference in a fuel tank. Interesting.
__________________
Regards,
Kevin
|
12-11-2011, 05:52 PM
|
|
CC Member
|
|
|
Join Date: Oct 2002
Location: Eagle,
Ne.
Cobra Make, Engine: 1966 Lone Star 427SC.
Posts: 4,310
|
|
Not Ranked
Quote:
Originally Posted by dolphinboy400
|
We have to join that site to see the pics. Can you just post some here on CC ?
__________________
Regards,
Kevin
|
 Posting Rules
|
You may not post new threads
You may not post replies
You may not post attachments
You may not edit your posts
HTML code is Off
|
|
|
All times are GMT -7. The time now is 04:47 AM.
|
|


 Linear Mode


