Welcome to Club Cobra! The World's largest
non biased Shelby Cobra related site!
- » Representation from nearly all
Cobra/Daytona/GT40 manufacturers
- » Help from all over the world for your
questions
- » Build logs for you and all members
- » Blogs
- » Image Gallery
- » Many thousands of members and nearly 1
million posts!
YES! I want to register an account for free right now!
p.s.: For registered members this ad will NOT show
 
 Main Menu
|
|
Nevada Classics
|
|
Advertise at CC
|
|
December 2025
|
| S |
M |
T |
W |
T |
F |
S |
| |
1 |
2 |
3 |
4 |
5 |
6 |
| 7 |
8 |
9 |
10 |
11 |
12 |
13 |
| 14 |
15 |
16 |
17 |
18 |
19 |
20 |
| 21 |
22 |
23 |
24 |
25 |
26 |
27 |
| 28 |
29 |
30 |
31 |
|
|
|
|
|
CC Advertisers
|
|
 4Likes 4Likes

09-01-2011, 11:13 AM
|
 |
Full Blown Member

|

|
|
Join Date: Sep 2008
Cobra Make, Engine: KMP 427 S/C, Twin Paxton 511 FE
Posts: 2,594
|
|

 Not Ranked
Thumbs up, Avmaviator!

__________________
rodneym
|
-
Advertising

09-08-2011, 01:03 PM
|
 |
CC Member
|
|
|
Join Date: May 2010
Location: Birmingham,
AL
Cobra Make, Engine: Kirkham 289 FIA, 363 Stroker
Posts: 751
|
|
Not Ranked
Jeez, and i thought my motor was sexy. Yours makes mine look like a budget build.  |
09-24-2011, 09:54 AM
|
 |
CC Member
|
|
|
Join Date: Mar 2011
Location: Sleepy Hollow,
IL
Cobra Make, Engine: Kirkham #647 brushed
Posts: 412
|
|
Not Ranked

Hey folks,
It's been a while since I posted an update. I have been really busy with a lot of projects, but it is a good busy 
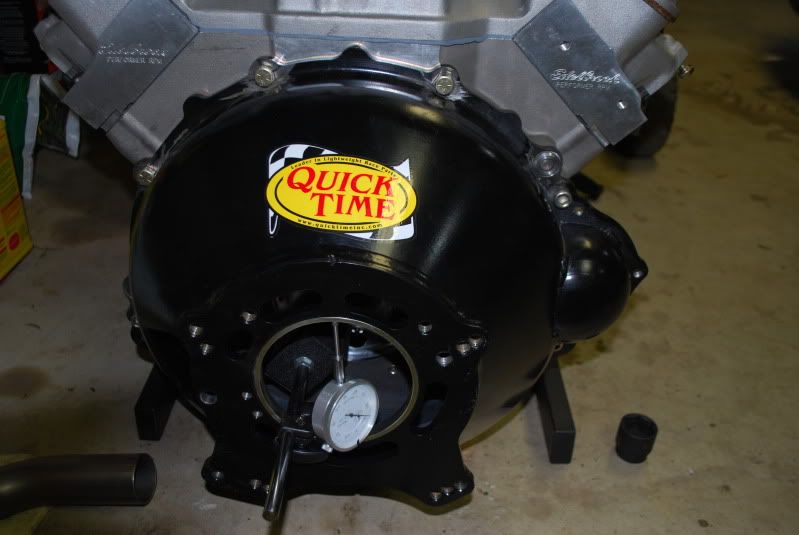
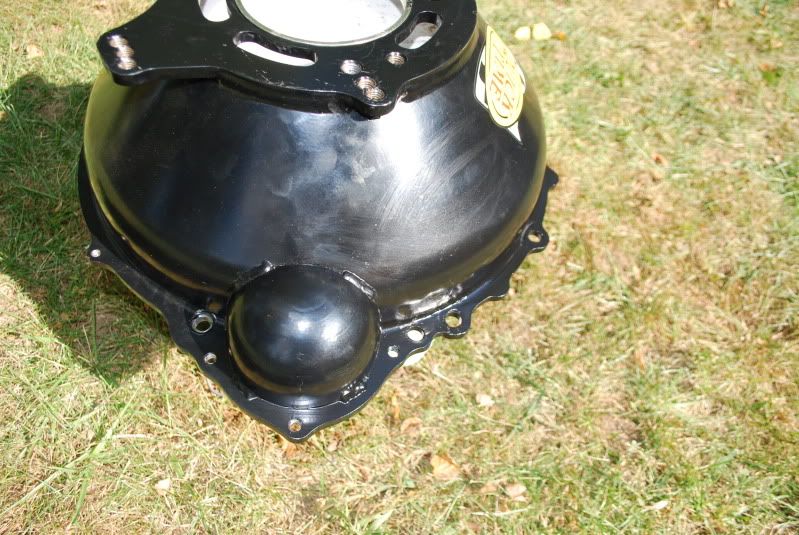
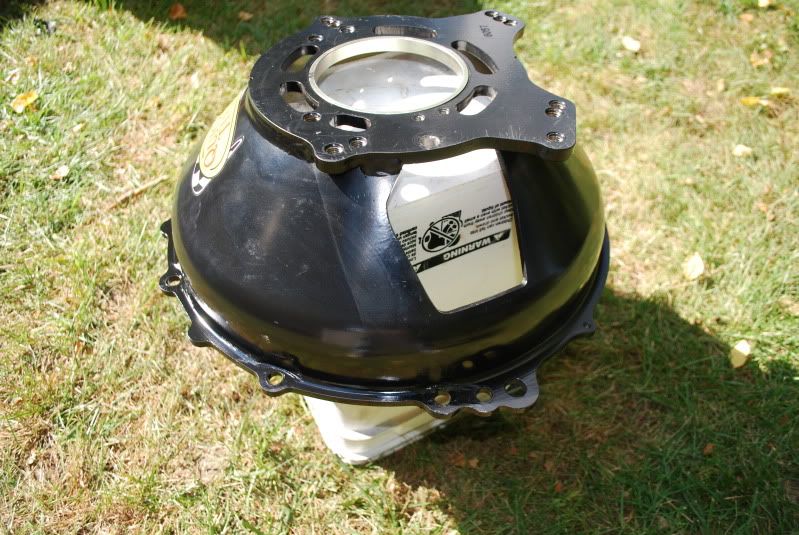
So I finally got a bunch of parts from Summit and made some progress with KM647. I just finished dialing in the bell housing yesterday morning, what a *****. When I bolted the housing in, right from the box, it was at .014 TIR. So I ordered a Lakewood locating kit, the weldable one. First problem, when I got the lakewood rings I could tell that there wasn't going to be enough metal on the flange for me to drill out the 1 and 1/16 hole needed to drop the rings in... Lovely.nso I grinded down the rings to what I needed and felt safe with for welding. So yesterday morning I centered the housing, got it within .001 TIR, which must have been a fluke. I tightened everyting (checked again) and welded the rings in. They came out to .010 TIR... Son of *****  So luckly for me, it was easy to take the rings out (they were sticking out a bit from the flange, so I just grinded them down flush with the flange and punched them out). Long story short, on the second round I'm at .004 TIR, good enough for me.
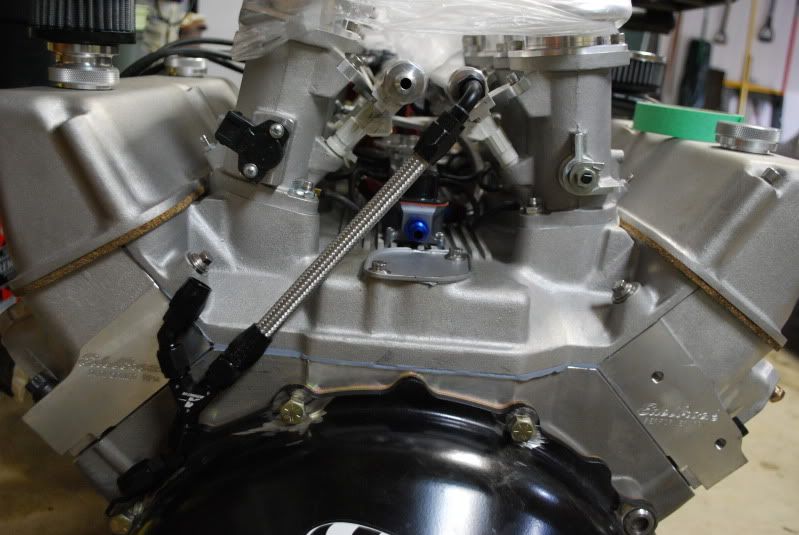
I've been putting together a few AN fittings for the fuel lines too. I got the two rails all hooked up. Looks nice. Other then that, I'm just installing parts here and there. Going to roughly lay the FAST wire harness when I get home this week and we'll see when I can drop the engine in... Soon I hope.
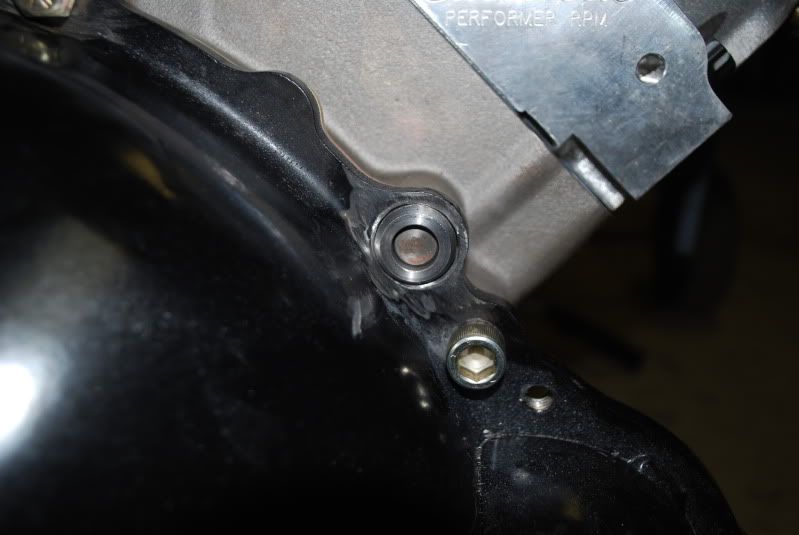
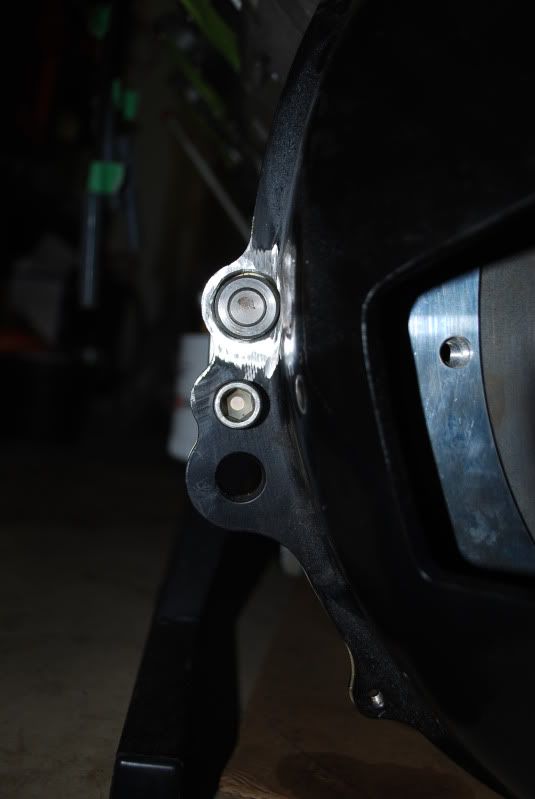
Anyways, here are some pics.
You can see there isn't that much room on the flange. So I stopped at that thickness.
The AN fuel lines.
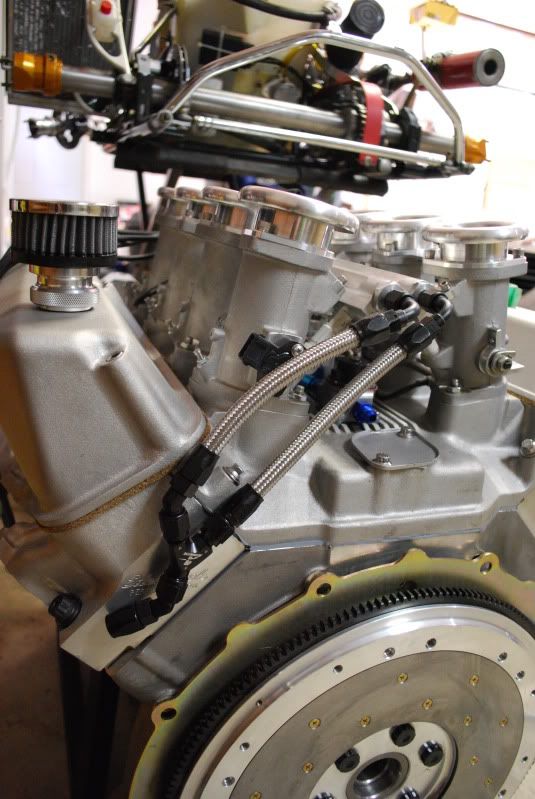
Painted the housing, now just got to clean the housing and install everything

|
10-19-2011, 09:48 PM
|
|
CC Member
|
|
|
Join Date: Mar 2011
Location: Sleepy Hollow,
IL
Cobra Make, Engine: Kirkham #647 brushed
Posts: 412
|
|
Not Ranked
Finally an update for your guys!
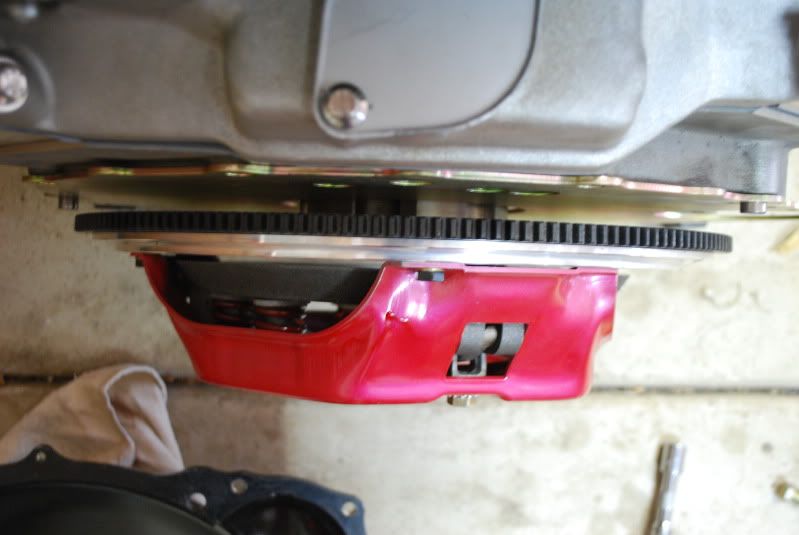
I've been battling clutch/bell housing clearance issues for the last two weeks and it has been finally resolved thanks to Brent. After trying a few different parts, different mounting brackets, and different ways, we went with a diaphragm clutch from McLeod instead of a long style type clutch, and that fixed it. The main issue I was having is not enough clearance between the pressure plate and the bell housing, so I could not put the fork in between the two. Anyways, that is over, now to the rest of the build :
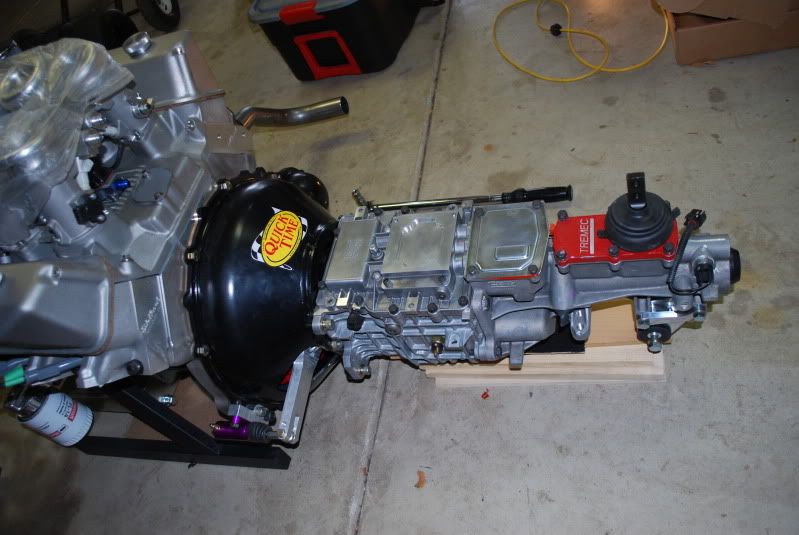
I installed all the components yesterday and today. Clutch, fork, bell housing, slave cylinder, and transmission. The transmission was not the easiest thing to install, especially by myself. I could get it as far at the register ring but that is about it. So I used the bolted to bring the tranny flush with the bell housing. But I did not have to crank on the bolts hard at all, I made sure everything went in smoothly, and I hope everything went in correctly... What is the best way to test the tranny for any rubbing or anything like that with the engine out of the car?
After that I installed the dipstick tube. From there I welded one side of the MSD coil bracket, to the dipstick tube support, so I can bolt both of them to the front of the head, and have the coil bracket supported (the coil bracket wasn't long enough to reach the two holes on the front side of the head).
I also mounted the kirkham oil filter adapter plate, and connected the hose to the remote oil filter bracket.
The EFI wiring harness install is coming along slowly. I have to figure out if the Kirkham has a fuel pump and fan relay because I need to tap into both of those for the computer.
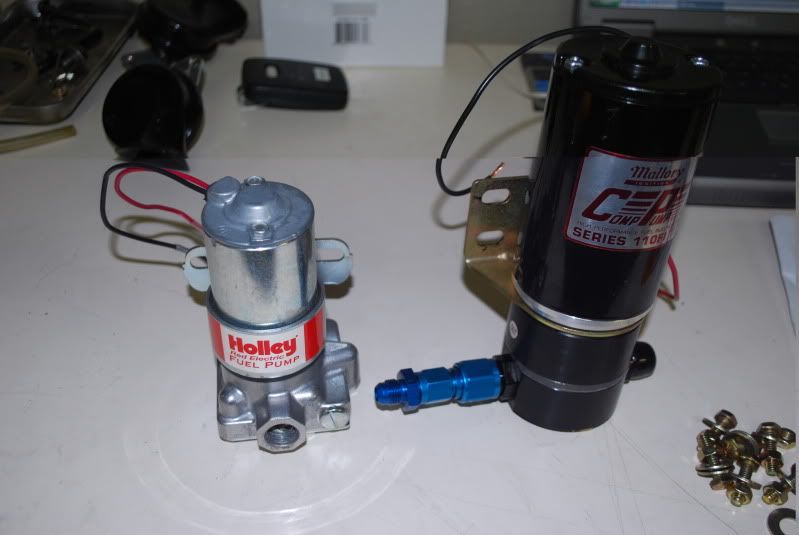
I made a bracket for the new pump, which is much bigger then the previous Holley pump. I mostly have to go get some bolts in order to finish that project. And lastly I have put together a lot of different AN lines for the fuel system.
Basically I am close to dropping the engine in, which is pretty damn exciting! Anyways, that is all for now. I will try to stay on top of the updates
Here are some pics:
The long style pressure plate (top), it sticks out a lot more then the new diaphragm type pressure plate.
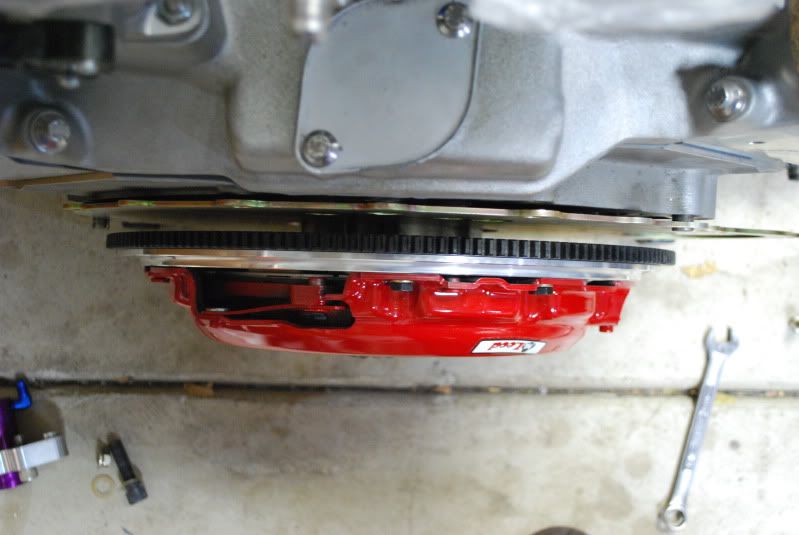
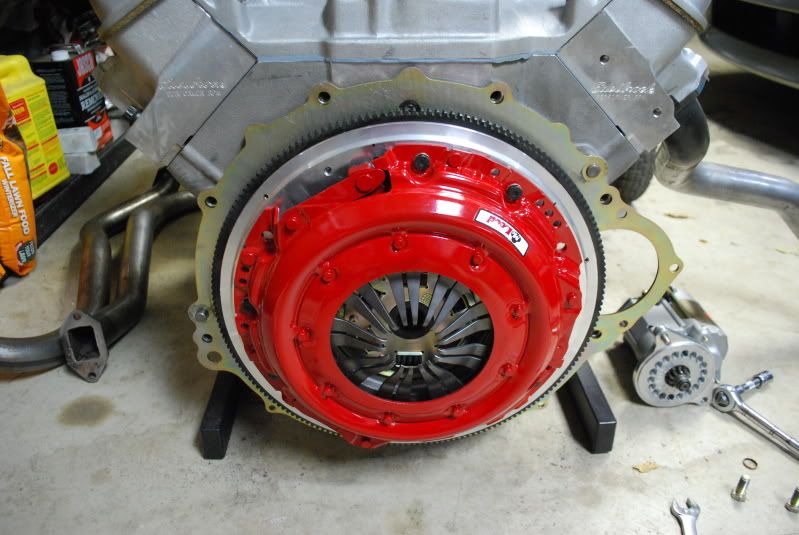
The new McLeod clutch kit
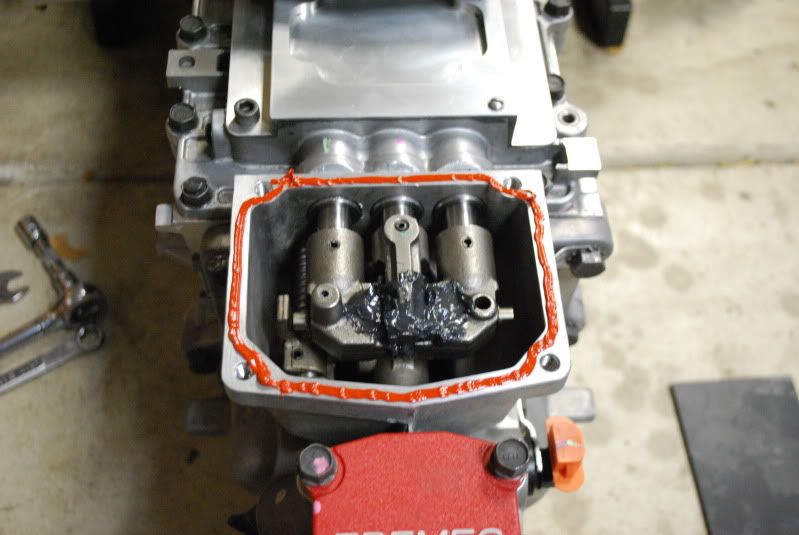
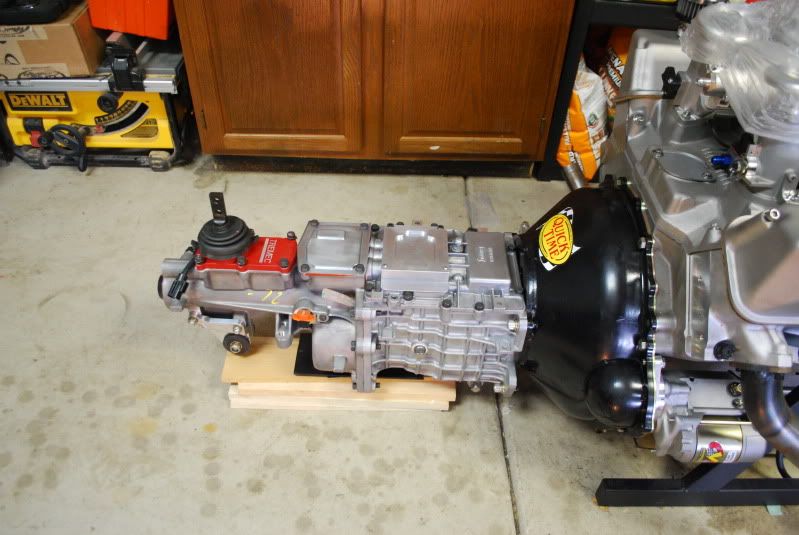
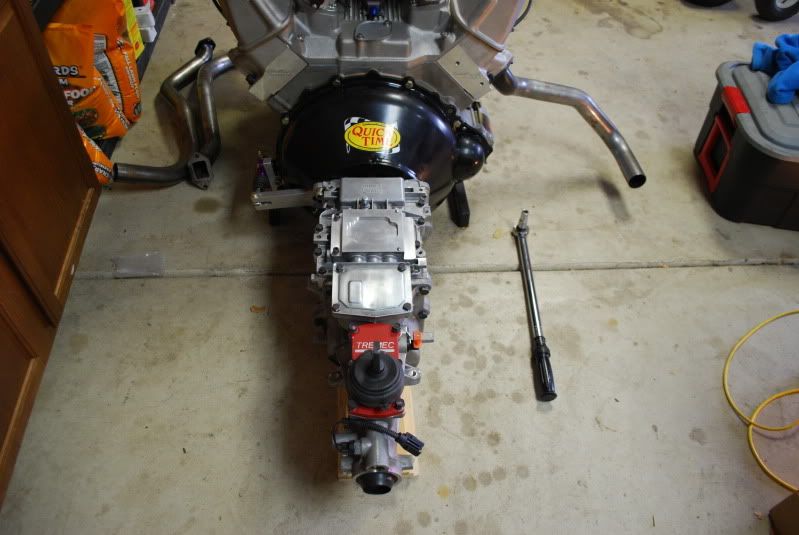
The tranny and the rest installed. In these pictures I took out one of the covers on the tranny, cleaned out the factory black sealant, and replaced it with some red rtv.
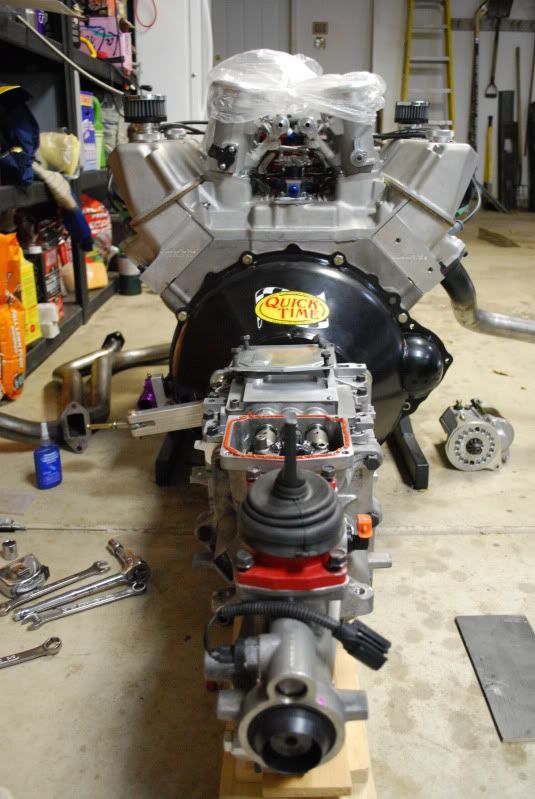
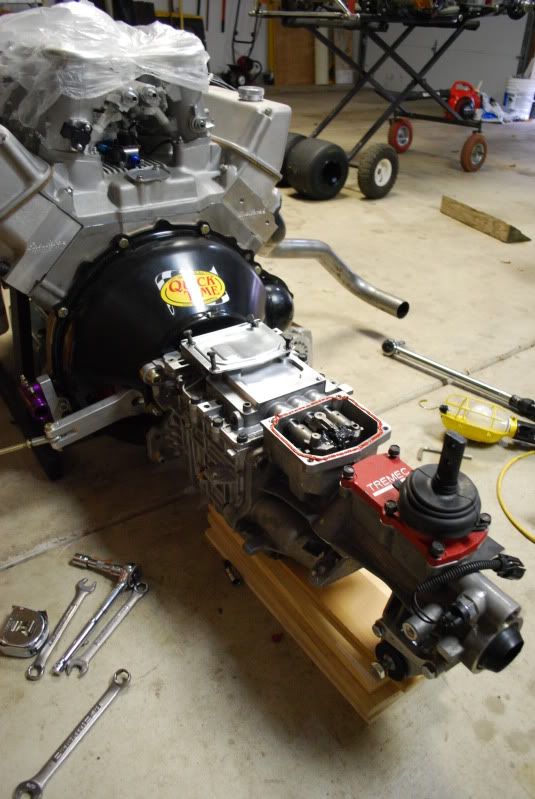
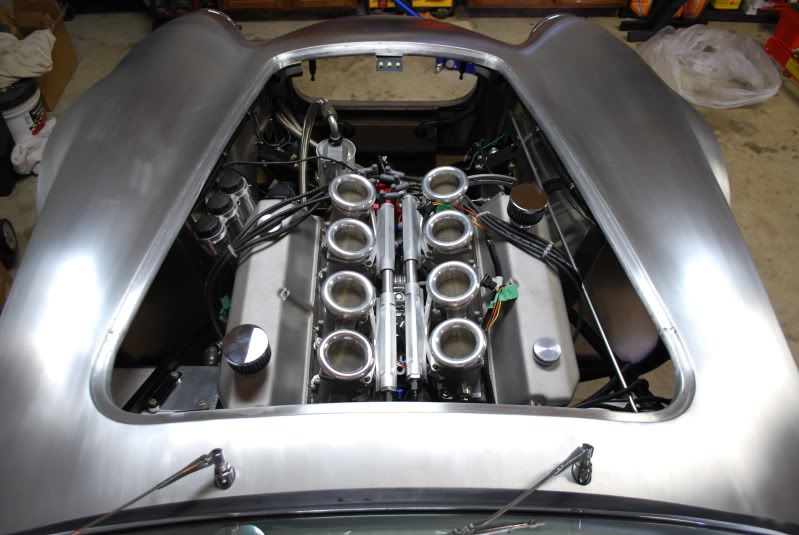
Finally making some progress! This engine is so big!
|
10-19-2011, 10:18 PM
|
 |
CC Member
|
|
|
Join Date: Jun 2008
Location: Chester Springs,
PA
Cobra Make, Engine: Kirkham 289 FIA #690, FRPP 427 Boss engine
Posts: 764
|
|
Not Ranked
Now you're cooking! Looks great and glad you got the correct pressure plate. I just noticed in your pictures the old pressure plate had the three fingers on pivots like a borg and beck style. I guess that was the problem.
__________________
RCR GT40 SOLD to Fast 5
Kirkham #690 289 FIA
|
11-07-2011, 02:34 PM
|
|
CC Member
|
|
|
Join Date: Mar 2011
Location: Sleepy Hollow,
IL
Cobra Make, Engine: Kirkham #647 brushed
Posts: 412
|
|
Not Ranked
A few updates.
The endless "waiting for parts" game was in full effect the last couple weeks. But now I have made some progress
Here are a bunch of pictures. I still need to upload a few more to the host site. Plus I did some more work today.
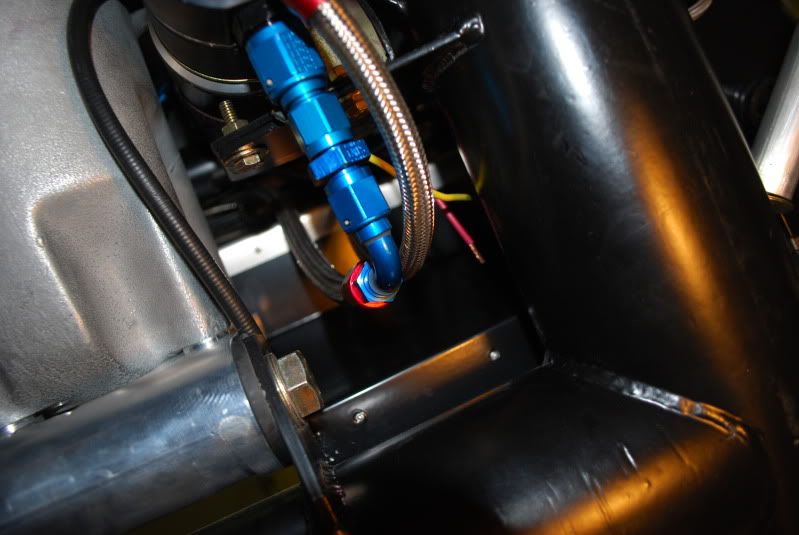
I removed all the fuel lines that were installed on the car. They were AN-6 lines, but with this thin plastic hose on the inside which 1) wouldn't fit in my -6 fittings I bought, and 2) looked too flimsy for 45 psi. I want the peace of mind of the rubber insert AN lines when running that much pressure, especially with the fuel line. So I also added some more fittings as you will see.
(Upside down) Still need to rivet the holder rings in place.
The new Mallory fuel pump, quite a size difference. Why are the black ones always so much bigger?? 
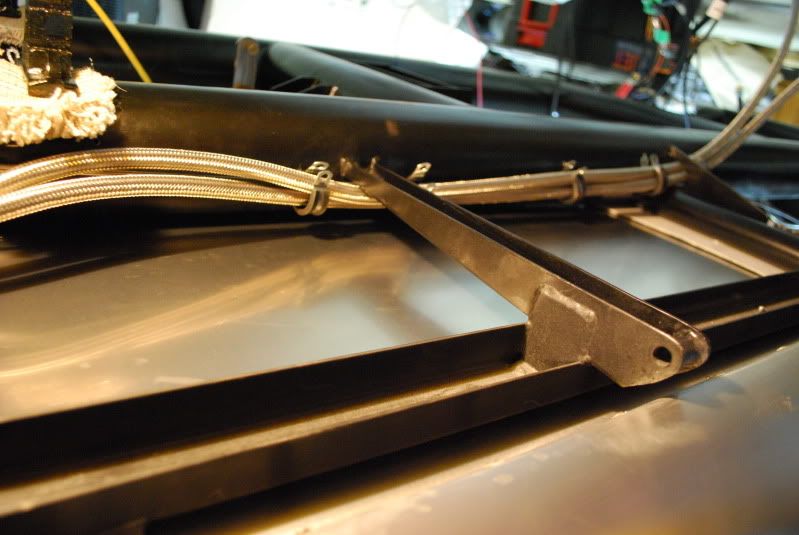
I had to fabricate a new mounting plate for the fuel pump, which was pretty quick. Bent and welded some steel, holes, paint, and off we go.
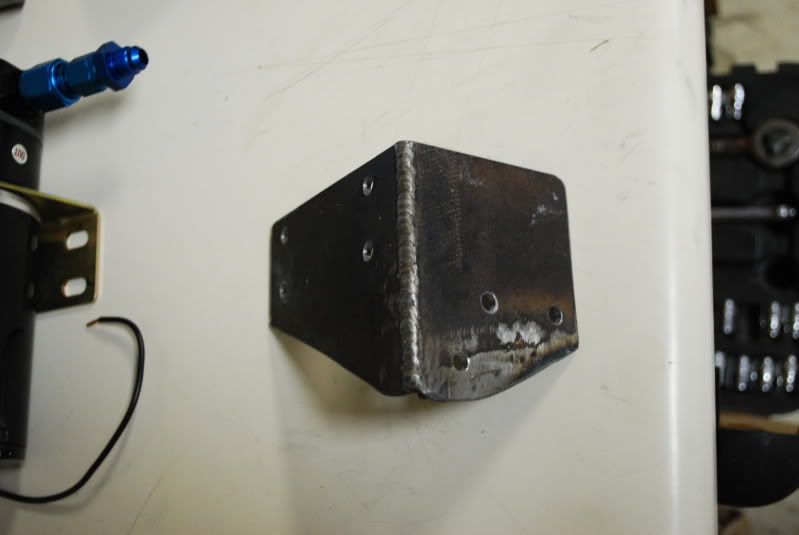

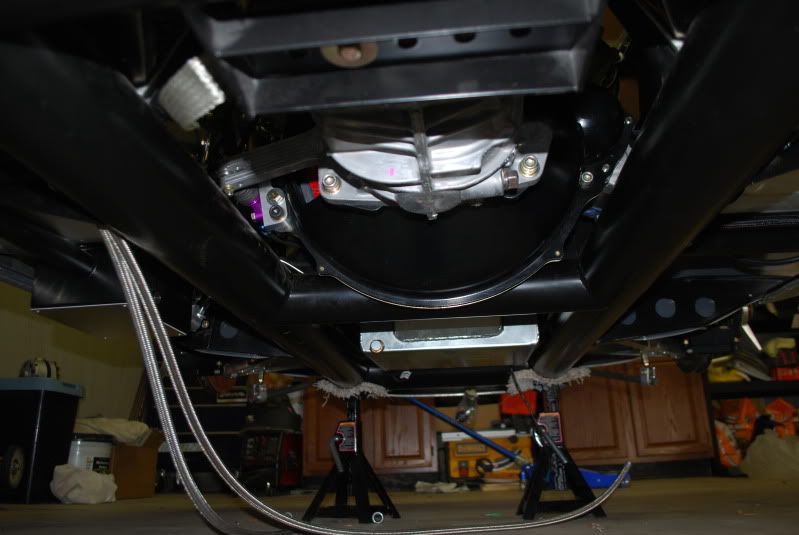
Installed. You will notice there is an air bleed line that runs from the bottom, and ties into the return line. You will see where it ties up on the next photos.
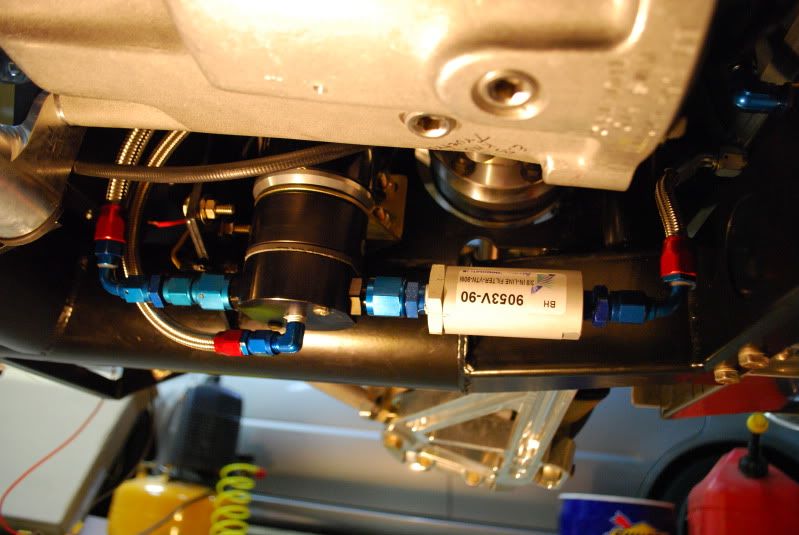
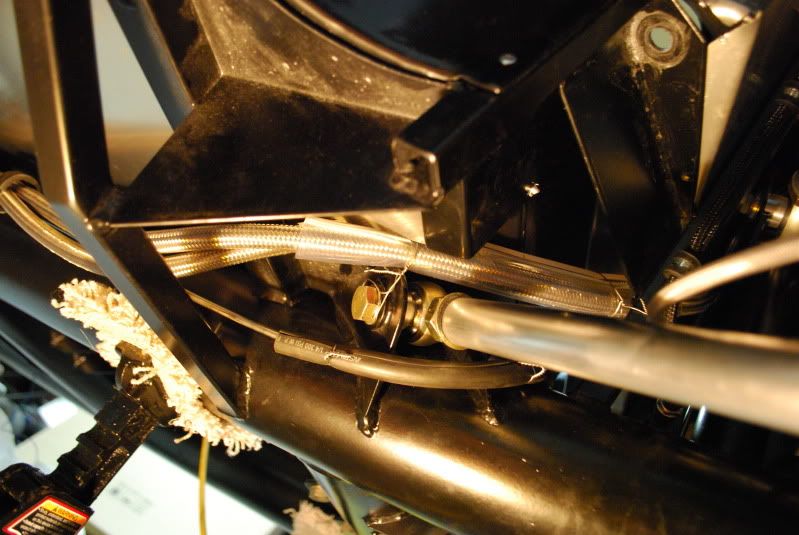
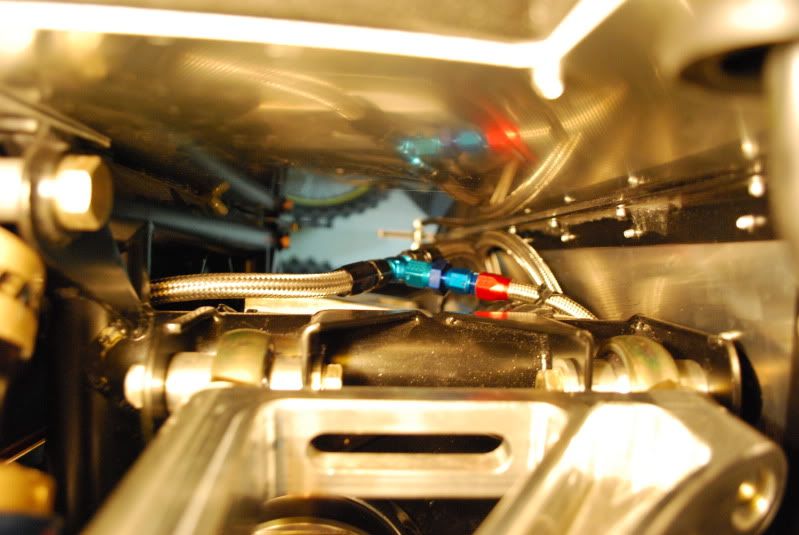
The new return fuel lines, with the bleed air line tee-ing up above the diff.
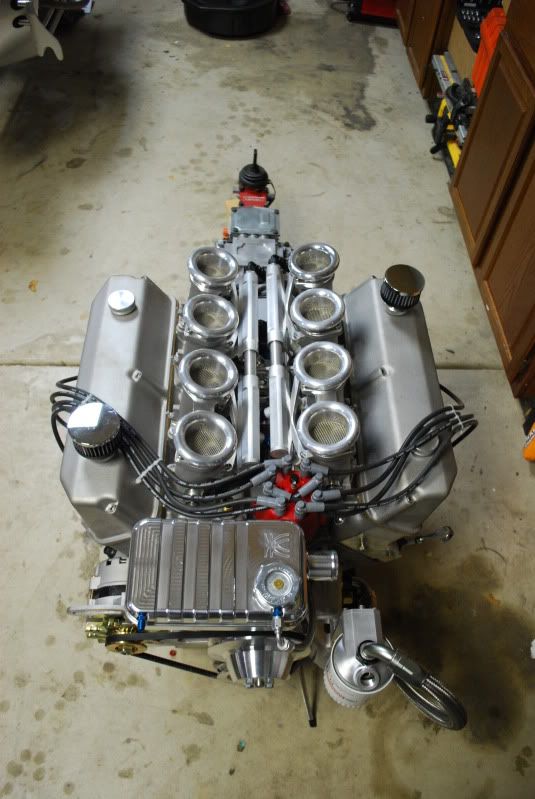
I polished the coolant tubes.

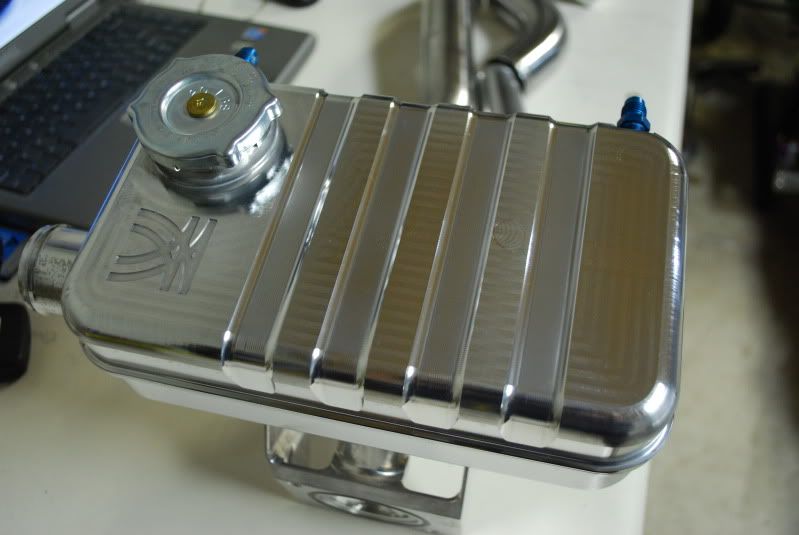
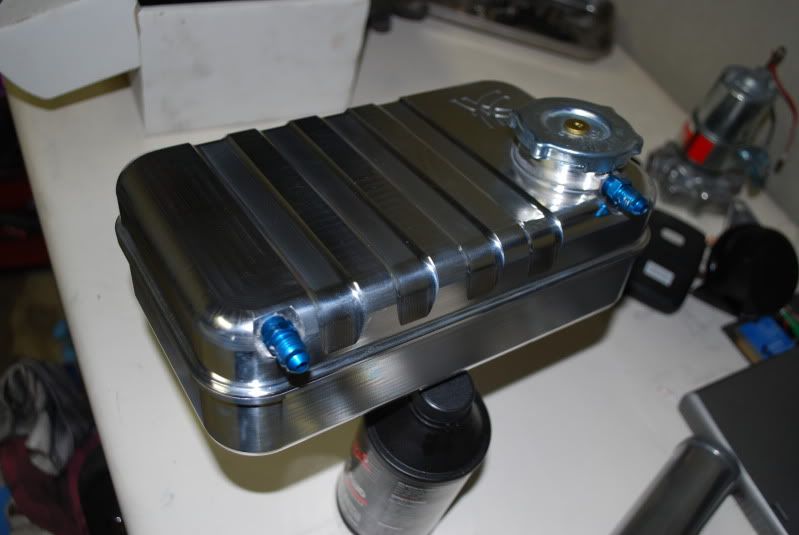
And also cleaned up and polished the Kirkham surge tank.
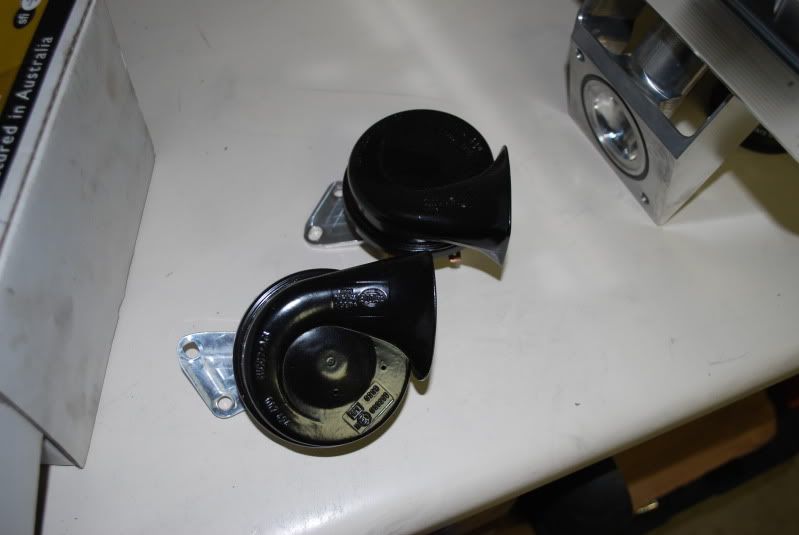
Painted the god-awful red horns, now nice and black.
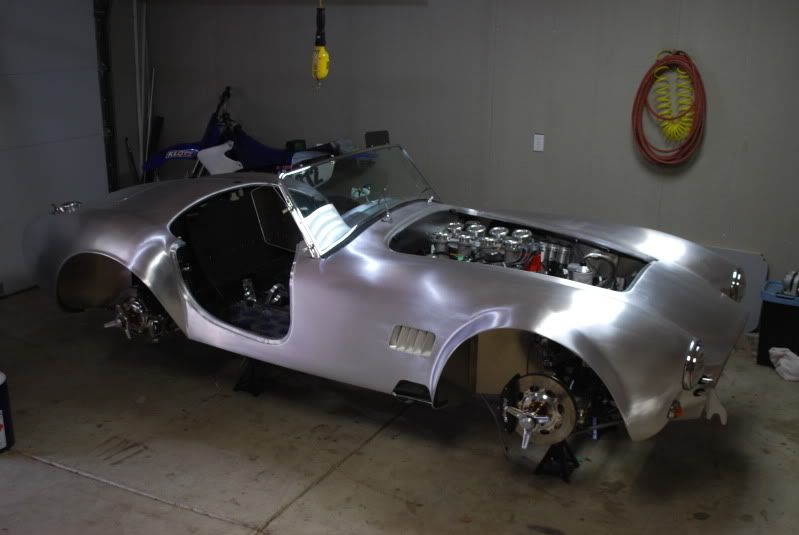
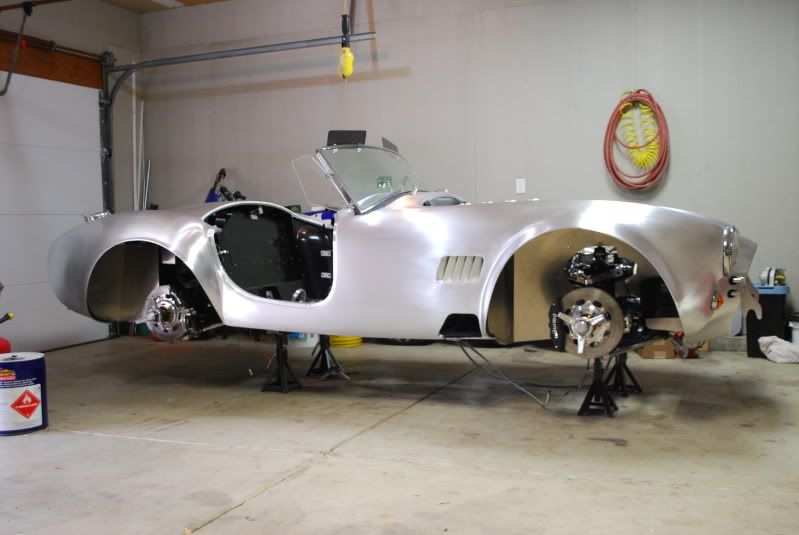
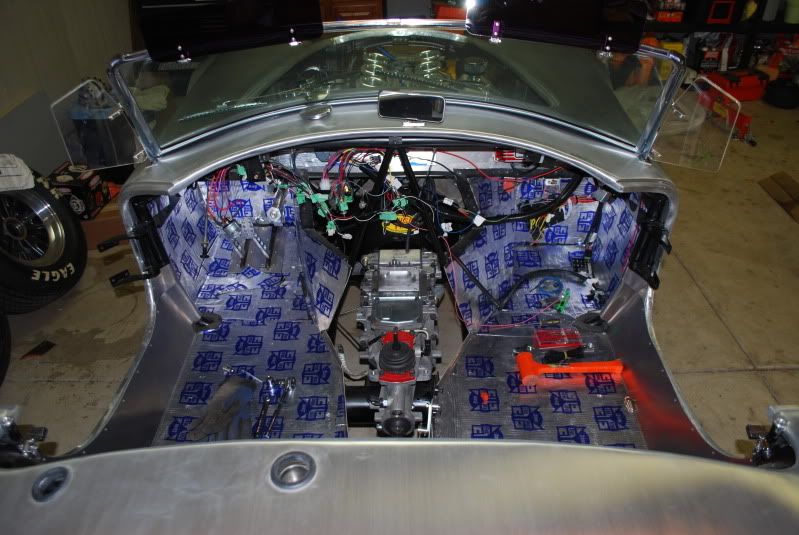
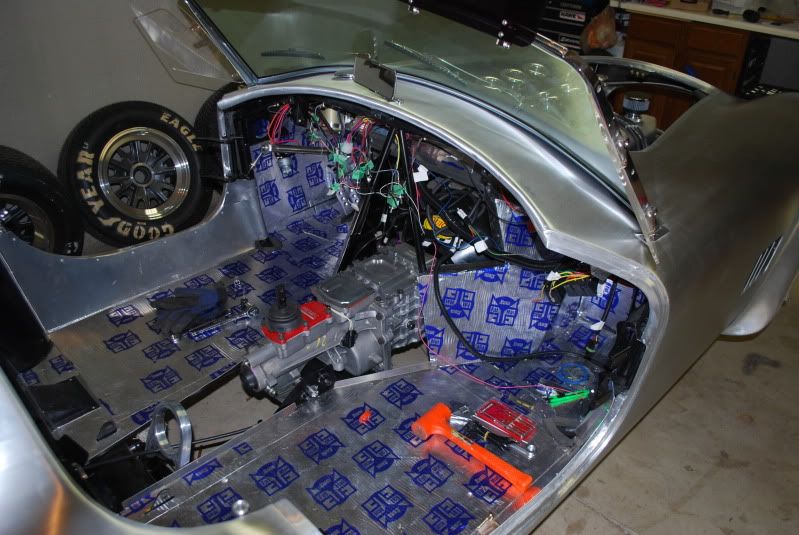
The chassis is ready for it's aluminum chunk
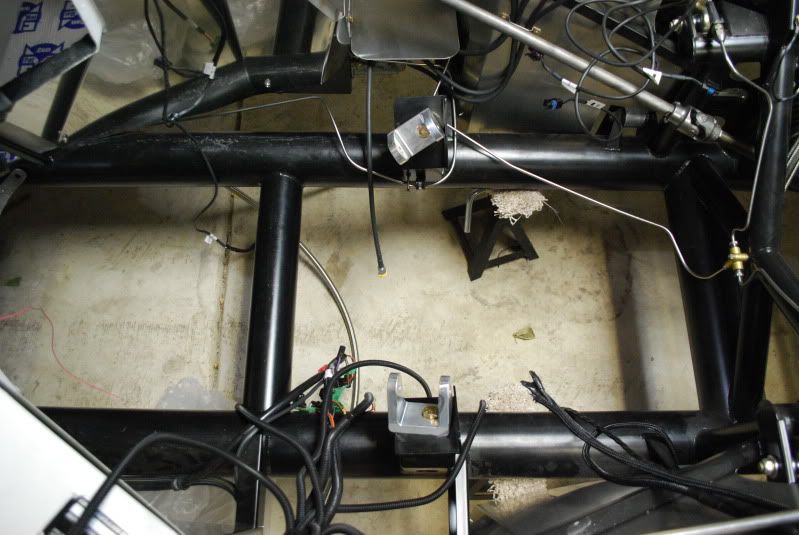
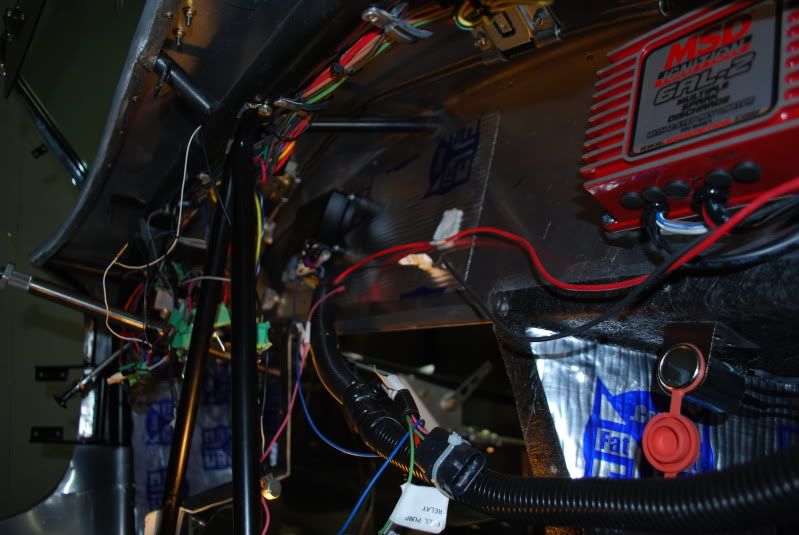
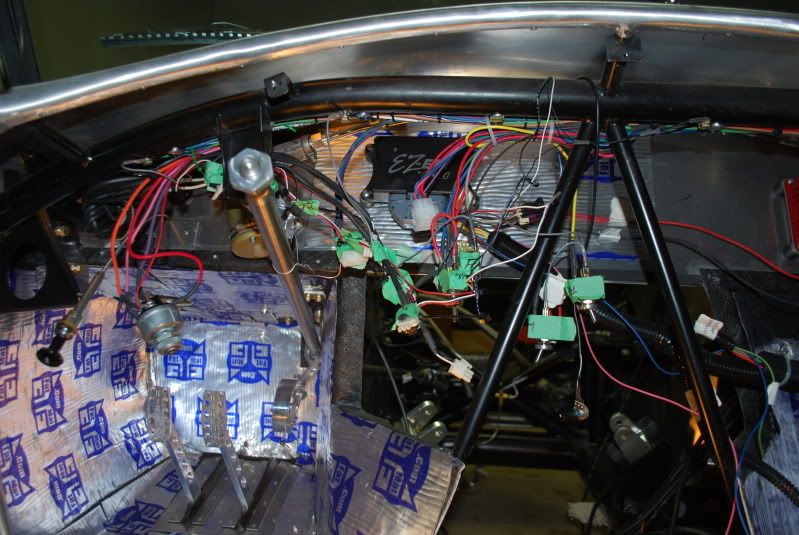
The EFI wire loom is hanging on the left hand side. I just ran it into the engine bay, and once the engine is in I will be able to connect everything and make it look nice.
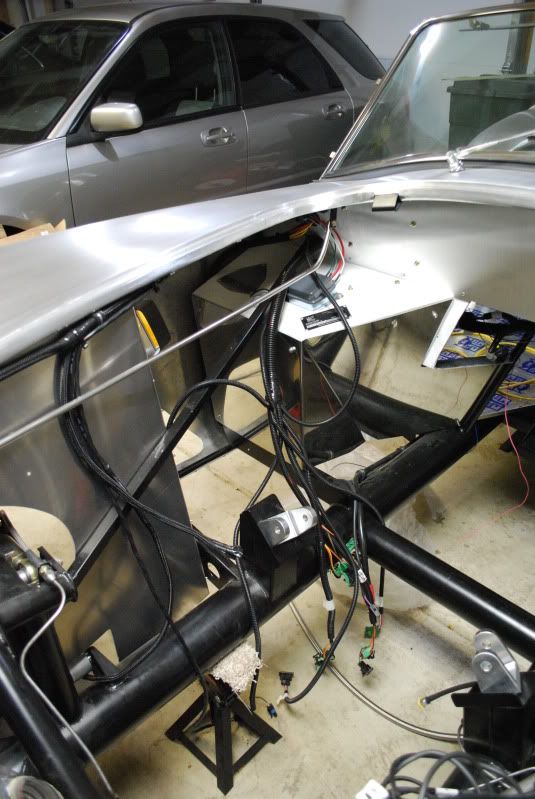
I mount the EFI ECU box. That harness is also just hanging there till I have the engine in.
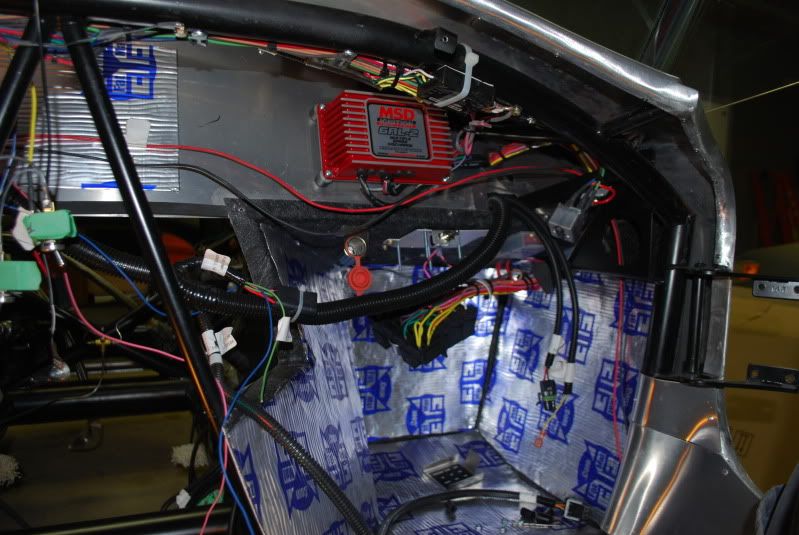
You can also see the Fatmat I put on the floor.
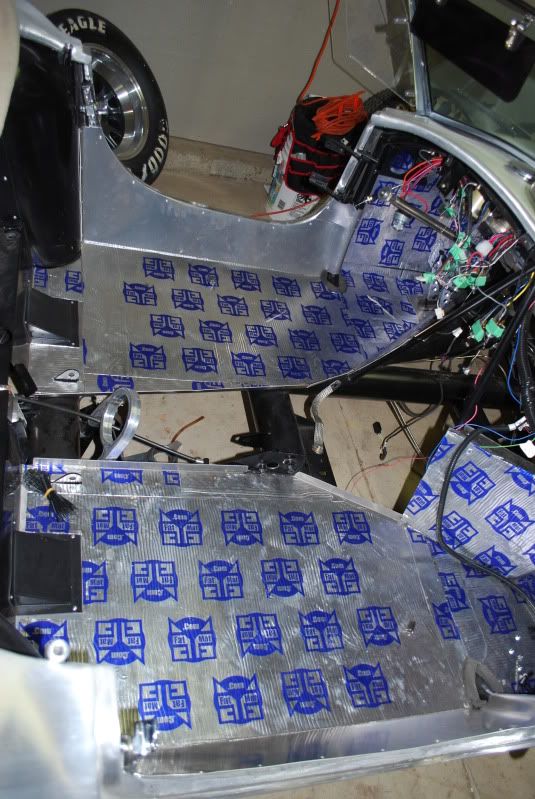
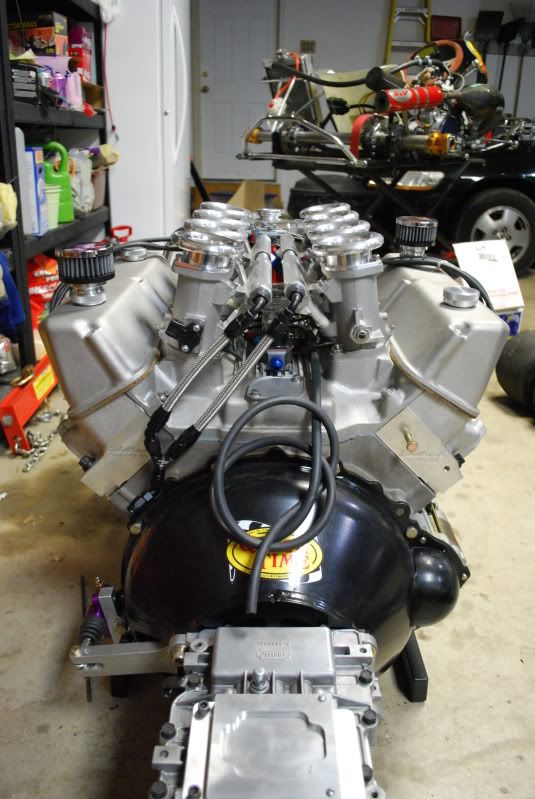
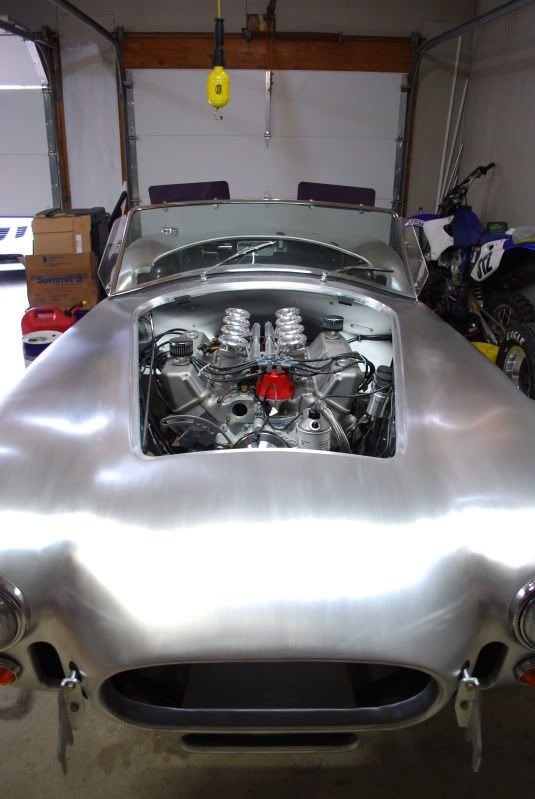
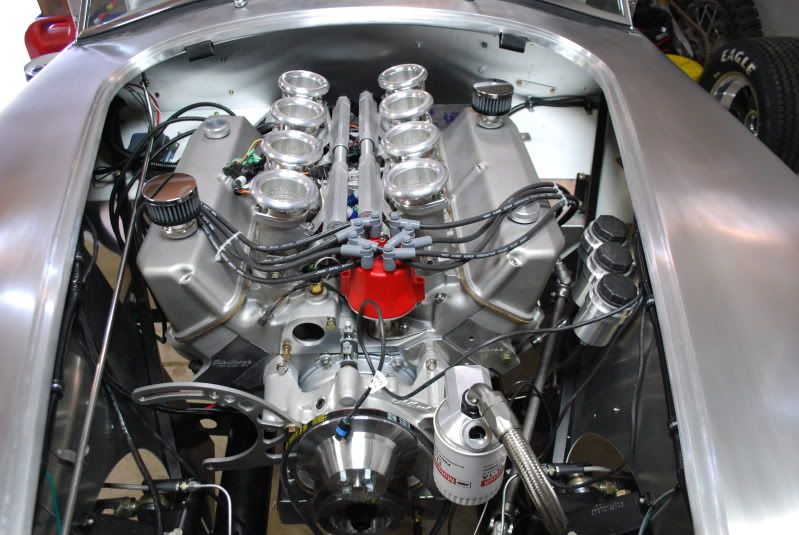
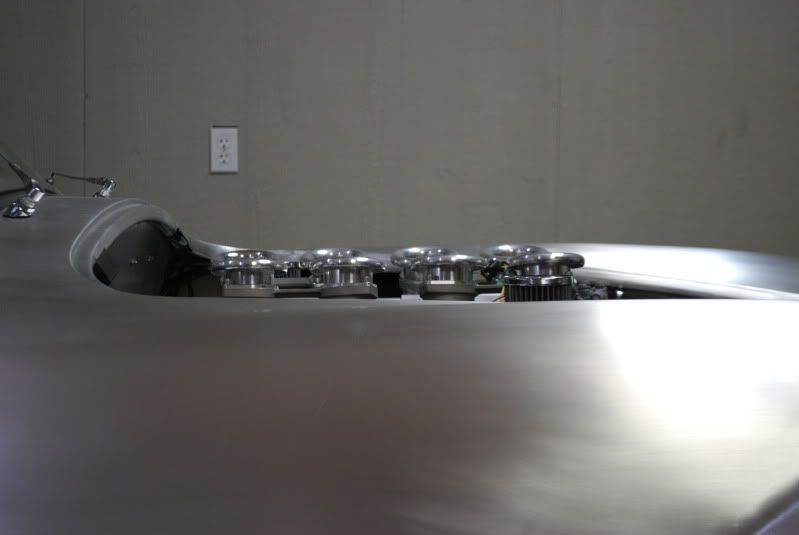
Engine is ready to go in! All accessories are installed (alternator will come out for the install), dipstick, oil temp bung, etc...
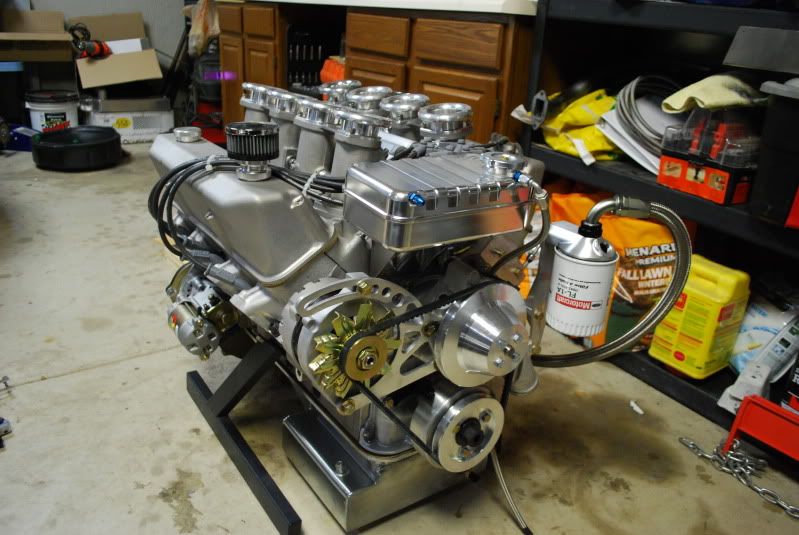
I hope to have some good pics by the end of the week....
|
11-07-2011, 03:30 PM
|
|
CC Member / Sponsor
|
|
|
Join Date: Jan 2002
Location: Provo,
UT
Cobra Make, Engine: HiTech Legends GT500
Posts: 1,359
|
|
Not Ranked
Your build is looking good.
Two issues:
The thin plastic inner liner on the braided stainless steel fuel hose is Teflon. The fuel line we supply is rated over 500+ PSI. The rubber lined hoses break down with alcohol. The rubber hoses are also permeable to gasoline.
From the school of hard knocks, we have learned, the rubber hoses will slide off polished radiator tubes. You will need to sandblast the end of the tube that the hose covers up, to provide enough friction for the hose to stay on.
|
11-07-2011, 03:54 PM
|
|
CC Member
|
|
|
Join Date: Mar 2011
Location: Sleepy Hollow,
IL
Cobra Make, Engine: Kirkham #647 brushed
Posts: 412
|
|
Not Ranked
Quote:
Originally Posted by Tom Kirkham

Your build is looking good.
Two issues:
The thin plastic inner liner on the braided stainless steel fuel hose is Teflon. The fuel line we supply is rated over 500+ PSI. The rubber lined hoses break down with alcohol. The rubber hoses are also permeable to gasoline.
From the school of hard knocks, we have learned, the rubber hoses will slide off polished radiator tubes. You will need to sandblast the end of the tube that the hose covers up, to provide enough friction for the hose to stay on.
|
Good to know, thanks Tom. I could not find any fittings for those Teflon lines so that is why I went with the rubber. I still have the lines and could always reuse them, I just cut the fittings off at the end.
I thought about the polished tubes and was planning on "roughing" them up before use.
Thanks again Tom |
11-07-2011, 05:21 PM
|
 |
CC Member
|
|
|
Join Date: Apr 2008
Location: Melbourne,
Vic
Cobra Make, Engine: Some polish thing... With some old engine
Posts: 2,286
|
|
Not Ranked
Quote:
Originally Posted by Tom Kirkham
Your build is looking good.
Two issues:
The thin plastic inner liner on the braided stainless steel fuel hose is Teflon. The fuel line we supply is rated over 500+ PSI. The rubber lined hoses break down with alcohol. The rubber hoses are also permeable to gasoline.
From the school of hard knocks, we have learned, the rubber hoses will slide off polished radiator tubes. You will need to sandblast the end of the tube that the hose covers up, to provide enough friction for the hose to stay on.
|
Its info like this that keeps me coming back to this site...
I would only have learned that the hard way!
So many thanks!
Avmaviator - Great work. Keep it coming... I'm loving it!
So many thanks to you also |
11-08-2011, 11:40 AM
|
|
CC Member
|
|
|
Join Date: May 2010
Location: Birmingham,
AL
Cobra Make, Engine: Kirkham 289 FIA, 363 Stroker
Posts: 751
|
|
Not Ranked
Hey Frenchy, make sure you bring a scarf for our Cruise Thursday.  It looks like the high is going to be around 59 degrees. I know you have a plethora of scarves for every occasion. Just kidding. Sorry, couldn't resist after my recent trip to Paris.
hey, if you have a decent video camera can you bring it??? I am not impressed with the gopro camera. It gives stable videos, but due to the wide angle lens it makes 0-60 seem like it takes 15 seconds, or just appears like mild acceleration to 40mph. Plus, since it is enclosed in the thick plastic case, it does not record sound very well.
The build is looking good! Even though you had some troubles, Im glad you decided to go with the locators on the bellhousing instead of the offset dowel pins. I spent 14 hours getting my bellhousing dialed in. That was definitely the most pissed off i have ever been at a car part and i was still nervous that it wasnt quite right until after the first test drive. Have fun with that wiring!!! Wiring is definitely the most time consuming part of any custom build. I could not believe the amount of time that i spent on mine. The 1100 for the plug in Kirkham harness was starting to seem like it would have been money very well spent after I was on about day 3 or 4 of wiring my car.
|
11-08-2011, 12:24 PM
|
|
CC Member
|
|
|
Join Date: Mar 2011
Location: Sleepy Hollow,
IL
Cobra Make, Engine: Kirkham #647 brushed
Posts: 412
|
|
Not Ranked
Quote:
Originally Posted by RestoCreations
Hey Frenchy, make sure you bring a scarf for our Cruise Thursday. It looks like the high is going to be around 59 degrees. I know you have a plethora of scarves for every occasion. Just kidding. Sorry, couldn't resist after my recent trip to Paris.
hey, if you have a decent video camera can you bring it??? I am not impressed with the gopro camera. It gives stable videos, but due to the wide angle lens it makes 0-60 seem like it takes 15 seconds, or just appears like mild acceleration to 40mph. Plus, since it is enclosed in the thick plastic case, it does not record sound very well.
The build is looking good! Even though you had some troubles, Im glad you decided to go with the locators on the bellhousing instead of the offset dowel pins. I spent 14 hours getting my bellhousing dialed in. That was definitely the most pissed off i have ever been at a car part and i was still nervous that it wasnt quite right until after the first test drive. Have fun with that wiring!!! Wiring is definitely the most time consuming part of any custom build. I could not believe the amount of time that i spent on mine. The 1100 for the plug in Kirkham harness was starting to seem like it would have been money very well spent after I was on about day 3 or 4 of wiring my car. |
How dare you make jokes of my 200+ scarf collection! 
It is funny because it has been in the 70s all this week, and then bam, Thrusday is supposed to be the coldest day (besides the rain tomorrow). I'm not too much of sissy, I should be able to take it since I have an awesome beret.
I do have a good camera, but I need to find it as I have not seen it since the move last year...
I soldered the main wires last night. I need to go pick up some extra wires and electrical connectors to finish up the rest. I'm feeling pretty good about it.
Actually, the only thing that I don't know is where to hook up the "12V Switched" cable for the EFI ECU....
|
11-08-2011, 03:32 PM
|
|
CC Member
|
|
|
Join Date: Jun 2008
Location: Chester Springs,
PA
Cobra Make, Engine: Kirkham 289 FIA #690, FRPP 427 Boss engine
Posts: 764
|
|
Not Ranked
Pink coil wire. Please send me a scarf as a reward.
__________________
RCR GT40 SOLD to Fast 5
Kirkham #690 289 FIA
|
11-08-2011, 06:04 PM
|
|
CC Member
|
|
|
Join Date: Mar 2011
Location: Sleepy Hollow,
IL
Cobra Make, Engine: Kirkham #647 brushed
Posts: 412
|
|
Not Ranked
Quote:
Originally Posted by mreid
Pink coil wire. Please send me a scarf as a reward.
|
Thanks Mark.
For your scarf, you can choose between dark pink, light pink, fluorescent pink, soft pink, and black. |
11-08-2011, 06:16 PM
|
 |
CC Member
|
|
|
Join Date: Dec 2010
Location: Tempe,AZ-High Point,NC,
AZ
Cobra Make, Engine: Kirkham #684, 482FE, Mike Mccluskey build
Posts: 2,520
|
|
Not Ranked
Are period correct bellhousings black or red or neither.
__________________
PRIDEnJOY
|
11-09-2011, 12:13 PM
|
 |
CC Member
|
|
|
Join Date: Oct 2002
Location: Eagle,
Ne.
Cobra Make, Engine: 1966 Lone Star 427SC.
Posts: 4,310
|
|
Not Ranked
I don't care for the SILVER PAINT JOB ! 
__________________
Regards,
Kevin
|
11-12-2011, 02:14 PM
|
|
CC Member
|
|
|
Join Date: Mar 2011
Location: Sleepy Hollow,
IL
Cobra Make, Engine: Kirkham #647 brushed
Posts: 412
|
|
Not Ranked
|
11-12-2011, 03:11 PM
|
|
CC Member
|
|
|
Join Date: Jun 2008
Location: Chester Springs,
PA
Cobra Make, Engine: Kirkham 289 FIA #690, FRPP 427 Boss engine
Posts: 764
|
|
Not Ranked
That is very exciting, congratulations! When I put mine in all I kept thinking about was the lift dropping and smashing the engine into my beautiful aluminum body. I didn't remove the radiator, so it was truly like threading a needle. I hope to post my first start video this week!!!
The three biggest milestones in my opinion are engine in, first start, first drive. First start is probably the most harrowing. That one is next!!!
__________________
RCR GT40 SOLD to Fast 5
Kirkham #690 289 FIA
|
11-12-2011, 03:35 PM
|
|
CC Member
|
|
|
Join Date: Mar 2011
Location: Sleepy Hollow,
IL
Cobra Make, Engine: Kirkham #647 brushed
Posts: 412
|
|
Not Ranked
Quote:
Originally Posted by mreid
That is very exciting, congratulations! When I put mine in all I kept thinking about was the lift dropping and smashing the engine into my beautiful aluminum body. I didn't remove the radiator, so it was truly like threading a needle. I hope to post my first start video this week!!!
The three biggest milestones in my opinion are engine in, first start, first drive. First start is probably the most harrowing. That one is next!!!
|
Has your engine been started at all (dyno)? That has to be more exciting for sure Since ours has run on the dyno before I know it works, but will my hook ups work? That is questionable haha. |
11-12-2011, 05:29 PM
|
|
CC Member
|
|
|
Join Date: Oct 2002
Location: Eagle,
Ne.
Cobra Make, Engine: 1966 Lone Star 427SC.
Posts: 4,310
|
|
Not Ranked
AGAIN,.....simply amazing build ! (sorry I didn't call you back. You have a pm)
Simple question- what brand is the heat/sound mat ?
I've always wanted to use some, but don't know who's is best ?
Does your help both or just heat ?
__________________
Regards,
Kevin
|
11-12-2011, 08:24 PM
|
|
CC Member
|
|
|
Join Date: May 2010
Location: Birmingham,
AL
Cobra Make, Engine: Kirkham 289 FIA, 363 Stroker
Posts: 751
|
|
Not Ranked
Big Testicles, or was it stupidity??? I cant remember hmmmm
|
 Posting Rules
|
You may not post new threads
You may not post replies
You may not post attachments
You may not edit your posts
HTML code is Off
|
|
|
All times are GMT -7. The time now is 11:30 PM.
|
|


 Linear Mode


